

RunDiffusion is a platform that allows you to start a dedicated stable diffusion workspace in the cloud. We support Automatic1111 and InvokeAi. You rent high performance servers with datacenter GPUs. The environment is ready to go in under 90 seconds.
To use RunDiffusion please ensure your computer meets the following requirements:
- Updated Version of Chrome or Edge Browser (Brave has issues)
- Turn off Adblocks. It can mess with uploading images to the UI
- Become familiar with Automatic1111 or InvokeAi
- Reliable internet with low latency to the Central United States
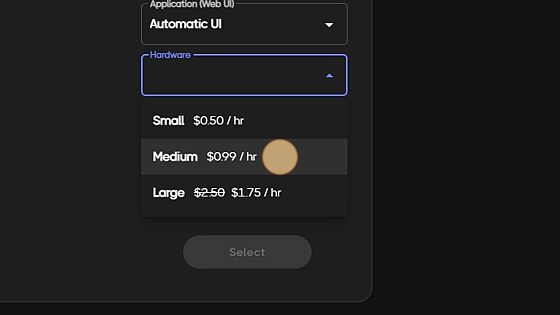
Our servers have 3 tiers, small, medium and large. All information regarding these sizes are one the home page you will visit in the next step. Servers have an hourly rate, but charged by the minute. Therefore, if you pay for 1 hour on a small server (50cents) and you shut down the server after 30 minutes, 25cents will be credited back into your available balance. You are not charged for time waiting for a server to spin up or spin down.
Navigate to https://app.rundiffusion.com/
First we will choose what platform we would like to launch: Automatic1111 or InvokeAi
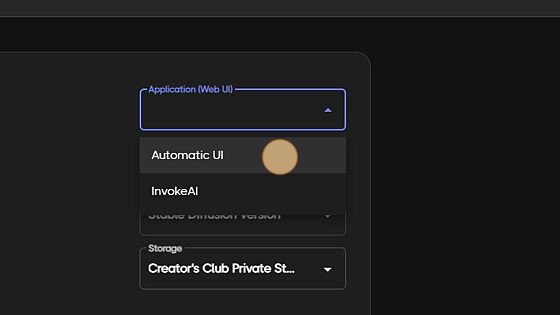
Secondly, choose the size of server you require. (details below option menu for server sizes and capabilities)
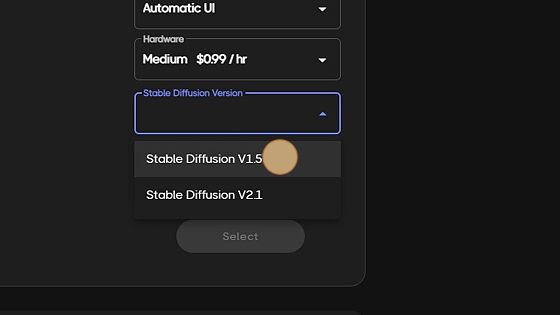
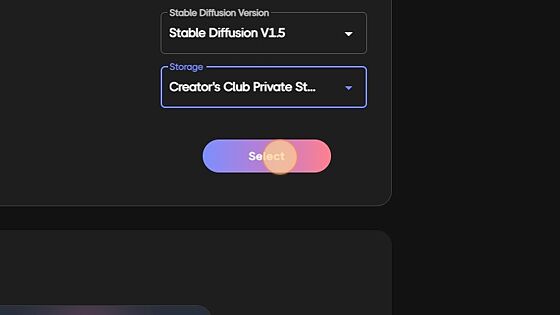
Here, you will decide to launch either Stable Diffusion V1.5 or V2.1. Choosing V1.5 has numerous custom models already loaded in and ready to go. V2.1 is only base model at this time.
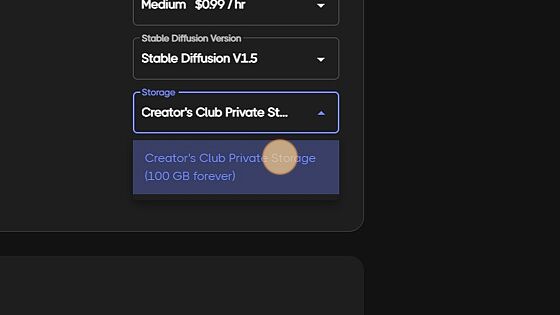
This option will default to 72 hour storage for non creator club member. If you have joined our Creators club, you will see your 100gig private storage. Along side the private storage, Creators club comes with many added benefits. Check out https://rundiffusion.com/creators-club for more info!
Select to continue
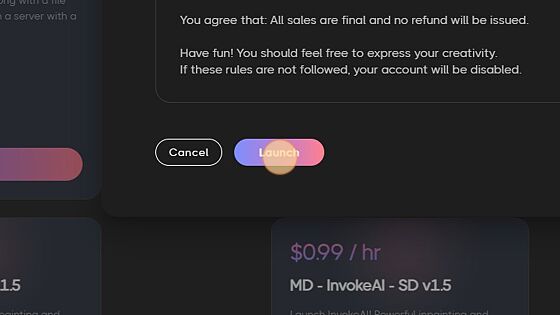
Within the popup, you will choose the server up time for this session, along having a visual of your balance left in your account. As a side note, when finished with the server and time is still remaining, click "stop server" in the top righthand corner of the webui. This will shutdown the server and provide a balance back to your account with the amount of time that was left on the clock when shut down.
Below is the very basics of generating your first images within Stable Diffusion. This will give you the knowledge to start creating art, as well guide you in the right direction to move forward and deep dive further aspects within text2img.
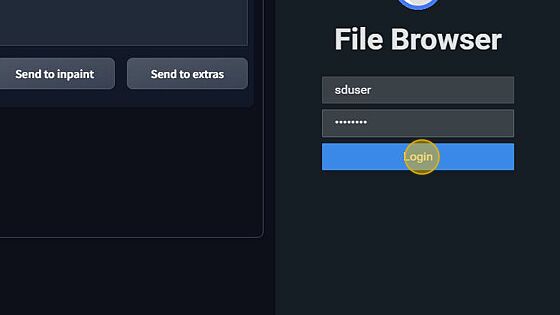
Upon launching your server you will be greeted with the file browser on your righthand side. The login for this is "sduser" and "password" once filled in, you can click log in.
There are two options above the file browser, the highlighted one as shown below, hides the side view file browser and the button to the right of it, allows you to open a Fullscreen browser in a new tab. Preference is up to you.
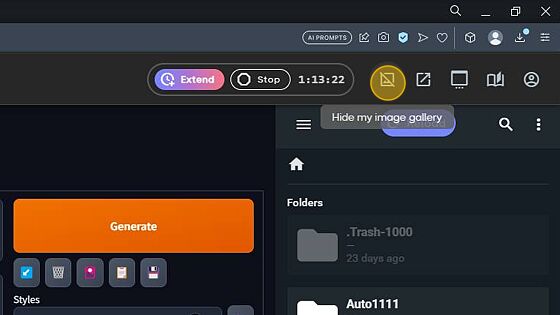
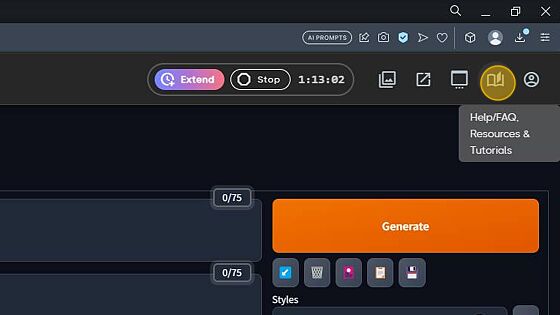
The next 3 buttons are for the following:
- View/open another session
- Help/FAQ/Resources and Tutorials
- Account menu where it will show your available balance (and storage if you are apart of our Creators Club)
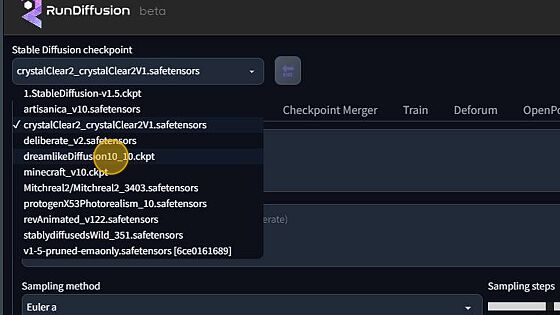
Over in the top left corner; you will see the model viewer. Here you will choose between a list of models preloaded. Take note, if you sign up for creators club, you will gain access to private storage and will not have access to all the preloaded models. However, within the creators club documentation you received by email, you are able to upload custom models as your leisure.
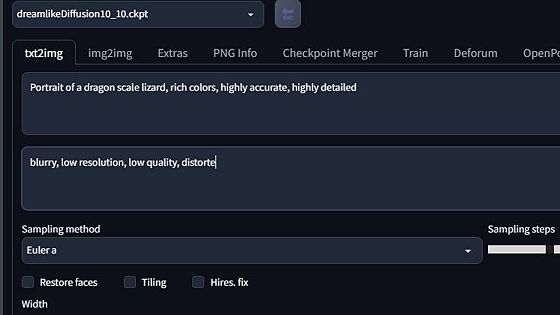
Below are our prompt windows. Top is your positive prompt and beneath is the negative prompt. The positive prompt is where you are going to input everything you want to be in your picture, whilst the negative prompt is for everything you do NOT want in your prompt.
Prompting is nothing short of an art and requires a lot of research/trial and error. However you generally want to layout your prompt as follows.
(Subject) This is your main objective. "A vast scenery of an unexplored planet", "A fluffy white rabbit", "1967 Ford Mustang crossing the checkered flag".
A common mistake is not writing enough about the subjects. This includes adding supporting details that help describe the "subject". Each descriptor will be separated with a comma and space.
Example - A fluffy white rabbit, white fur, eating a carrot, standing beneath a tree"
(Medium) This is the material used to make artwork. Some examples are illustration, oil painting, 3D rendering, and photography. Medium has a strong effect because one keyword alone can dramatically change the style.
Example - A fluffy white rabbit, white fur, eating a carrot, standing beneath a tree, Close up portrait, photorealism
(Style) refers to the artistic style of the image. Examples include impressionist, surrealist, pop art, etc.
Example - A fluffy white rabbit, white fur, eating a carrot, standing beneath a tree, close up portrait, Modern art
(Resolution/supporting descriptors/lighting) is the second to last details we want to add to our prompt. These include all supporting details to really bring your image to life!
Example - A fluffy white rabbit, white fur, eating a carrot, standing beneath a tree, close up portrait, Modern art, highly detailed, highly accurate, masterpiece, unreal engine, powerful imagery, studio lighting, 8k UHD, HDR
(Artist names) are strong modifiers. They allow you to dial in the exact style using a particular artist as a reference. It is also common to use multiple artist names to blend their styles.
Example - A fluffy white rabbit, white fur, eating a carrot, standing beneath a tree, close up portrait, Modern art, highly detailed, highly accurate, masterpiece, unreal engine, powerful imagery, studio lighting, 8k UHD, HDR by example artist
As seen below, the negative prompt is populated with descriptors of things we want to stray from in our generated images.
This is a very basic start to prompting and there is MUCH more we will cover in Text2Img 201.
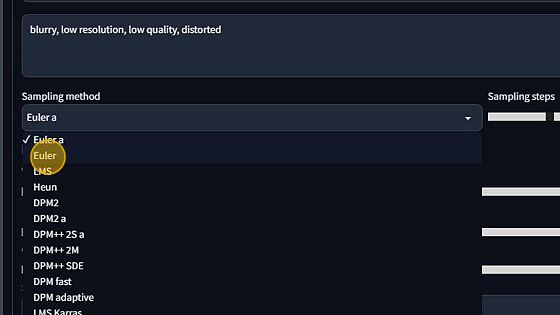
For your first time in Stable diffusion, stick with the Euler A sampler. It is highly renowned and great for nearly all cases. However, I do suggest doing a deep dive on different sampling methods when you have got the basics down. A workflow for samplers is on the horizon.
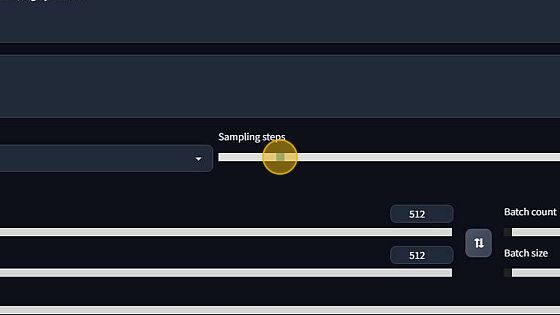
Sampling steps are basically how many steps the ai will take in order to create your prompt. Too low and you will get an unfinished image, too high and you will see and over produced image. This is all for you to trial and error to get the perfect image, as there is no perfect step count as they will vary between models, loras, etc. However, in saying that, it is a safe bet to stick between 25-65 steps.
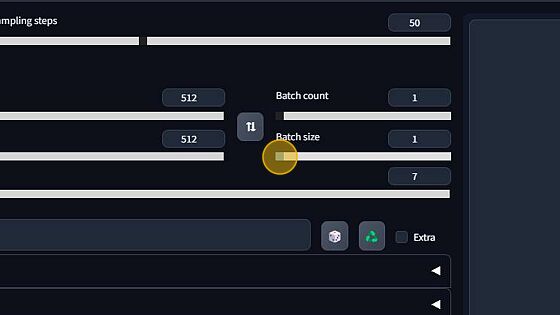
Width/height slider - determines the final resolution of your image. Most Stable diffusion V1.5 models are trained on 512x512, whilst most V2.1 models are trained on 768x768. Anything above these resolutions can start to cause negetive impacts upon your image. This is again, trial and error with different models.

CFG scale - This providses the ai guidance on how closely the ai will follow your input prompt. The default is set to 7 and to start, below is a simple guide.

CFG 2 – 6: Creative, but might be too distorted and not follow the prompt. Can be fun and useful for short prompts
CFG 7 – 10: Recommended for most prompts. Good balance between creativity and guided generation
CFG 10 – 15: When you’re sure that your prompt is detailed and very clear on what you want the image to look like
CFG 16 – 20: Not generally recommended unless the prompt is well-detailed. Might affect coherence and quality
CFG >20: almost never usable
Lastly, batch count and batch size. This will determine how many images, and batches of images Stable Diffusion will create with your prompt. For example, if you have a batch count of 1 and a batch size of 4, it will generate 1 batch of 4 images from your single prompt.
Hoooray! We're now ready to click "Generate" and watch the magic happen.
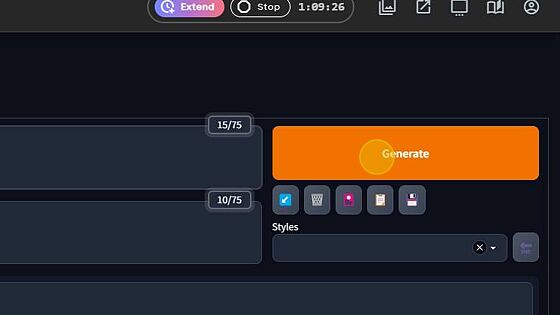
Once complete, you will see your images in the viewer below.

Congrats! your first images..
Remember, there is a lot that goes into generating art within Stable Diffusion, but with the right mindset, creative thinking and a helpful community behind you, you will be making your own masterpieces in no time!