

IMG2IMG in 2026
Img2img has evolved a lot by 2026. It’s no longer just a clever way to restyle an image, it’s a full editing workflow. Modern img2img pipelines let you drop in an existing image, describe the change you want, and get back a version that feels like a polished “redux” of your original instead of a random variation.
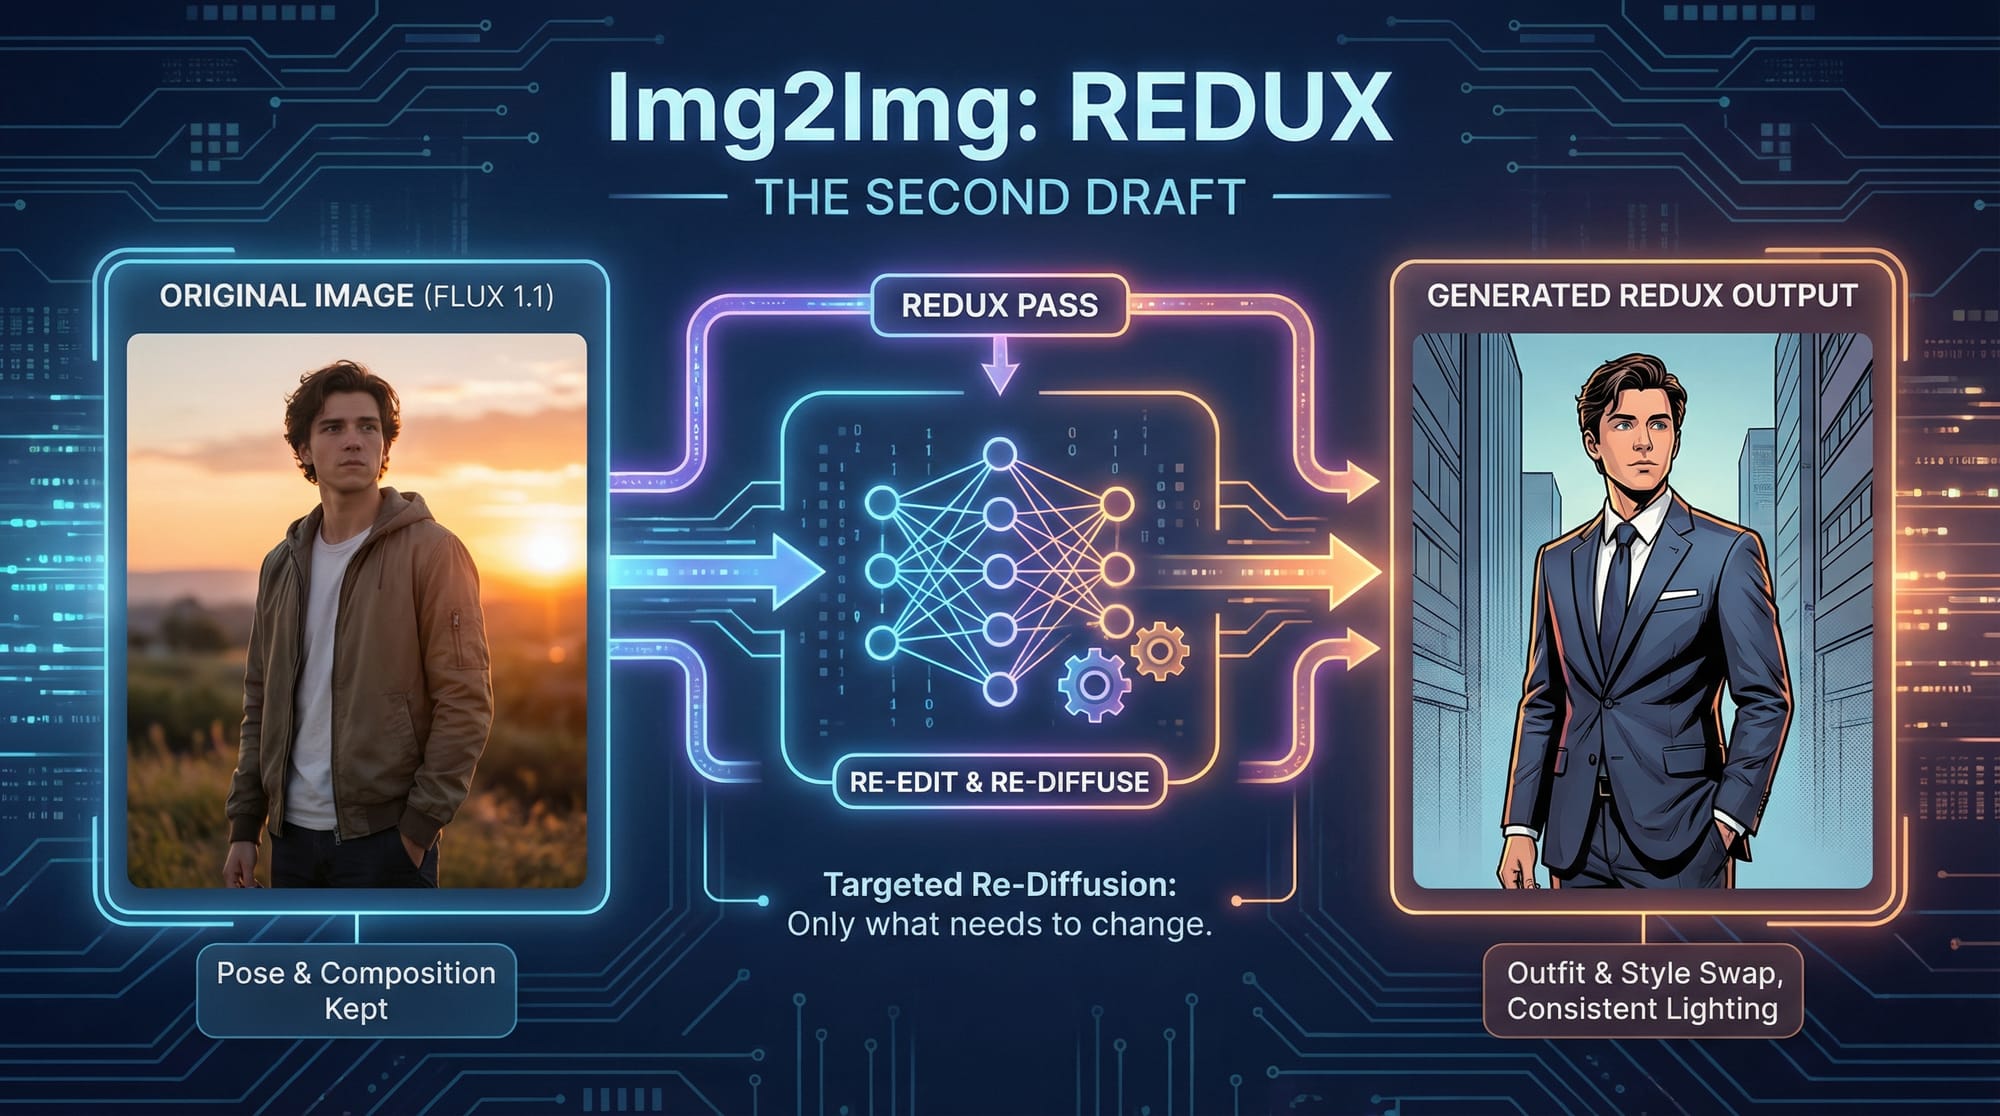
What does “Redux” mean in this context? In systems like Flux 1.1, Redux is a re-edit pass: the model takes your original image plus your new img2img prompt, then carefully re-diffuses only what needs to change. Think of it as a second draft that keeps your composition, lighting, and colors, but lets you rewrite the details. Need to swap outfits, adjust the time of day, or turn a portrait into a comic-book cover while preserving the same pose? That’s exactly what Redux-style img2img editing is for.
New edit-first models such as Nano Banana, Seedream 4.0 Edit, and the NEW Seedream 4.5 Edit and Flux Kontex build around this idea. You upload a reference image, paint or mask the areas you want to update, and write a focused img2img prompt: “replace the sky with a dramatic storm,” “turn this product photo into a studio-style hero shot,” or “convert this sketch into a clean 3D render.” Instead of regenerating everything from scratch, these img2img tools treat your image like a canvas that can be iterated on again and again.
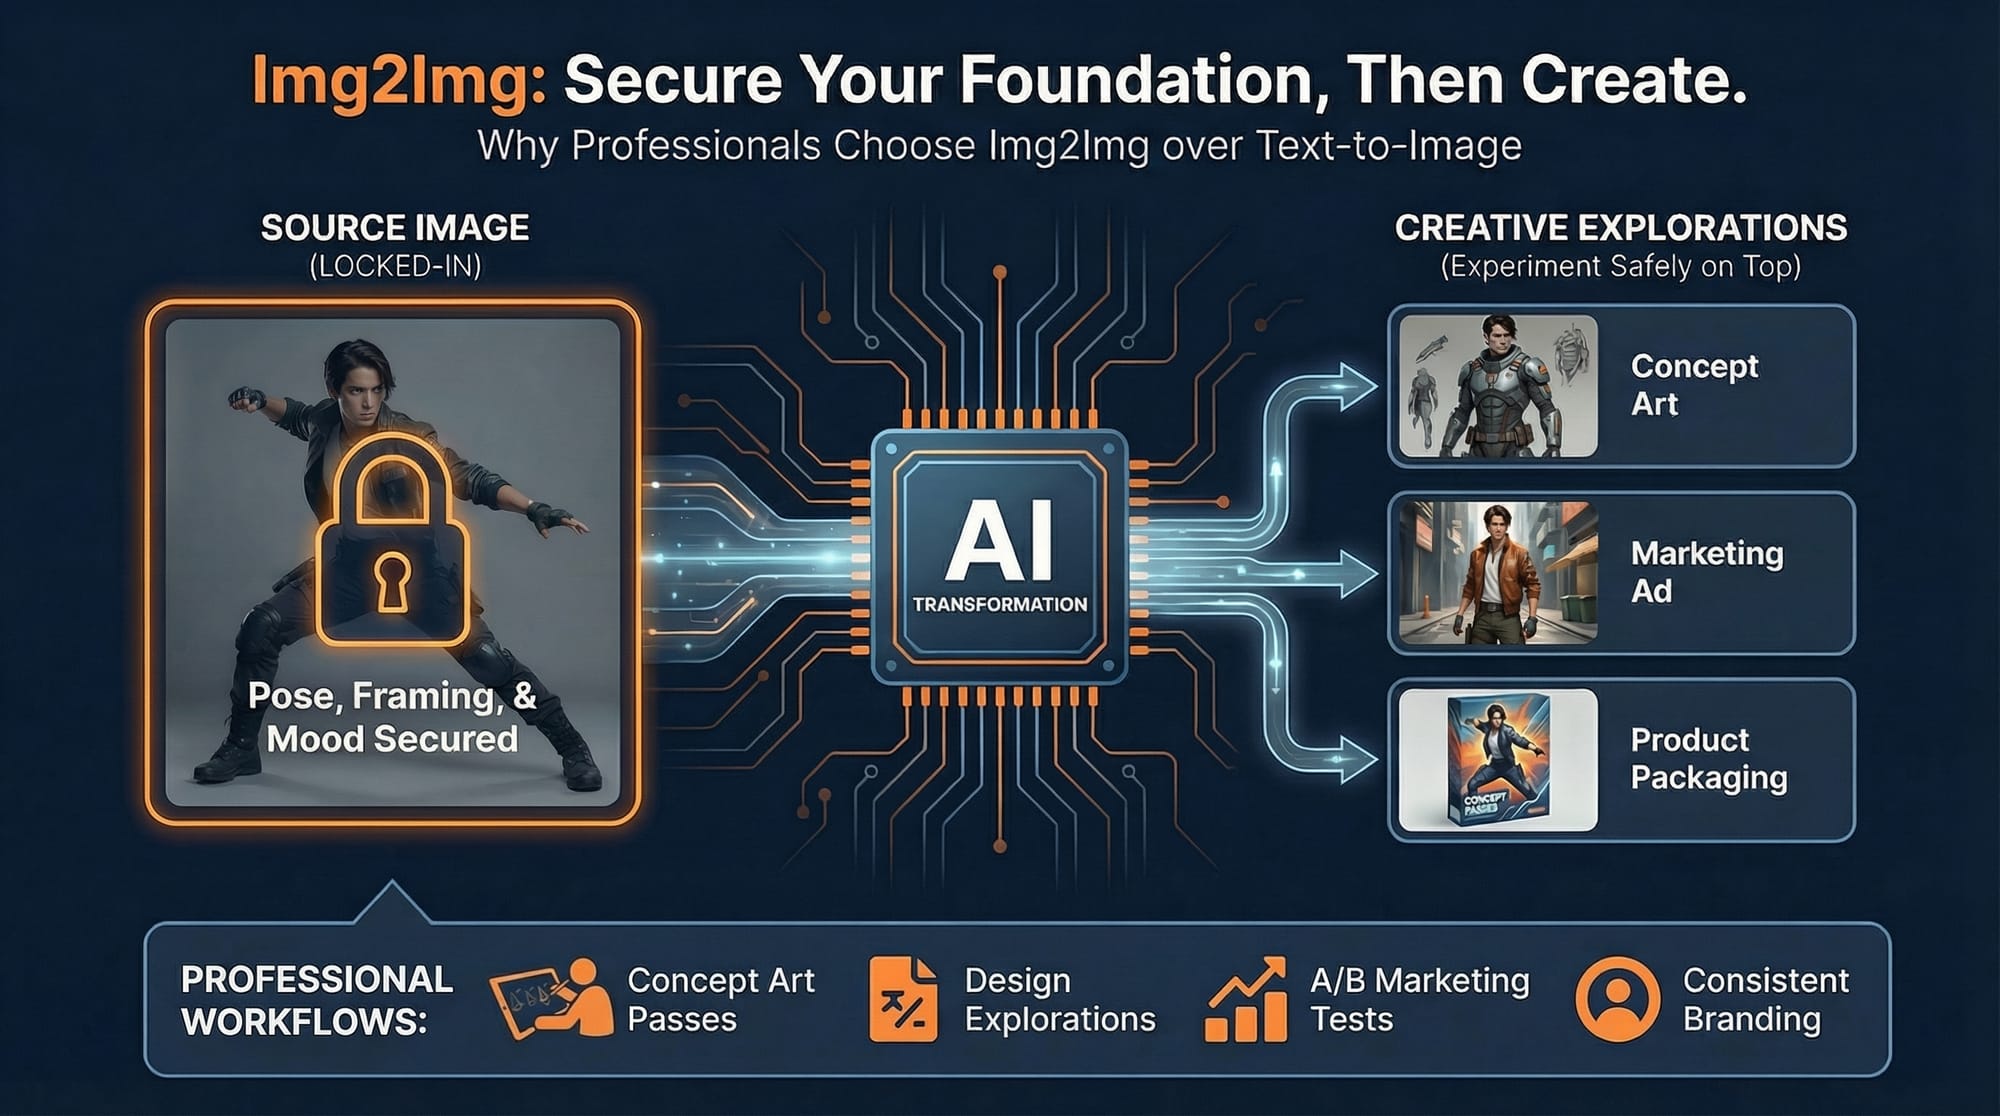
Why reach for img2img instead of plain text-to-image? Because you already solved the hardest parts: framing, pose, layout, and overall mood. Img2img lets you lock those in while experimenting safely on top. That’s why creative teams are increasingly using img2img workflows for concept art passes, design explorations, A/B tests of marketing images, and consistent character or product renderings across many scenes.
Below, we’ll focus on the classic img2img controls you’ll see in tools like Automatic1111. As we publish more advanced guides (for Redux workflows, Nano Banana, Seedream 4.0 Edit, Flux Kontex, and other img2img setups), this article will serve as a hub you can branch out from.
Img2img (image-to-image) is a way to remix an image with AI: you feed it a starting picture plus a text prompt, and it produces a fresh version that keeps the original layout and general color vibe, but shifts the style, details, or even the subject in the direction you describe. Under the hood, it lightly “scrambles” the input with a tunable amount of noise, then a diffusion model rebuilds the image toward your prompt—so you can push subtle refinements or dramatic transformations while still staying anchored to the source.
Settings:
Many here are the same as Txt2Img, so we will focus on what is new.
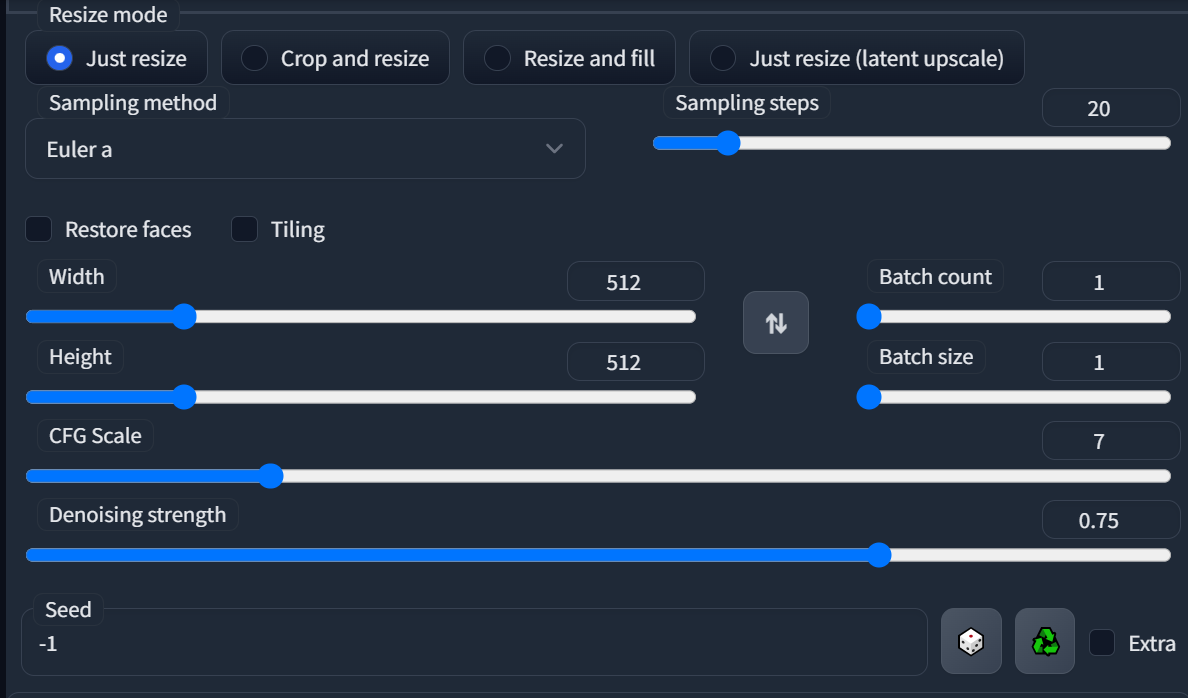
Resize Mode
- Just Resize - this will resize your image to meet the width / height set
- Crop and Resize - this will crop the image to the set resolution and and then diffuse the image
- Resize and fill - resizes the image, fills empty space with images colors
- Just Resize (Latent Upscale) - latent space is an abstract space that contains an interpretation of the observed events. You could even say individual perceptions of humans are in a latent space, although some camps disagree and think our direct perception is reality. Lots of philosophical arguments are about this. Anyways, I digress... in Stable Diffusion, latent space is the image representation space learned by the encoder in training. This option will resize and use it's interpretation of the image to upscale. Pretty cool, huh?
Denoising Strength
Denoising Strength determines how much diffusion will change the original image. A high denoising strength will completely replace the image and a low denoising strength will keep the original image intact. Everything in between will slowly introduce more of the diffusion into the mix. This can be useful in inpainting, but also for making slight changes or drastic ones.
Batch Processing
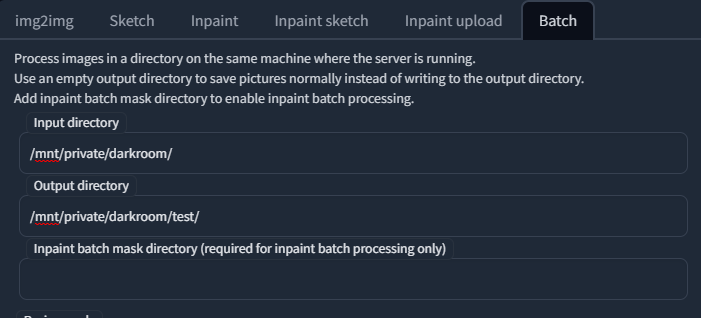
Batch processing is a great way to process a number of images in a directory. Using controlnet you can even create creative videos by processing every frame.
Batch processing requires private storage with our Creators Club subscription. You then create a folder, and reference that folder in the Input directory. Your root directory in Creator's Club is /mnt/private/
For more information on Batch Processing in Creator's Club, including how to make ControlNet Img2Img videos, check
Ultimate Upscale
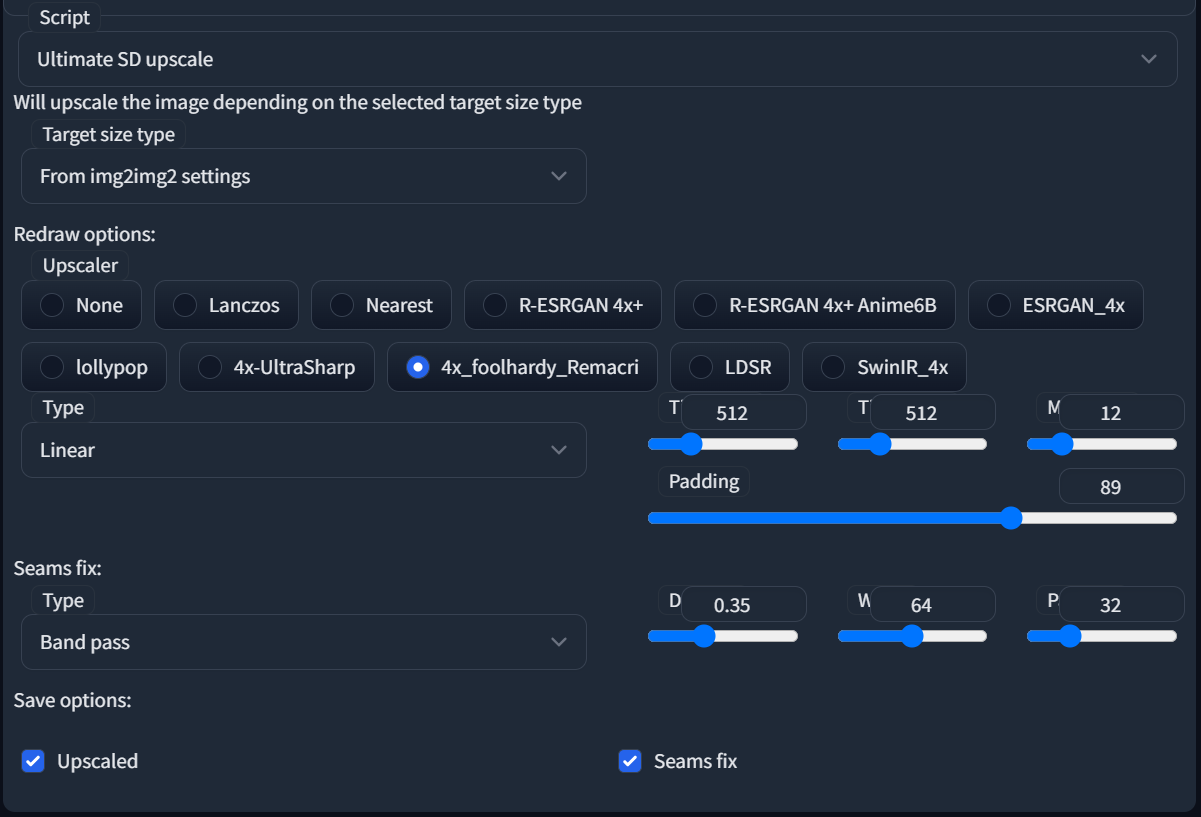
It's best not to use Euler A, try to keep a less dynamic sampler. Use a redraw option to give a broad idea of the upscale, then Ultimate upscaler will break into tiles and upscale each one. You can change the tile size, and the tile amount (Starts with "M" in first row of settings, with number 12).
Seams fix will reduce the amount of generation between the tiles, padding can help with this as well.
Set the img2img resolution will be used to determine the final resolution of the image. The ultimate upscaler settings will determine how it gets to that resolution.
Inpainting
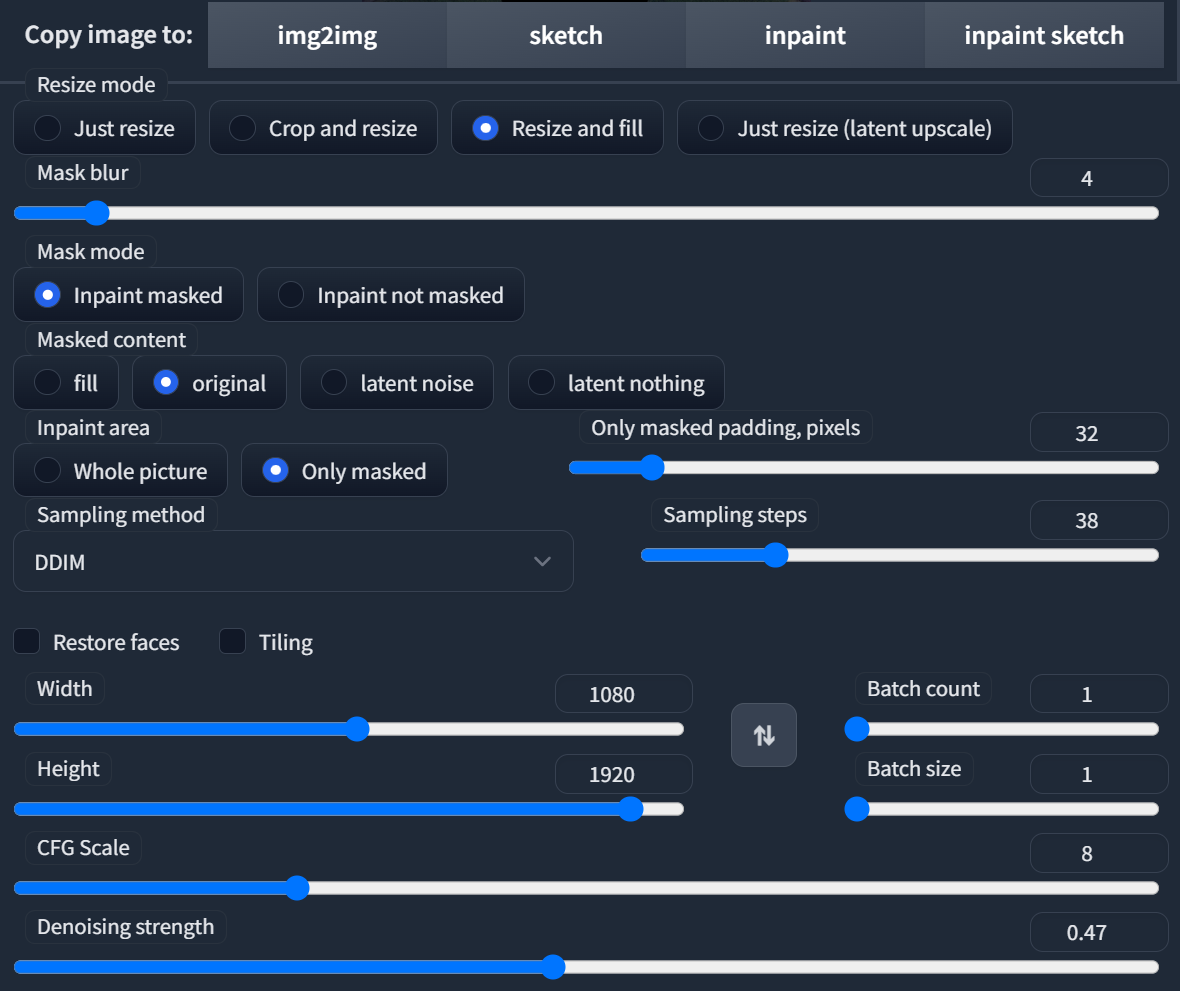
Use this tab to replace portions of an image. You can also use it for outpainting.
With inpainting, you can draw on your canvas and mask the area you wish to replace. Write in a prompt that contains the existing prompt you used for your image, but tweak it to generate what you want to inpaint. "Inpaint masked" will replace the area that you have drawn on the canvas. If you keep the masked area option on "Original" it will keep the image you had already underneath the mask.
Try creating larger batches and then determining which replacement you want to use. Crop and resize is usually a good idea when working on an upscaled image, as it will reduce the size. Working with the original size of the model, aka 512 or 768 is best. That being said - try it all!