
Step-by-Step Guide: Audioreactive DEFORUM video using hybrid motion on rundiffusion.com
- Tadeáš Hrdina|
- 26 steps|
- 12 minutes
- Note - you may want to create a smaller video first to preview how it looks before doing a long render!
1.
Navigate to vizrecord.app

2.
Click the "Choose File" option under the "Pick a local audio file (file is not uploaded):" field.

3.
Check the preset that catches your eye.
(Not all presets are good for deforum. Try to find a simple preset that clearly shows the motion and is not too complex. We are aiming for a good preset to capture the motion for hybrid video.)
I find "martin - bombyx mori" preset good enough for hybrid motion.
Click "Start play & record"
then Click "download video" button after recording is finished.
(highlighted in orange)

4.
- after downloading your preset,convert it to mp4 with tool of your choice.
(default format webm will not work with deforum keep that in mind!)
i did conversion with wondershare filmora
upload your .mp4 to your drive.

5
Click "Deforum"
Click "Extensions"
disable "adetailer"
disable "multidiffusion-upscaler-for-automatic1111"
Click "Apply and quit"
These extensions conflict with Controlnet, and need to be disabled to use Controlnet with Deforum.
6
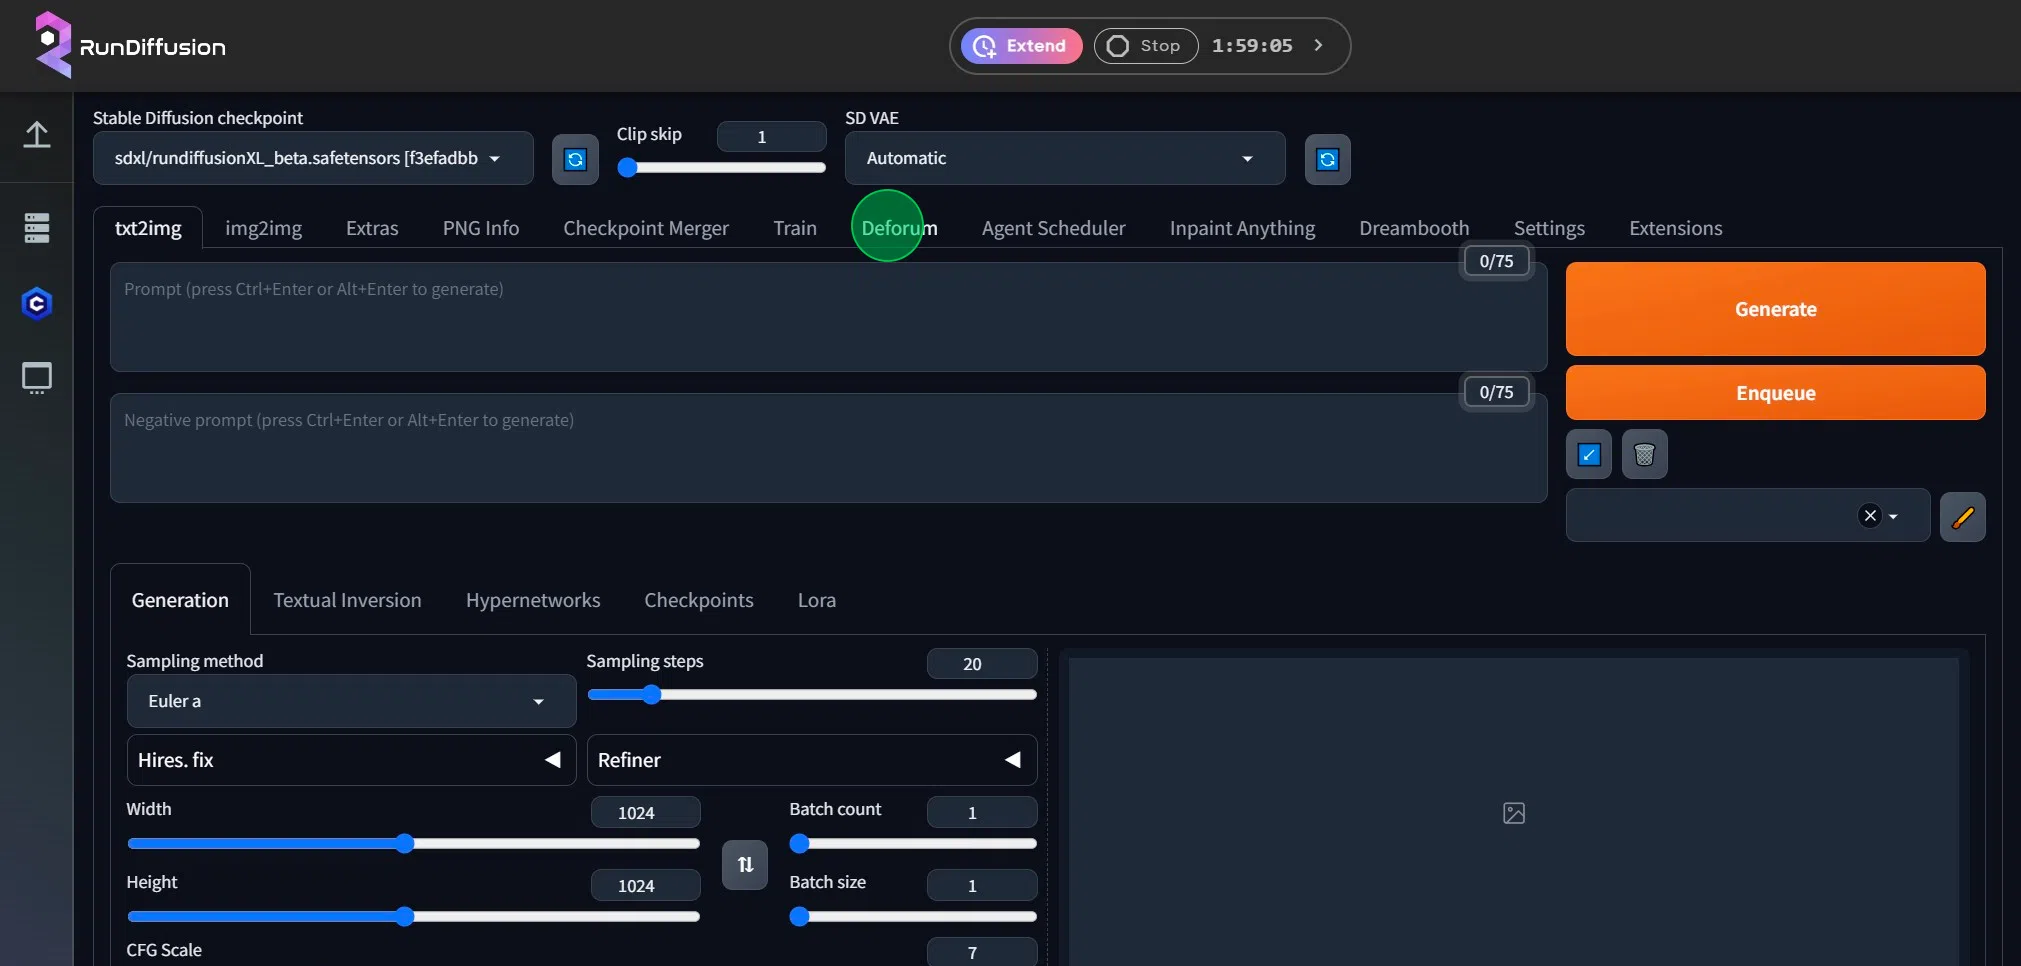
choose checkpoint of your choice.
i am going for "v1/dreamshaper_631BakedVae.safetensors"

7
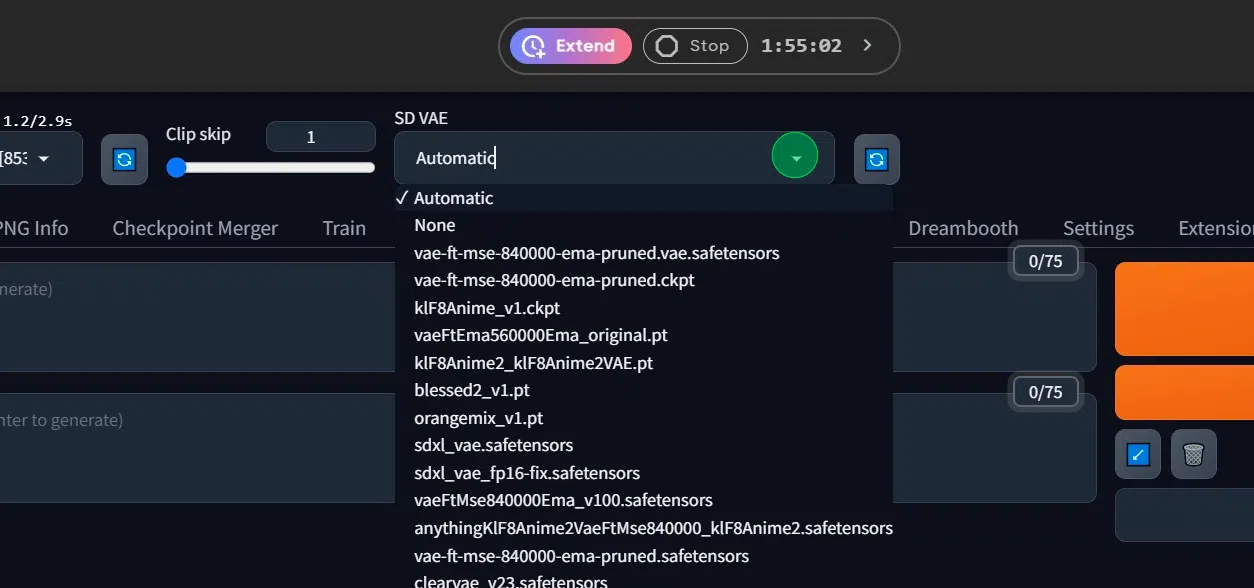
Change SD VAE to "None"
"v1/dreamshaper_631BakedVae.safetensors" have already VAE baked inside the checkpoint. VAE is quality of life.
its not necessary to have vae.
vae is good for improving details of final image,such as colors,detail of eyes,hands.etc
(Without VAE, you might end up with blank eyes without pupils or three fingers instead of five, or washed-out colors. VAE will fix the colors, not necessarily fingers or eyes.)
8
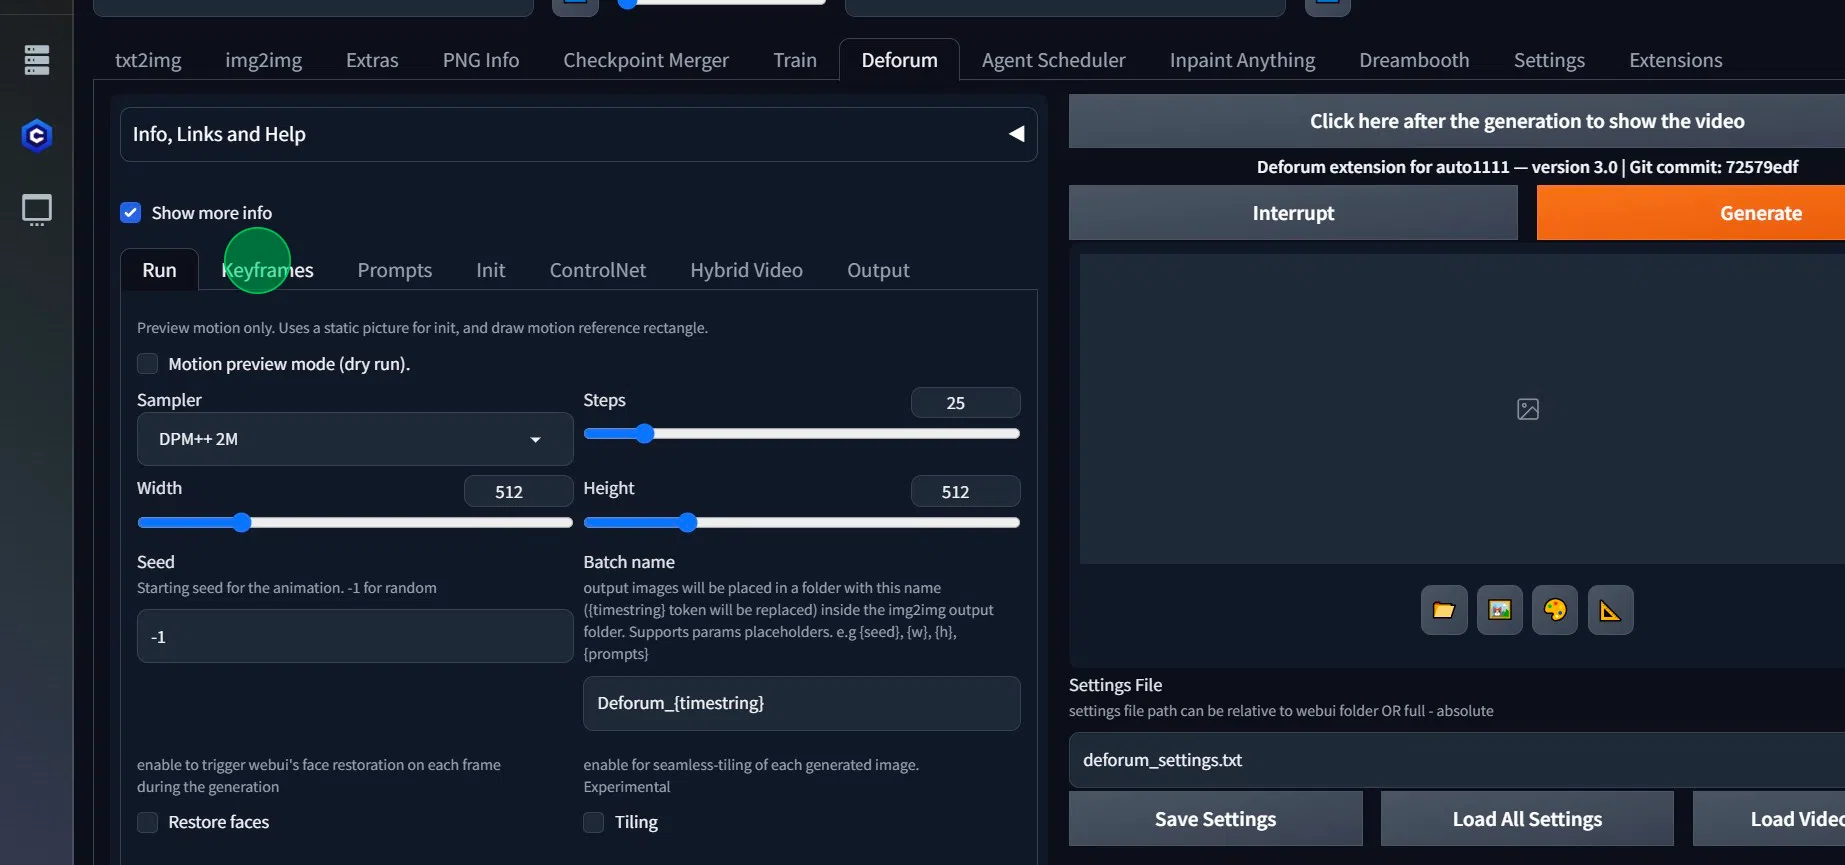
Click "Deforum"

9
Select sampler of your choice.
Click "DPM++ 2M"
"euler a" is also good choice.but all samplers marked with letter "a" (ancestral) results in more variety but less consistency.
also set the resoluton .
my video is rendered in 640x384

10
Click "Keyframes"
Click the "3D" field.
Click the "Translation Z" field.
Change the value "1.75" o "0"
"Translation Z" stands for zoom factor in the motion.
Our init video will guide the motion. (step 18.)
11
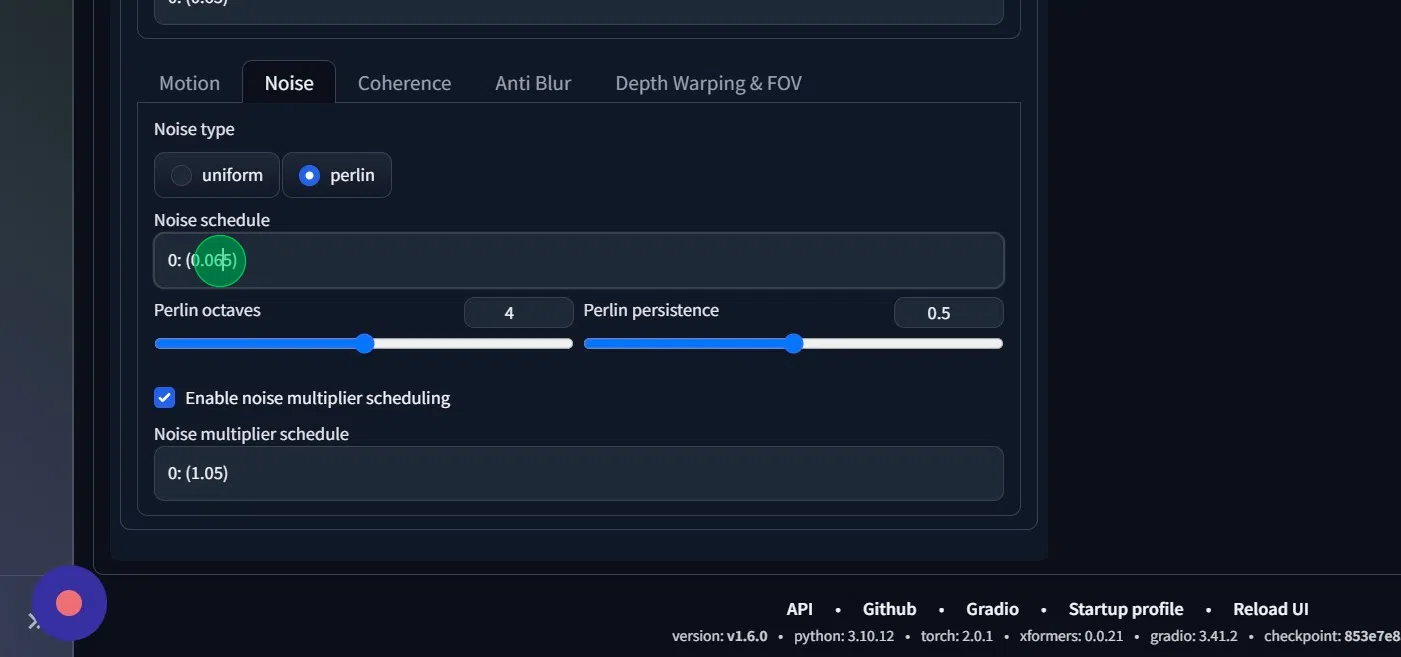
Click "Noise"

12
- Set "Noise schedule" to "0"
- Untick "Enable noise multiplier scheduling"
we dont want noise in our animation.
13
Click "Anti Blur"
no anti blur also.

14
Click the "Amount schedule" field and set it to "0"

15
Set up your prompt.
My prompt consists of LoRas and art style being scheduled on various keyframes.
After adjustment, my final prompt is as follows:
{
"0": "lora:Earth:0.6,multiplanet system,epic,cinematic,8k,masterpiece,planet,earth,abstract",
"2700": "lora:Earth:0.6,multiplanet system,epic,cinematic,8k,masterpiece,planet,earth,abstract,lora:CosmicEldritchTech-20:0.65",
"5850": ",lora:Earth:0.6,multiplanet system,epic,cinematic,8k,masterpiece,planet,earth,abstract,lora:CosmicEldritchTech-20:0.65,trending on ArtStation,art by Alberto Seveso"
}
"<" Lora ">" symbols must be included in case of LoRas. "<"before Lora and "> "after the specified weight of Lora.
Example: <lora:nameofthelora:0.8>
The number before > ranges from 0.35-1.0 for your Lora to trigger.
Some LoRas need a trigger word included in the prompt; some don't.
(Lora weight below 0.35 without a trigger word will not trigger Lora at all, based on my observations with using multiple LoRas for SD 1.5 models.)
In case of multiple LoRas in your prompt, setting Lora weights higher than 0.8 in general will result in more frequent artifacts and defects in your output. Lower the value, for example, to 0.6, so other LoRas can blend better.
Also, consider experimenting in the txt2img tab or img2img tab to see how LoRas or embeddings react together.

16
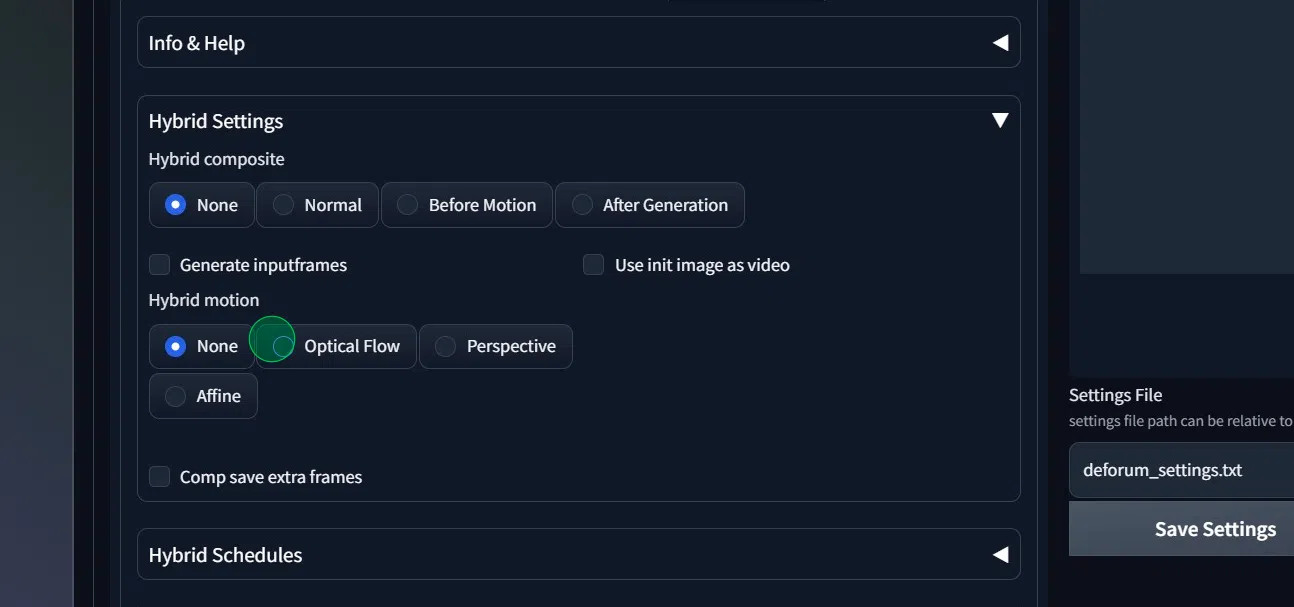
Click "Hybrid Video"

17
- Click the "Optical Flow" field.
- Click the "DIS Medium" field. (Optional: Raft/DIS Fine/Farnebackprovides good results also!)
- Click the "Generate inputframes" field.
"we want to capture only the motion of our init video"
18
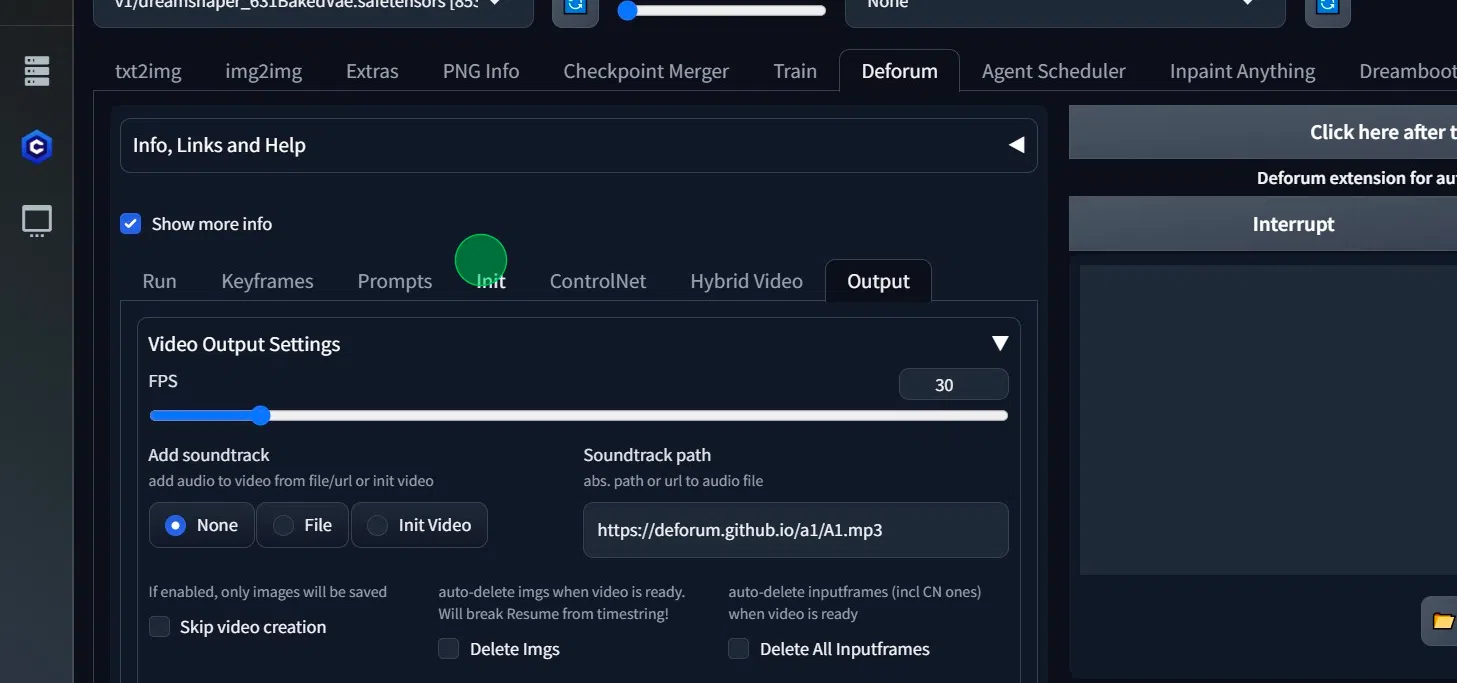
- Click "Output"

19
Set FPS to match the FPS of your init video!
(not doing so will result in desynchronization of sound and video!)
My init video is 30fps.

20
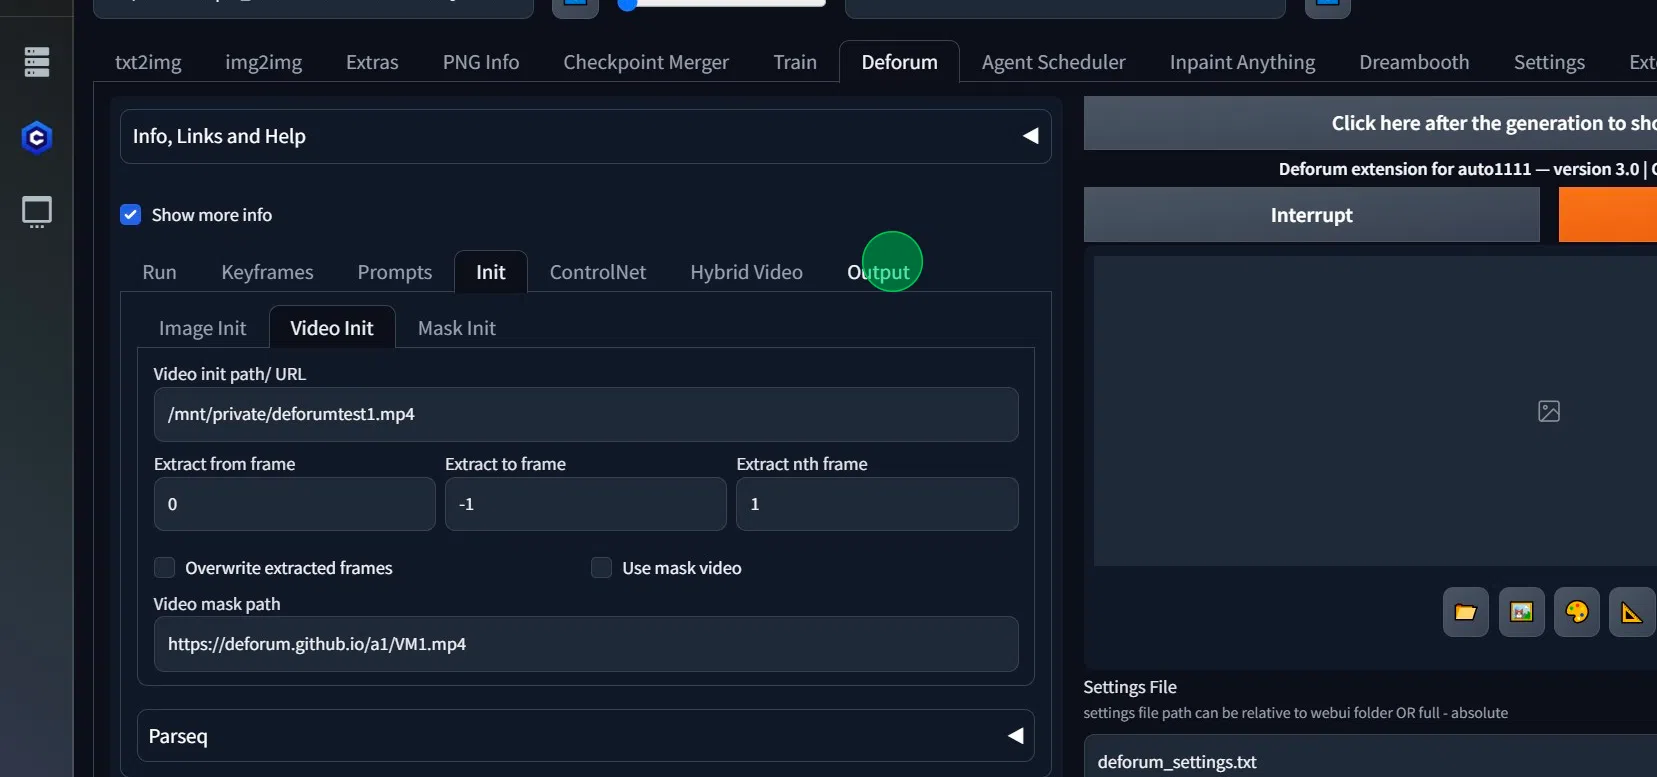
- Click "Init" tab
- Click the "strength" field. and set it to "0.65"
21
Click "Output"
I want audio to be included in our output video also.
- Tick the "Init Video" to capture audio from our init video,
- Tick the "File" to include audio from different file.
- for example: /mnt/private/your_file_somewhere_on_the_drive.mp3
22
- set FPS to match the FPS of your init video!(not doing so will result in desynchronization of sound and video!)My init video is 30fps.
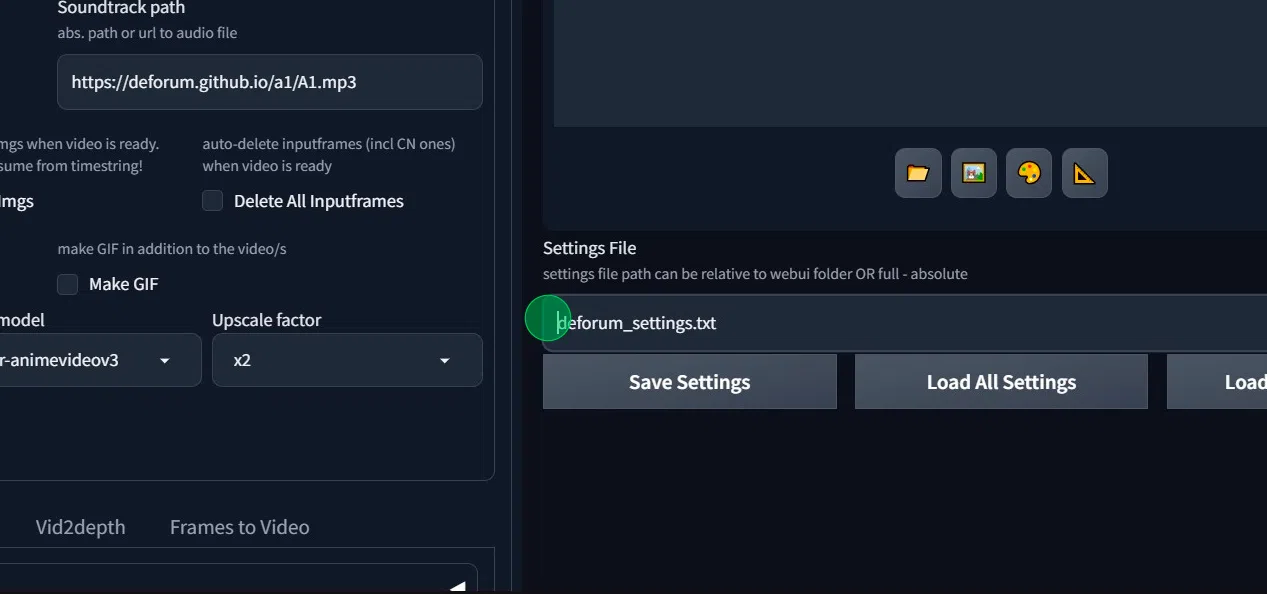
- Tick the Upscale box and specify the upscaler and factor of upscaling. 2x/3x/4x for realesr-animevideov3(realesrgan-x4 plus and realesrgan-x4 plus-anime have better results.but you cannot specify the factor and takes longer to upscale!)
- tick "FILM" for interpolation method.raise the " interp x" slider to multiply the output FPS by 2 times from 30fps to 60fps

23
Backup your settings!
in case of local installation of auto1111 ,you can click save settings right away.
on Run diffusion. dont forget to specify path/
always add /mnt/private/
example:
/mnt/private/deforum_settings7.txt
Click "Save Settings"
new file will be created with your saved settings.
and you can load the setings file with the same path by clicking "Load All Settings" button" anytime.any session.
24
specify the path to your "init video"
in my case:
"/mnt/private/videoinit/deforumtest1.mp4"

25
After clicking generate,
wait for estimation around 5-10 minutes to calculate the time of the render to finish.
as soon as you see the deforum timer to have more stable timing...
Click "Extend"
in my case "Click "3 hours"
Click "Confirm"

Now sit back and let your video generate! Make sure to check the logs and keep your browser tab open while processing. The server logs (right hand side) are best for watching progress.
Congratulations! You now have an audioreactive deforum video!