


Step-by-Step Guide for Ultimate SD Upscaler in ComfyUI
This tutorial will guide you through using the UltimateSD Upscaler workflow on RunDiffusion, based on the provided JSON workflow file. This guide is designed for upscaling images while retaining high fidelity and applying custom models. Follow these steps to upscale your images effectively.
As powerful as the Ultimate SD Upscaler is in ComfyUI it can be resource intensive and therefore take a long time to process your images especially if you have a large batch. In those cases you may want to switch over to the RunDiffusion Runnit Platform that offers tools like Topaz, Nano Banana Pro and many other amazing options for upscaling.
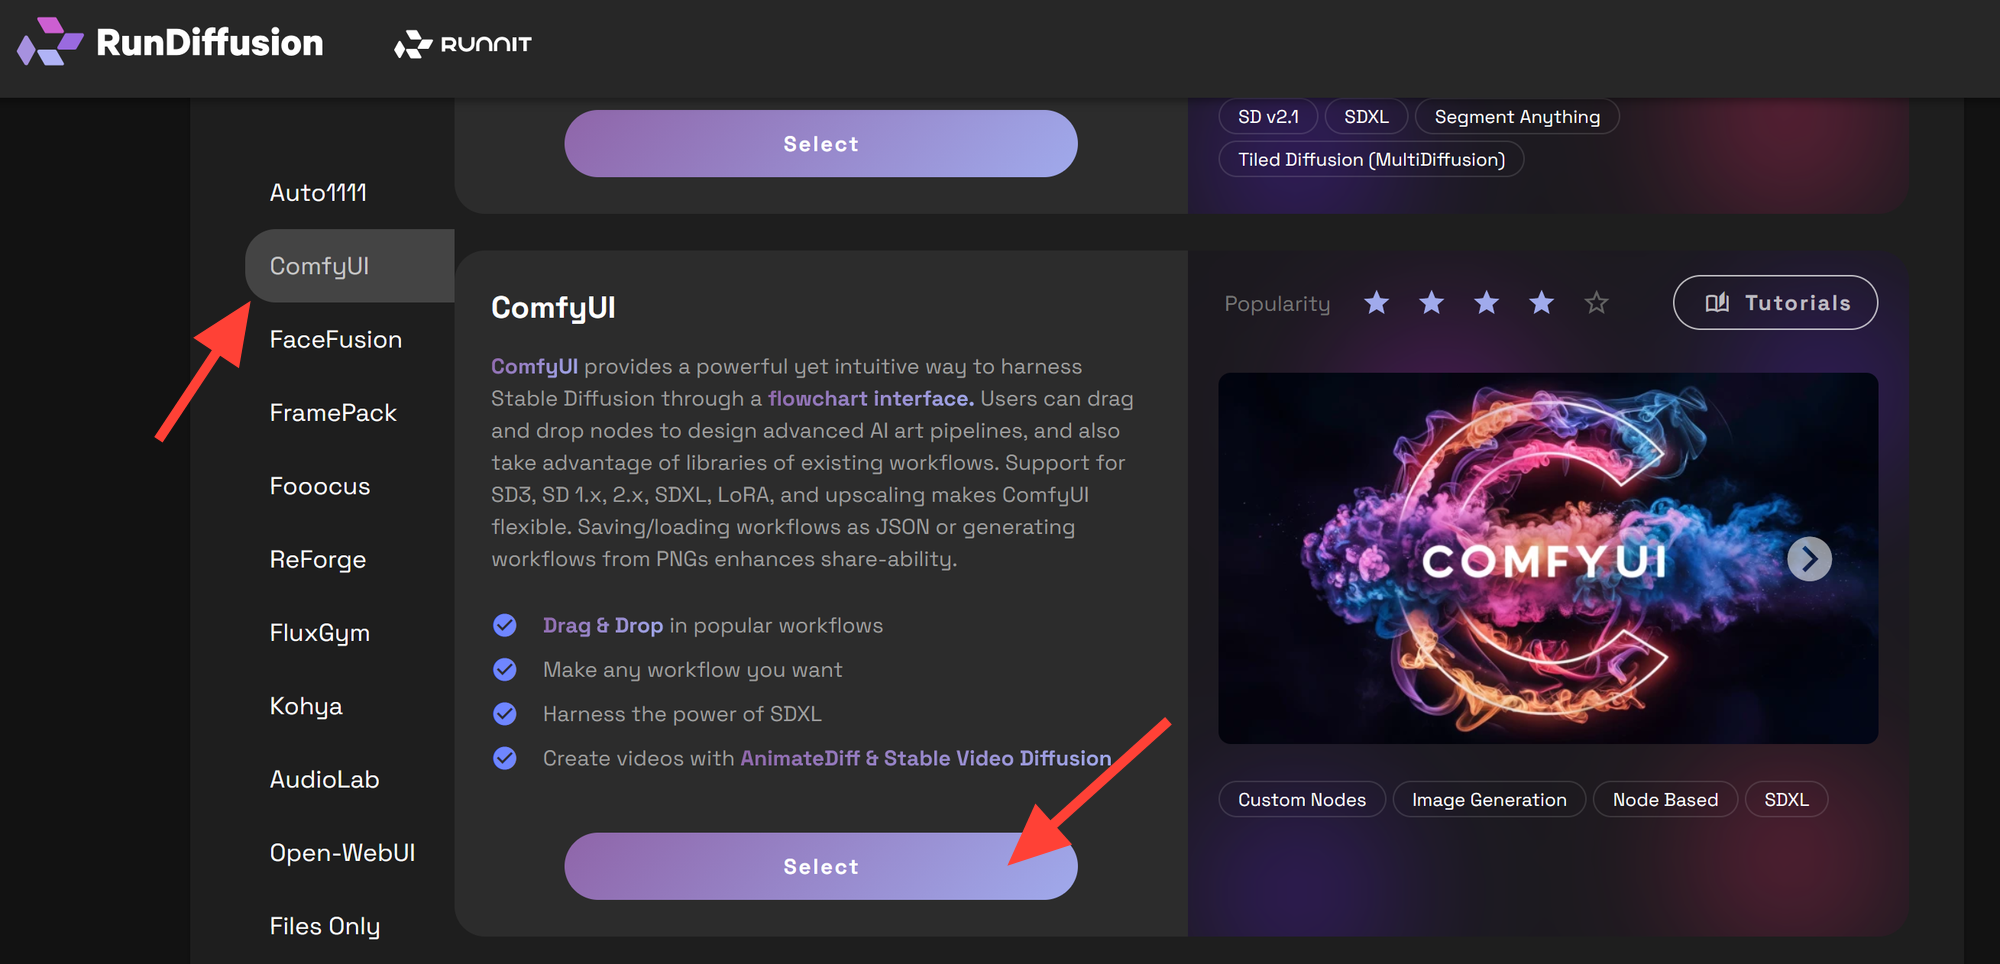
Click on ComfyUI on the left sidebar then select ComfyUI.
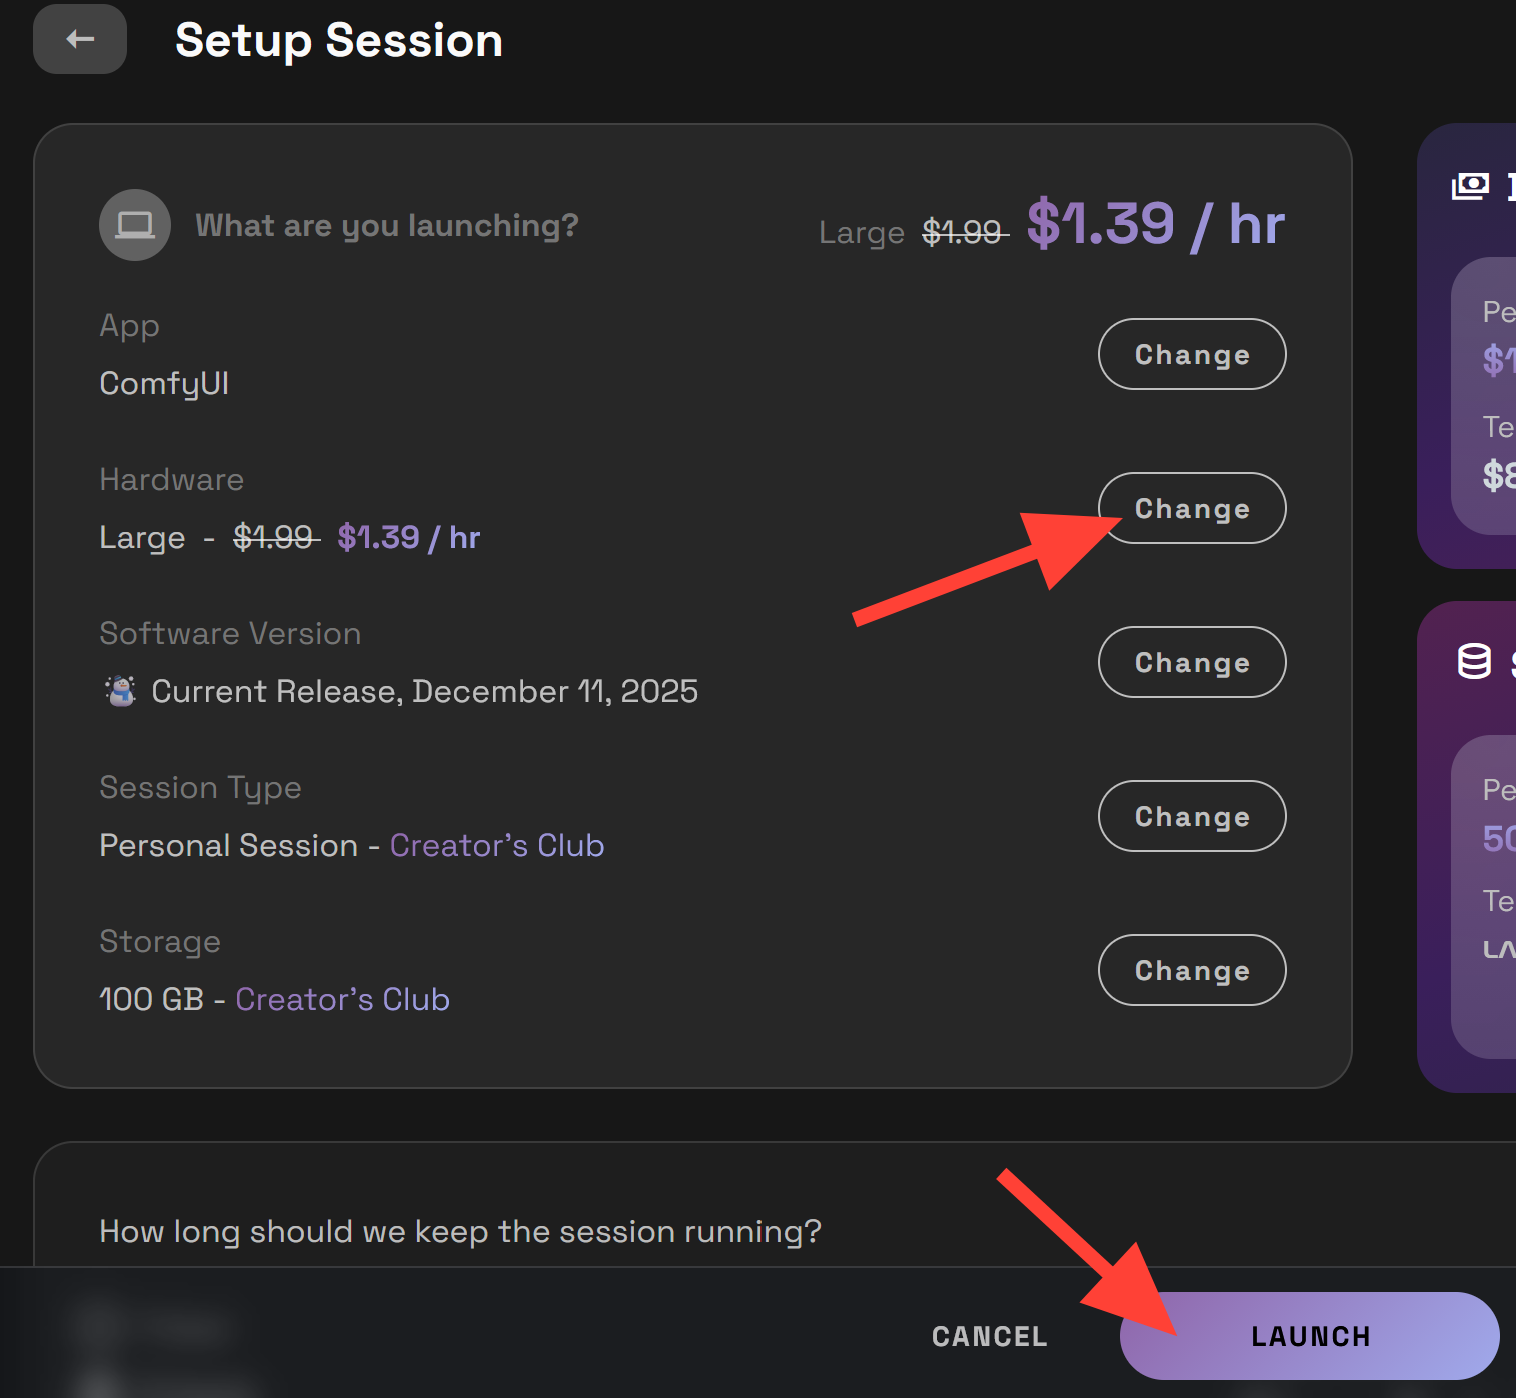
We recommend a Medium or Large server for this workflow. Then click Launch.
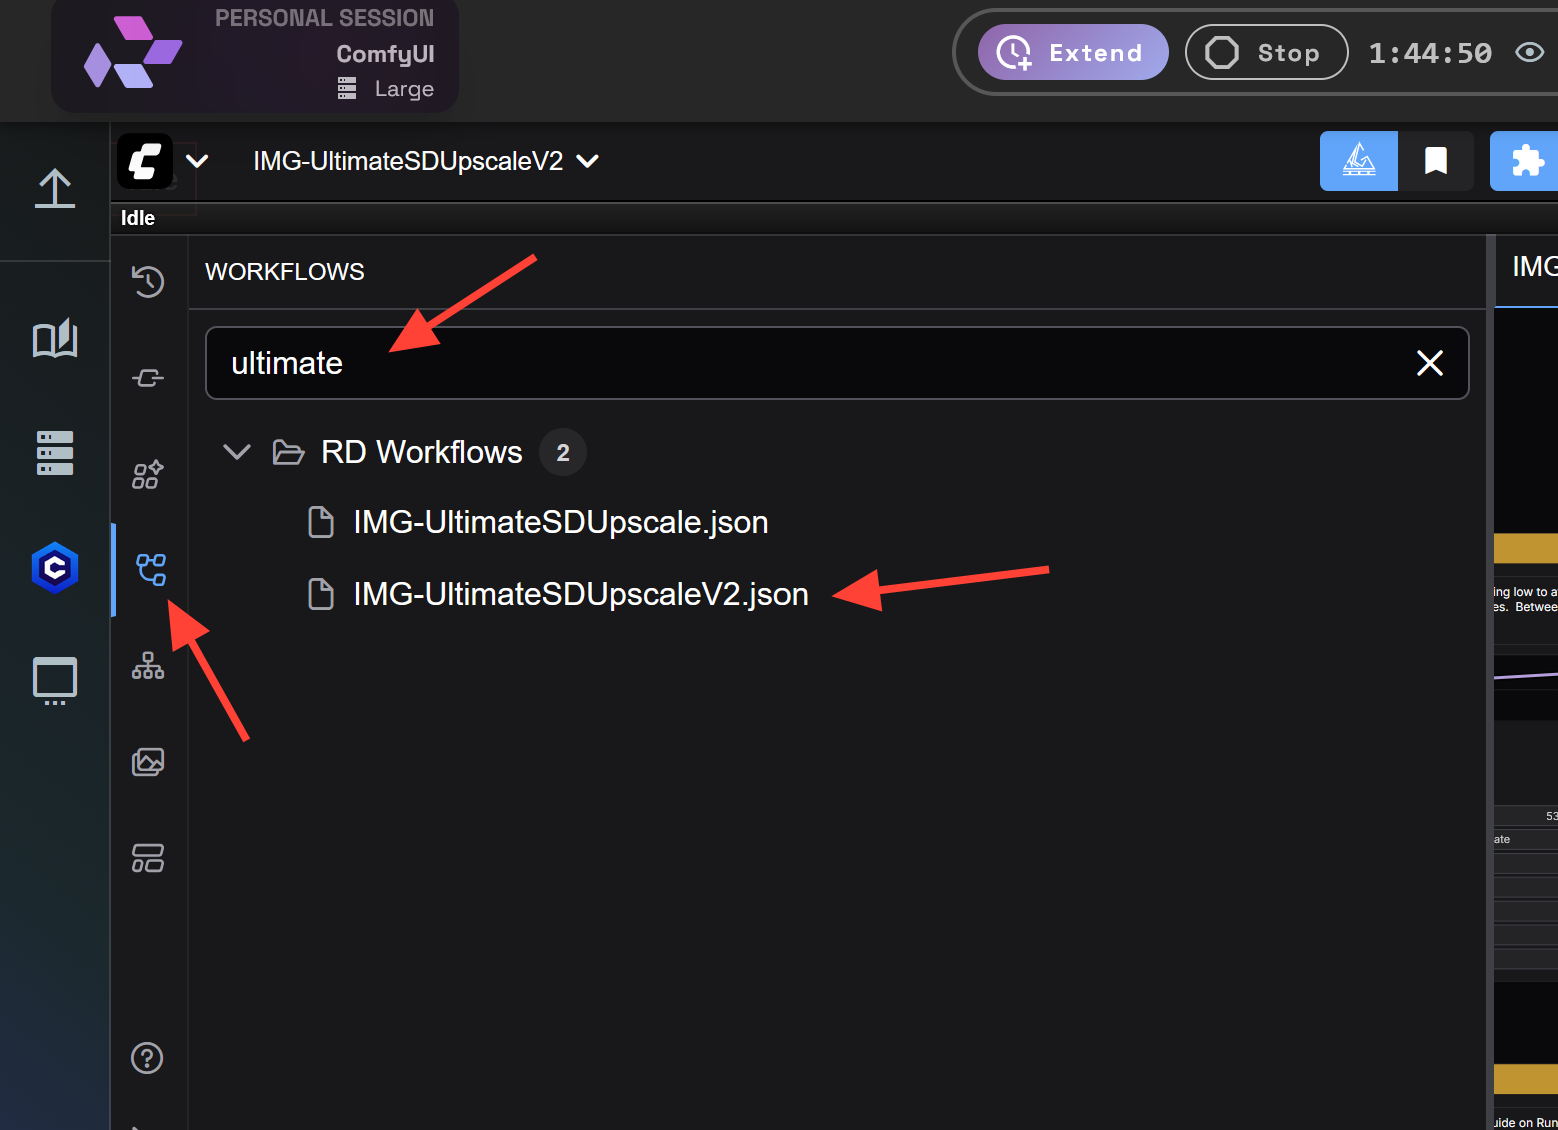
Click on the workflow icon on the sidebar, then click on the RD Workflows folder, then search for Ultimate. Then select IMG-UltimateSDUpscaleV2.json.
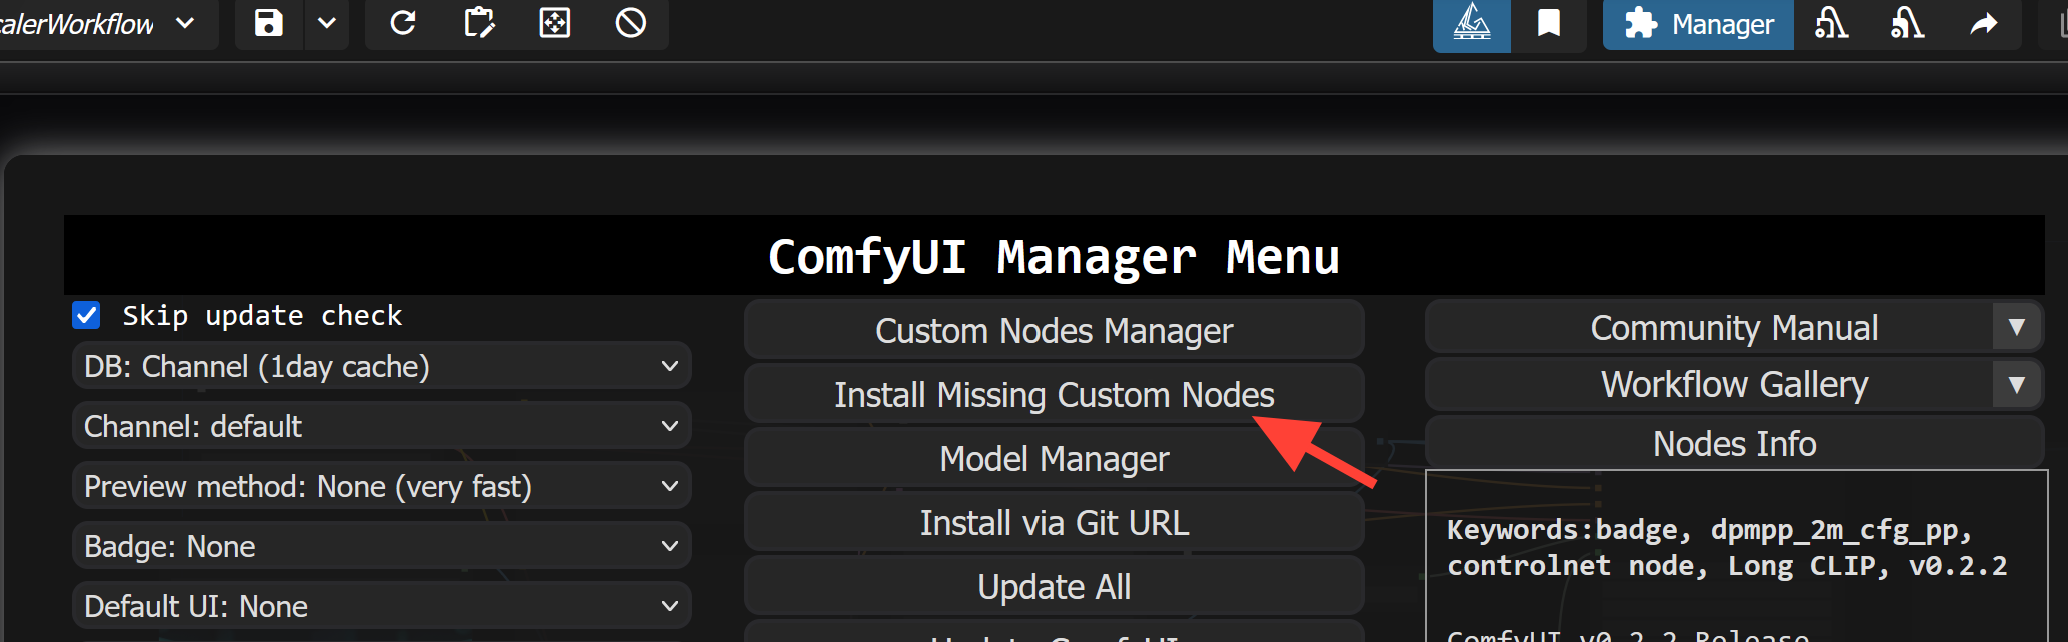
Before we jump into the individual nodes let's make sure we have the necessary nodes installed. Be sure to click on the Comfy Manager in the top right.

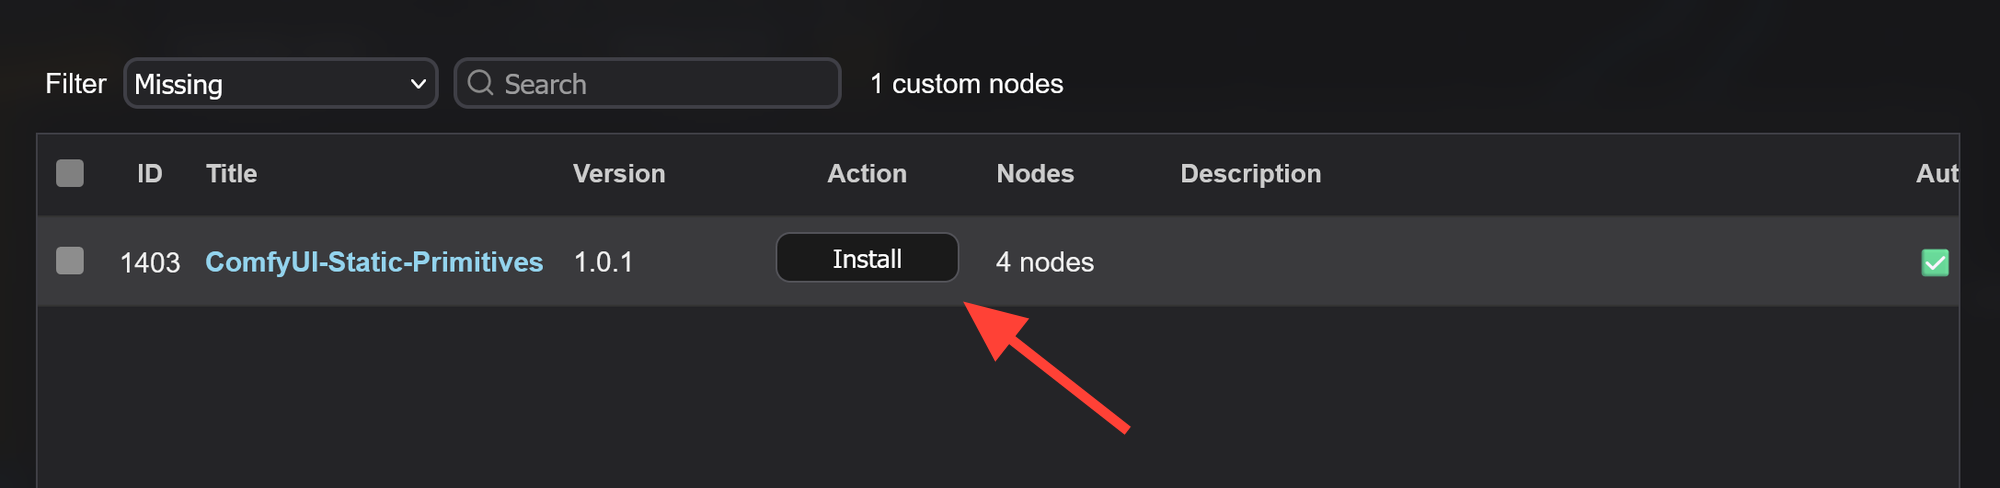
Click on Install missing nodes.
Then click on Install
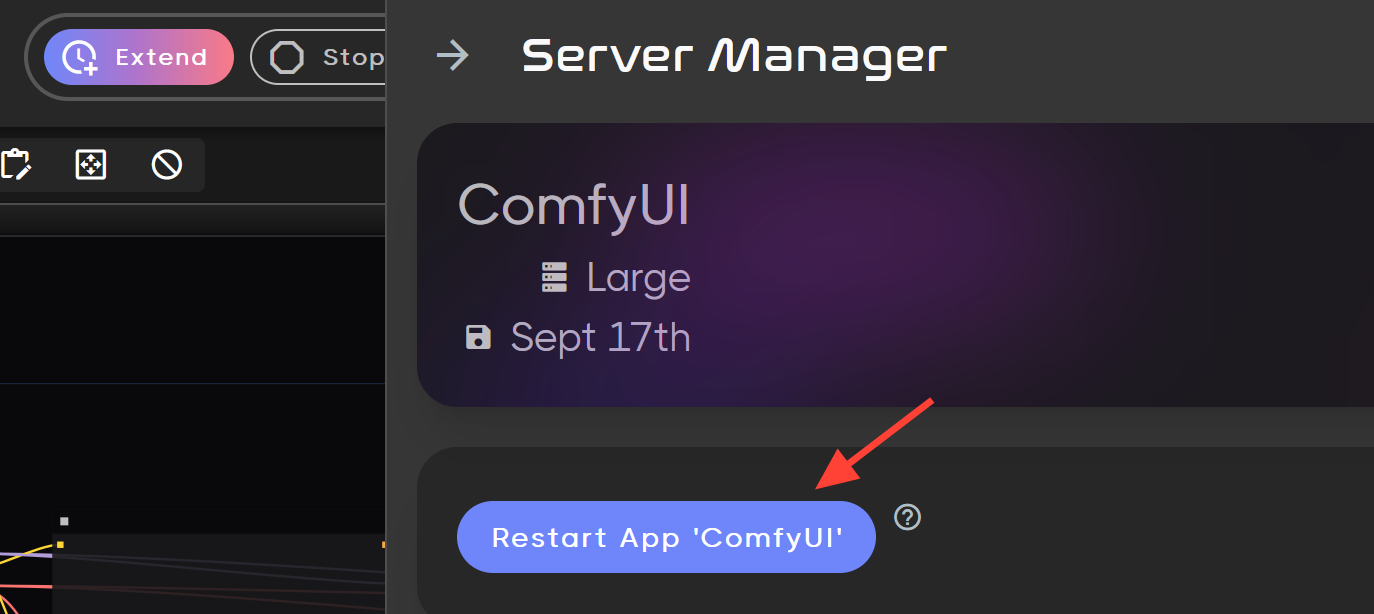
Open the server manager on the left side.

Finally restart App.
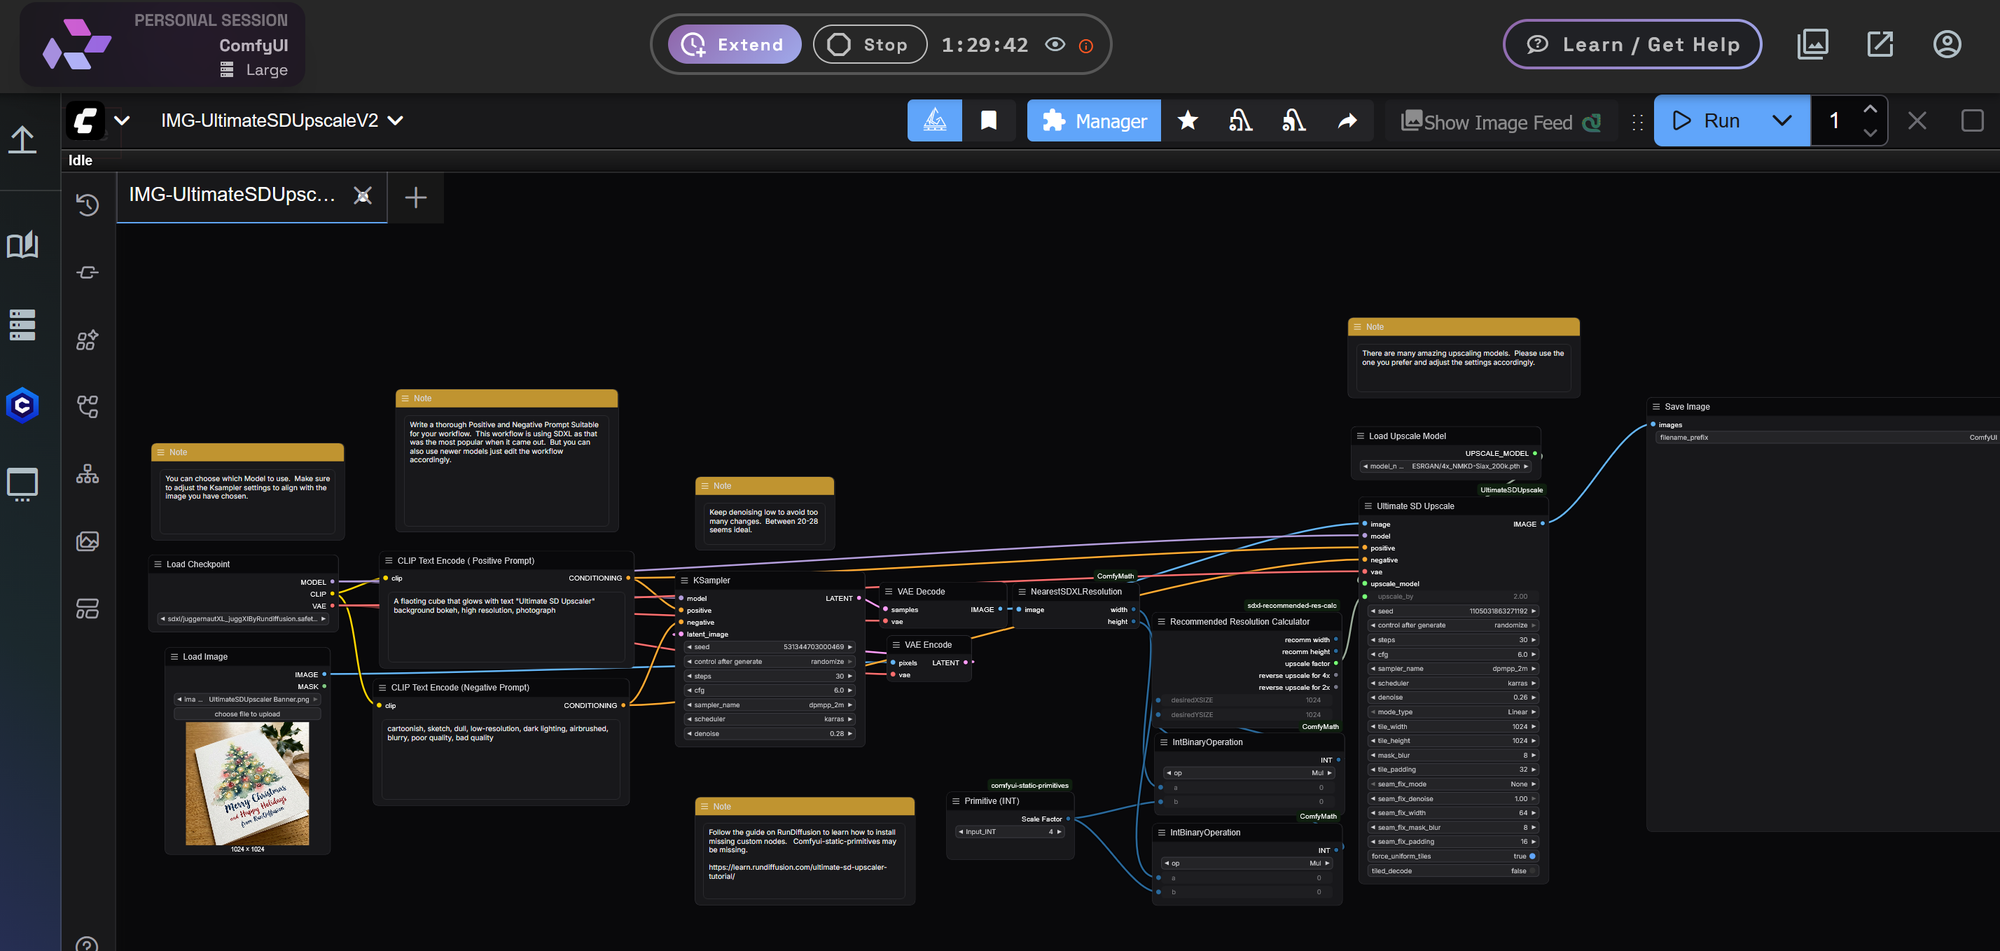
Your workflow should now look like this.
Node Explanations
1. Load the Necessary Models
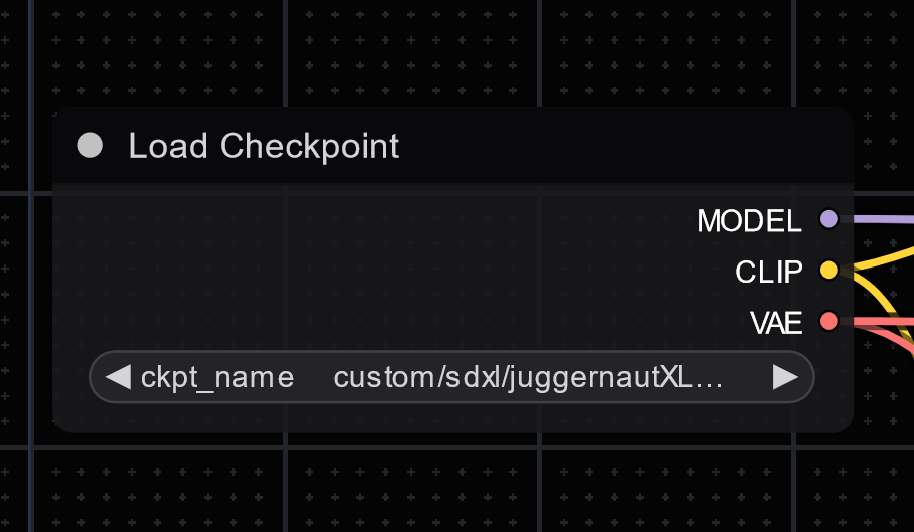
- Checkpoint Loader: The first step is to load the appropriate model. In this case, the workflow is using JuggernautXL:Make sure you load this checkpoint from the RunDiffusion preloaded models using the Load Checkpoint node.
- Node:
CheckpointLoaderSimple - Model Path:
custom/sdxl/juggernautXL_juggXIByRundiffusion.safetensors
- Node:
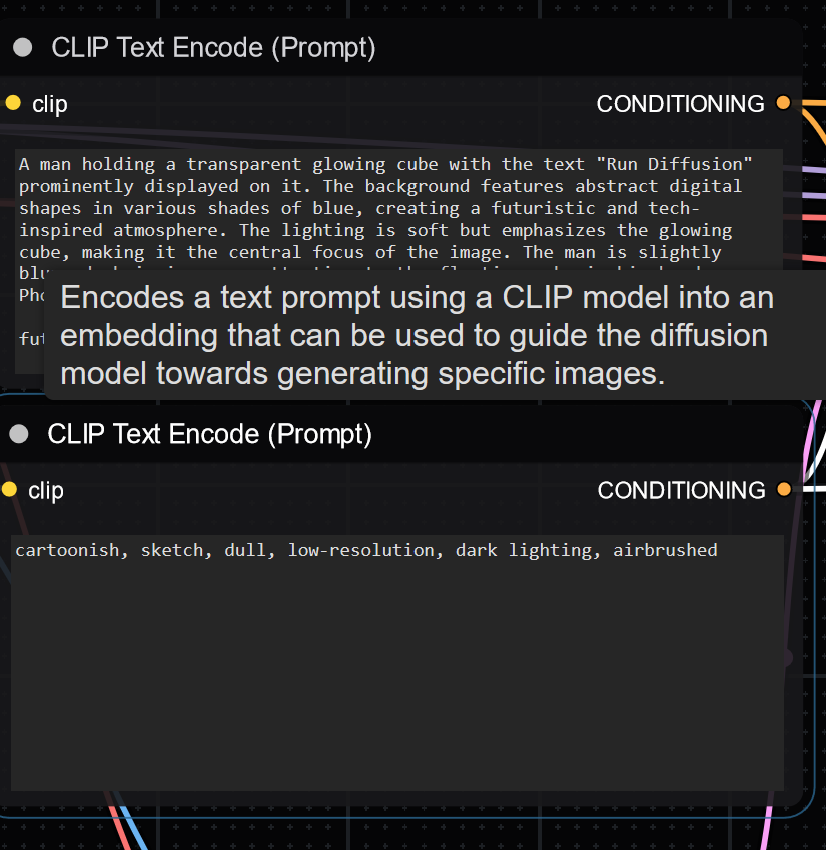
2. Define the Text Prompts
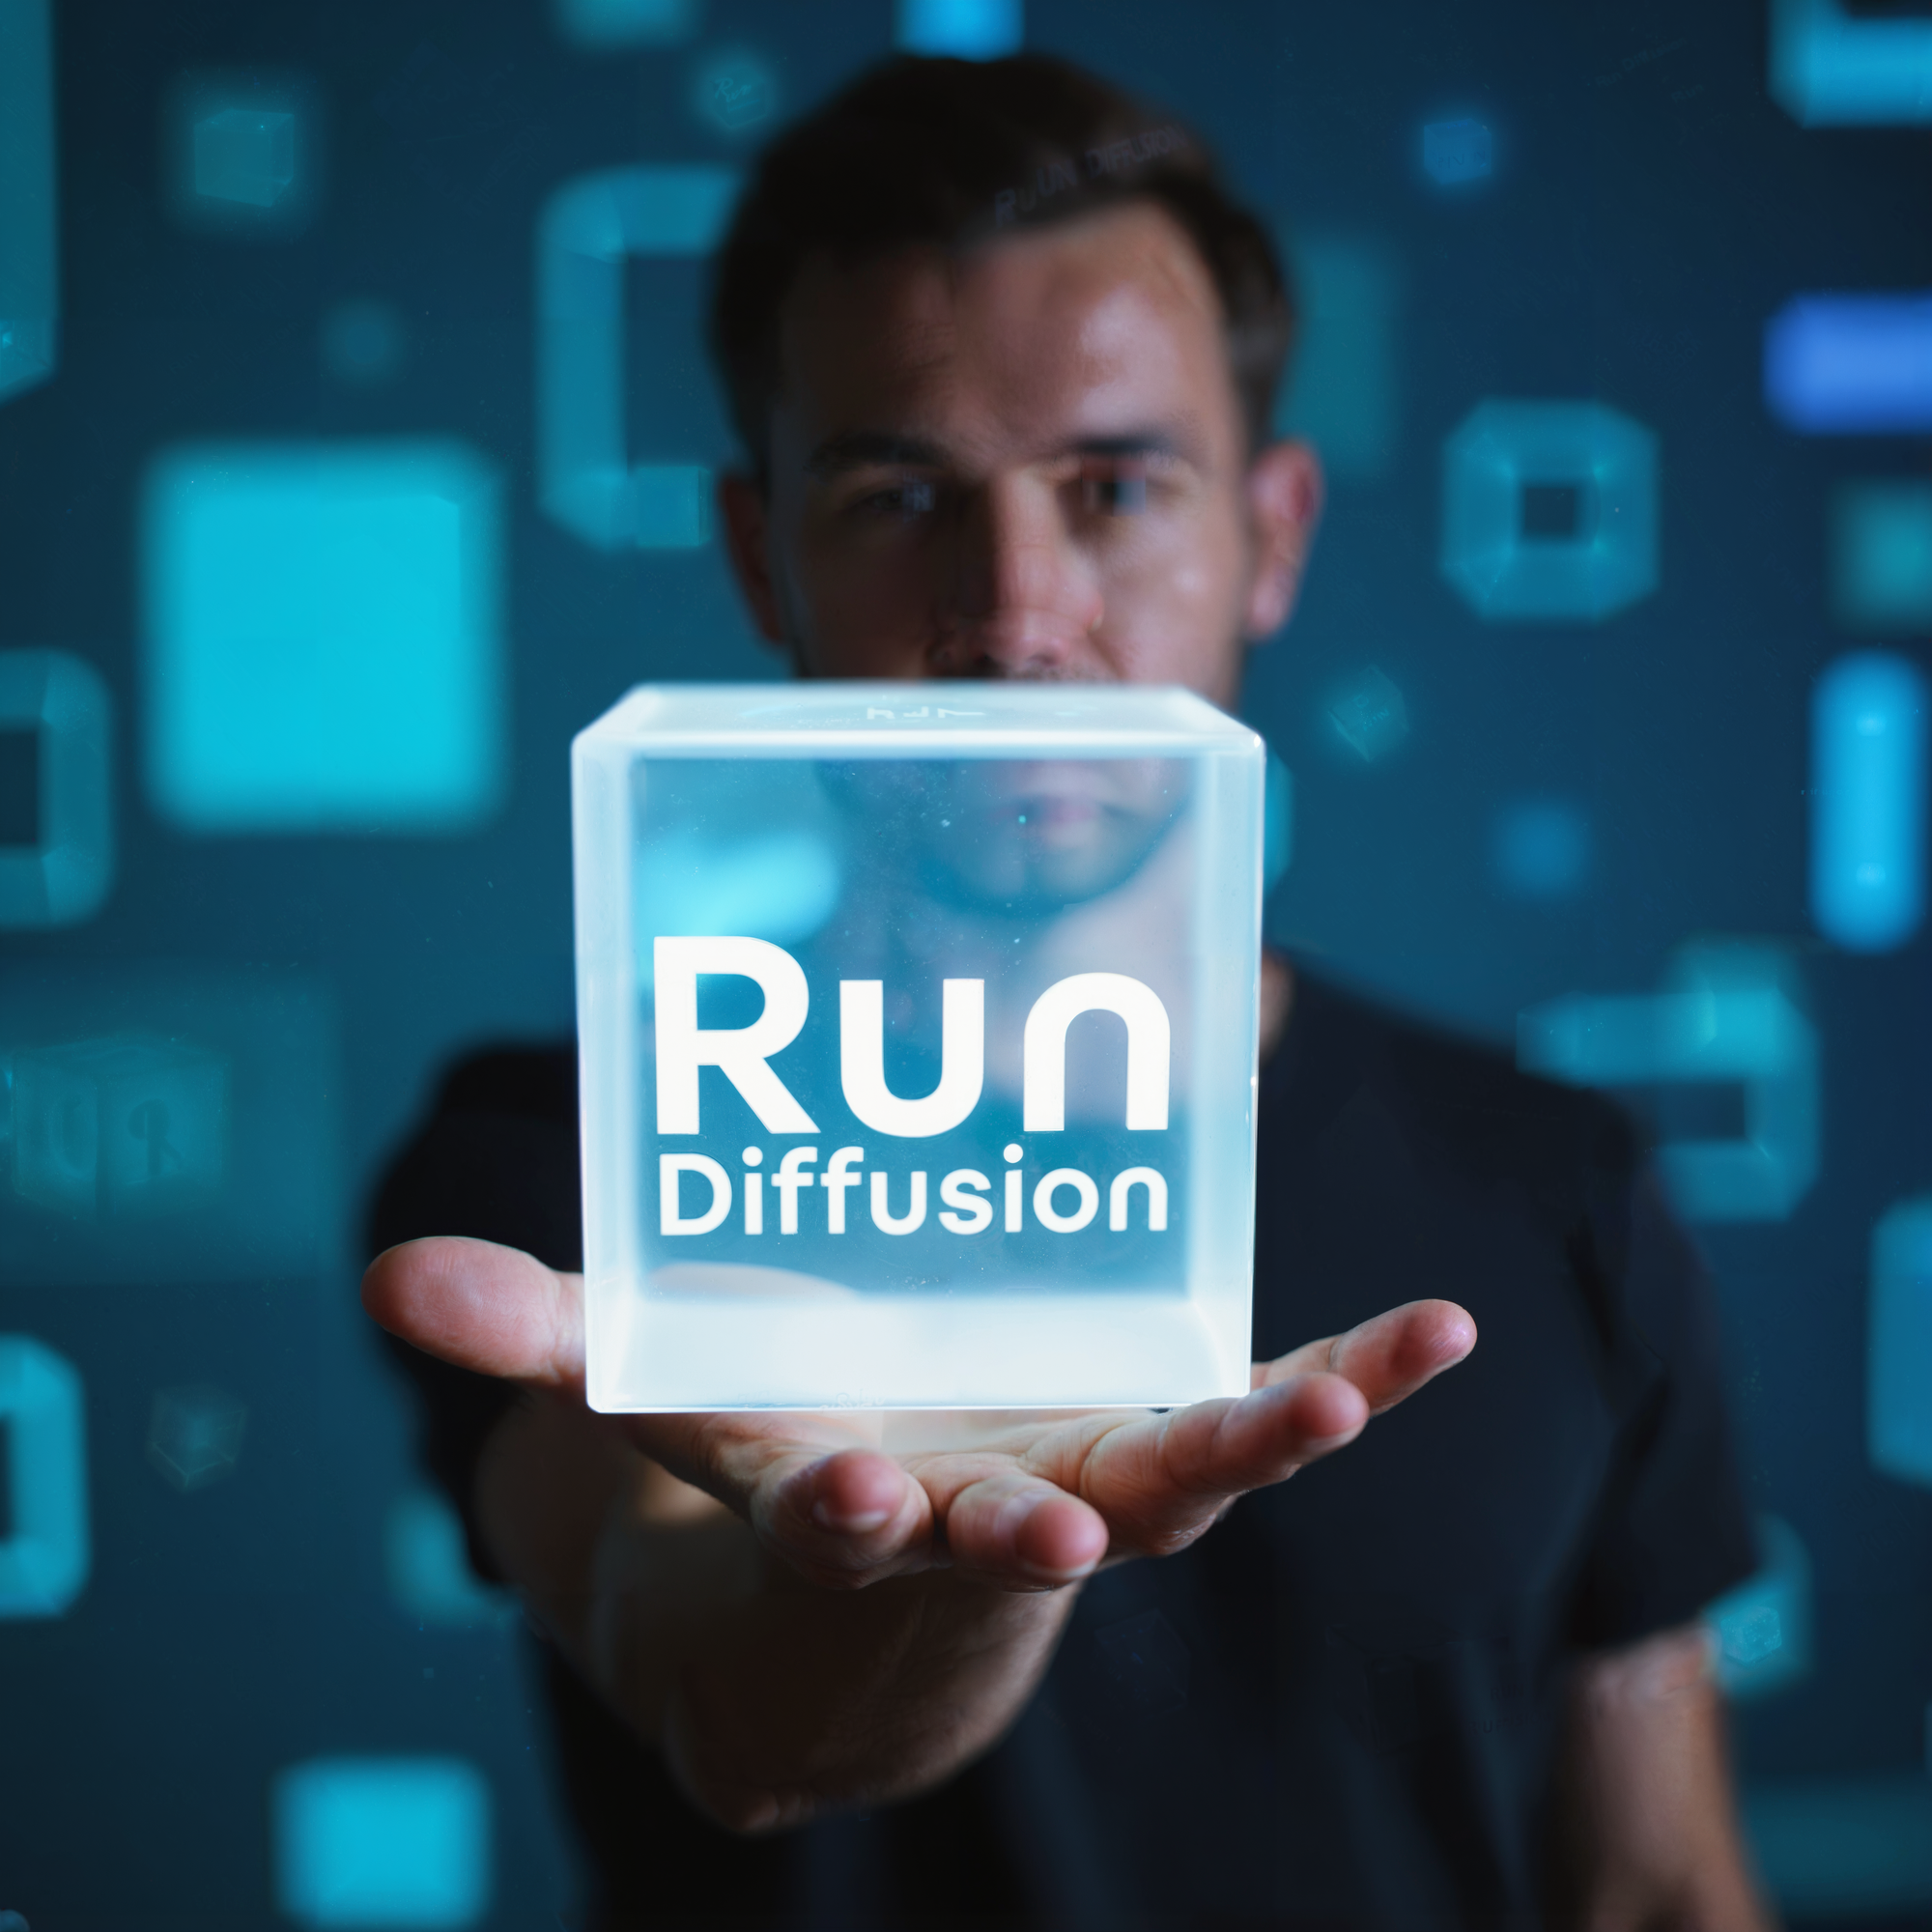
- Positive Prompt: In this workflow, the prompt describes a futuristic, digital glowing cube with the Run Diffusion text. Ensure your prompt is clear, with all necessary artistic and technical elements highlighted:
- Example: "A man holding a transparent glowing cube with "Run Diffusion" text. Abstract digital shapes in blue shades in the background."
- Negative Prompt: It's important to eliminate unwanted elements, such as cartoonish or low-resolution outputs. The negative prompt here focuses on excluding styles like sketch, dull colors, and low resolution:
- Example: "cartoonish, sketch, dull, low-resolution, dark lighting, airbrushed."
- Nodes:
CLIPTextEncode(Positive & Negative prompts)
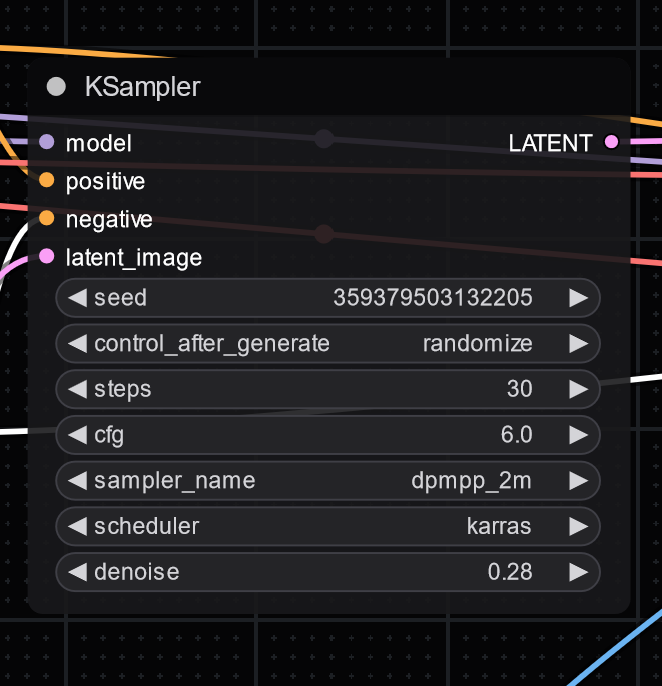
3. Sample the Latent Space
- The KSampler node is configured to sample from the latent space, using 30 steps with a DPM++ 2M Karras scheduler.
- Settings:
- Steps: 30
- Scheduler: dpmpp_2m
- CFG Scale: 6
- Noise Seed: Randomize
- Denoise: 28
- Settings:
This step controls how the latent image is generated before further processing. If you want less changes lower the denoising.
4. Decode the VAE
- After sampling, the latent space must be decoded to generate the initial image. The VAEDecode node handles this process, converting latent space back into an image format.
- Node:
VAEDecode
- Node:
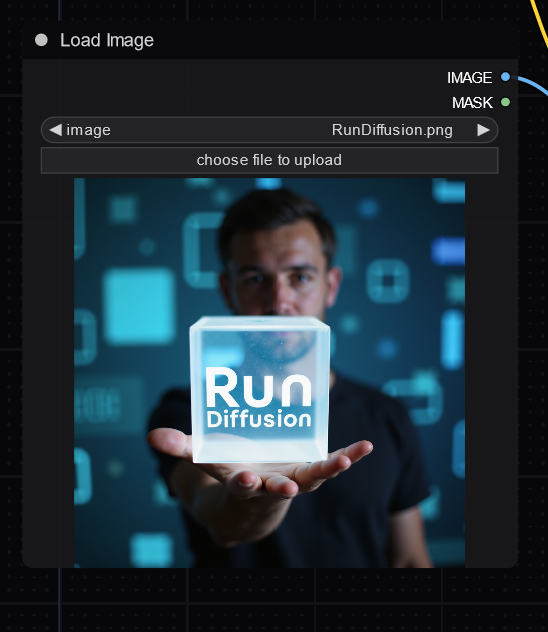
5. Load and Preprocess the Image
- In this tutorial we will be working with an existing image so we'll use the LoadImage node. This node allows you to upload an image from your local machine.
- Node:
LoadImage - Example: Image used in this workflow is named
RunDiffusion.png.
- Node:
The image is encoded using a VAEEncode node, converting it into latent space for upscaling.
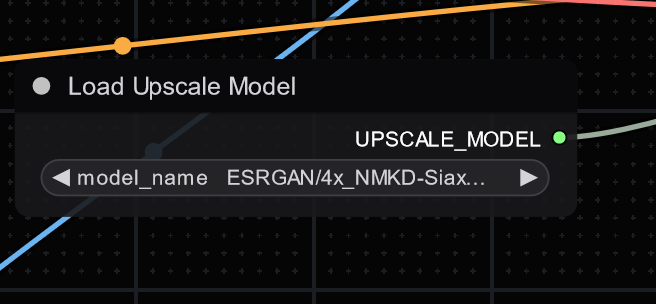
6. Load the Upscale Model
- The upscaling model (ESRGAN) is loaded separately using the UpscaleModelLoader node. This separation gives you flexibility to easily change the model if needed depending on the image you chose to process.
- Node:
UpscaleModelLoader - Upscale Model Path:
ESRGAN/4x_NMKD-Siax_200k.pth - Upscale Factor: Set at 4x by default.
- Node:
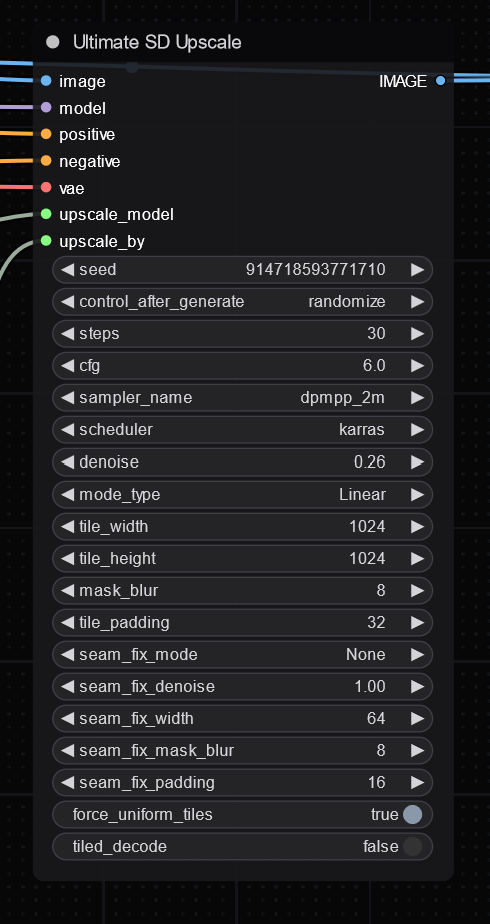
6. UltimateSD Upscaler Node
- The UltimateSDUpscaler node is where the actual upscaling happens. After generating the base image and loading the upscaling model, the workflow processes the image and applies the 4x upscale.
- Node:
UltimateSDUpscaler - Settings:
- Upscale Factor: 4x (This can be adjusted to suit your needs)
- Positive Prompt: Connect from the CLIPTextEncode positive prompt.
- Negative Prompt: Connect from the CLIPTextEncode negative prompt.
- VAE: Connected from the VAEDecode node.
- Base Model: Connect from CheckpointLoaderSimple.
- Node:
Here are some values that control how the UltimateSD Upscaler node performs. These can all be adjusted to suit your needs:
7. Preview and Save
- Before saving the final result, you can preview the upscaled image using the PreviewImage node. This gives you an opportunity to make adjustments before finalizing canceling the queue if it isn't what you want.
- Once satisfied with the result, the image is saved using the SaveImage node.
Upscaled:
Tips for Optimal Use
- Use Medium or Large Servers so that you have sufficient VRAM for processing high-resolution outputs, especially when using intensive models like ESRGAN.
- Try different prompts to see how conditioning affects the final output.
- Adjust denoising as needed if the changes are too drastic or not enough.
This workflow leverages the Ultimate SD Upscaler for significant resolution enhancement while maintaining visual quality, particularly suitable for detailed art or photography.
For more tutorials on how to refine workflows like this or work with other AI-driven art tools, check out our RunDiffusion Learning Center.
Frequently Asked Questions (FAQ)
What is the Ultimate SD Upscaler workflow used for?
The Ultimate SD Upscaler workflow is used to significantly increase image resolution while preserving fine details and visual fidelity. It combines Stable Diffusion sampling with a dedicated upscaling models to produce high-quality results suitable for detailed artwork or photography.
ComfyUI is difficult is there an easier way to upscale?
Yes you can use the RunDiffusion Runnit platform and use Nano Banana Pro, SeeDreamV4.5 Edit, Topaz or Magnific to upscale. ComfyUI has many strong suites but it is complicated and servers as a powerful tool for experts.
What about Video Upscaling?
On RunDiffusion we offer Video upscaling on our RunDiffusion Runnit Platform. You can use Topaz Video Upscaler.
Where do I load the JSON workflow file?
You load the JSON workflow directly into ComfyUI. Save the JSON file locally, then use ComfyUI’s workflow load option to import it.
What should I do if nodes are missing when I load the workflow?
Open ComfyUI Manager in the top-right corner, click Install missing nodes, then Install. After installation, open the Server Manager and restart the app to ensure all nodes load correctly.
Which Stable Diffusion model does this workflow use?
The workflow is configured to use the JuggernautXL checkpoint. But you can use any SDXL checkpoint but adjust KSampler settings to align with the checkpoint you use.
Can I use a different checkpoint or upscale model?
Yes. Both the base checkpoint and the upscale model are modular. You can swap JuggernautXL for another compatible SDXL model, or replace the ESRGAN upscale model depending on your desired output style and performance. Adjust ksampler settings when changing models.
What does the denoising value control?
Denoising controls how much the upscaled image is allowed to change from the original. Lower denoising values preserve the original image more closely, while higher values introduce more transformation and detail regeneration.
Why are positive and negative prompts still required for upscaling?
The Ultimate SD Upscaler uses prompt conditioning to guide detail reconstruction during the upscale process. Positive prompts reinforce desired features, while negative prompts help suppress artifacts such as blur, low-resolution textures, or unwanted styles.
What hardware is recommended for this workflow?
Medium or Large servers are recommended due to VRAM requirements. High-resolution upscaling with models can exceed the memory limits of smaller servers.
How do I preview the image before saving?
Use the PreviewImage node to view the output before finalizing. If the result is not satisfactory, you can cancel the queue and adjust prompts, denoising, or sampling settings.
Is this workflow customizable?
Yes. You can modify prompts, CFG scale, sampling steps, denoising strength, upscale factor, and even the models used. The workflow is intentionally flexible to accommodate different artistic and technical goals.
Where can I find more tutorials like this?
Additional workflow tutorials and learning resources are available in the RunDiffusion Learning Center.
