

What is it?
ControlNet enhances the level of control in Stable Diffusion image composition, taking it to a whole new level. Imagine Image2Image with a powerful boost. It empowers you with extensive and refined command over the image creation process using Txt2Img and Img2Img.
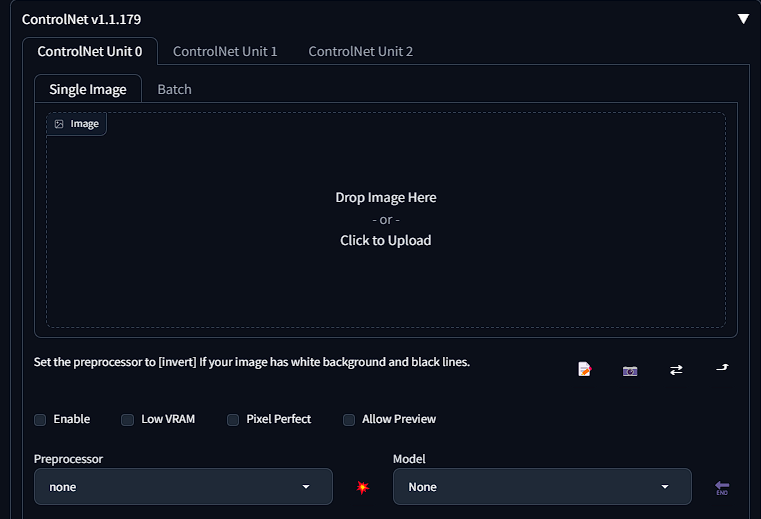
After you start up a server on "as of 05/20/23 v1.5 prelease of controlnet 1.1" (This will later be implemented to all v1.5 servers) go to the Txt2Img tab, you'll see a new "ControlNet" section at the bottom that you can expand.
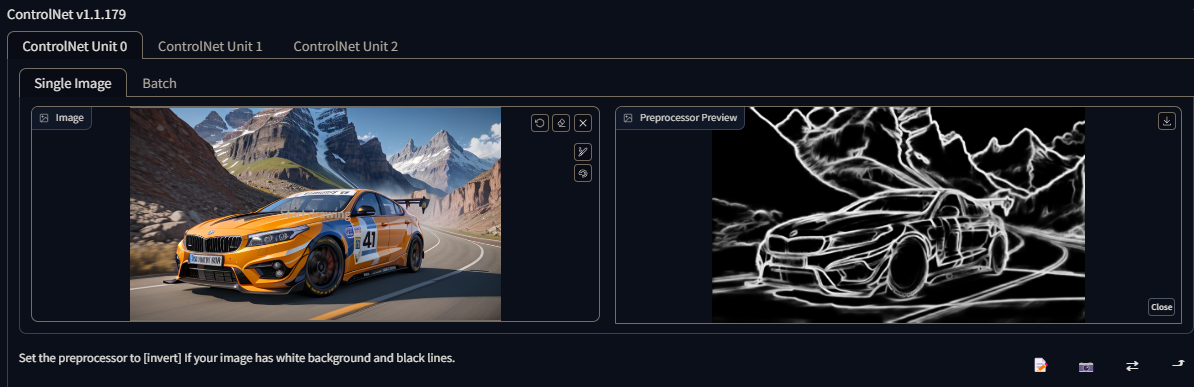
The first portion is where you upload your image for preprocessing into a special "detectmap" image for the selected ControlNet model. Simply drag and drop a photo inside the box.
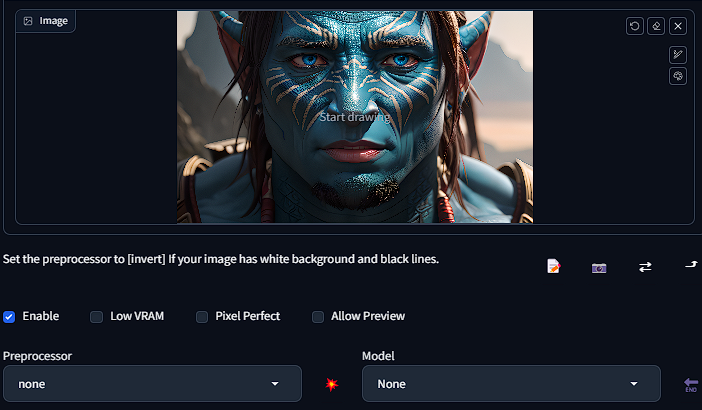
The guiding image for enhancing Stable Diffusion is referred to as a "Detectmap." It serves as a unique image that assists the model in accurately predicting the arrangement and structure, enabling it to effectively guide your input. Once the image is loaded, you will have access to familiar buttons similar to those in Img2Img, allowing you to annotate and draw on the uploaded picture.
Below is a few checkboxes with various options

ControlNet Extension: Disabled by default, check the box to enable it.
- Invert Input Color: For user-imported detectmap images with black lines on a white background, this option reverses the colors to match the model's expectations.
- RGB to BGR: Used for user-imported normal map type detectmap images that may have a different color channel order than expected by the extension.
- Low VRAM: Helps systems with less than 6 GiB of VRAM by trading off processing speed.
- Guess: Experimental option (as of 2023-02-22) where no positive or negative prompts are used. ControlNet tries to recognize the object in the imported image using the current preprocessor.
- Pixel Perfect: Another new ControlNet feature, "Pixel Perfect" - Sets the Annotator to best match input/output - Prevents displacement/Odd generations.
The weight slider determines the level of emphasis given to the ControlNet image within the overall prompt. It can be seen as a similar concept to using prompt parenthesis in Automatic1111 to highlight specific aspects. For instance, setting a weight of "1.15" can be interpreted as "(prompt:1.15)" in terms of emphasizing certain elements.
The Resize Mode feature governs how the detectmap is resized when the uploaded image's dimensions differ from the width and height specified in the Txt2Img settings. It does not affect the "Canvas Width" and "Canvas Height" sliders in ControlNet, as those are exclusively utilized for user-generated scribbles.
Preprocessing
The preprocessor is a vital component of ControlNet as it plays a crucial role in converting the uploaded image into a detectmap that can be utilized by ControlNet to guide Stable Diffusion.
It's important to note that a preprocessor is not required when uploading your own detectmap image, such as a scribble, depth map, or normal map. Preprocessors are primarily used to transform a "regular" image into a compatible format for ControlNet to effectively process and utilize.
There are many Preprocessors to choose from, all of which have their own unique style and use:
control_v11p_sd15_canny
A Canny Edge Map basically takes the edges of a picture and, from it, generates the boundaries of what is going to appear on the final image

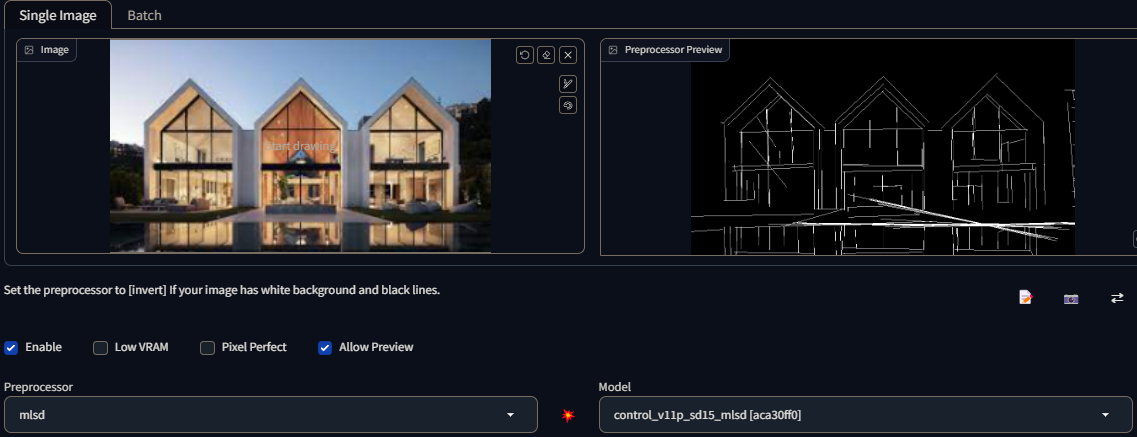
control_v11p_sd15_mlsd
MLSD: Creates straight lines. Very useful for architecture and other man-made things with strong, straight outlines. Not so much with organic, curvy things. Name stands for "Mobile Line Segment Detection"
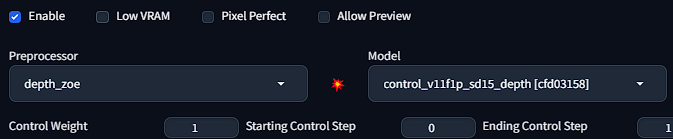
Depth-lres
Depth-lres Creates a depth map like "Depth", but has more control over the various settings. These settings can be used to create a more detailed and accurate depth map
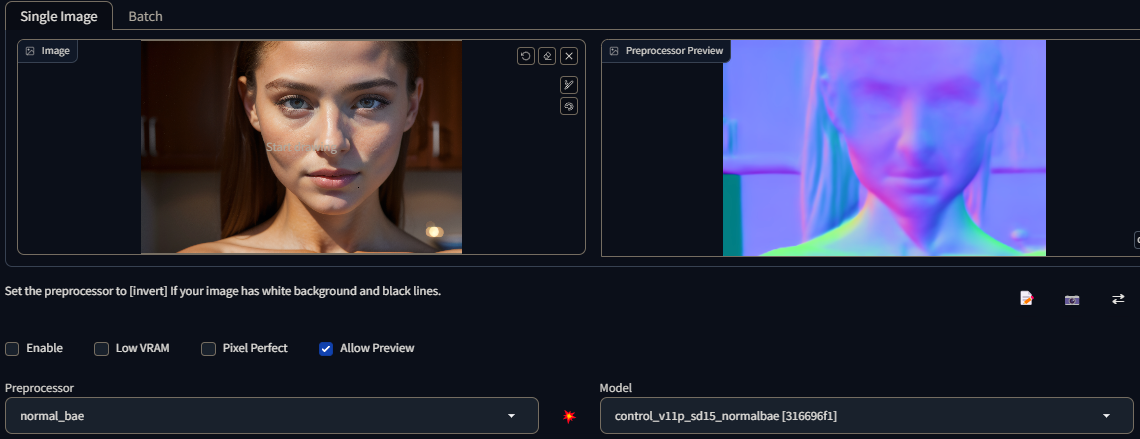
control_v11p_sd15_normalbae
Normal Map: Generates a fundamental normal mapping estimation derived from the input image. Retains a significant amount of detail, although it may yield unintended outcomes since the normal map is merely an approximation based on the image rather than being accurately created within a dedicated 3D modeling software.
For those unfamiliar with normal maps, the image utilizes three colors: red, green, and blue. In the realm of 3D programs, these colors are employed to determine the perceived smoothness or bumpiness of an object's surface. Each color channel corresponds to a specific direction, such as left/right, up/down, and towards/away, enabling the simulation of intricate surface characteristics in a three-dimensional environment.
control_v11p_sd15_lineart
Line Art: Line Art preprocessing is a technique used to render the outline of an image, aiming to simplify it into a basic drawing or sketch-like representation. It involves converting the original image into a version where only the essential lines and edges are preserved.
There are several line art preprocessors available, each with its own distinctive style:
Line Art Anime: This preprocessor specializes in generating anime-style lines. It applies a line rendering technique that mimics the distinctive linework commonly seen in animated Japanese artwork.
Line Art Anime Denoise: This variant of line art preprocessing focuses on producing anime-style lines with reduced details. It applies a denoising algorithm to simplify and smooth out the lines, resulting in a cleaner and less intricate appearance.
Line Art Realistic: This preprocessor is designed to generate realistic-style lines. It aims to capture the nuances and characteristics of traditional hand-drawn sketches or illustrations, simulating a more lifelike and natural line quality.
Line Art Coarse: The Line Art Coarse preprocessor produces realistic-style lines with a heavier weight. It emphasizes bold strokes and thicker lines, resulting in a more pronounced and bold appearance.
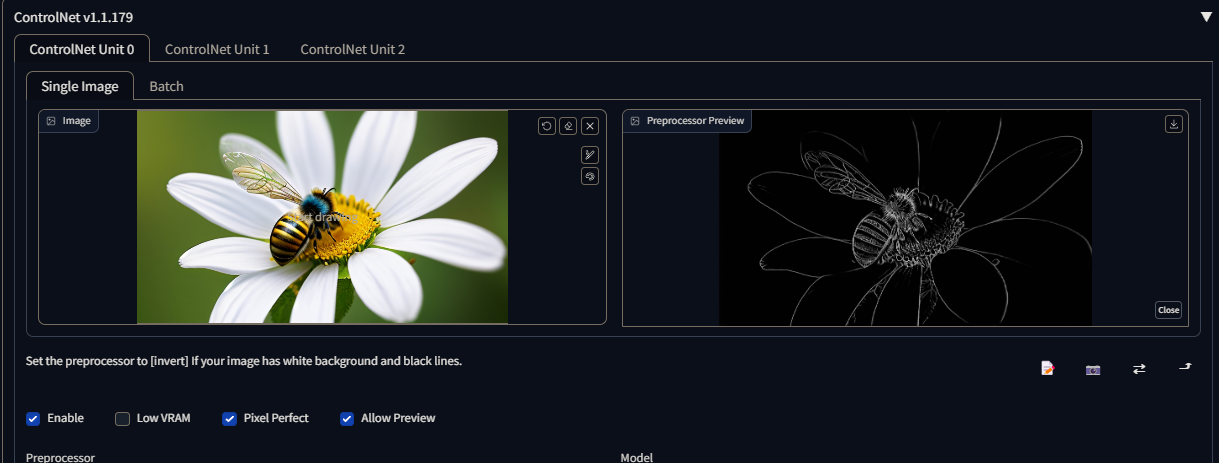
To utilize these line art preprocessors effectively, it is recommended to pair them with the appropriate lineart control model. The lineart control model enables better control over the line art generation process, ensuring that the desired style and level of detail are achieved.
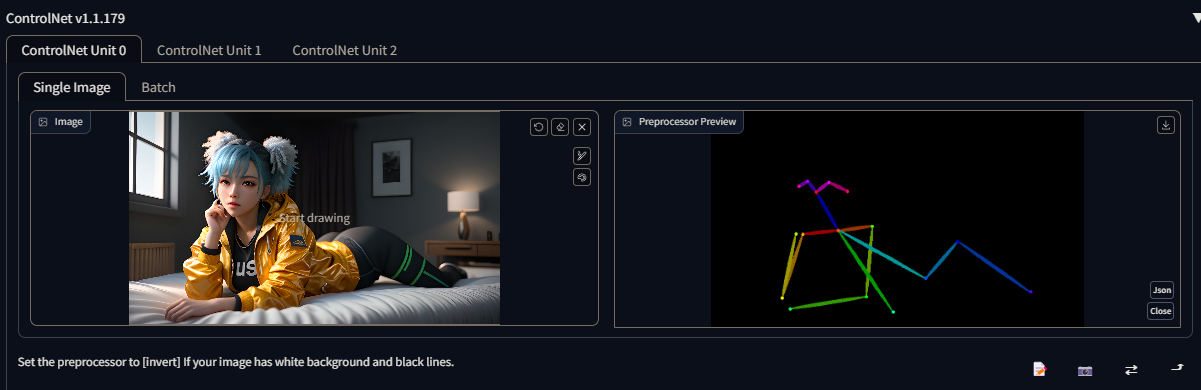
control_v11p_sd15_openpose
OpenPose: Generates a fundamental OpenPose-style skeleton for a figure. This technique is widely employed, particularly due to its ability to combine multiple OpenPose skeletons into a unified image. This consolidated representation assists in guiding Stable Diffusion, a process that facilitates the creation of multiple coherent subjects.
OpenPose provides a basic skeleton structure for a figure, allowing for the identification and localization of key body joints and parts. By utilizing this skeleton, subsequent algorithms can better understand the spatial relationships and pose of individuals within an image or video. This information can be further utilized in various applications, such as motion tracking, gesture recognition, and human pose estimation.
The ability to compose multiple OpenPose skeletons into a single image enhances the efficiency and accuracy of subsequent processes like Stable Diffusion. This approach aids in creating multiple coherent subjects by leveraging the collective information from individual OpenPose skeletons.
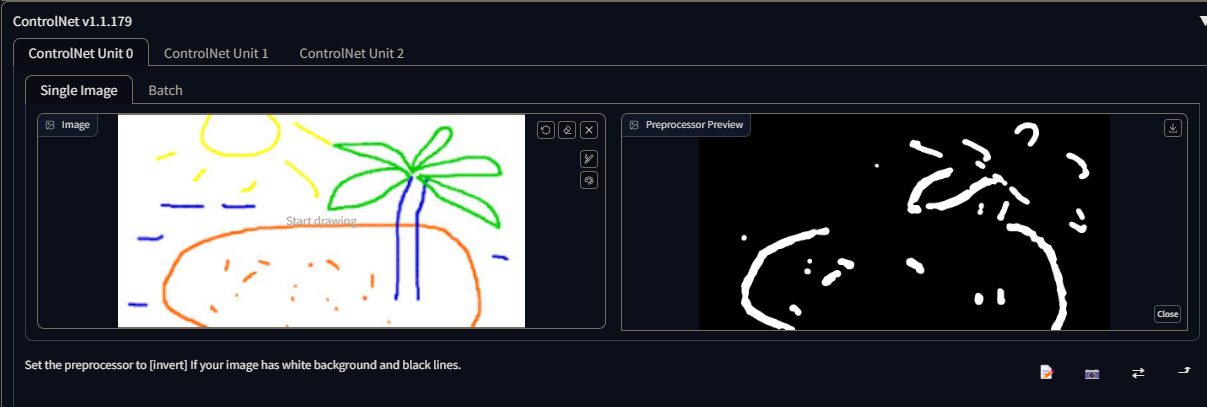
control_v11p_sd15_scribble
Scribble: In the context of ControlNet, scribble refers to a basic hand-drawn mark or doodle created using the "Create Canvas" options. It is primarily used as a simple sketch or annotation within ControlNet.
Typically, user-defined scribbles are not extensively employed as a preprocessing step to convert an entire image into a scribble. Instead, users typically upload their own custom scribbles directly into ControlNet without the need for additional image manipulation or conversion.
Scribbles serve as a means to provide rough guidelines, markings, or annotations on the canvas within ControlNet. They can be used to indicate specific areas of interest, highlight regions for further attention, or convey visual cues to guide subsequent operations or analysis within the ControlNet system.
control_v11p_sd15_softedge
Soft Edge 1.1 is a machine that makes pictures look better. It's much better than the older version because it doesn't hide any mistakes and focuses on making edges smoother. We trained it to remove most of the mistakes from the pictures, making it very reliable. In tests, Soft Edge 1.1 worked just as well as another model, so it has the potential to be used more often.
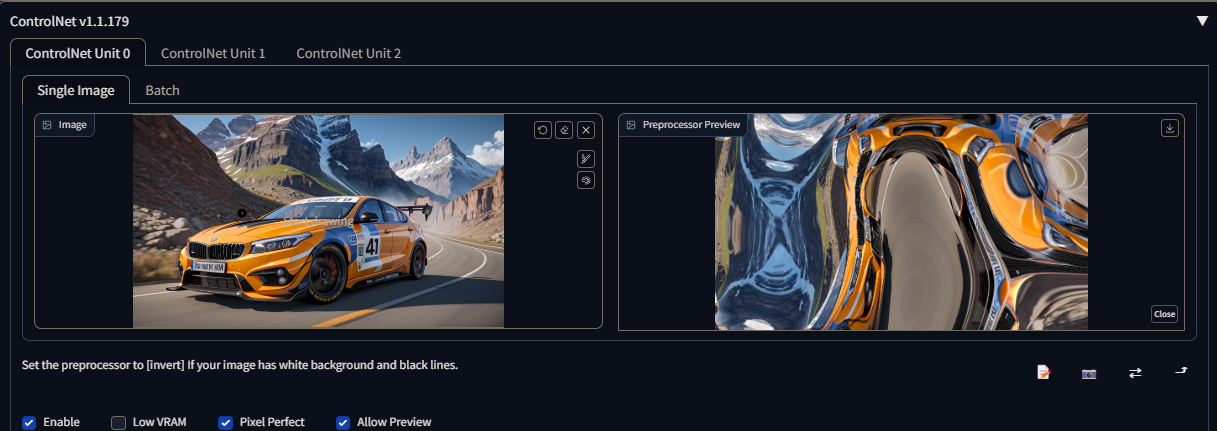
control_v11e_sd15_shuffle
The Shuffle preprocessor is designed to "stir up" or rearrange the pixel values of an input image. It introduces a random shuffling or permutation of the colors, resulting in a modified version of the original image. This process can lead to interesting and unpredictable visual effects by altering the color distribution and arrangement within the image.
When used in conjunction with the Shuffle control model, the preprocessor can be applied to transfer the color scheme or palette from a reference image. By shuffling the colors of the input image according to the reference image, it becomes possible to generate an output image with a color scheme that resembles that of the reference image. This technique can be utilized for tasks like color style transfer or creating images with a similar visual tone to the reference image
Reference
Reference Preprocessors: The reference preprocessors are a recent addition that allows the generation of images that resemble a reference image. These preprocessors provide a way to incorporate the visual characteristics or style of a specific reference image into the generated output. It is important to note that the resulting images are still influenced by the Stable Diffusion model and the provided prompt.
Unlike other preprocessors, reference preprocessors do not require the selection of a specific control model. After selecting a reference preprocessor, the model dropdown menu is hidden, indicating that the preprocessor will directly utilize the Stable Diffusion model in combination with the provided prompt and reference image.
The reference preprocessors enable users to generate images that align with the style, content, or visual attributes of a reference image without the need for additional model selection. By leveraging the reference image, users can guide the generation process towards a desired visual outcome and achieve results that are more closely aligned with the reference image's characteristics.
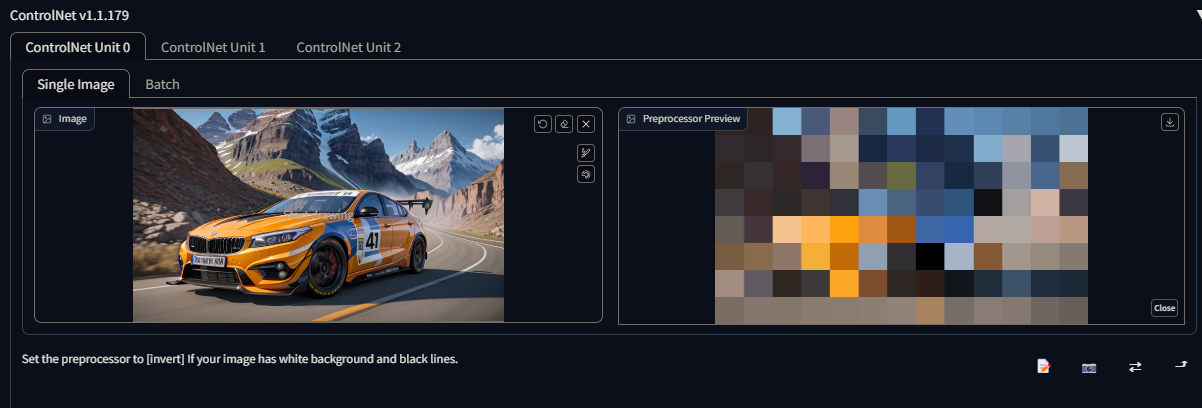
Color grid T2I adapter
Color grid T2i adapter preprocessor shrinks the reference image to 64 times smaller and then expands it back to the original size. The net effect is a grid-like patch of local average colors.
Models
Models apply the detectmap image to the text prompt when you generate a new set of images.
Each model is named after the preprocess type it was designed for, but there is nothing stopping you from adding a splash of chaos and mixing and matching preprocessed images with different models..
Example
We all know SD1.5 is awful at text, but what if we could bypass the limits of Stable Diffusion v1.5 by using the powers of control net?
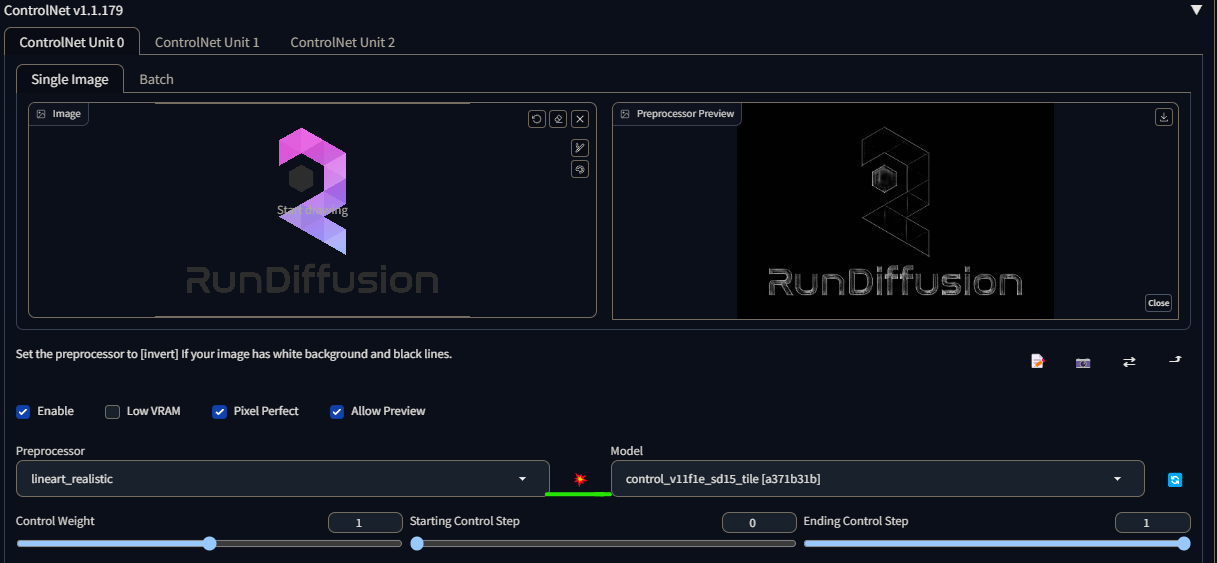
First we will want to start with an image with text in it you want to copy. I will be choosing a RunDiffusions' banner.
Once inside ControlNet we will want to choose a map that best suits our needs. For my case, Canny worked the best for this example, your experience may be different.
We can save time by clicking the "Run preprocessor" button, its a small red button in between the preprocessor and the model. This will give you an image of what the map bring out of your input image, without having to generate a photo to find out.
Once we have the correct preprocessor/model/enabled and pixel perfect checked (if you want it to match your input image perfectly), its time to move to our prompt.
Prompt
We have other workflows on prompting and if you haven't scene those yet, please feel free to do so here: https://learn.rundiffusion.com/prompting-101/
However, in our prompt we have 3 basic steps to a formatted prompt.
1. What type of style
2. What our style is creating
3. Supporting details for what were creating
Here is an example:
(photorealistic logo:1.2) BREAK (logo in the sand on a beach:1.4), tropical, sea foam, sundown BREAK highly detailed, highly accurate, 8k UHD, HDR, masterpiece
A few key points:
- BREAK is used to break up chunks of data into separate "ideas" in your prompt. It helps SD have a better understanding of what you're going after in your prompt. As you can see I used BREAK to separate "What my picture is about, what is in my picture, and details to help refine my picture"
- I used emphasis to let SD know I want it to focus more on those specific words. The higher the number, the more SD will focus on those words. How to do so can be found here: https://learn.rundiffusion.com/keyboard-emphasizing/
*Remember to experiment with different preprocessors and models. Each input image will react different to each preprocessor and model. Do some trial and error to find your best match, along with playing with your prompt. The possibilities with ControlNet 1.1 are endless.
This guide will give you the ins and outs of what is possible and the settings you will need to keep an eye out for. Do not forget, if there is anything missed or you need extra clarification on, hit us up in our discord and we will be happy to help :)