


Face Swapping Made Easy with Facefusion
We are excited to announce the addition of the RDFacefusion extension preloaded in Automatic1111 on RunDiffusion! This powerful tool allows you to seamlessly swap faces in images. Whether you're an artist, content creator, or just experimenting with AI, this feature provides an easy-to-use interface for high-quality face swapping.
How to Use Facefusion in Automatic1111 on RunDiffusion
Here’s a step-by-step guide to using the Facefusion extension inside Automatic1111:
Navigate to RunDiffusion
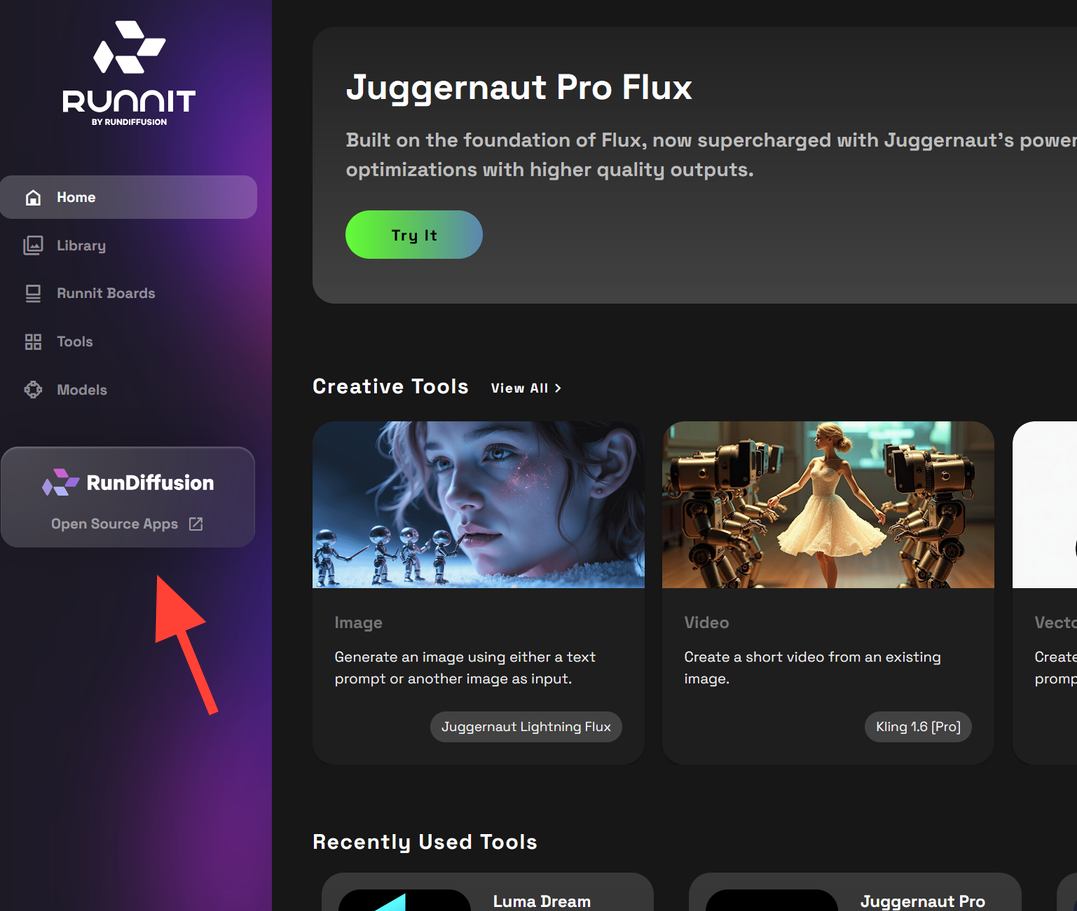
- Navigate to RunDiffusion and log in to your account.

Click on Open Source Apps
- On the left panel click on RunDiffusion Open Source Apps section. This will display a list of available AI applications.
Select Auto1111
- From the list, select Auto1111, the popular AI image generation tool.
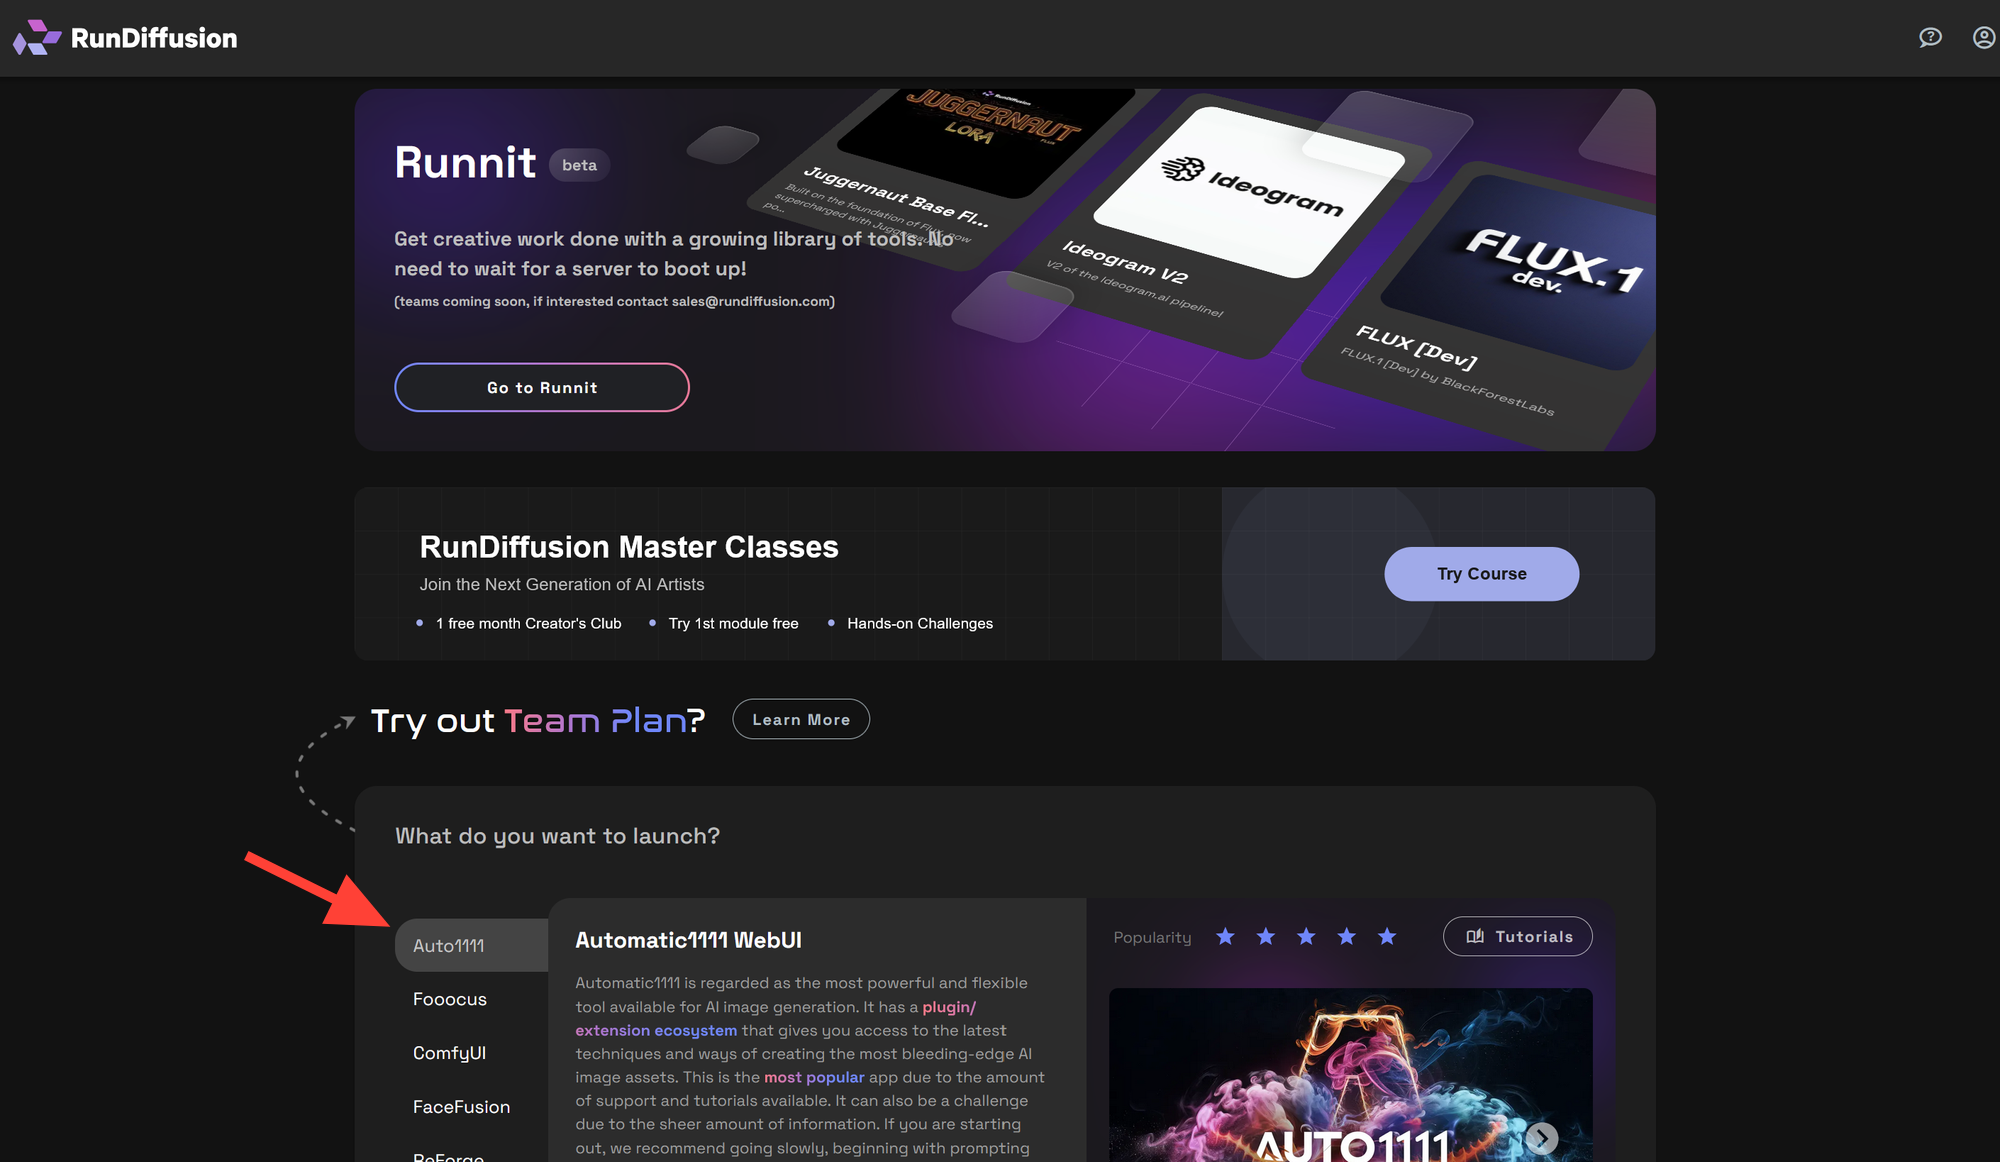
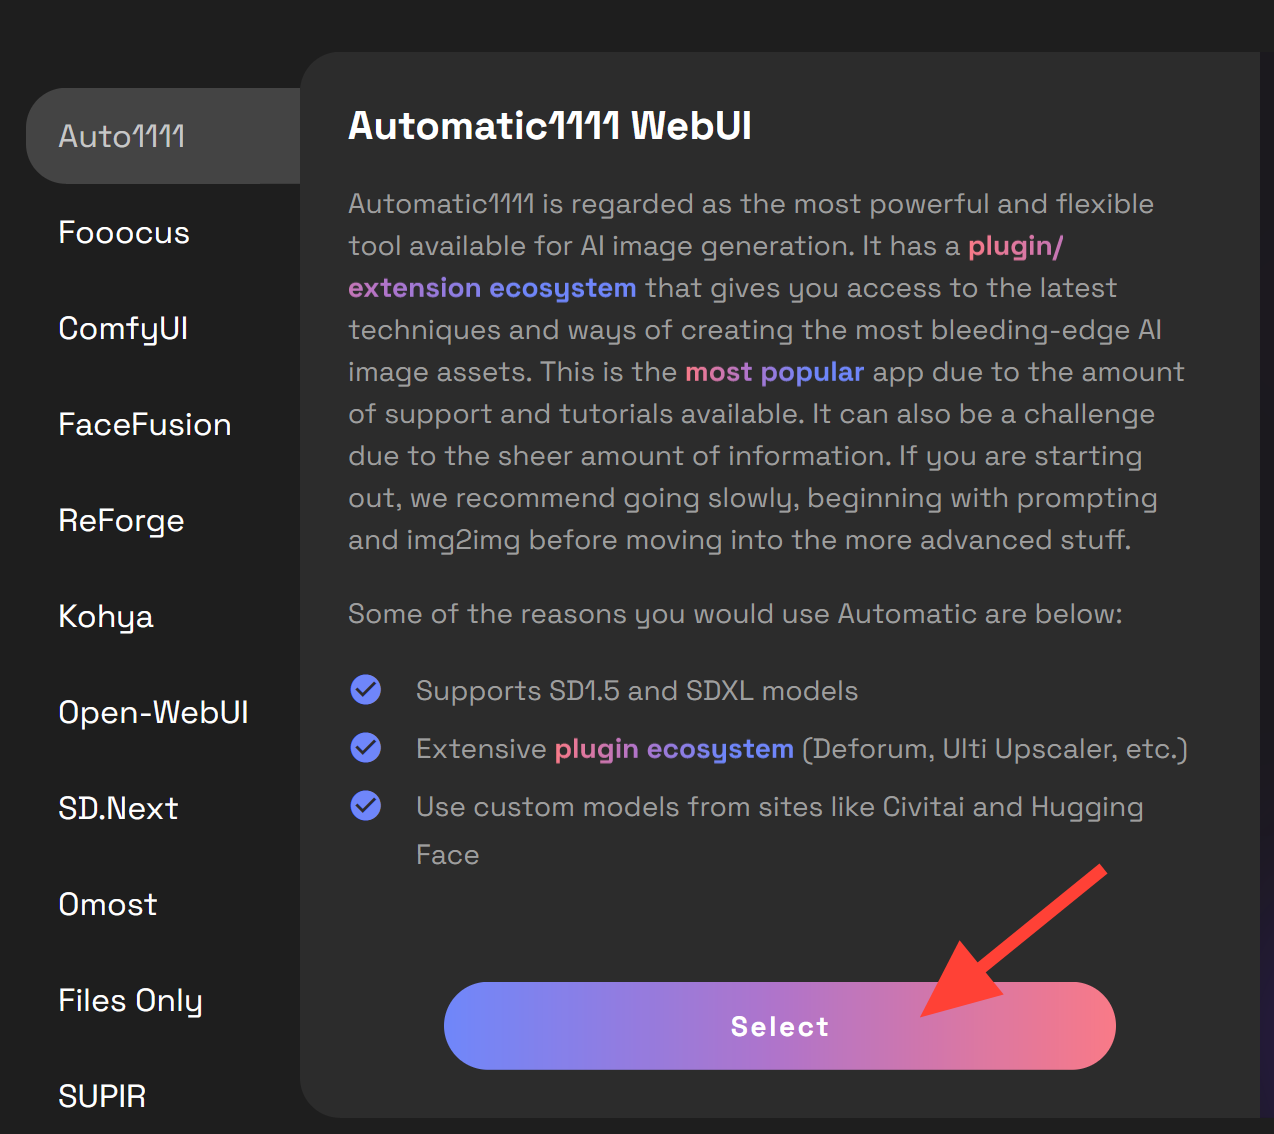
When you click Auto1111 you will see the information display for Automatic1111 WebUI click Select.
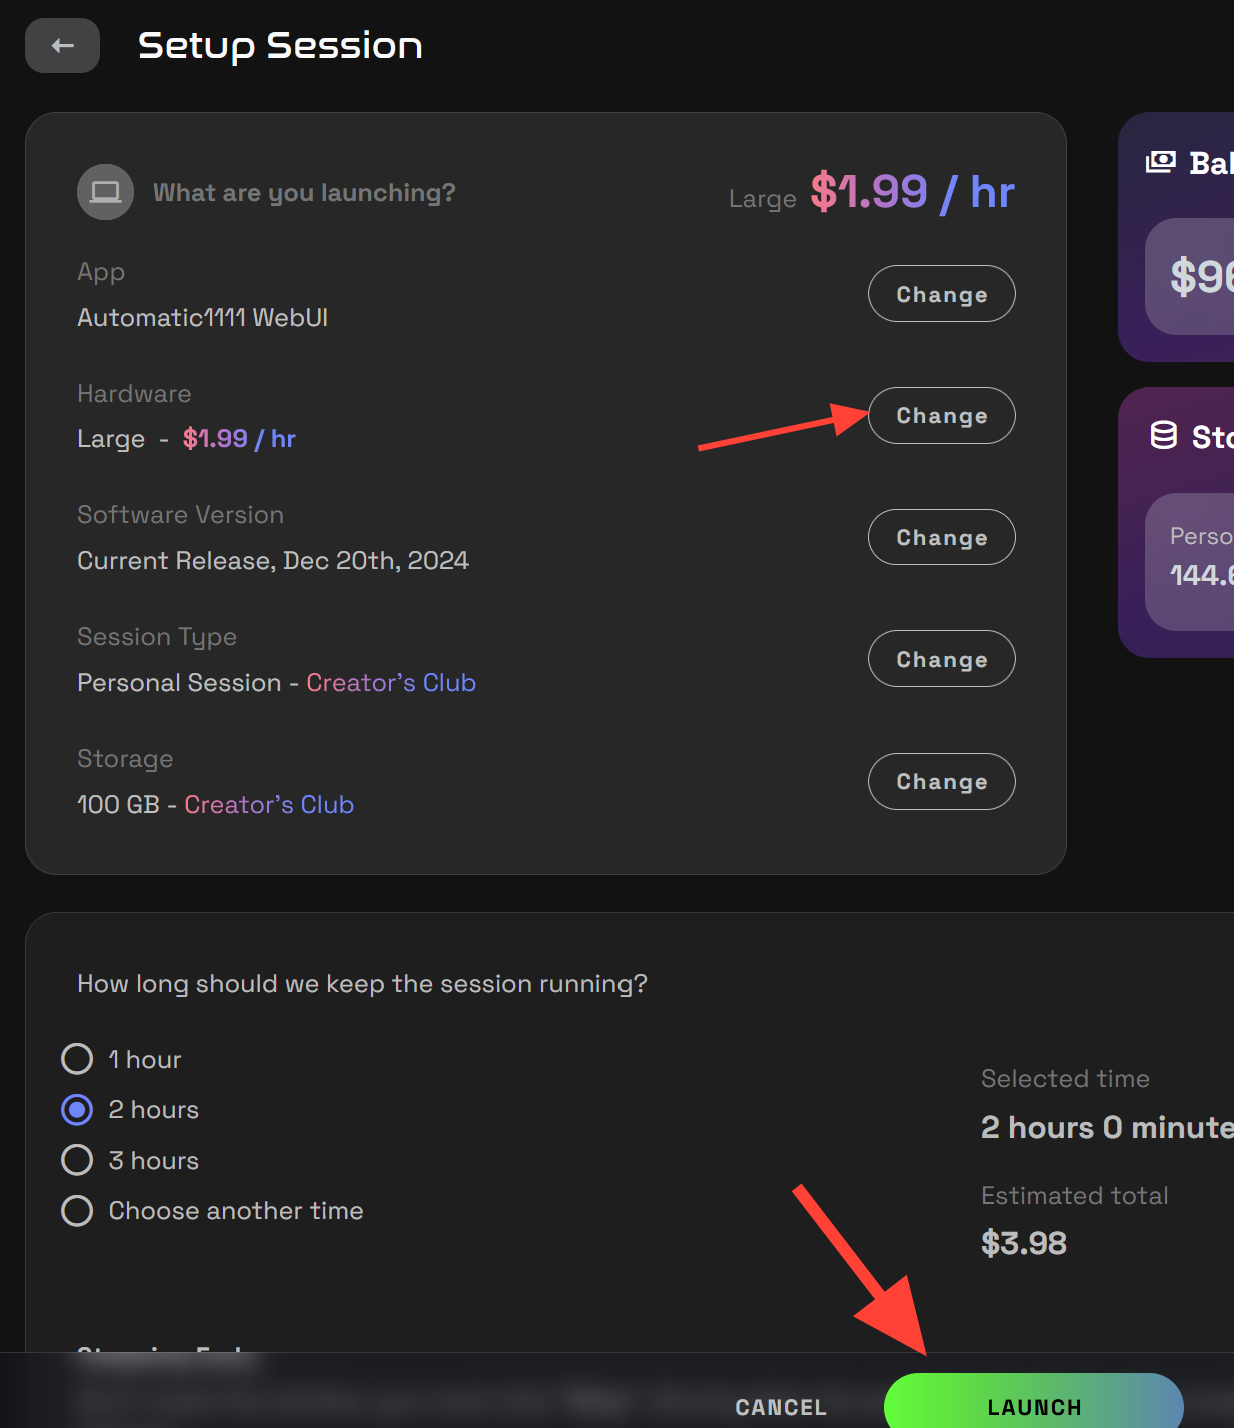
Now it is time to setup a server. We recommend a large server for fast face-swapping but Medium or Small may be possible too depending on your settings. Click Launch.
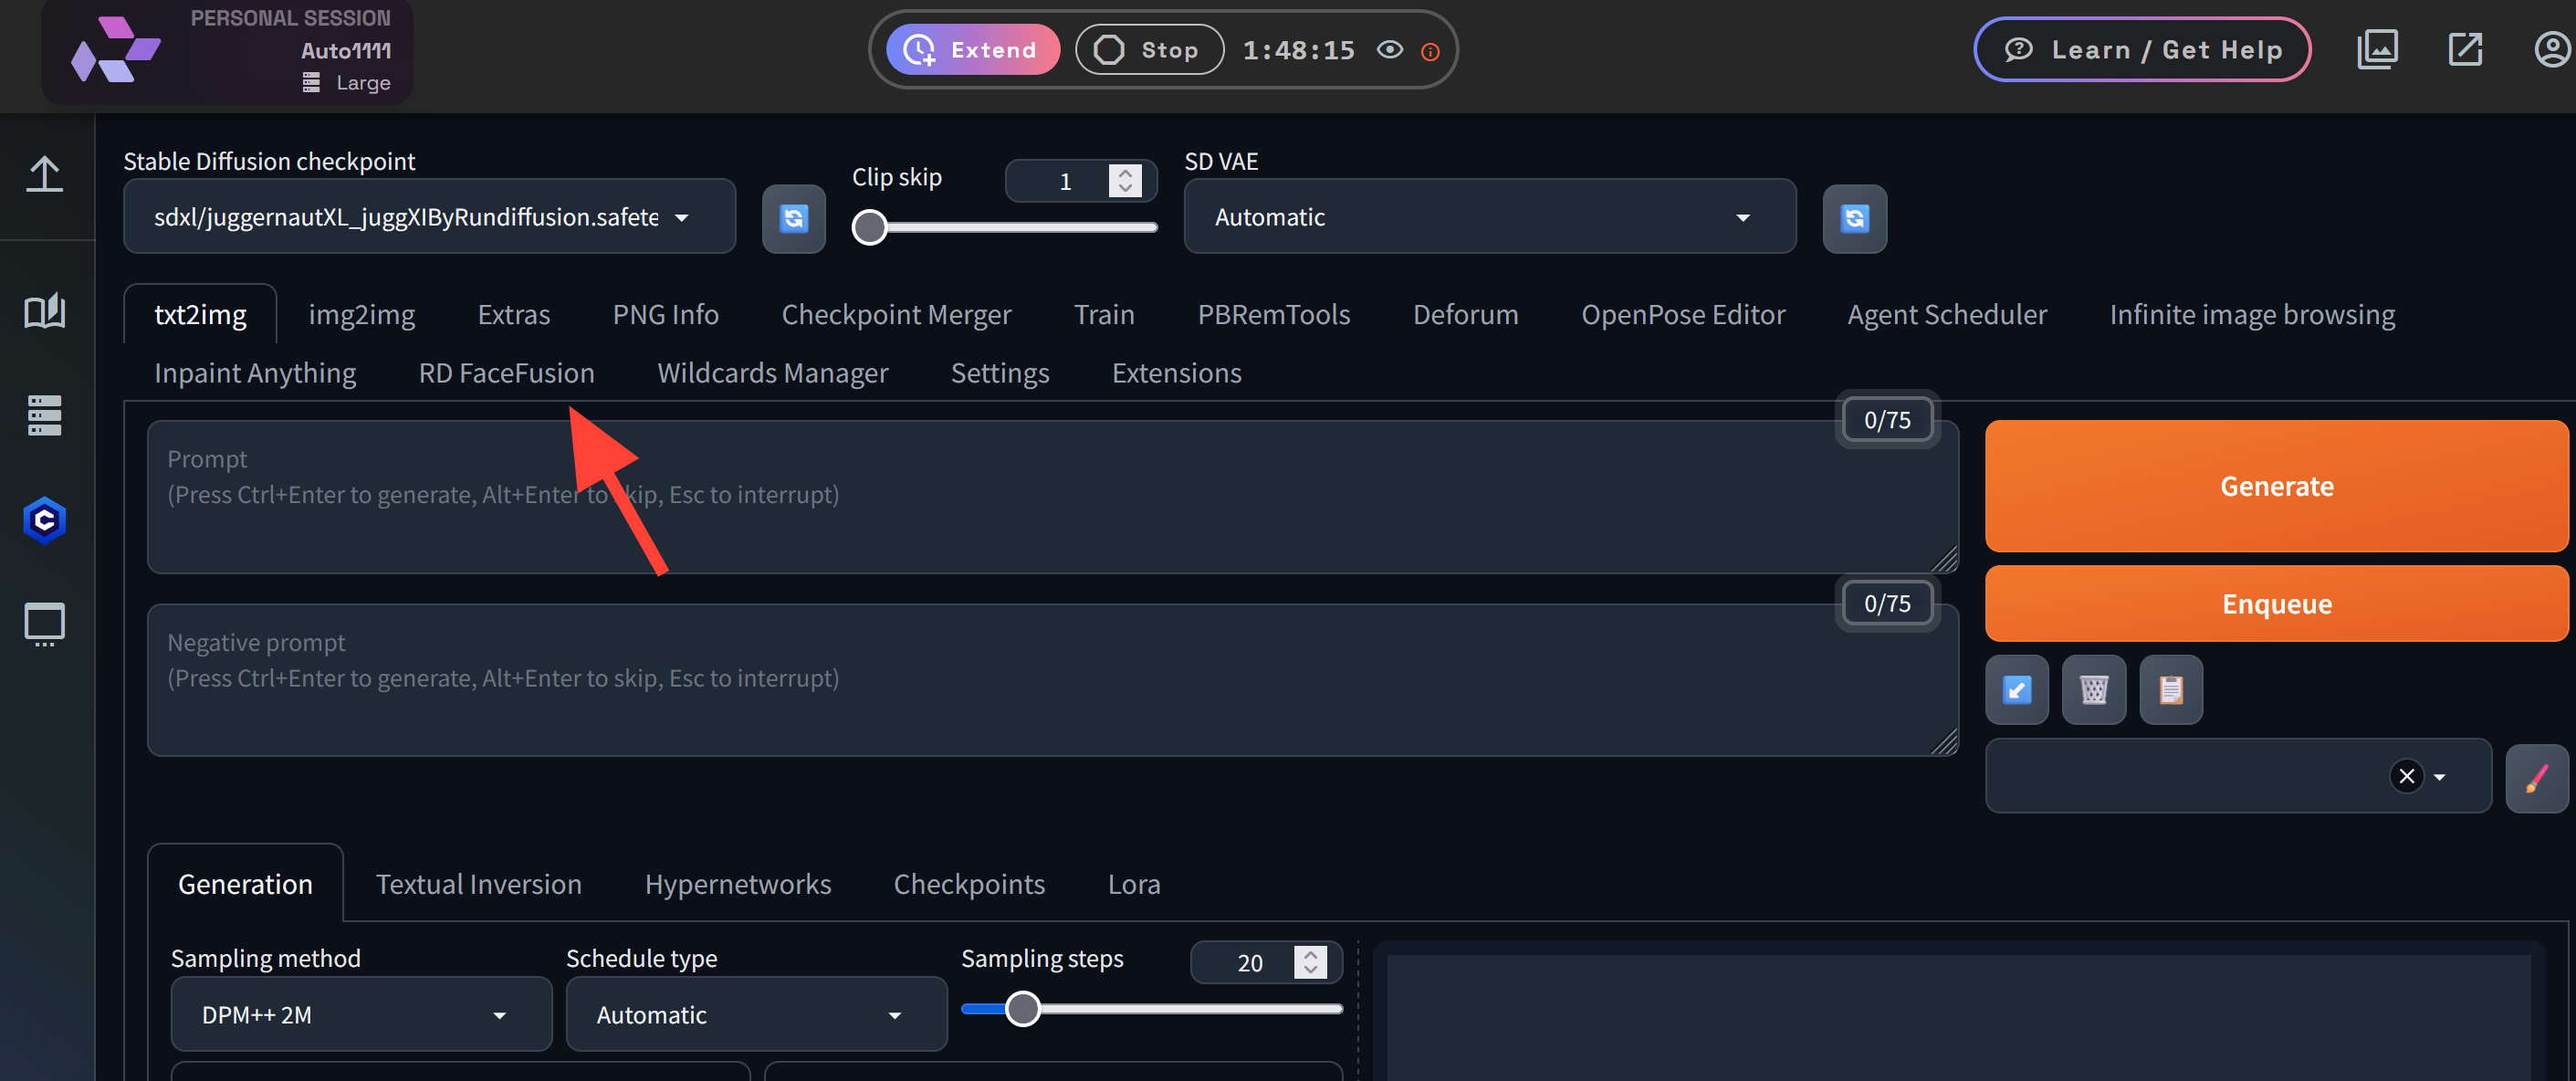
Access the RDFaceFusion Tab
- At the top of the Automatic1111 interface, you will now see RDFacefusion.
Upload a Source and Target image
- To perform a basic face swap we need to upload at least one source image and one target image. You can upload multiple source images if you want.

Example of source images. You want to have images that show the entire face when possible.
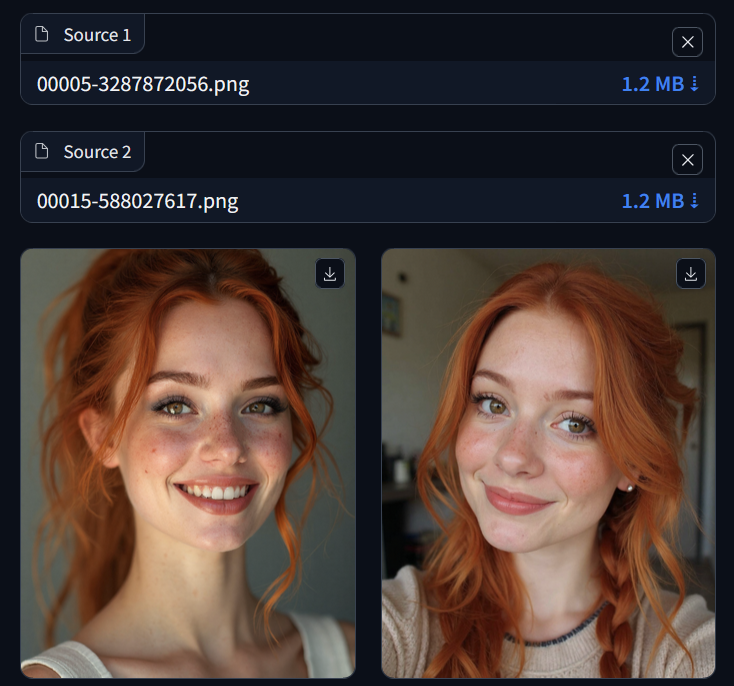
When possible images looking at the camera are usually best. Here is another good example of a face.

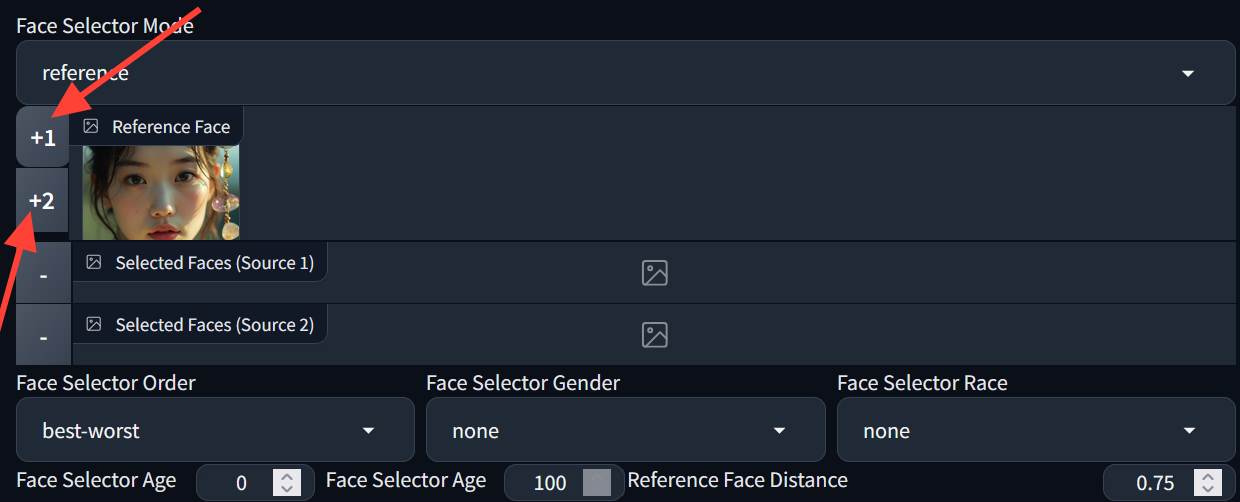
Face Selector
On the right side there is Face Selector Mode click on the +1 or +2 to decide which face to apply to your target image.
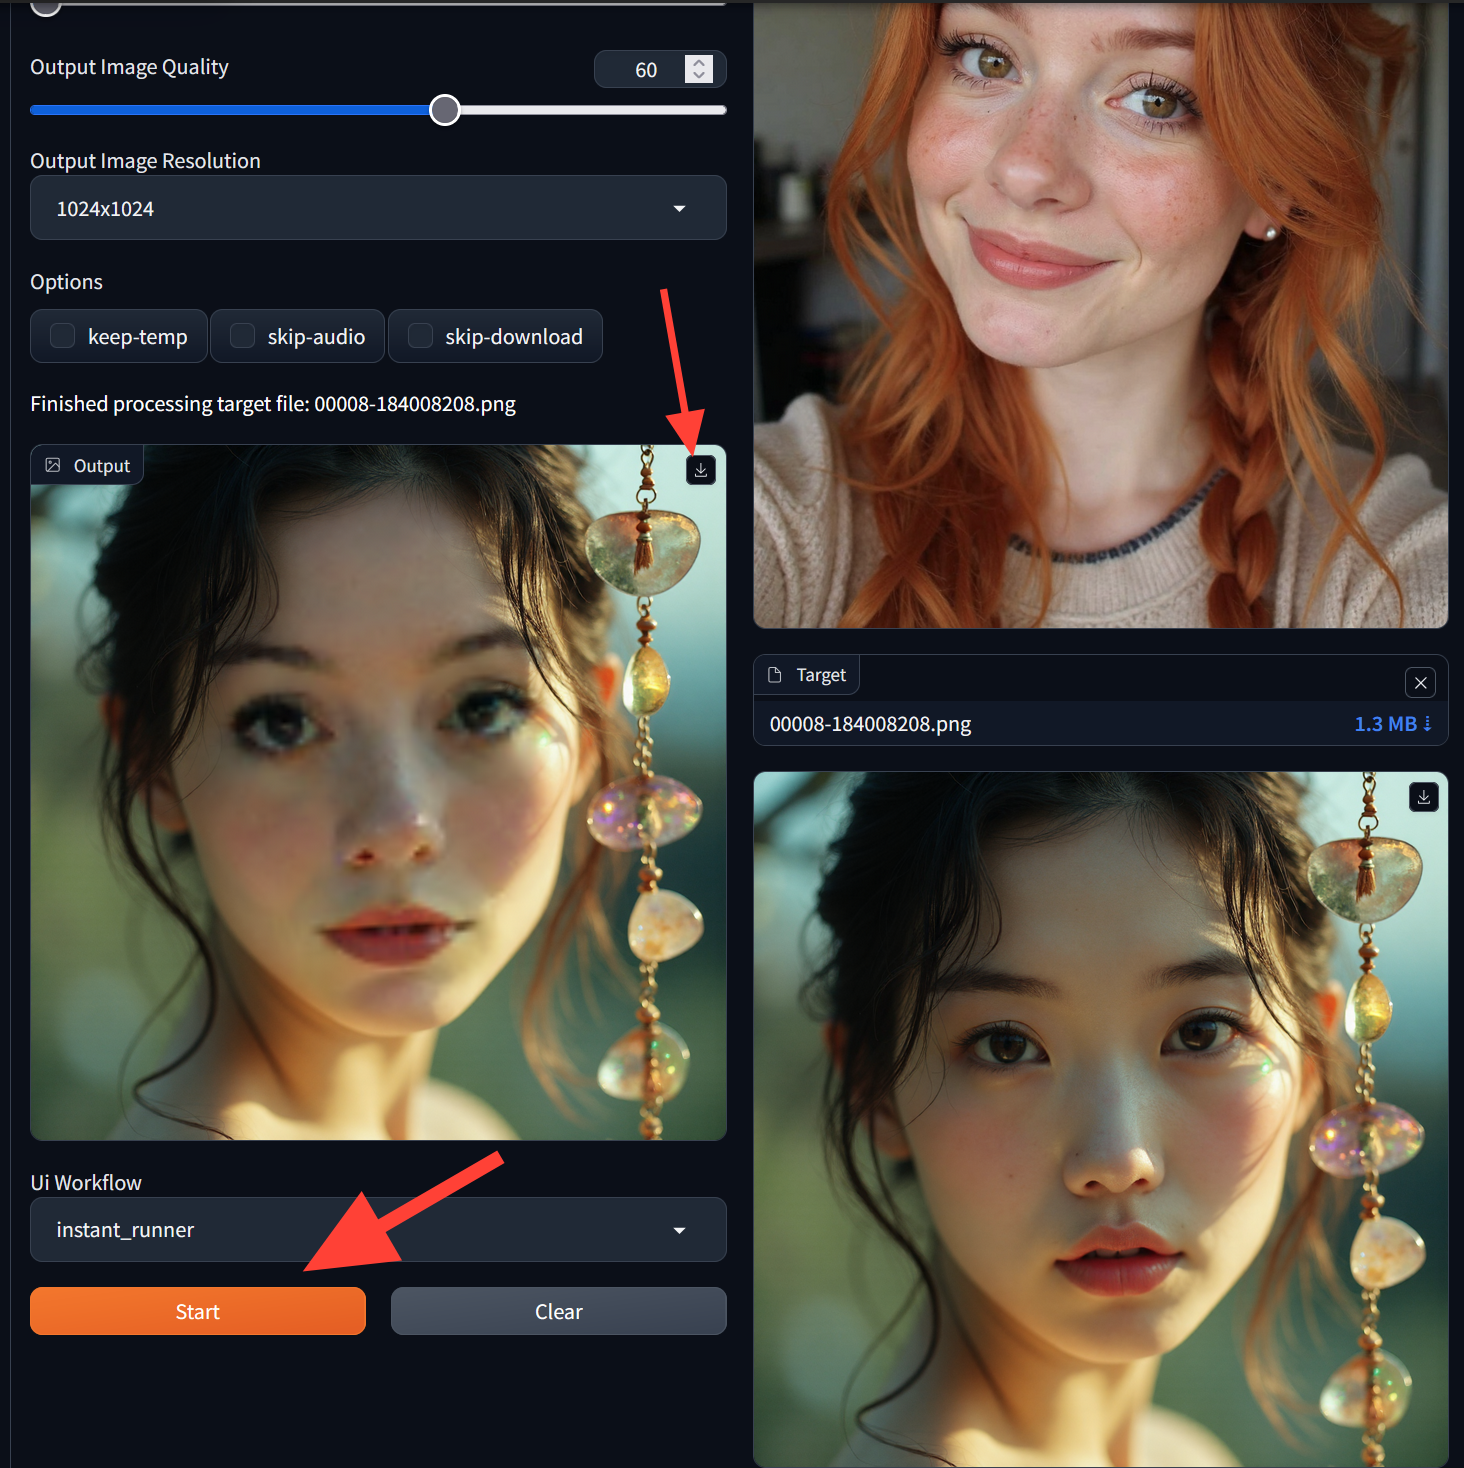
Run Face Swap
- Finally click Start, and let Facefusion work its magic! Click on the download icon to save your image to your computer.
Why Use Facefusion on RunDiffusion?
- No Local Setup Needed – Everything runs on the cloud, no complicated installations.
- Fast & Efficient – Leverage powerful AI servers for quick results.
- Seamless Integration – Directly available inside Automatic1111.
- High-Quality Output – Produces realistic and precise face swaps.
Additional Tips for Refining Face-Swapped Images
✅ Use Image-to-Image with Low Denoise – Helps refine the face while keeping original details intact.
✅ Inpainting & Masking – Focus on problem areas like eyes or mouth for a more natural look.
✅ Upscale for Higher Quality
✅ Start with a High-Quality Source Image – A well-lit, high-resolution source image leads to better results.
Further Reading
FaceFusion Tips and Tricks,
Facefusion 3.0
RunDiffusion Tutorials and Guides
