


How to Install and Remove Extensions in Automatic1111: A Step-by-Step Guide
Automatic1111 is one of the most popular user interfaces for Stable Diffusion, offering a wealth of customization and tools. One key feature of this interface is its support for extensions. Extensions allow users to enhance their workflow, integrate new features, and streamline tasks. If you're using Automatic1111 through RunDiffusion's cloud platform, learning how to install and remove extensions can significantly boost your AI art generation experience.
In this guide, we will walk you through the installation and removal process of extensions in Automatic1111.
What Are Extensions in Automatic1111?
Extensions are plugins or add-ons that expand the core functionality of the Automatic1111 interface. They can include everything from additional features for text-to-image generation, enhanced image processing tools, or integration with external services. Extensions are essential for users looking to customize their workflow beyond the standard offerings.
Why Should You Use Extensions on RunDiffusion?
By utilizing RunDiffusion's cloud platform, you can avoid the hassle of setting up your environment locally. It provides a streamlined, efficient way to manage your AI workflow in the cloud. When installing or removing extensions in Automatic1111 on RunDiffusion, it is easy to remove and install extensions as needed.
Installing Extensions in Automatic1111
Here’s a simple step-by-step process for installing extensions on Automatic1111 via the RunDiffusion platform:
Step 1: Launch Automatic1111 on RunDiffusion
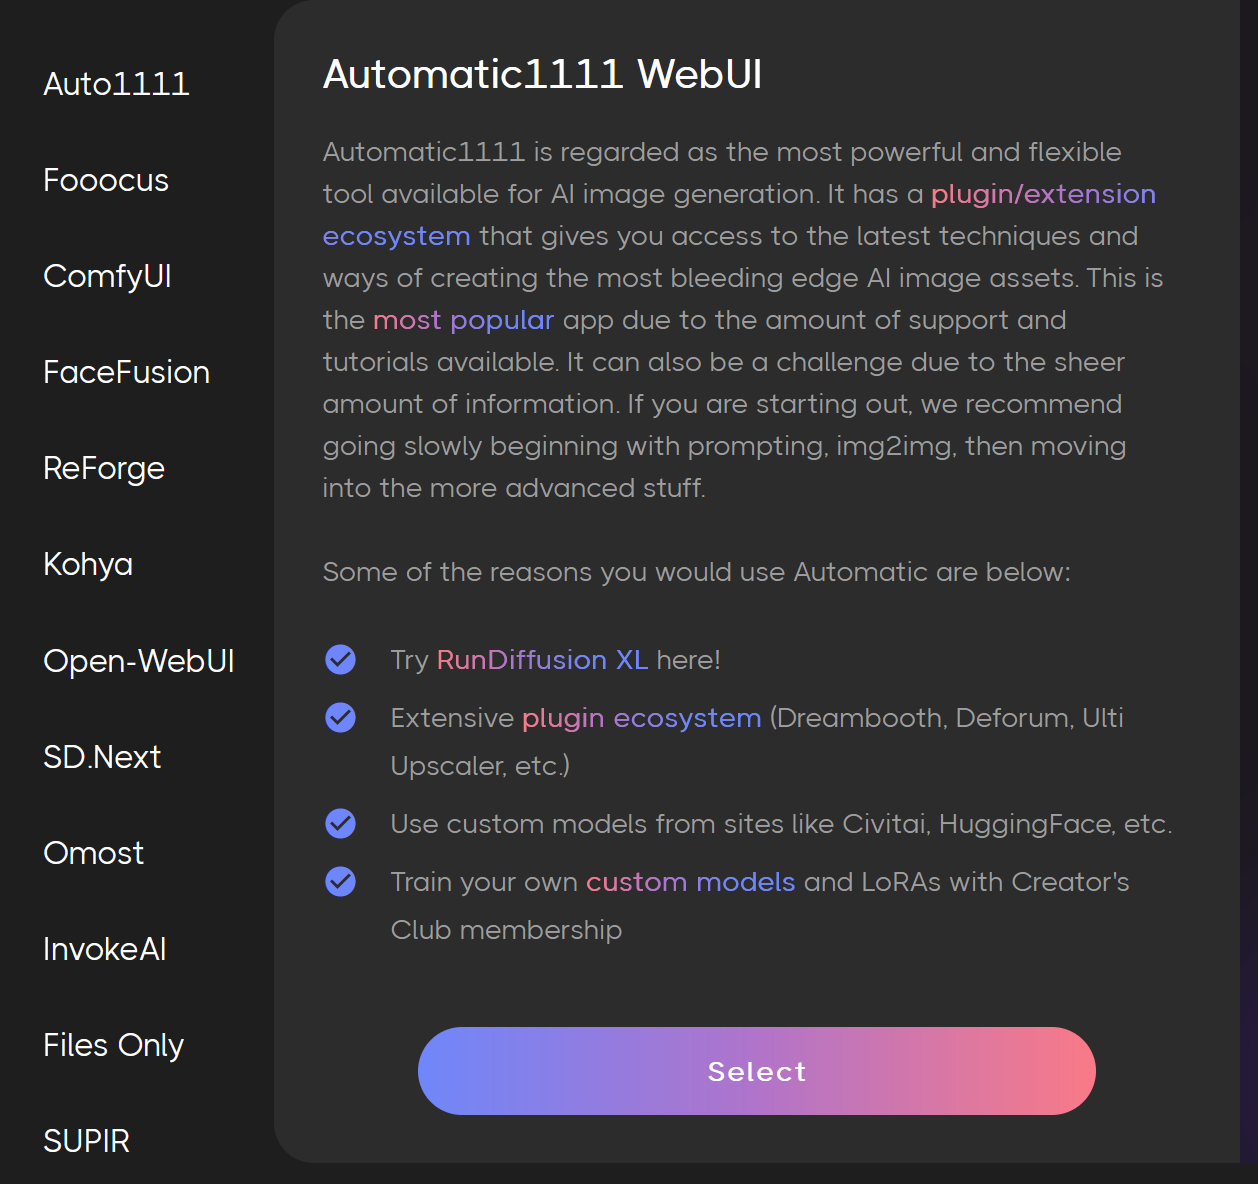
First, select Auto1111 on the left side of the dashboard and click Select.
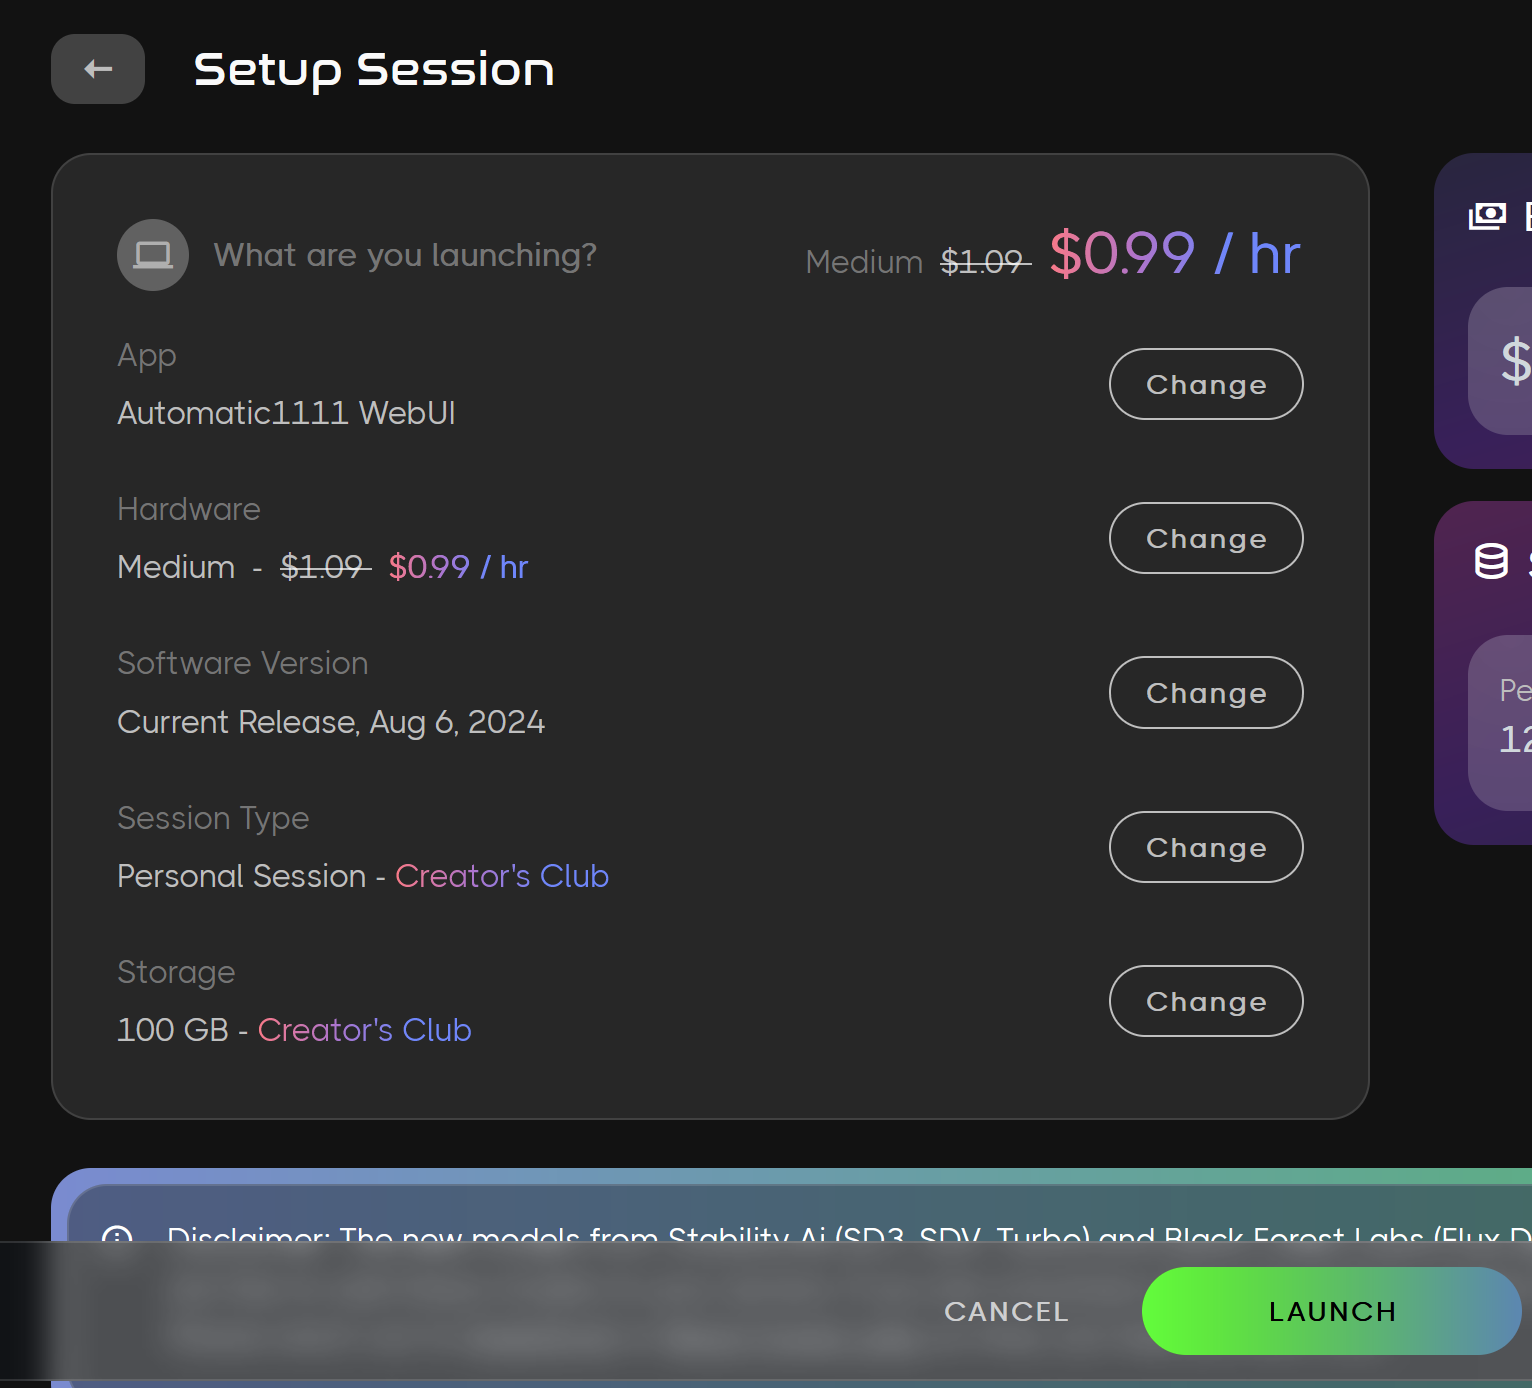
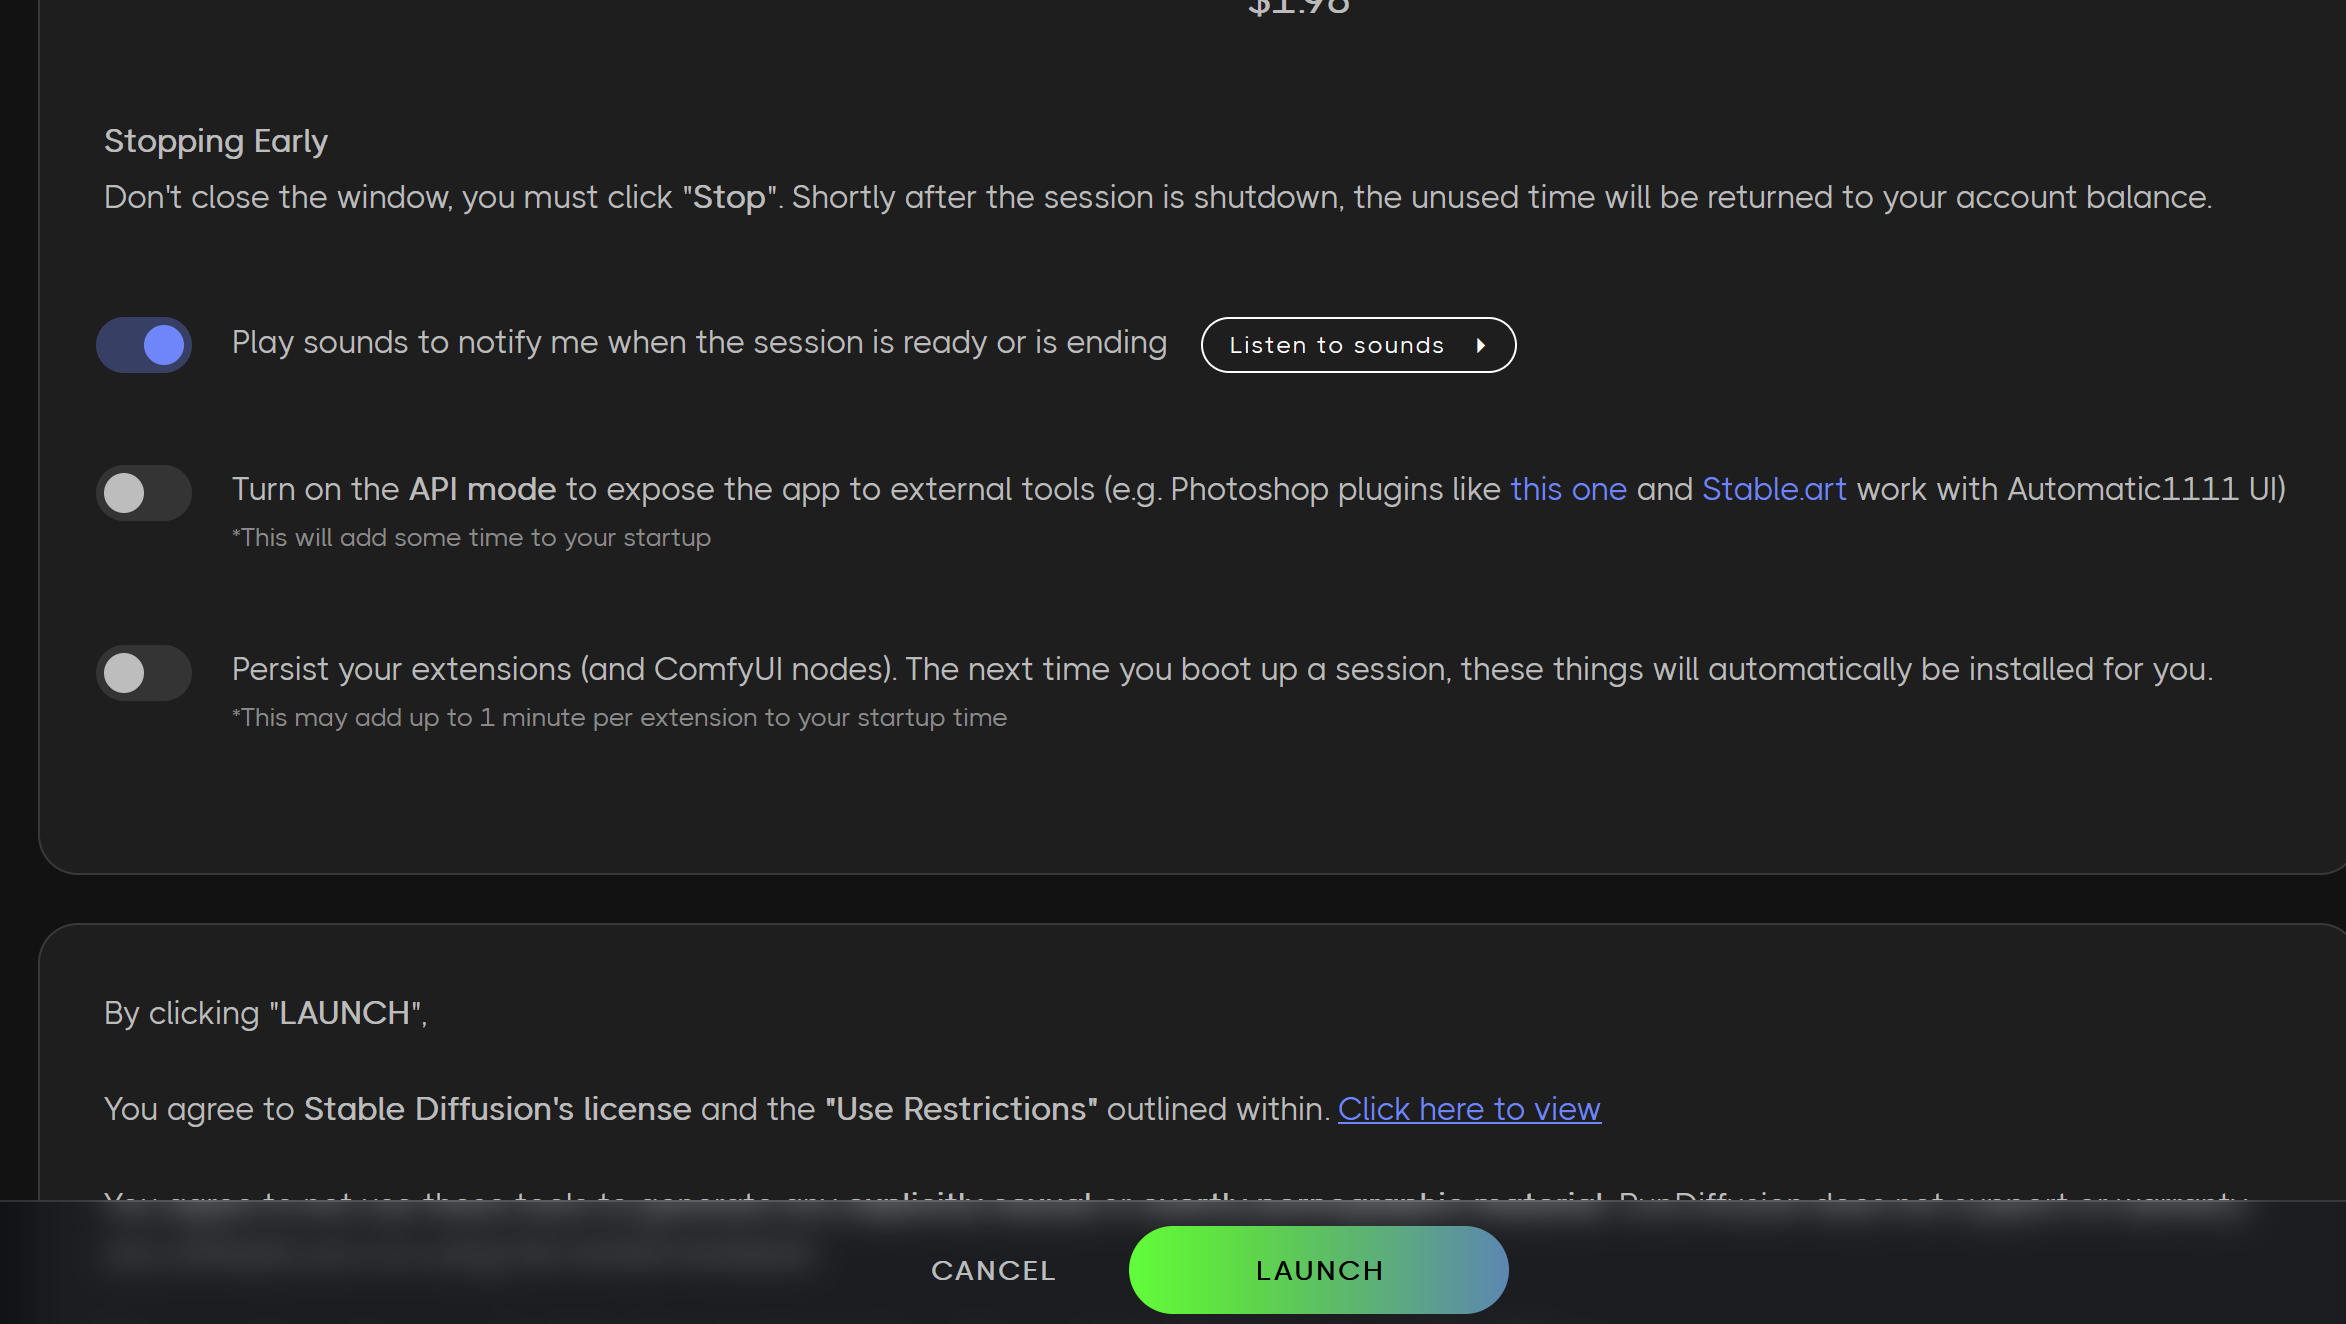
Set Up Your Session: Choose the hardware and build that you'd like to use. This will depend on your individual needs. On the launch screen, you can decide whether to turn on persistent extensions if you are a Creators Club or higher plan member. Pay-as-you-go customers don't have access to this feature. If eligible, scroll down and toggle the feature on.
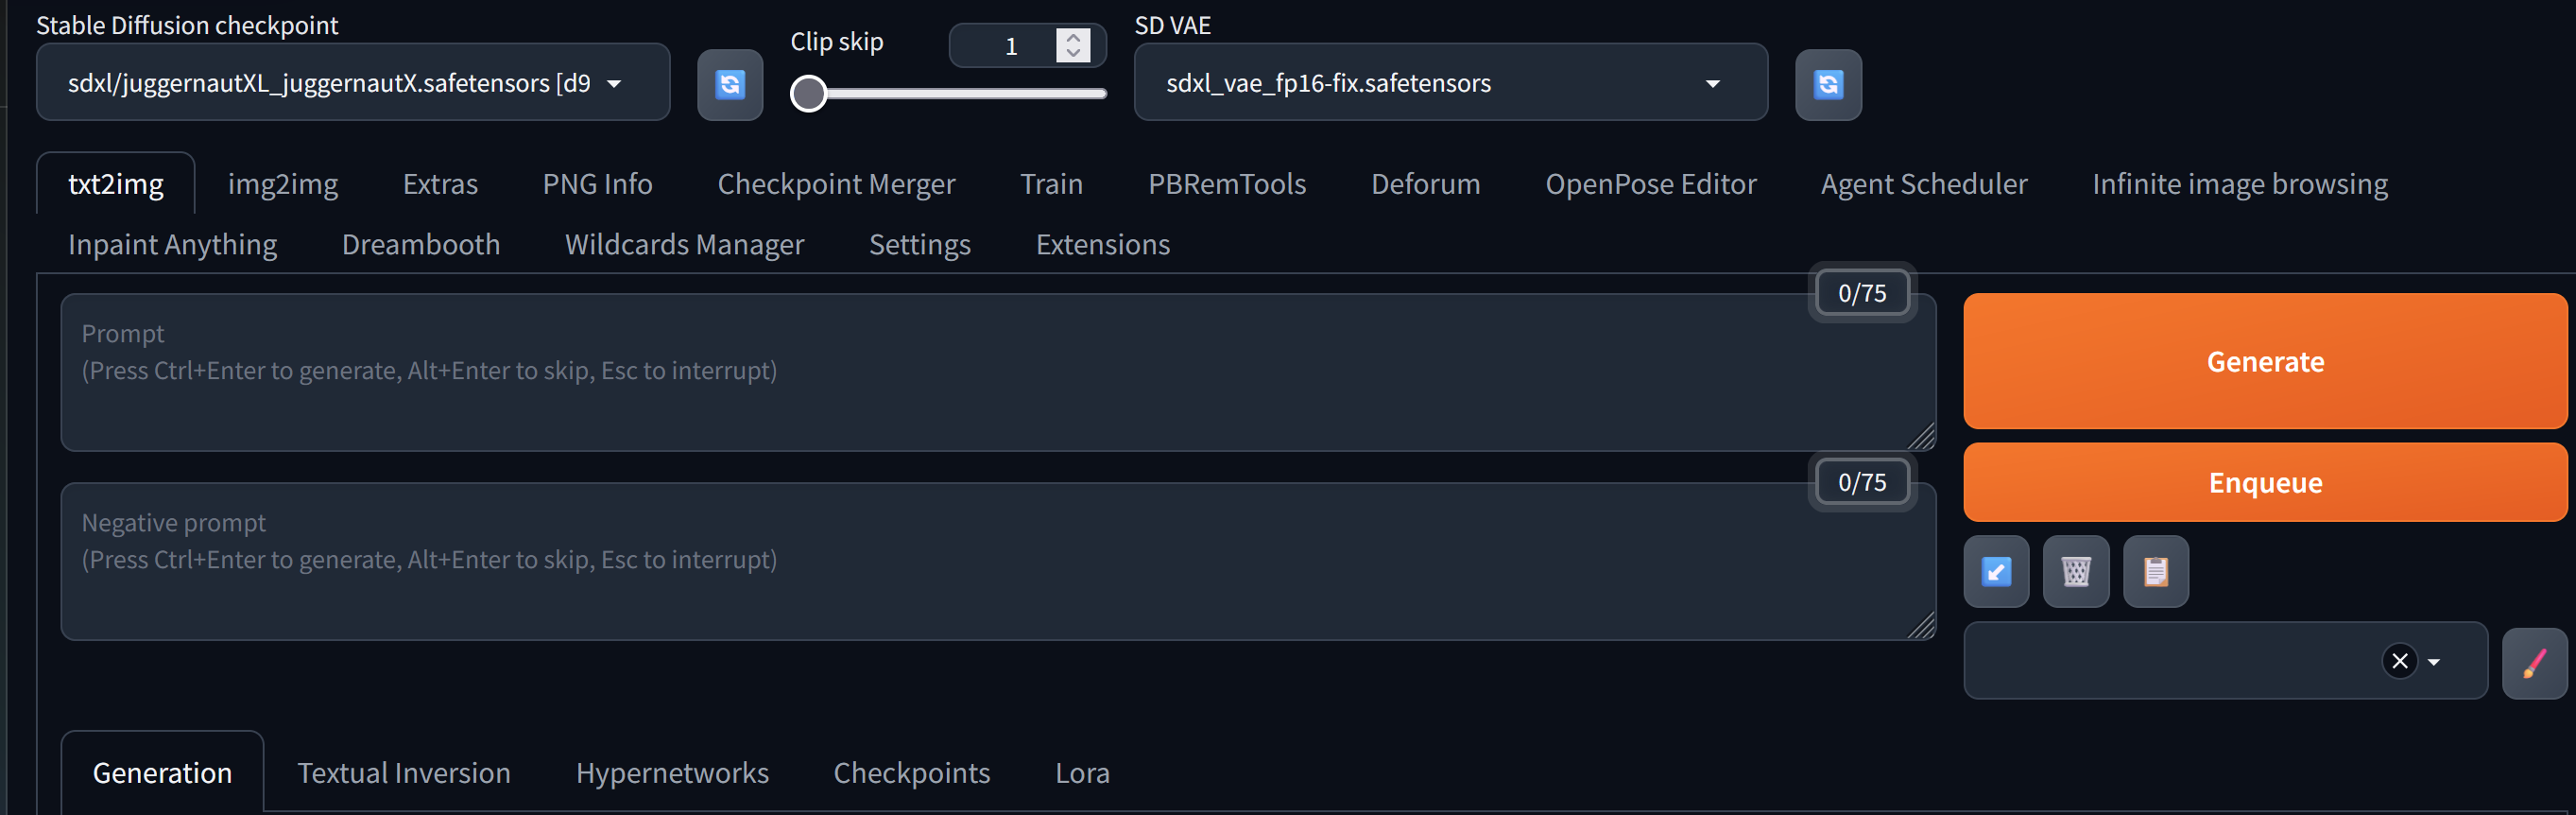
Step 2: Access the Extensions Tab
Once you're logged into your RunDiffusion account and have Automatic1111 running, navigate to the Extensions tab in the main menu.
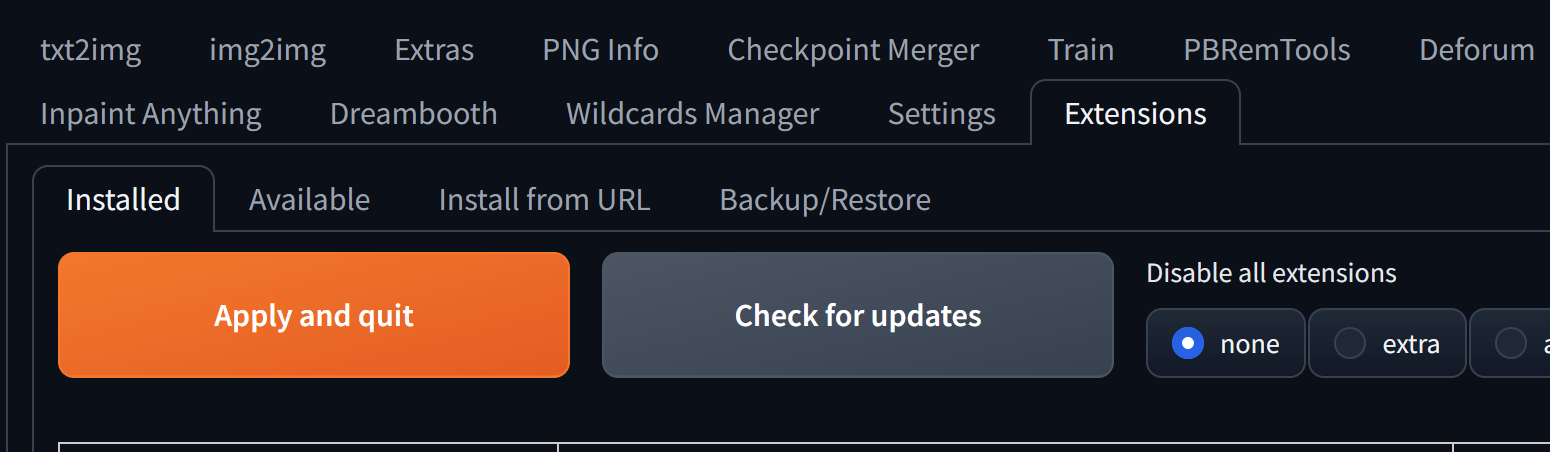
Step 3: Installing an Extension
There are multiple ways to install extensions. You can do it through the Available tab or the Install from URL tab.
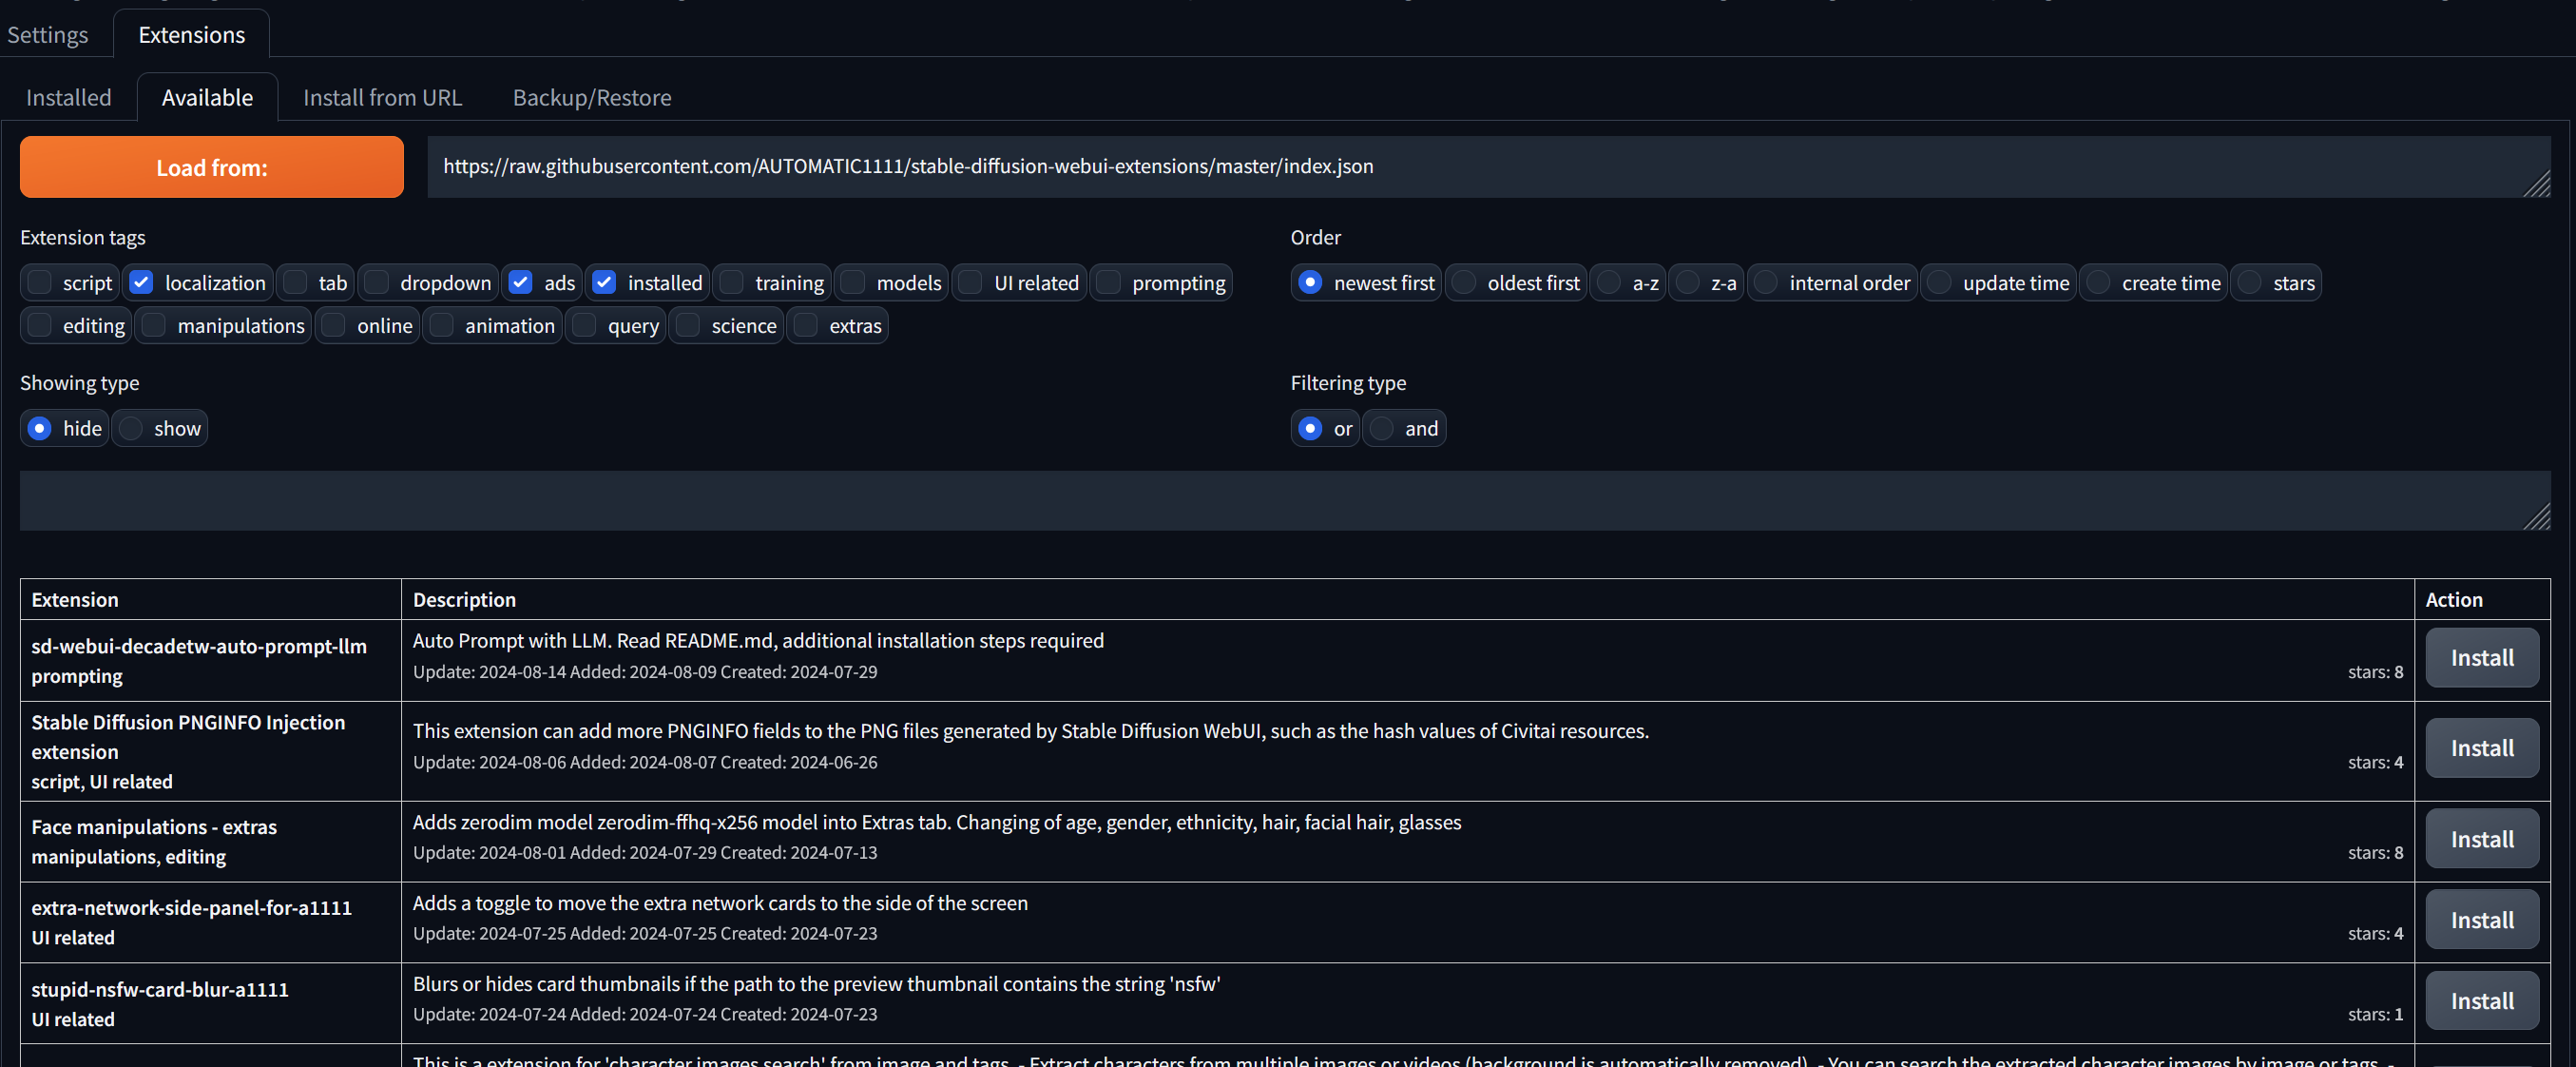
Available: Select the Available tab, then click Load from button and wait. After a few moments, it will load a list of extensions. Scroll down to the one you would like and click on install.
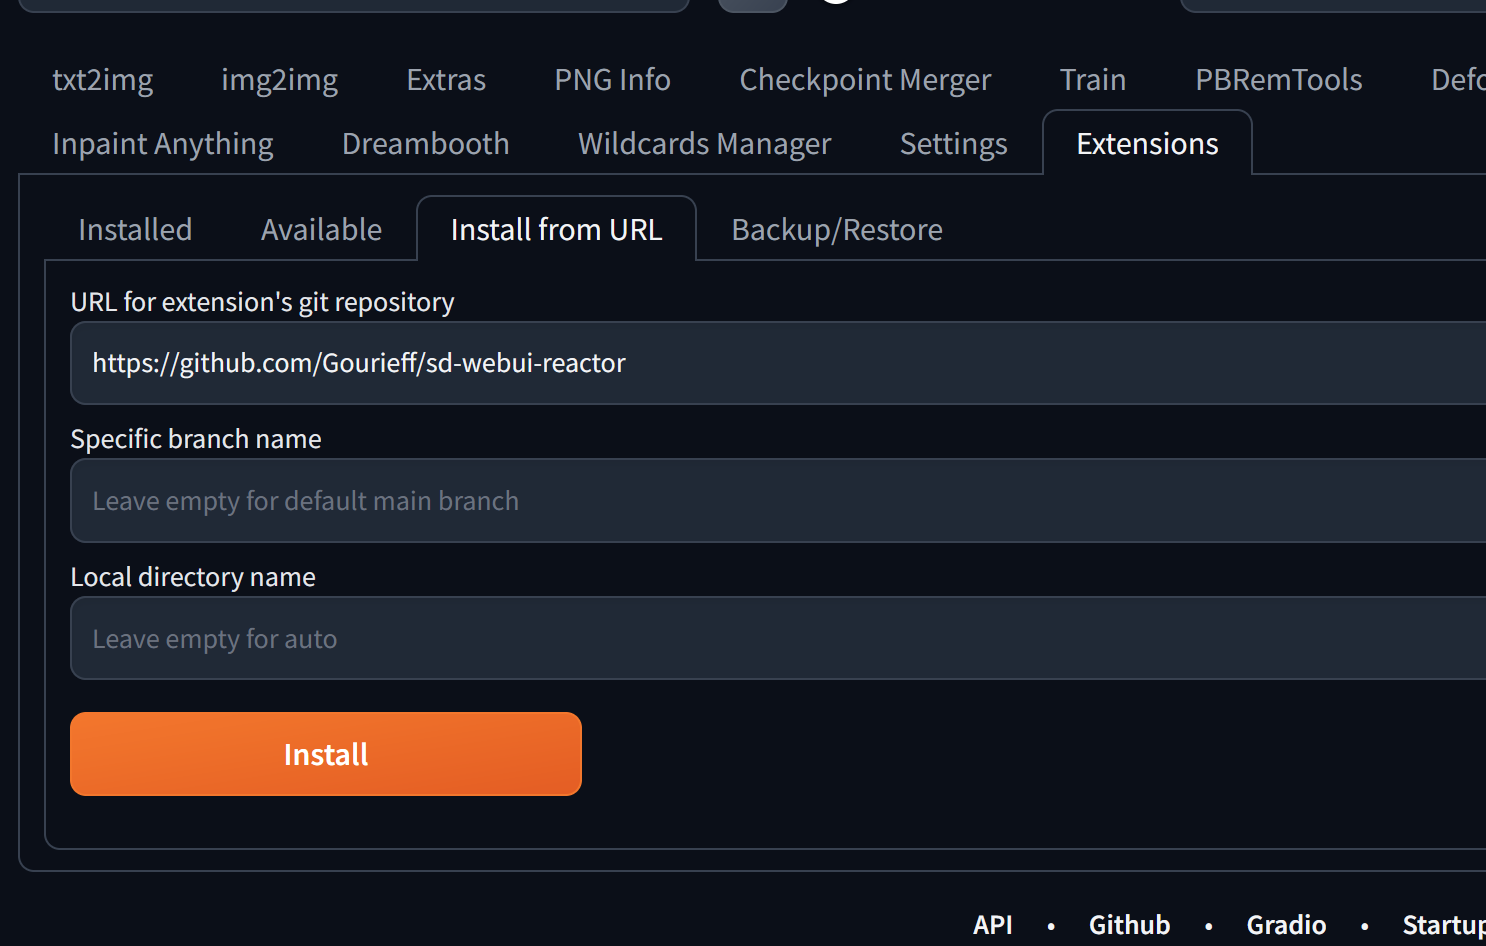
- Install from URL: Copy and paste the URL from the GitHub repository of the extension of your choosing. Then select Install.
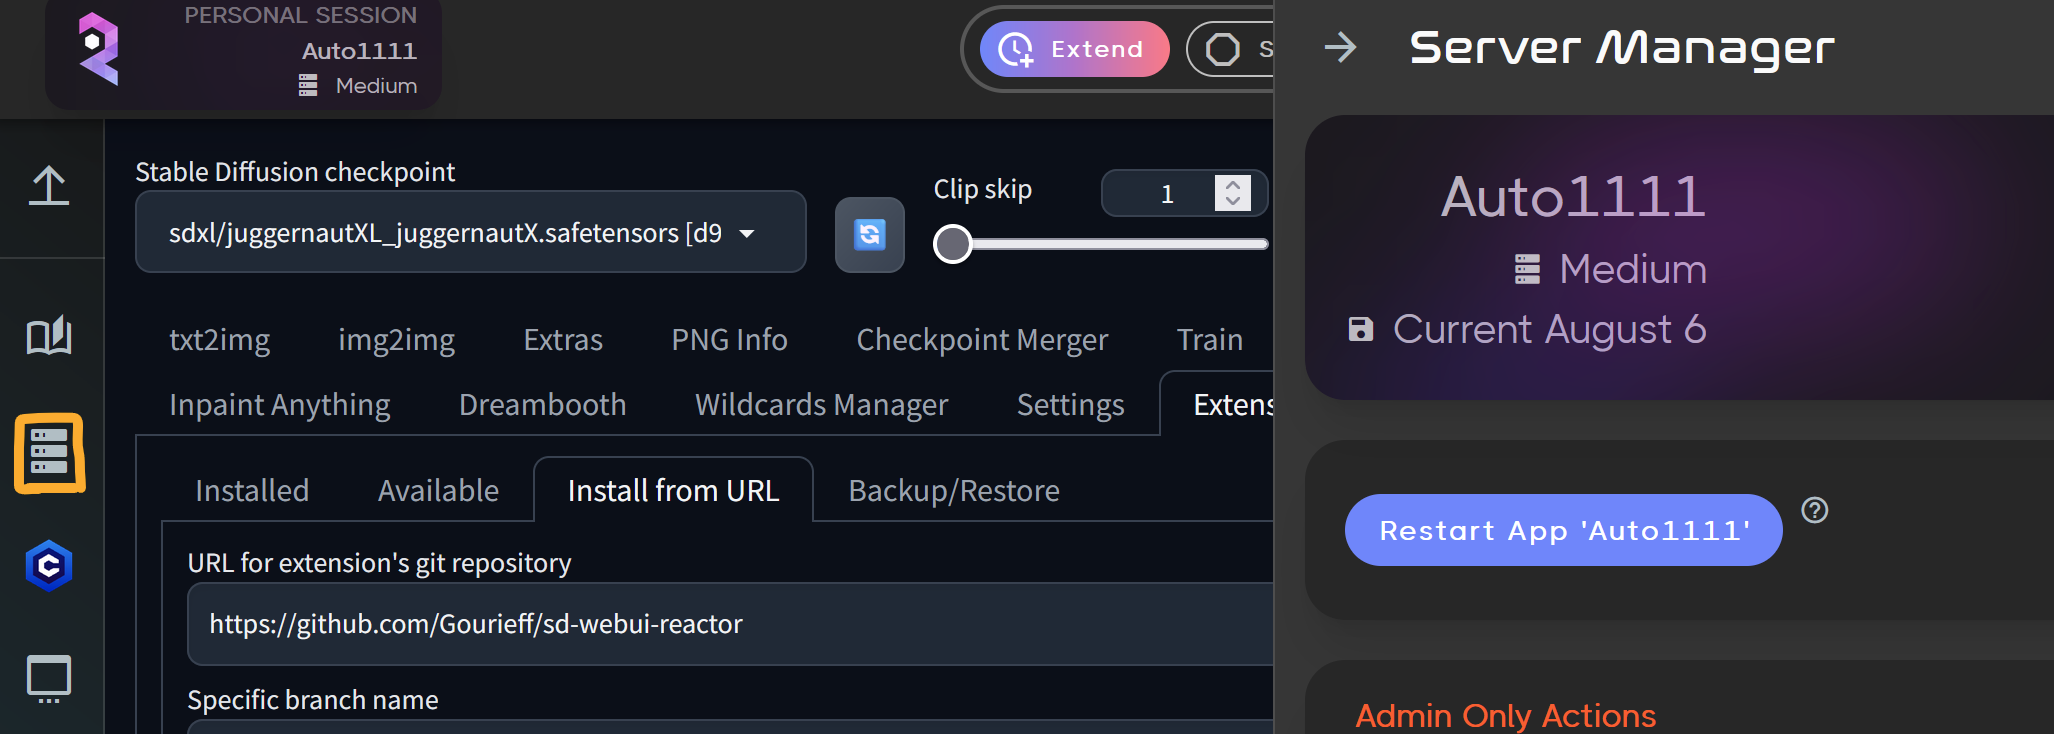
Step 4: Restart the Interface
On the left side click on the Server Manager on the left side of the user interface and then select Restart App 'Auto1111'.
Step 5: Use your Extension
Once you've installed your extensions and restarted the Automatic1111 interface, you're ready to start using them right away. Extensions are designed to integrate seamlessly into the existing workflow, offering new features and tools that can enhance your creative projects. To use your extension, it’s helpful to check the GitHub page for the extension to see where it integrates within the user interface. Extensions can have various locations in the UI, depending on their functionality.
Removing Extensions in Automatic1111
As you try out different extensions, you may find that some are no longer needed or may cause conflicts with others. Luckily, removing extensions is just as easy as installing them.
Turn off Persistent Extensions
To remove extensions, go back to the Launch Screen and toggle the Persist your extensions feature off. By doing so, your next session will launch without any previously installed extensions, giving you a fresh start.

Best Practices for Managing Extensions
- Download Models if Needed: Some extensions may require specific models to function correctly. Be sure to check the extension's GitHub repository or documentation for any additional downloads or requirements.
- Server Requirements: Certain extensions might demand more computational resources, especially if they involve complex processing tasks. If you’re using a resource-intensive extension, consider upgrading to a larger server on RunDiffusion to ensure smooth performance.
- Limit the Number of Extensions: While installing multiple extensions can be tempting, be mindful of potential conflicts. Limiting extensions can also help in maintaining performance.
- Use Appropriate Builds: Occasionally, updates to Automatic1111 may cause some extensions to malfunction. If an extension works on a previous build, you can select that build when launching the session to keep your extensions functional. Open-source technology is constantly evolving, so staying adaptable is key.
Conclusion
Installing and removing extensions in Automatic1111 on RunDiffusion is a simple process that can vastly improve your AI art generation capabilities. By following the steps outlined above, you can easily manage your extensions, allowing you to explore new creative possibilities. RunDiffusion’s cloud-based platform ensures that your workflow remains smooth and efficient, freeing you from the hassles of local installations and hardware concerns.
For more tips on using Automatic1111, check out our more recent articles, where we dive deeper into some of the most popular extensions and tools to boost your creative process.
This article was last updated: 9/4/2024
