


Introduction
Automatic1111はStable Diffusionを操作するための強力なインターフェースですが、すべてのユーザーが英語環境で作業したいわけではありません。
日本語のインターフェースで作業したい場合は、RunDiffusion上でAutomatic1111を使用しながら、日本語拡張機能をインストールして表示言語を切り替えることができます。
このガイドでは、RunDiffusionでAutomatic1111を起動し、日本語拡張機能をインストールして、インターフェースを日本語表示に変更する手順を説明します。
RunDiffusionでAutomatic1111を起動する
まず、RunDiffusionからAutomatic1111を起動します。
RunDiffusion にアクセスします。ログインするか、アカウントを作成します。

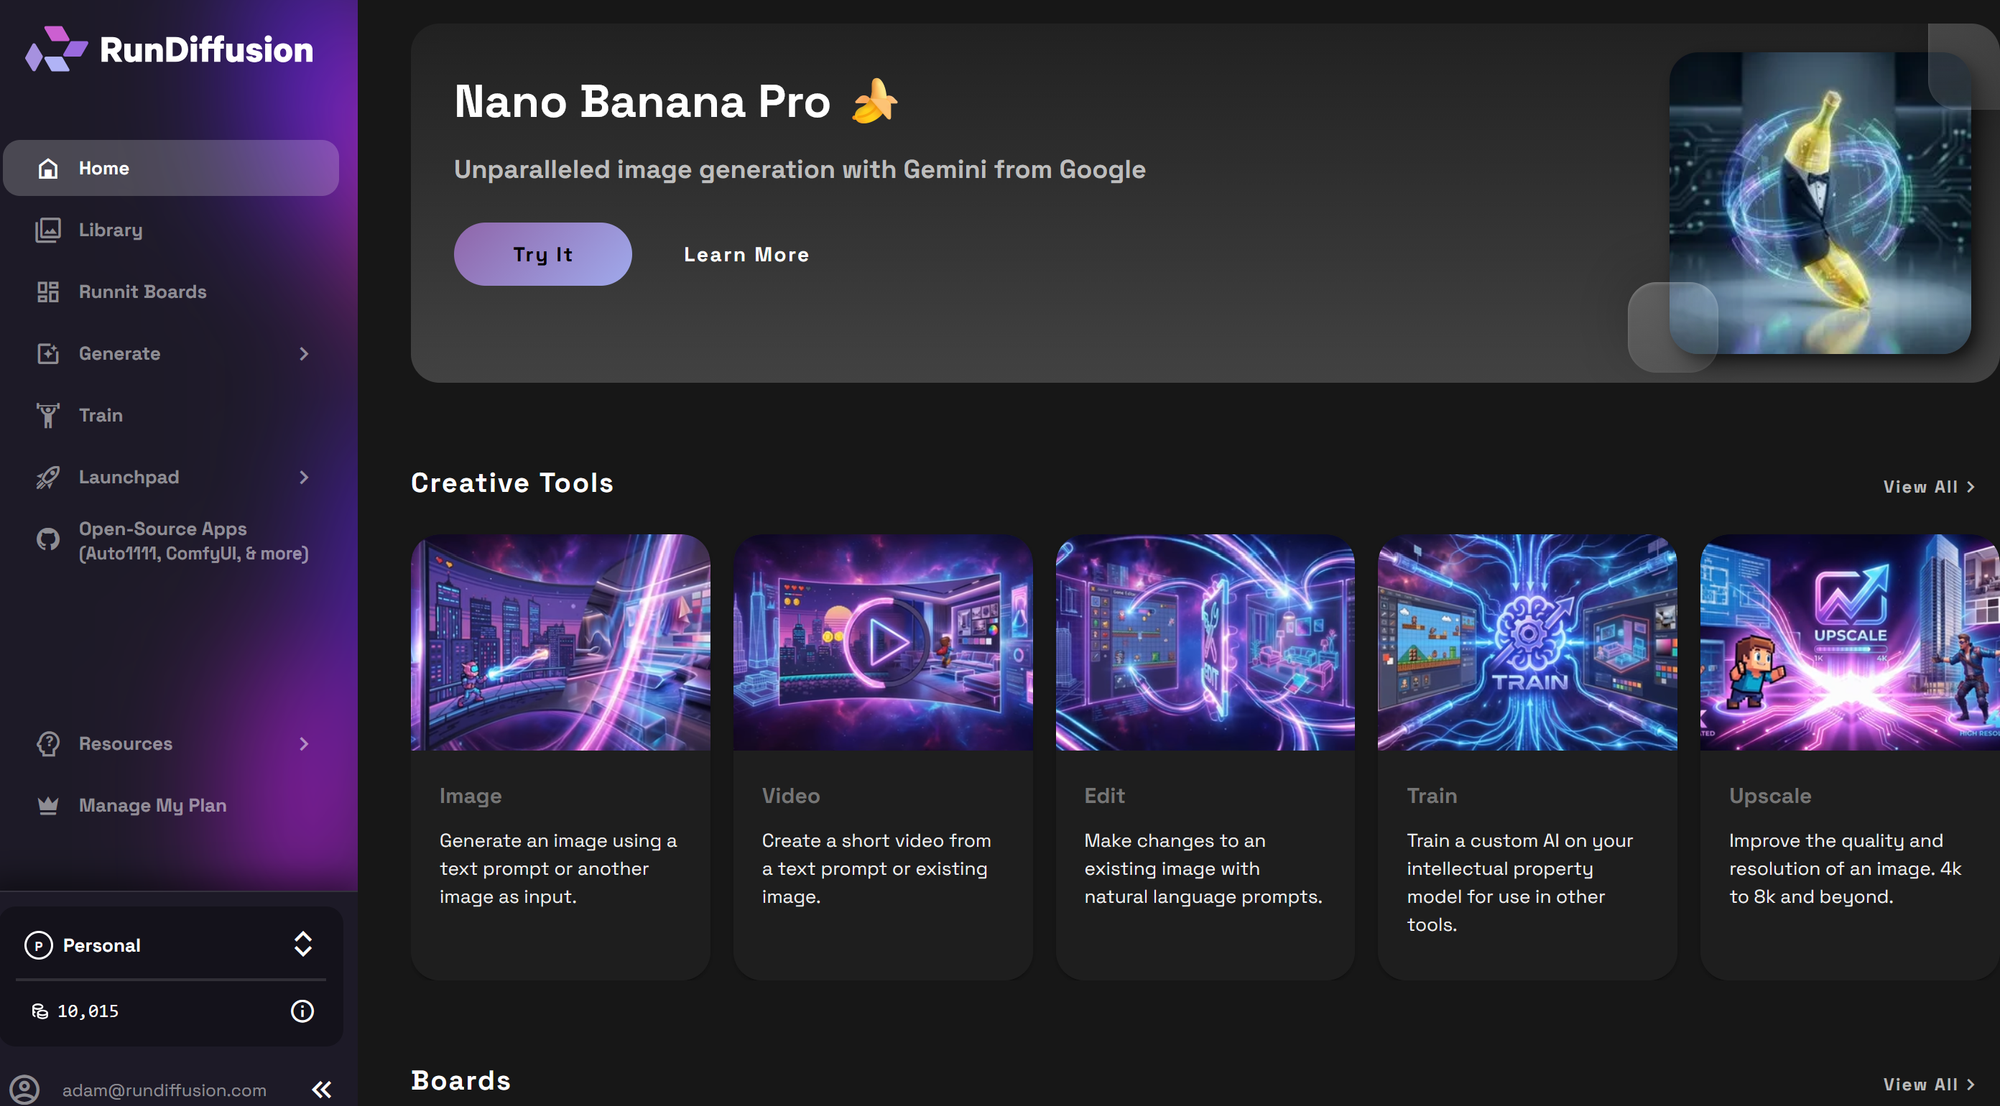
ログイン後、自動的に RunDiffusion's Runnit Platform にリダイレクトされます。
左側のサイドバーで Opensource Applications をクリックします。
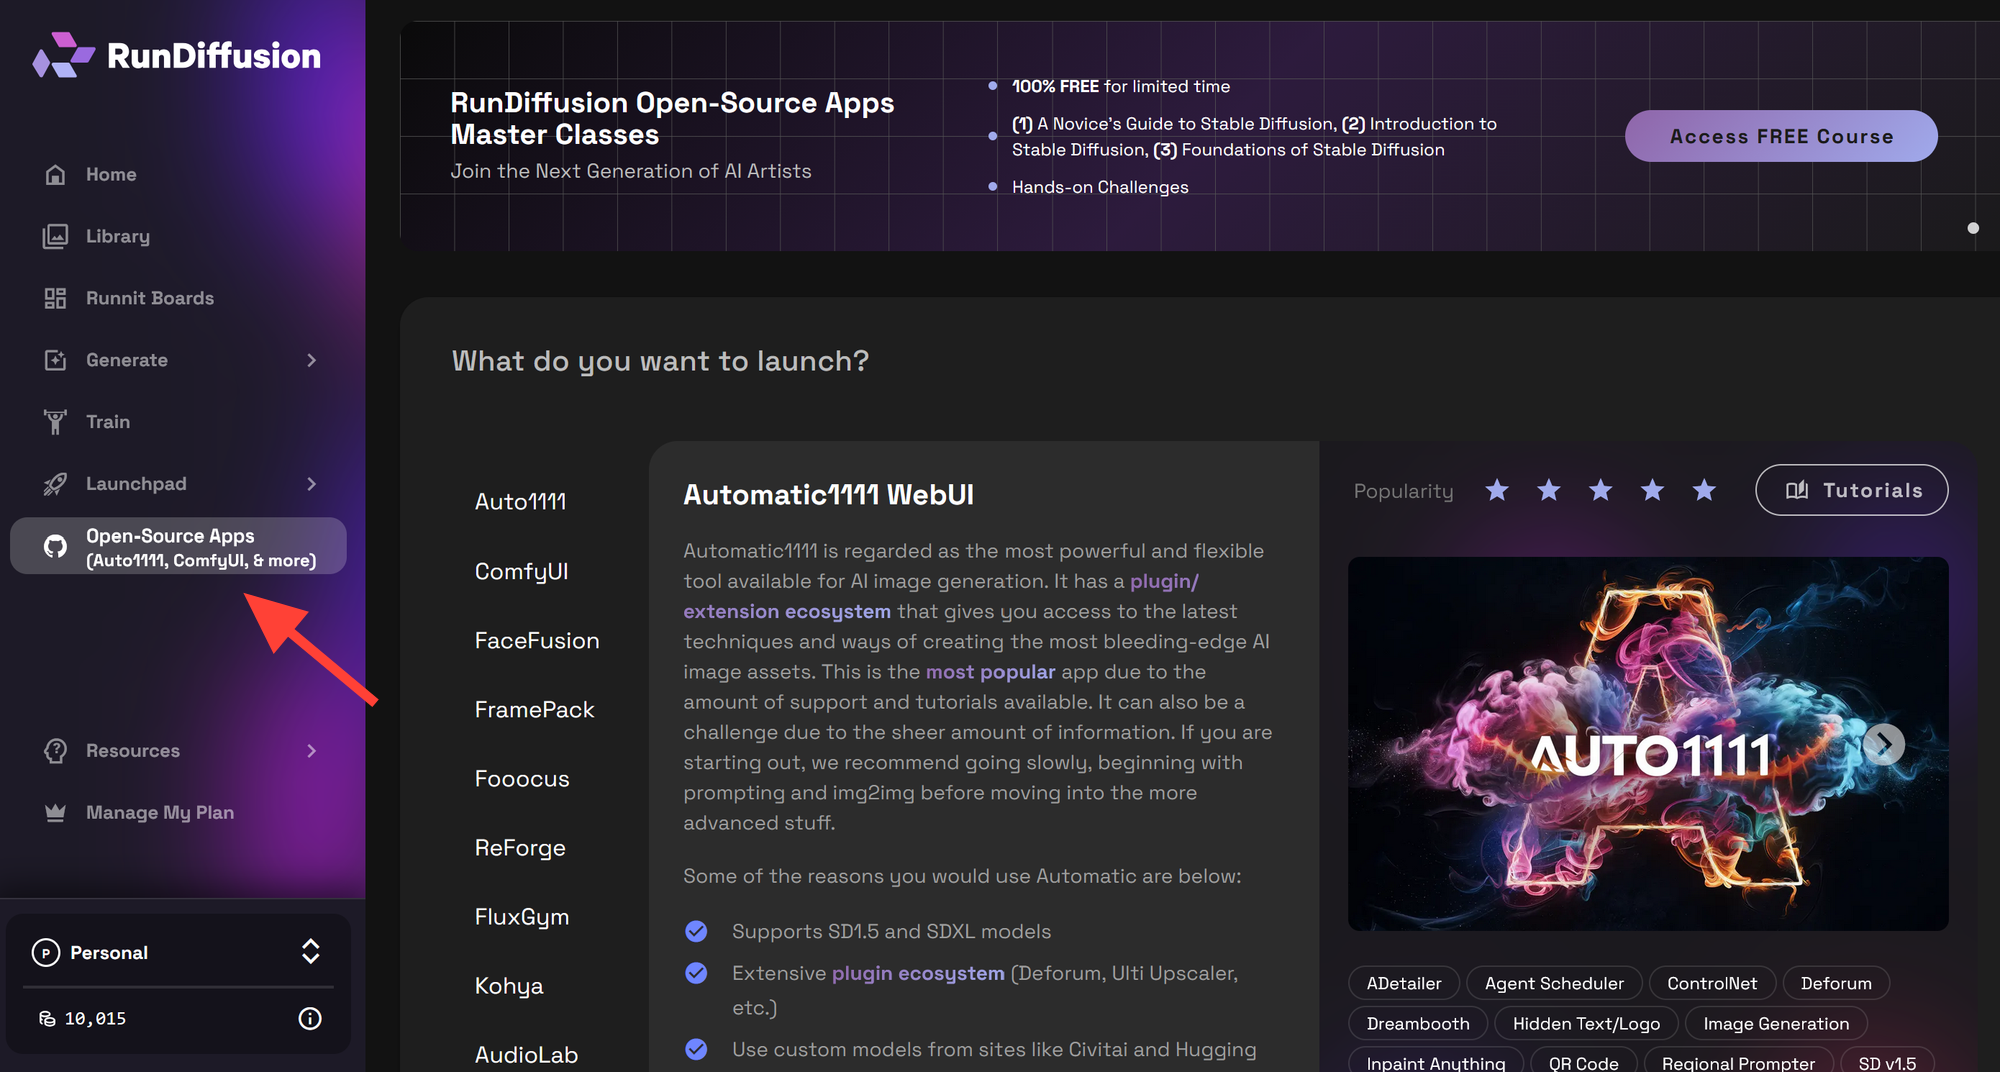
Automatic1111 をクリックします。
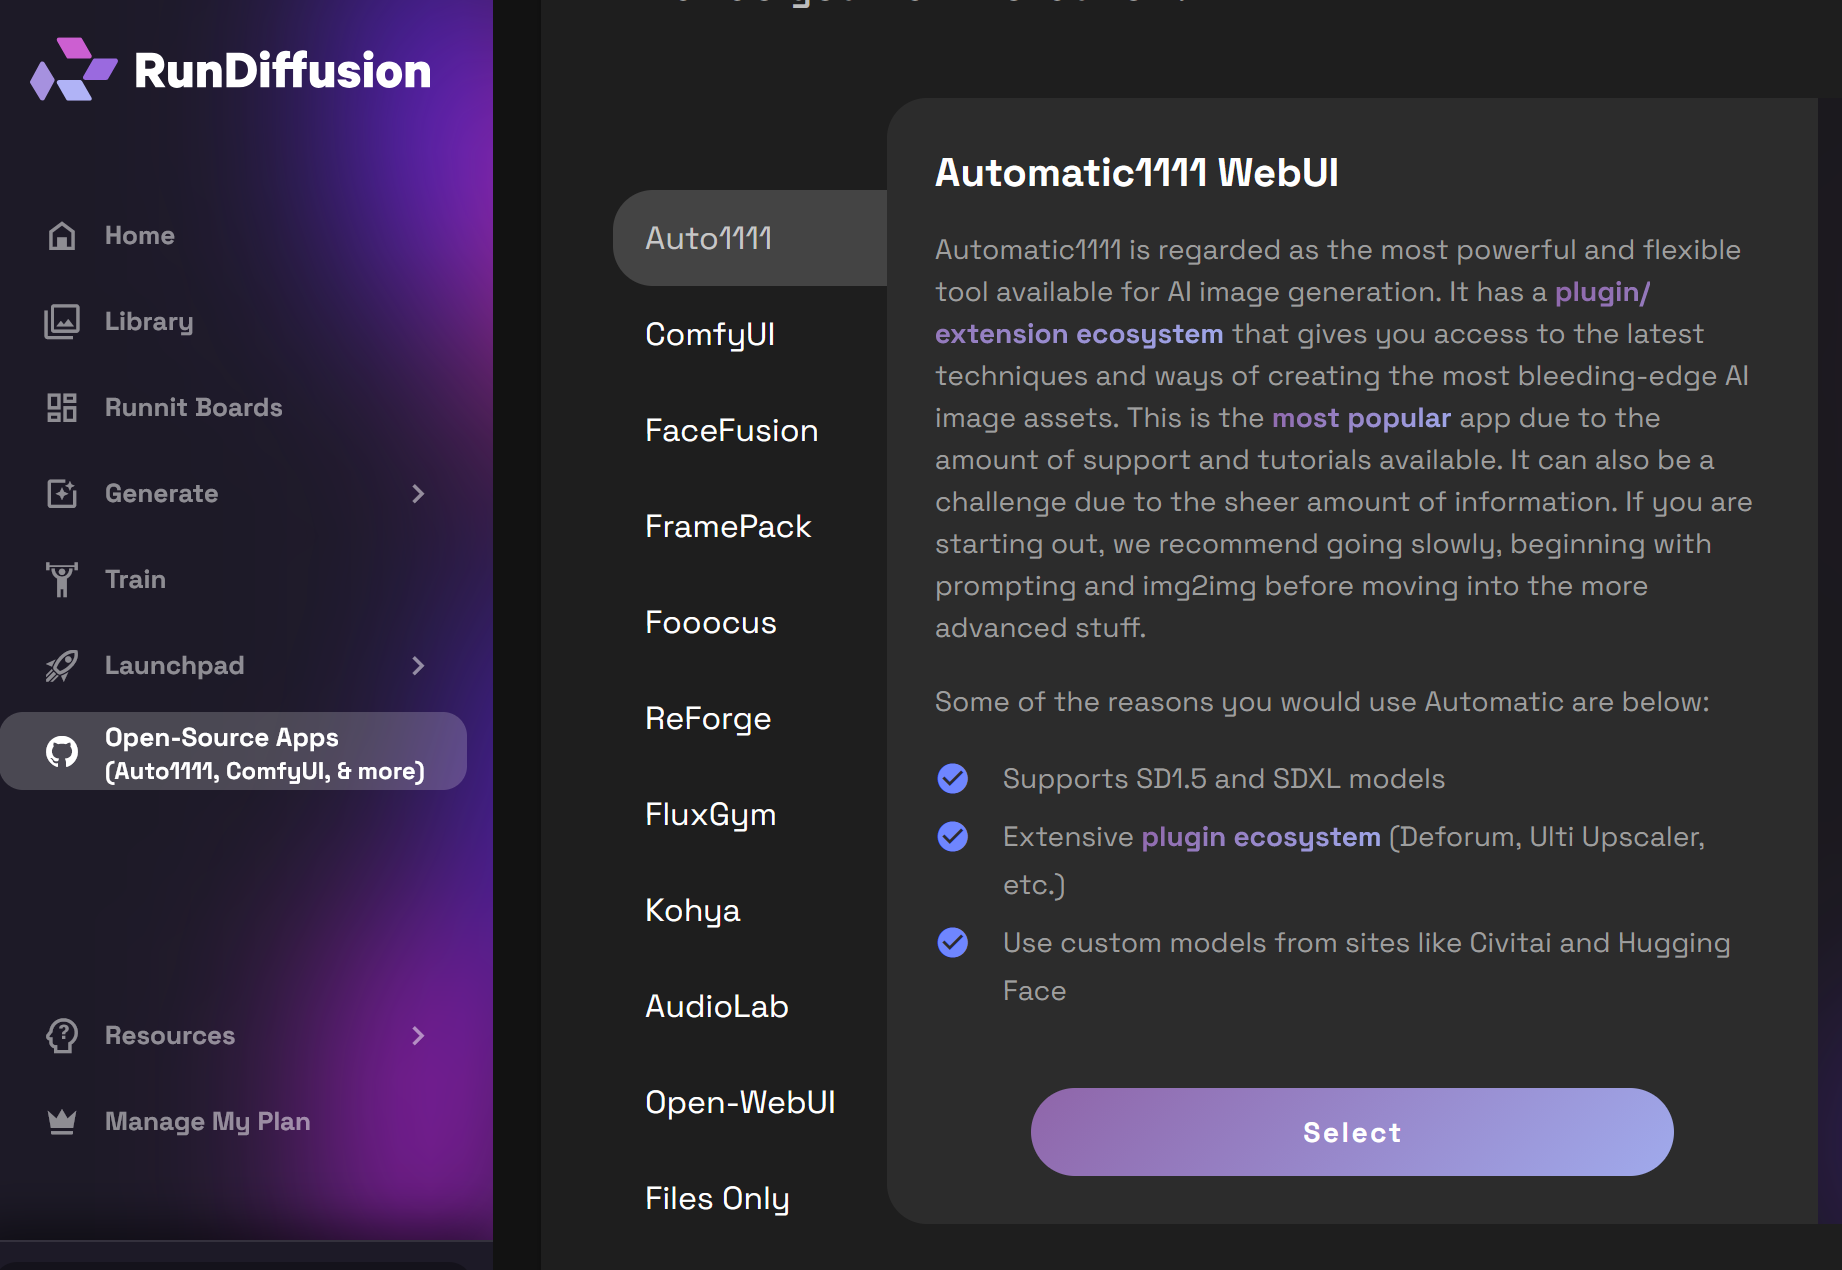
Launch Automatic1111 を選択します。
拡張機能のインストールをテストするだけであれば、小さめのサーバーから始めることができます。続行する前に、ビルドが最新であることを確認してください。
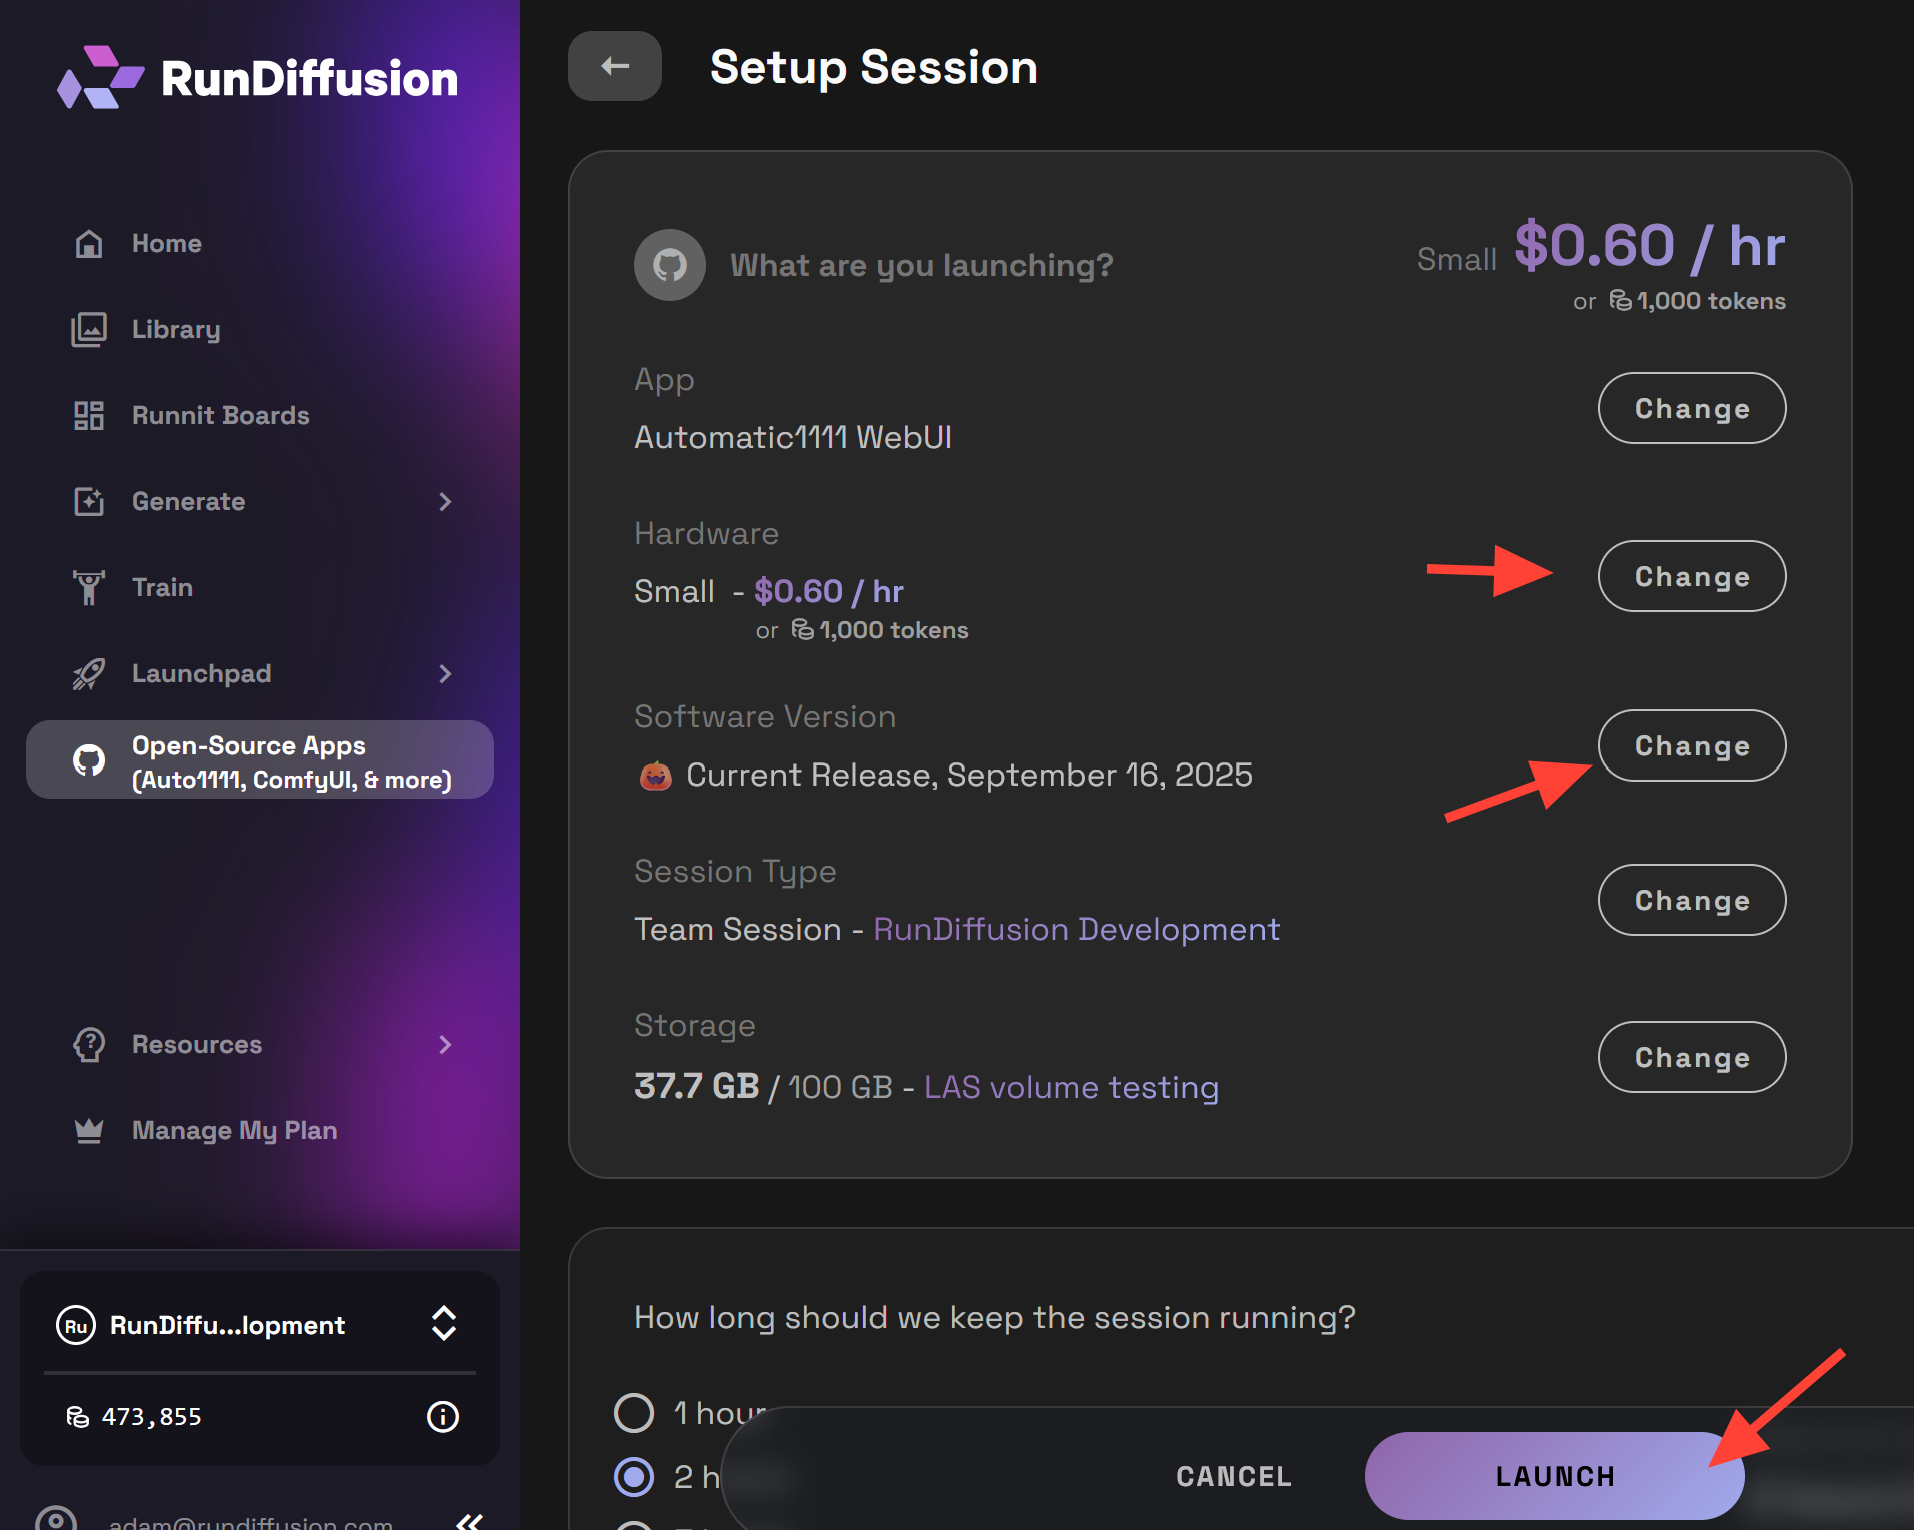
Automatic1111が開いたら、次の手順に進みます。
日本語拡張機能をインストールする
次に、Automatic1111内で日本語拡張機能をインストールします。
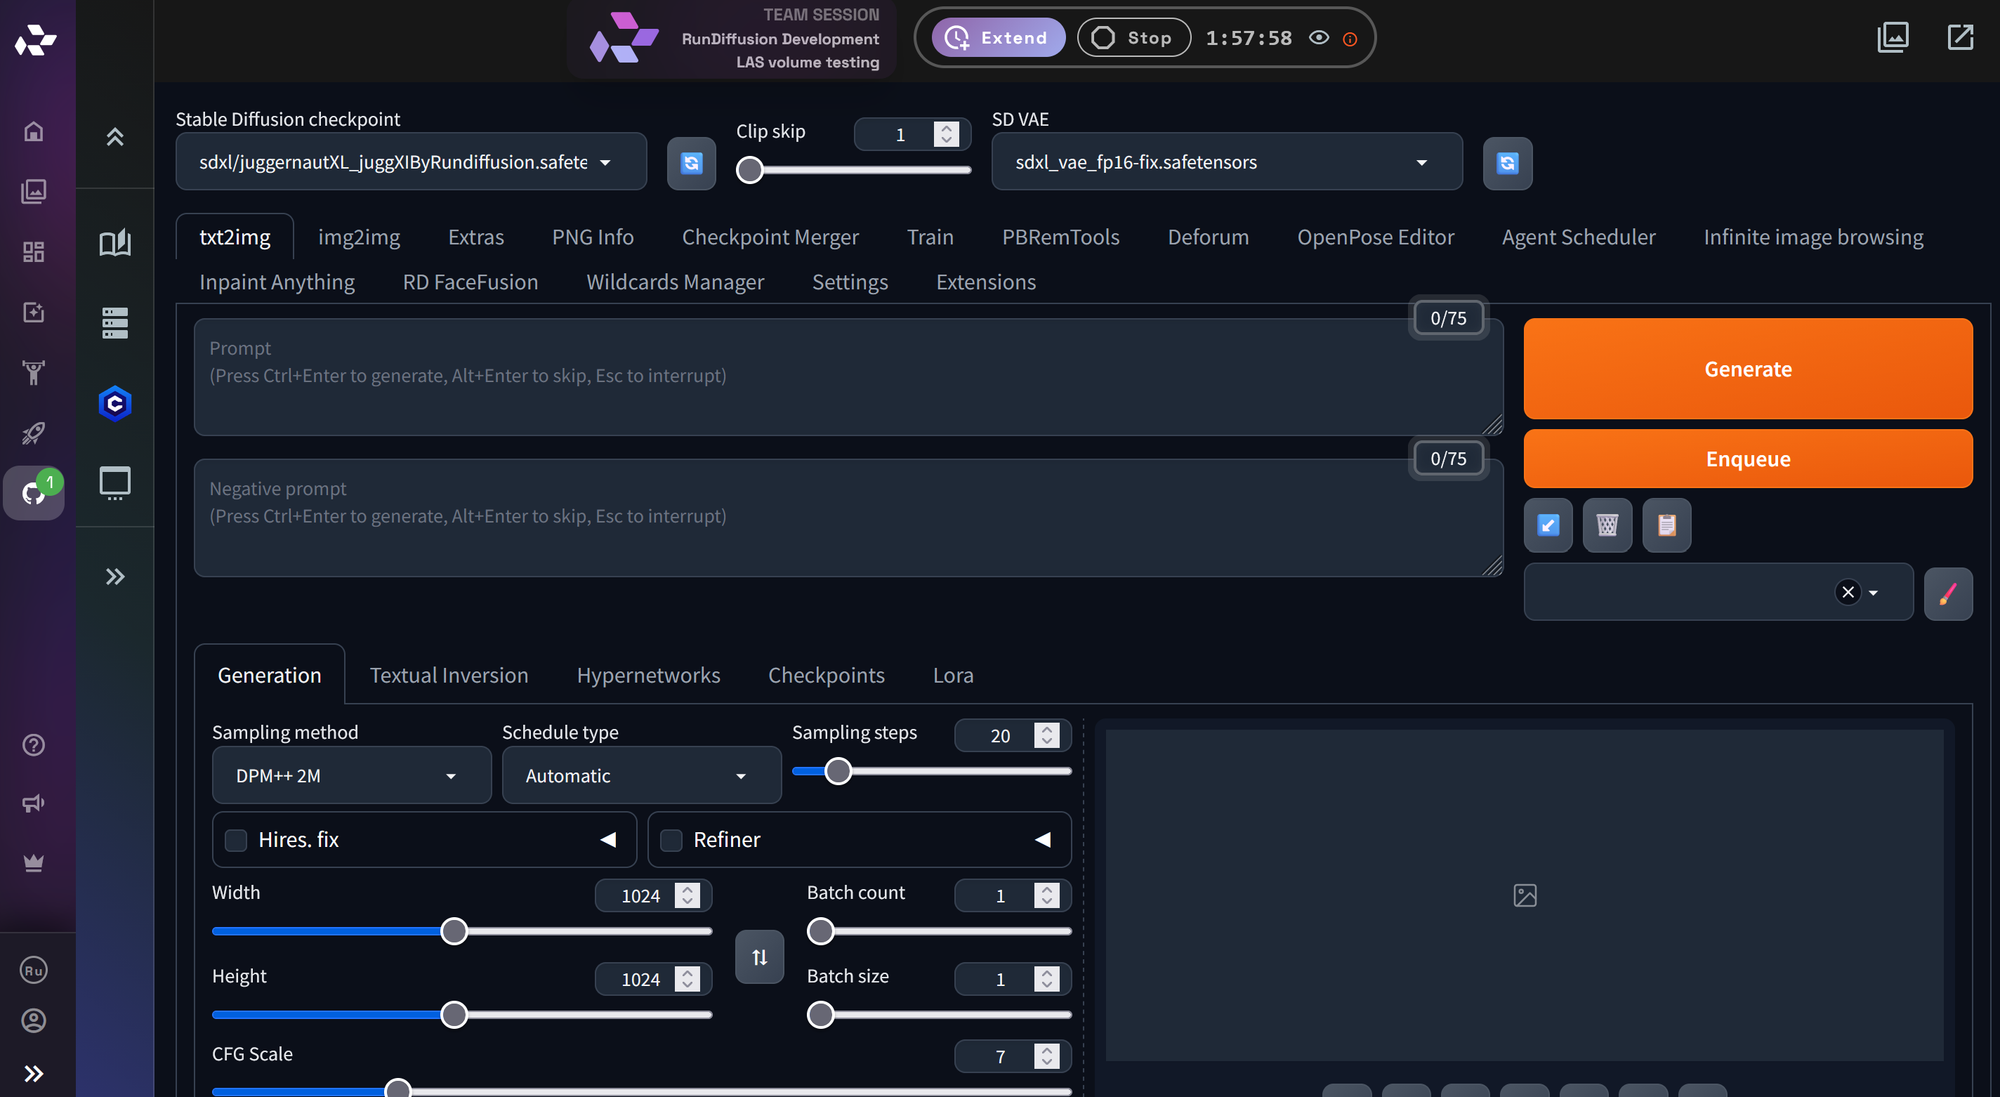
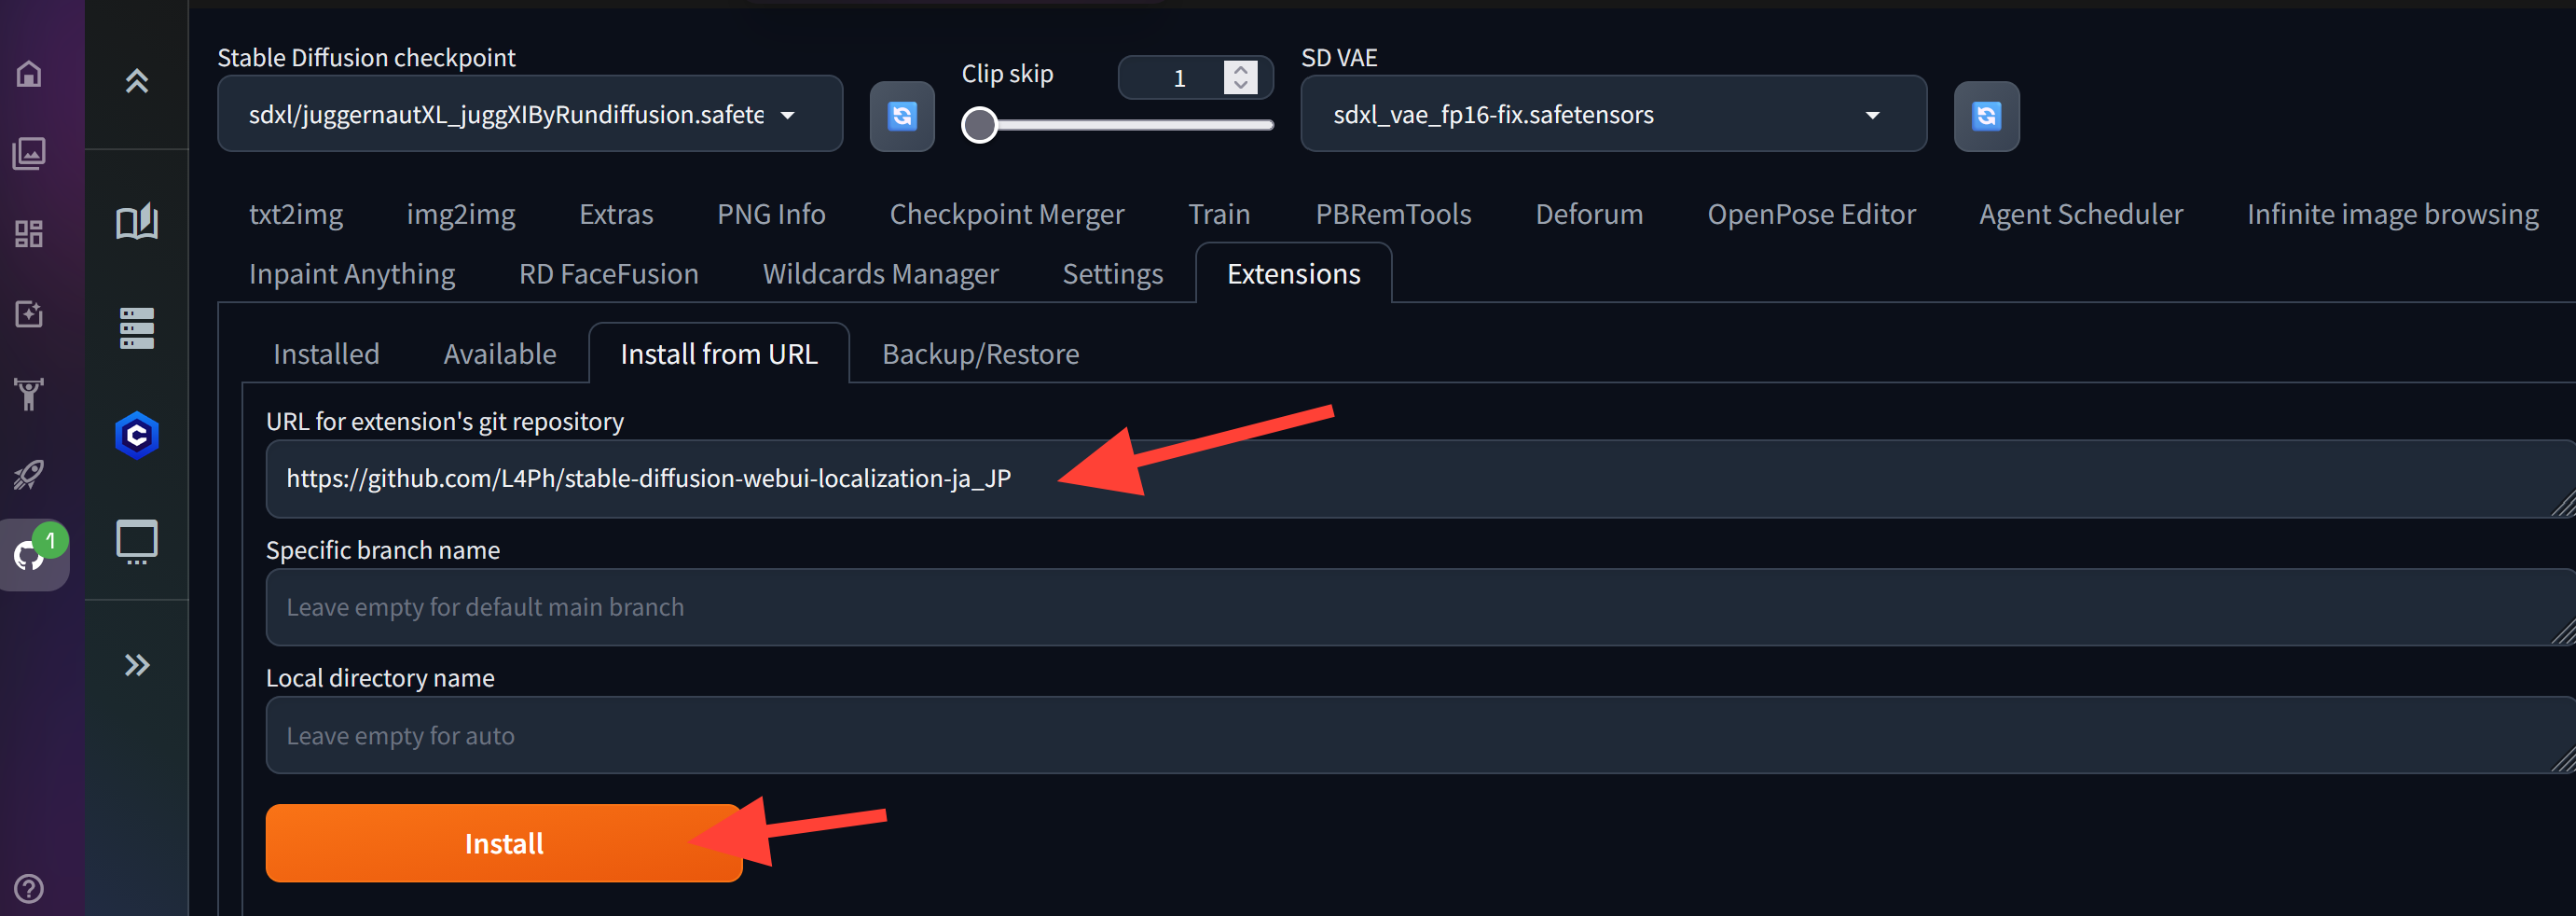
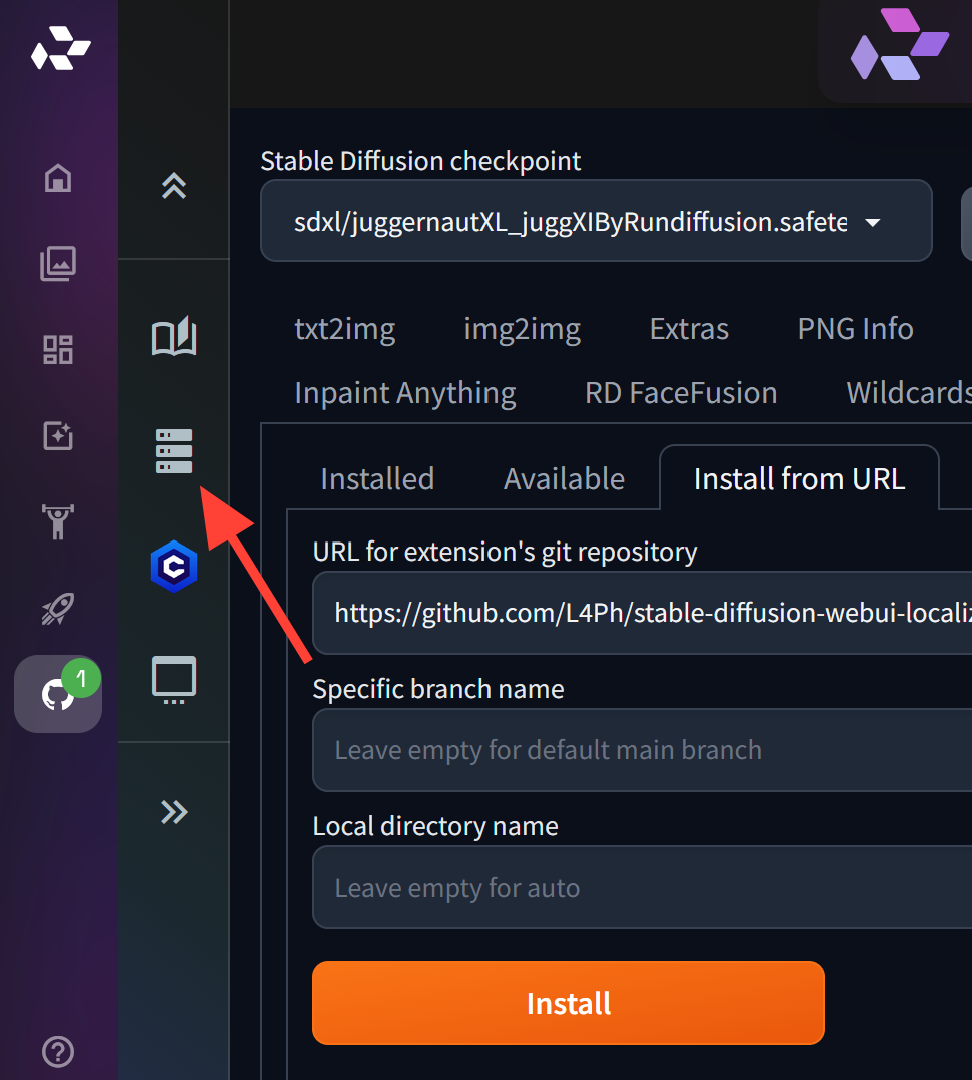
上部メニューで Extensions をクリックします。

Install from URL タブをクリックします。
URL for extension's git repository と表示された入力欄に、以下のURLを貼り付けます。
https://github.com/L4Ph/stable-diffusion-webui-localization-ja_JP
Install をクリックします。
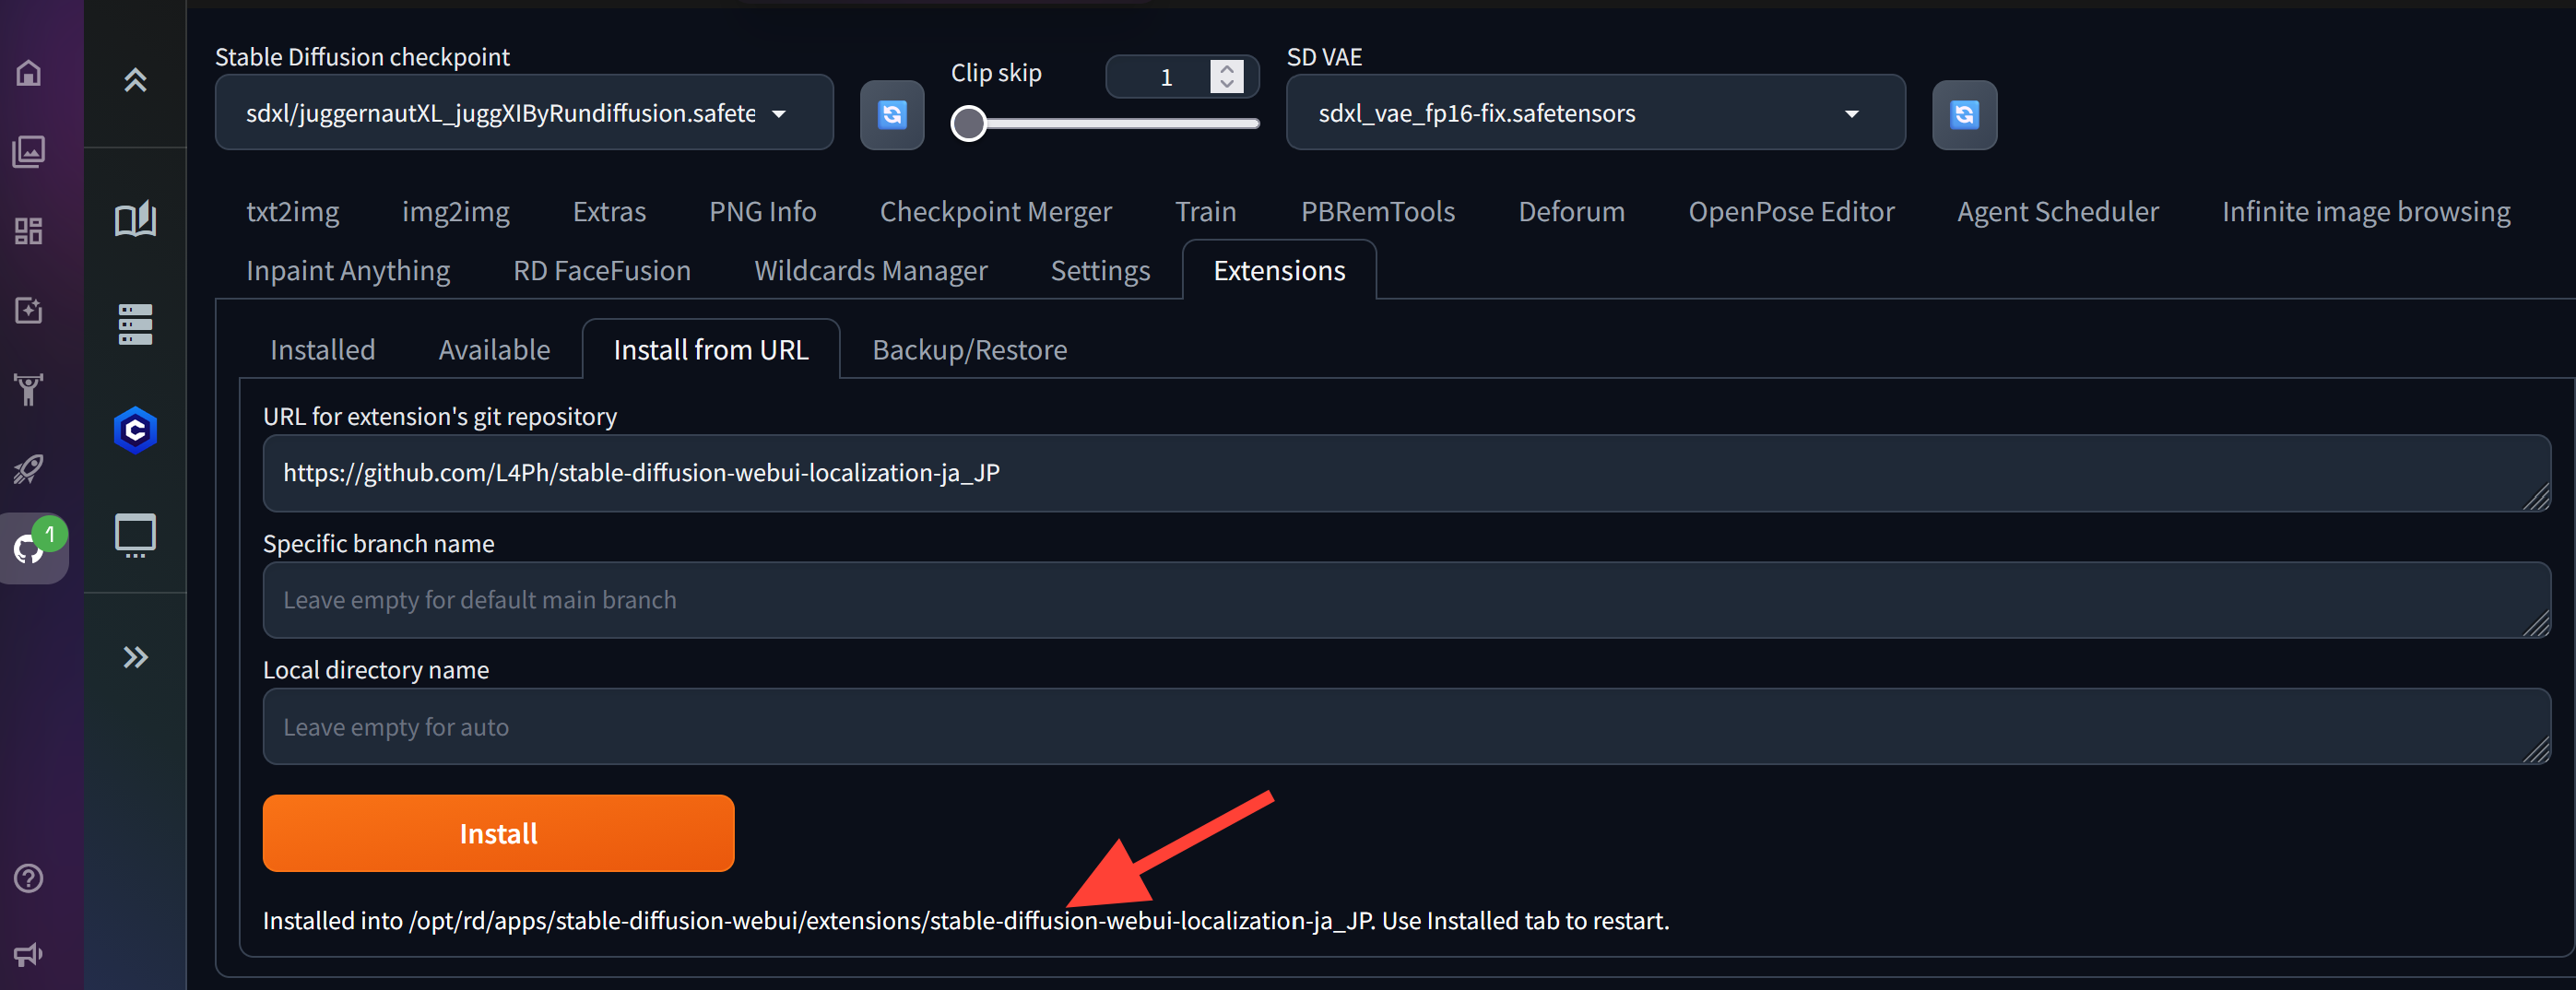
Automatic1111が日本語ローカライズ拡張機能をダウンロードしてインストールします。
インストールが完了すると、以下のようなメッセージが表示されます。
Installed into /opt/rd/apps/stable-diffusion-webui/extensions/stable-diffusion-webui-localization-ja_jp. Use Installed Tab to restart
Server ManagerからAutomatic1111を再起動する
拡張機能のインストール後、Automatic1111を再起動します。
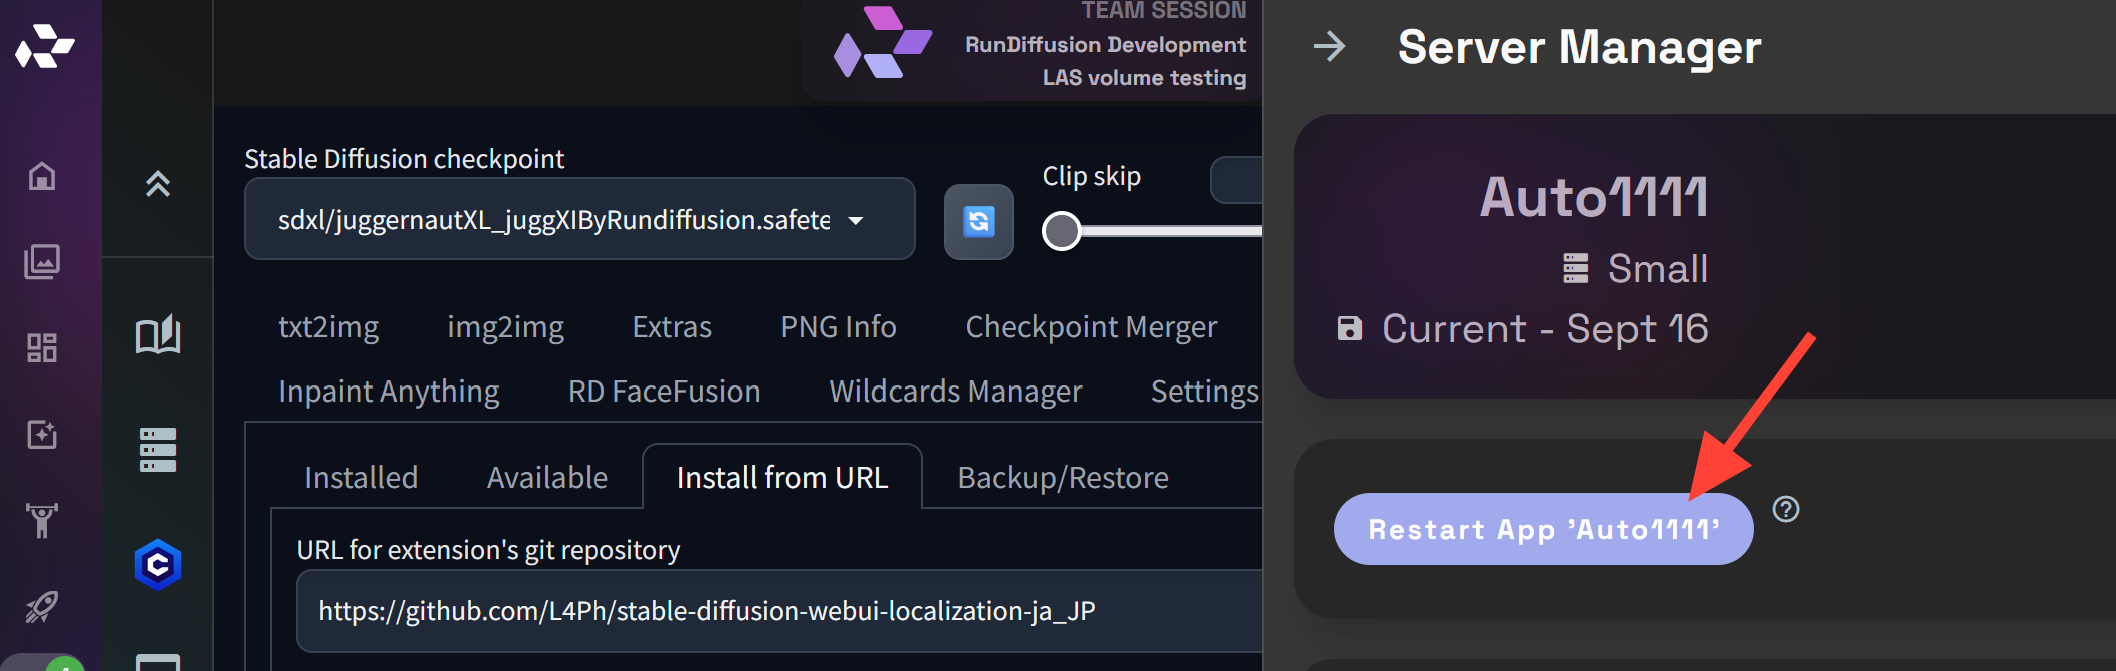
左側のサイドバーで Server Manager をクリックします。
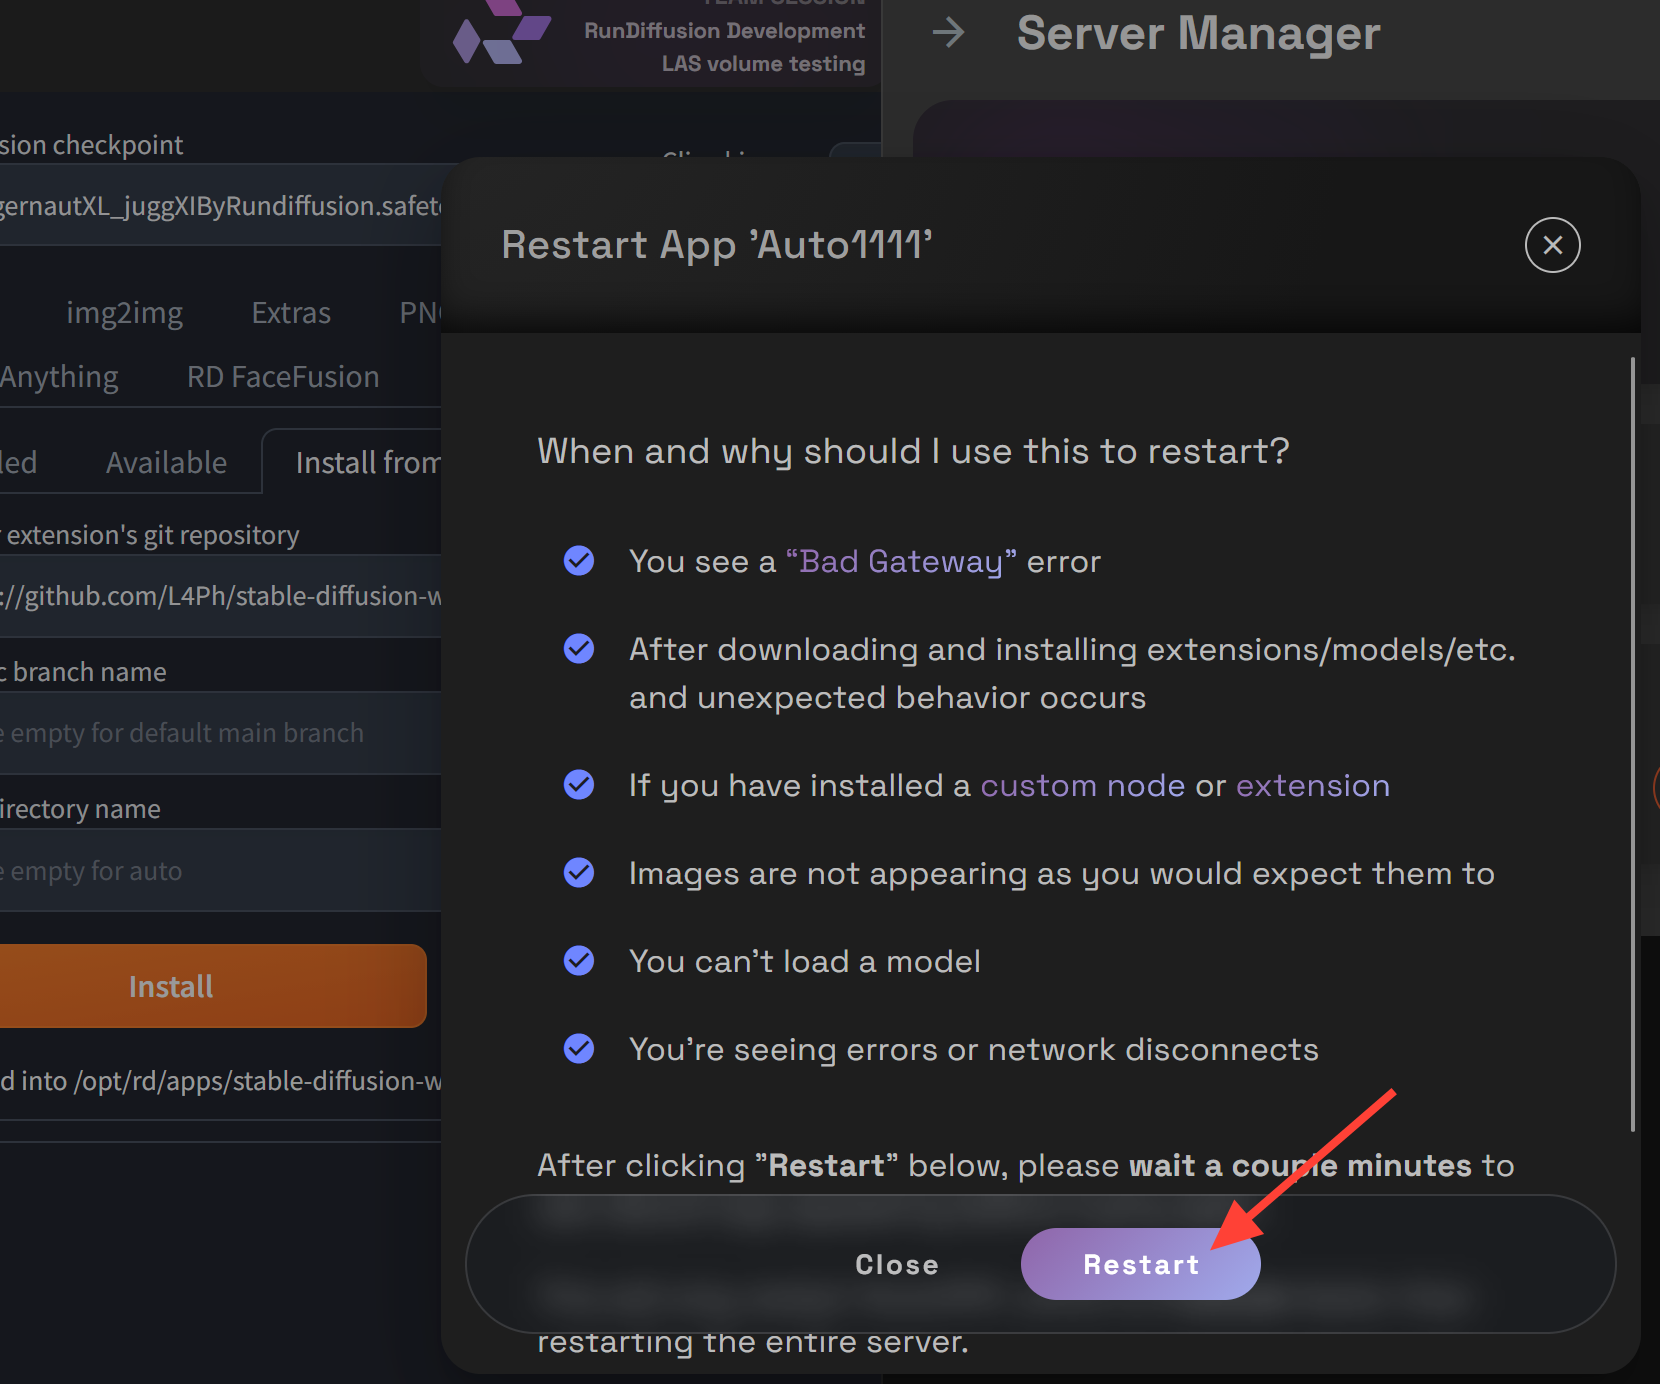
Restart App 'Auto1111' をクリックします。
Automatic1111は自動的に再起動して再度開きます。この再読み込みにより、新しいローカライズオプションが正しく表示されるようになります。
Automatic1111を日本語表示に切り替える
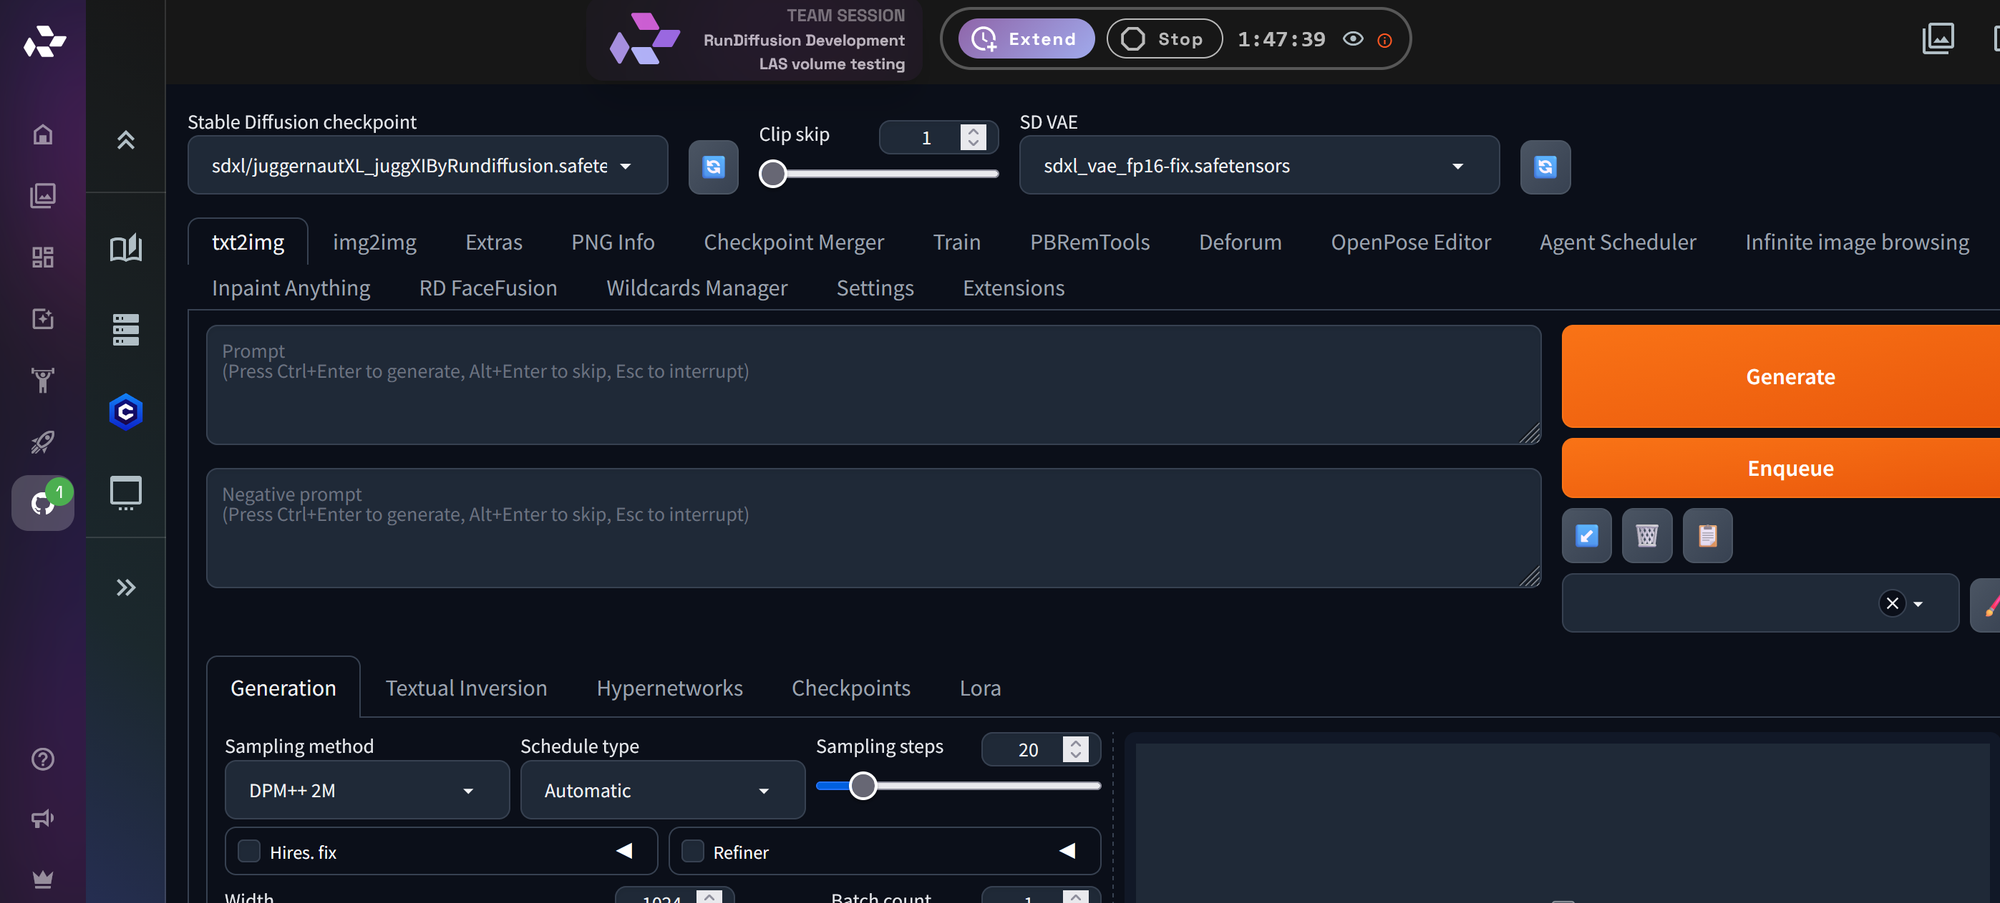
Automatic1111が再起動して再度開いたら、インターフェースを日本語に切り替えます。
上部メニューから Settings をクリックします。
下にスクロールして Bilingual Localization タブを探します。
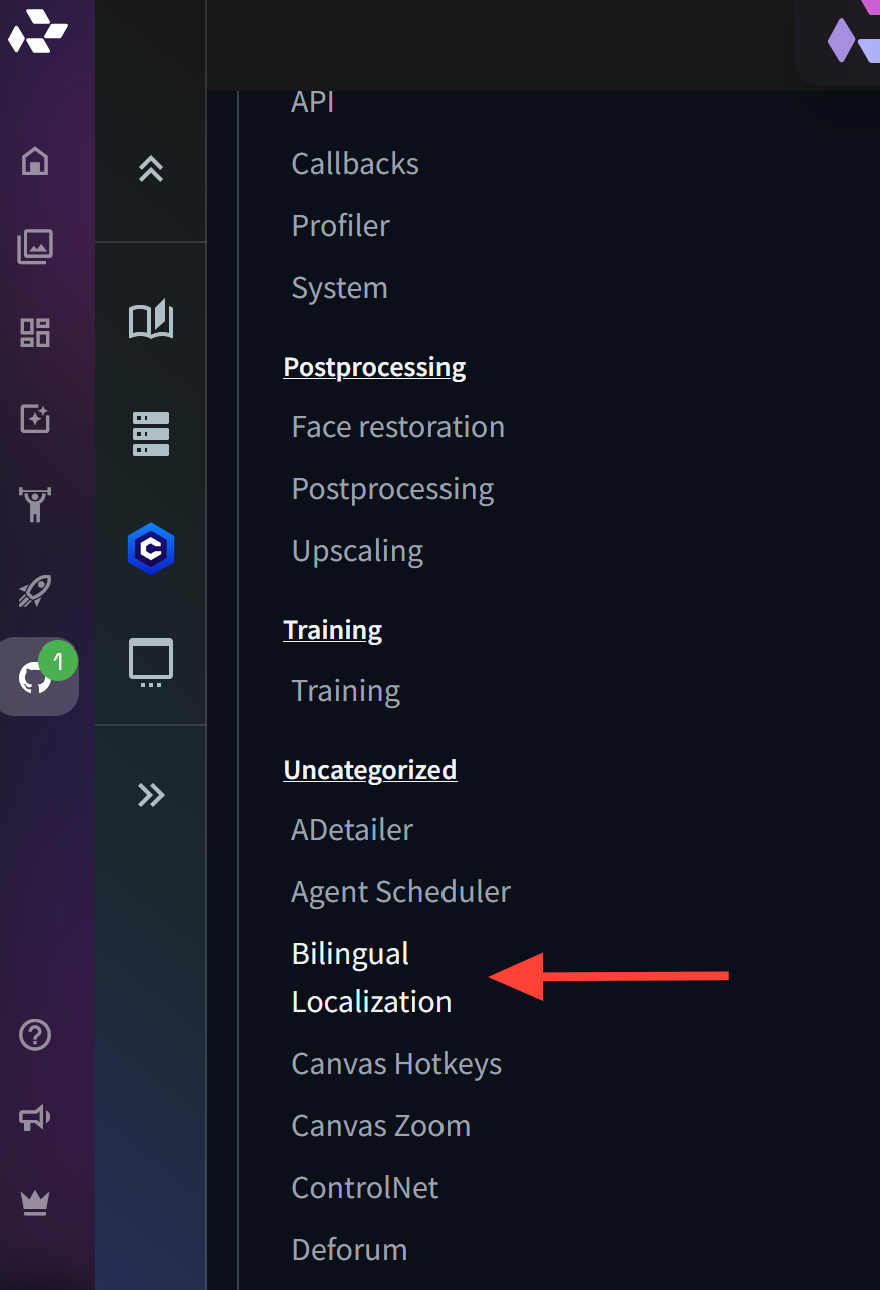
Bilingual Localization を1回クリックします。上にスクロールして、ローカライズのドロップダウンを表示します。ドロップダウンから ja_JP を選択します。
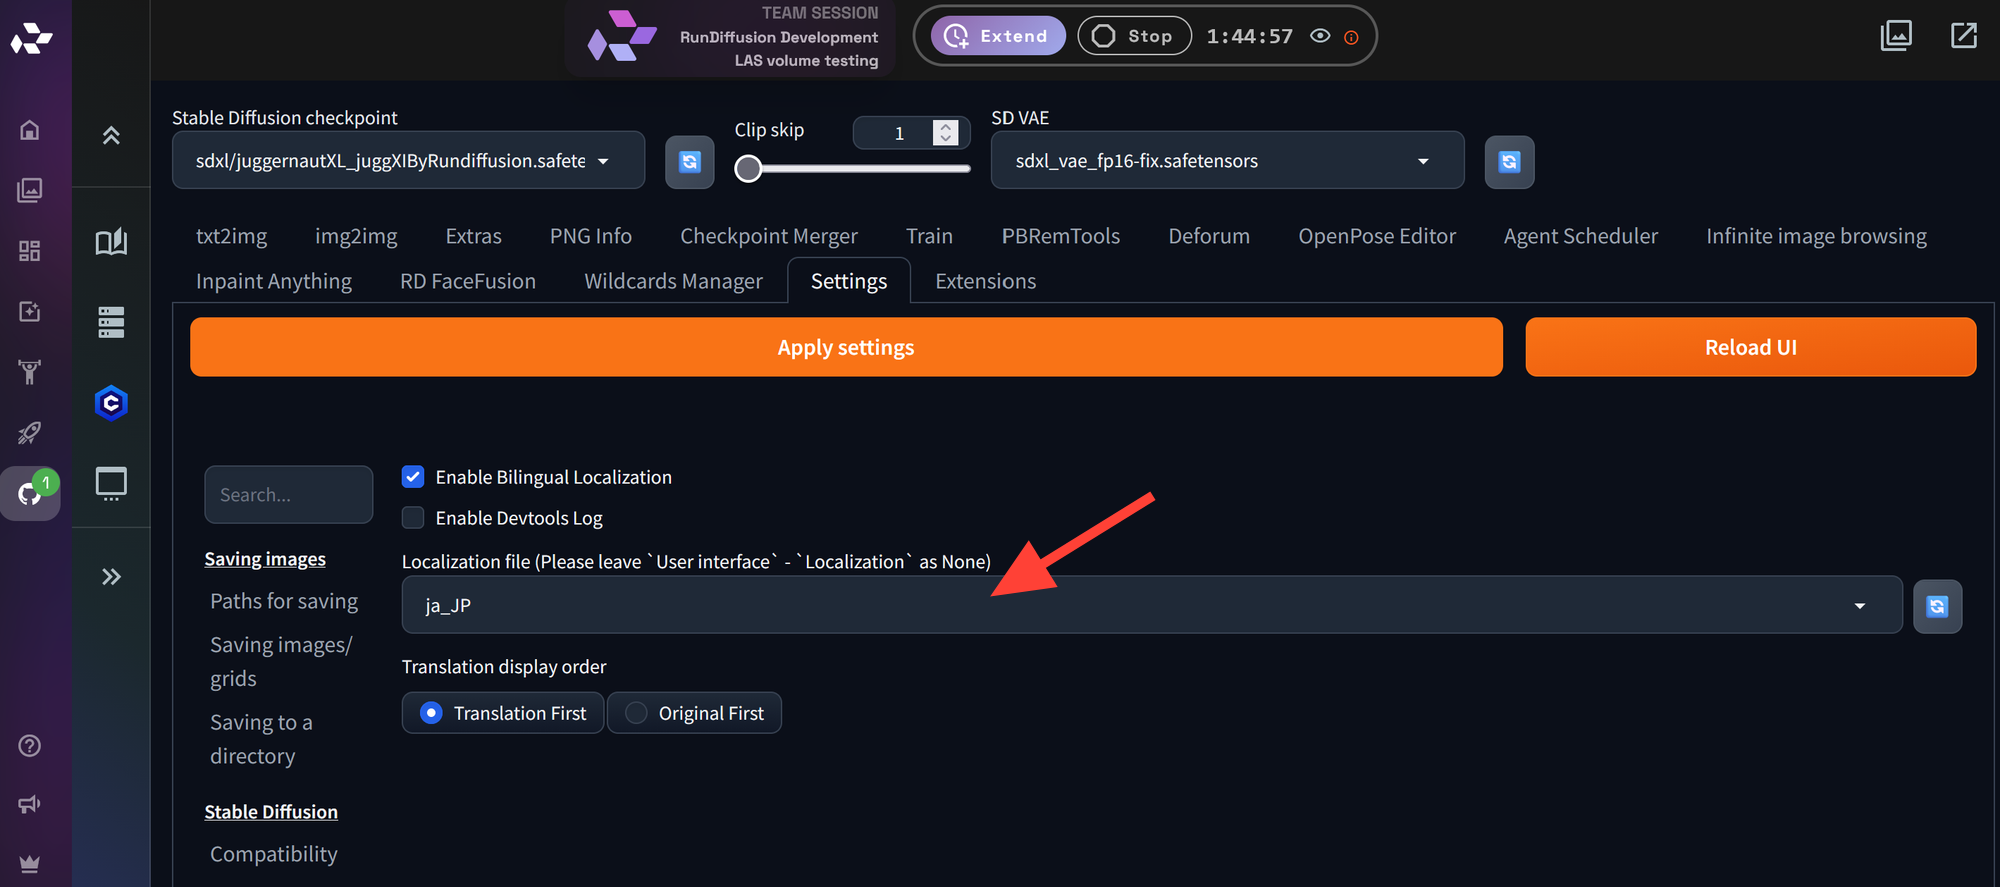
Apply settings をクリックします。Reload UI をクリックします。

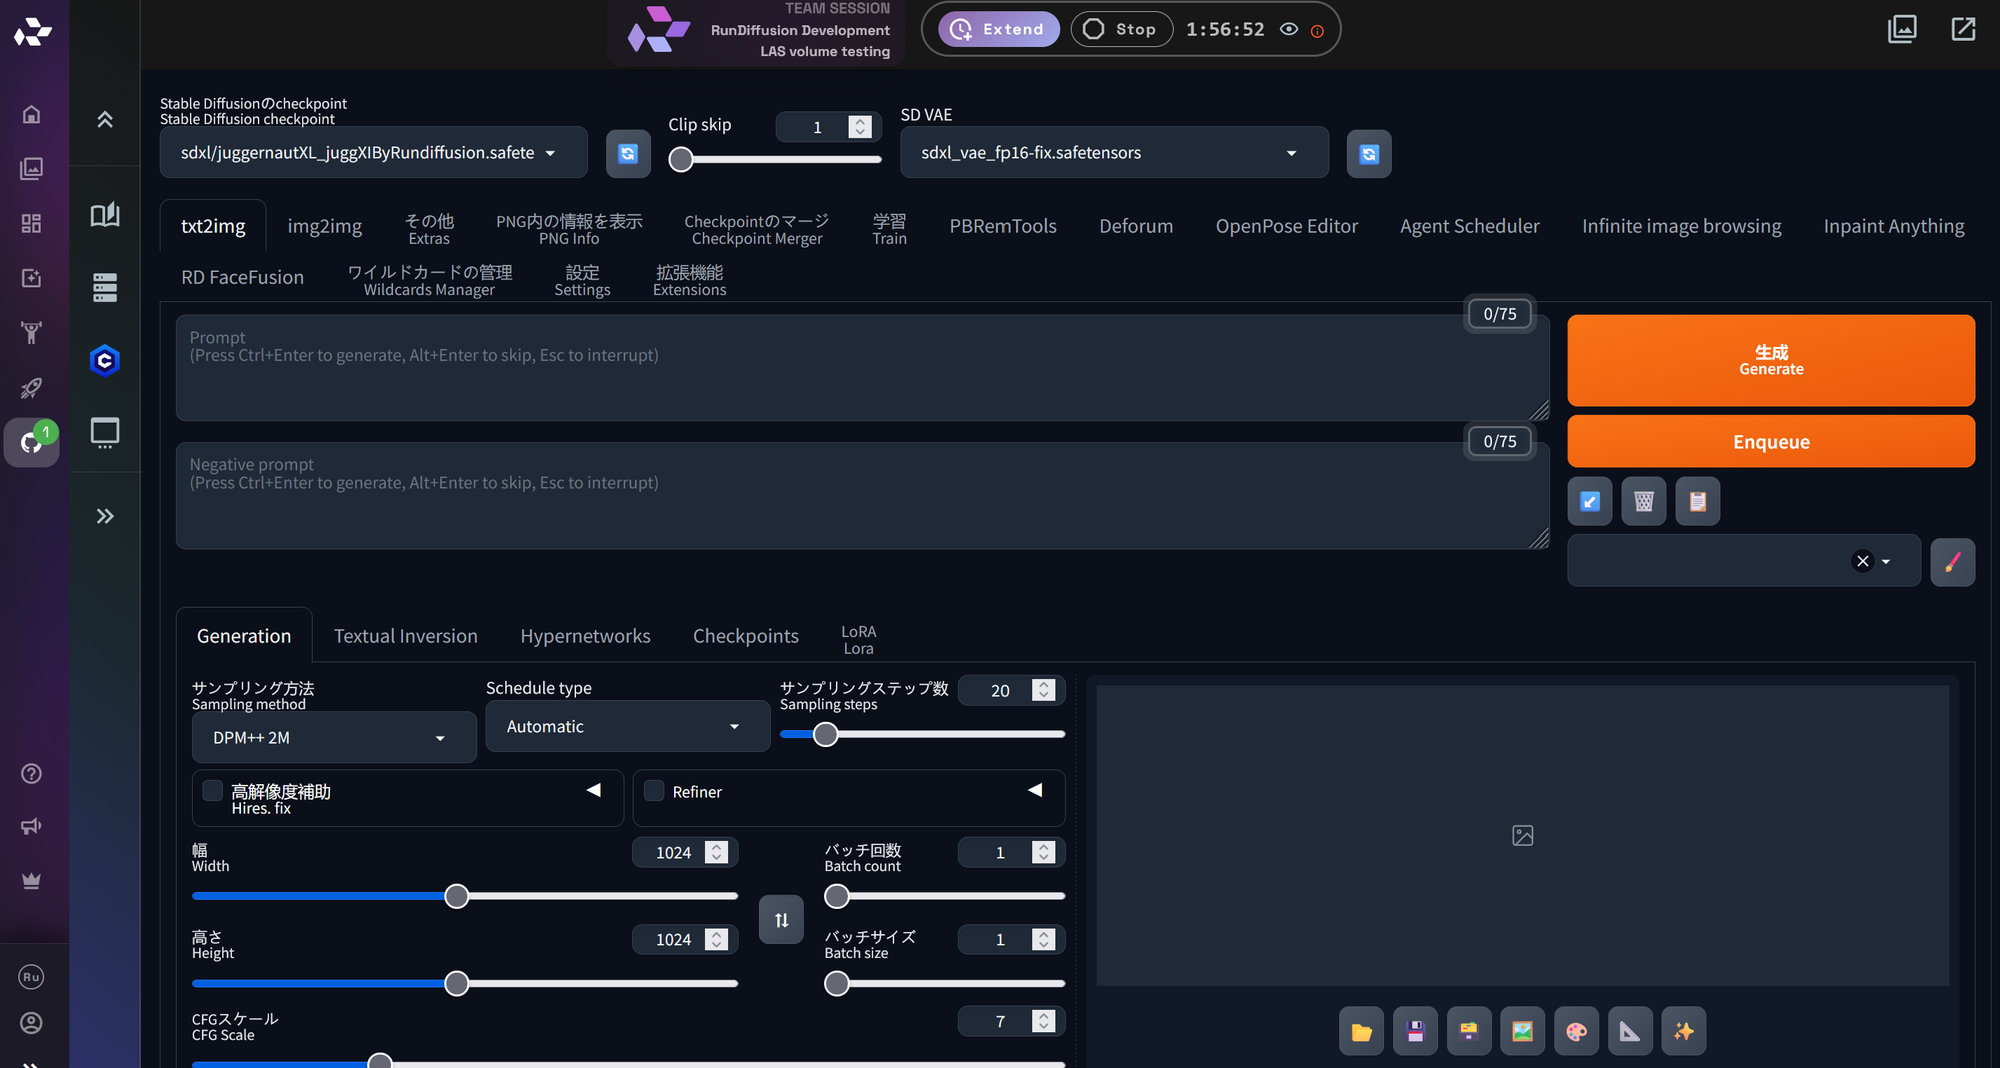
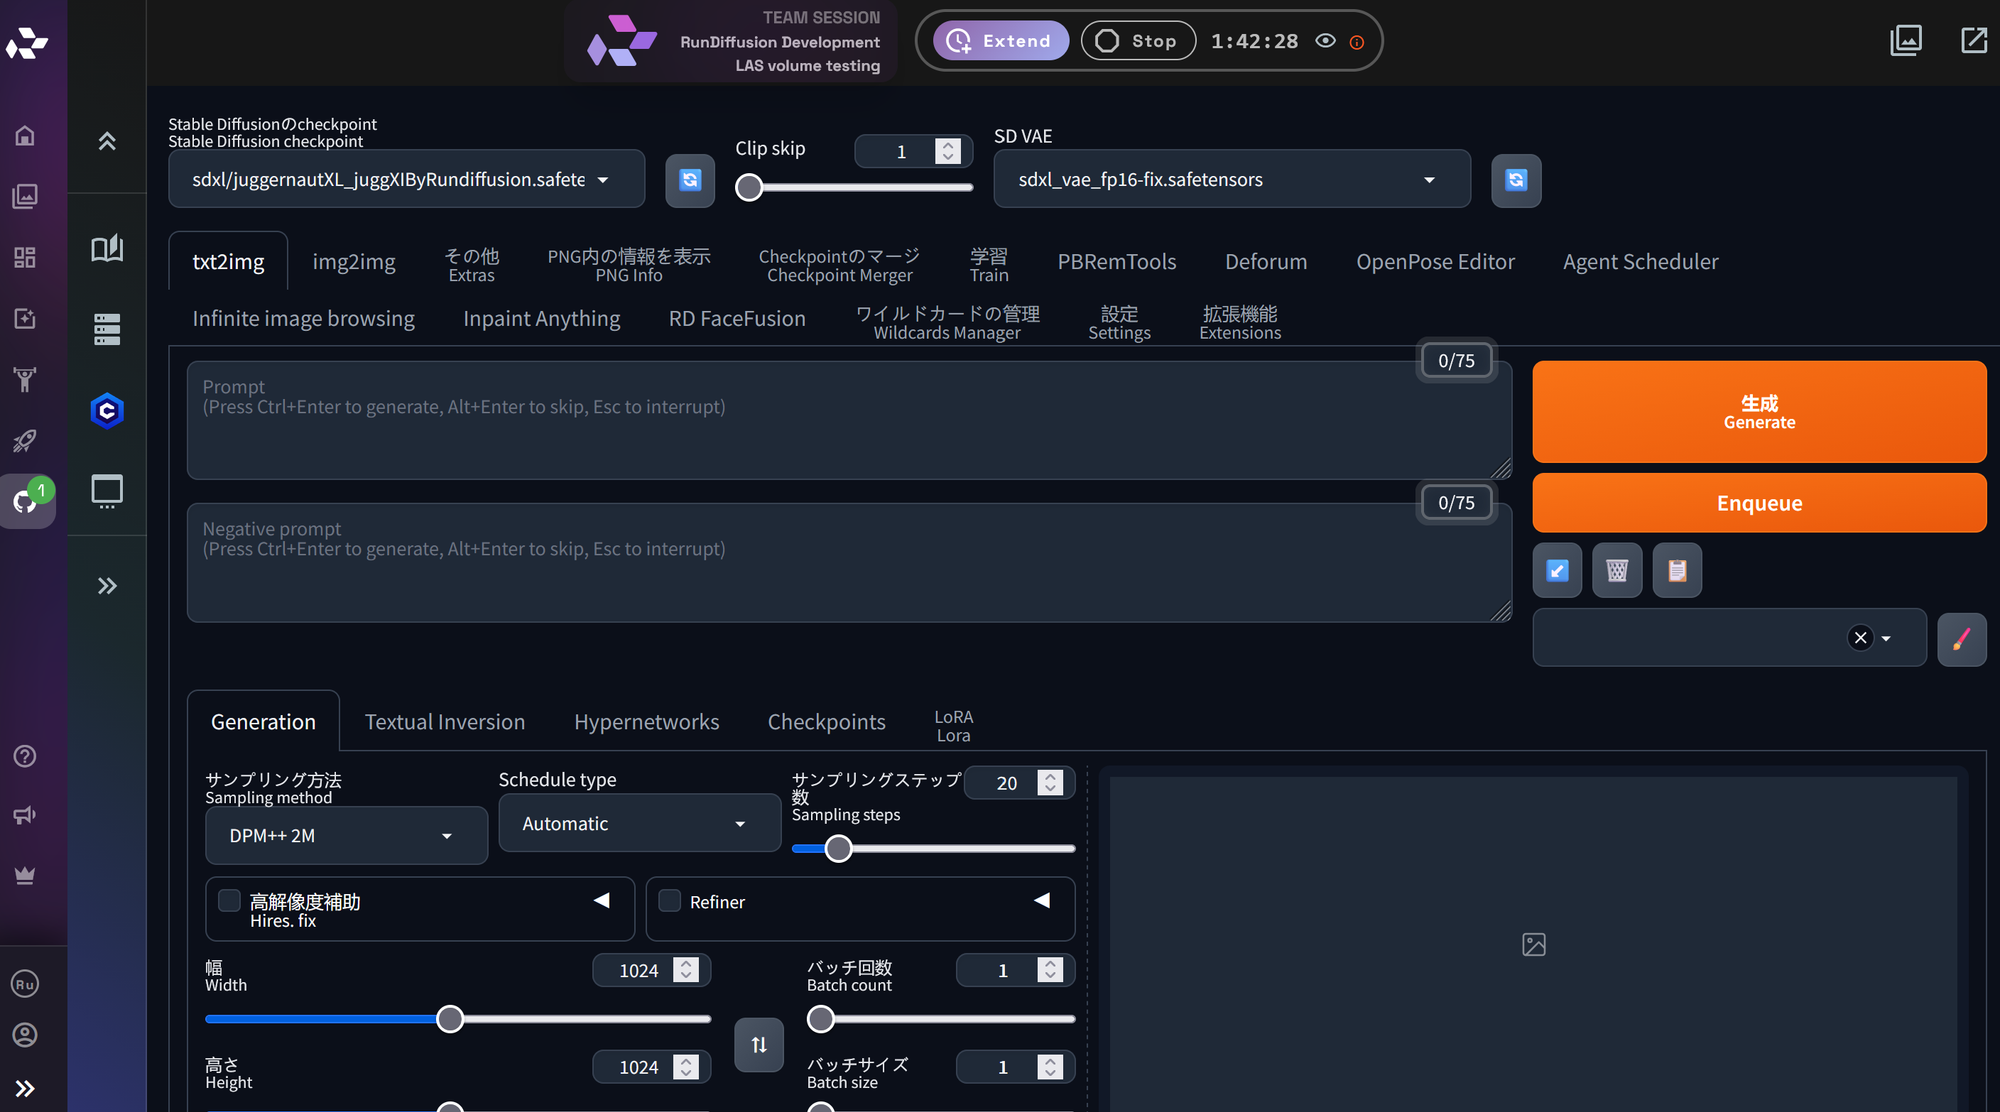
Automatic1111が再読み込みされ、インターフェースが日本語表示になります。
関連するRunDiffusionガイド
Automatic1111とRunDiffusionのセットアップに関する詳しい情報は、以下のガイドをご覧ください。
- Automatic1111 extensions
- Launching multiple opensource applications
- Understanding RunDiffusion pathing for opensource applications
完了
これでAutomatic1111のインターフェースが日本語表示になります。次回Automatic1111を開いたときも、日本語設定が適用された状態で使用できます。

