How to Use Krita With Stable Diffusion RunDiffusion (Updated 2025 Guide)
Krita is one of the most popular open-source digital art programs, offering a powerful and flexible drawing environment. With the AI Diffusion plugin, you can connect Krita directly to a cloud-hosted Stable Diffusion server using RunDiffusion’s ComfyUI API—no local GPU or complex setup required.
This guide walks you step-by-step through installing the plugin, launching a ComfyUI API session on RunDiffusion, and connecting the two inside Krita.
If you're new to ComfyUI or need additional help, the following internal resources may be useful
Install the Latest Version of Krita
Make sure you are running the most recent version of Krita 5.2.13 or newer.
Download from the official site:

Updating ensures full compatibility with the AI Image Generation plugin.
Download the Krita AI Diffusion Plugin
Download the latest plugin release from the official GitHub:
Save the .zip file—you’ll import it into Krita next.
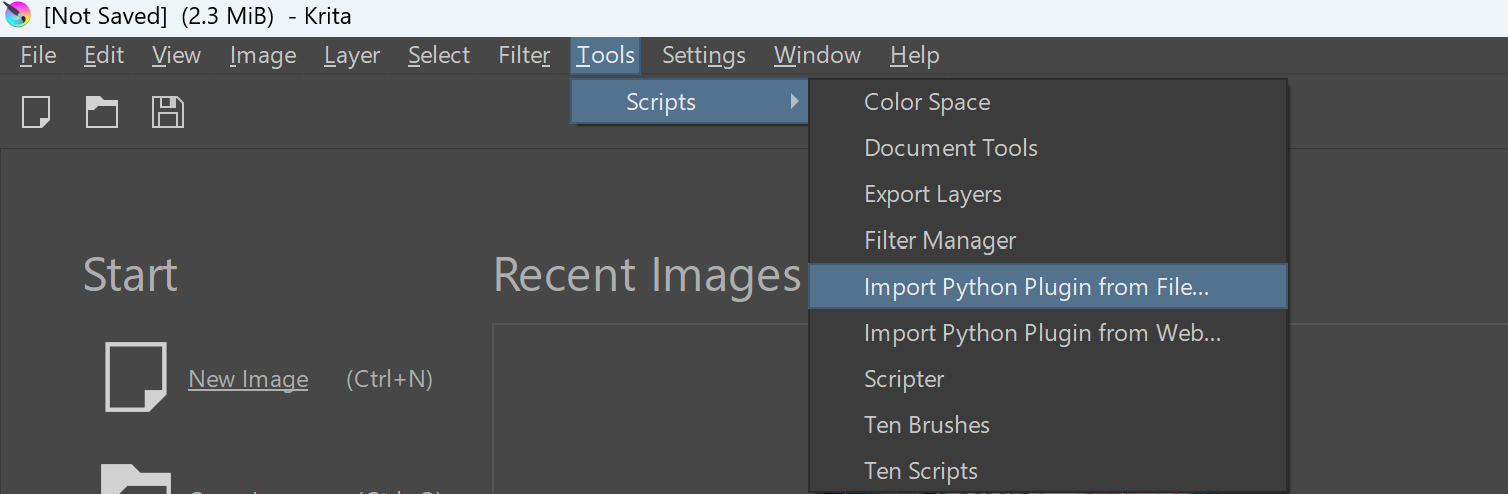
Install the Plugin in Krita
Open Krita
Go to Tools → Scripts → Import Python Plugin From File
Select the downloaded plugin zip file
Open ComfyUI in RunDiffusion
Log in to RunDiffusion: https://app.rundiffusion.com/login
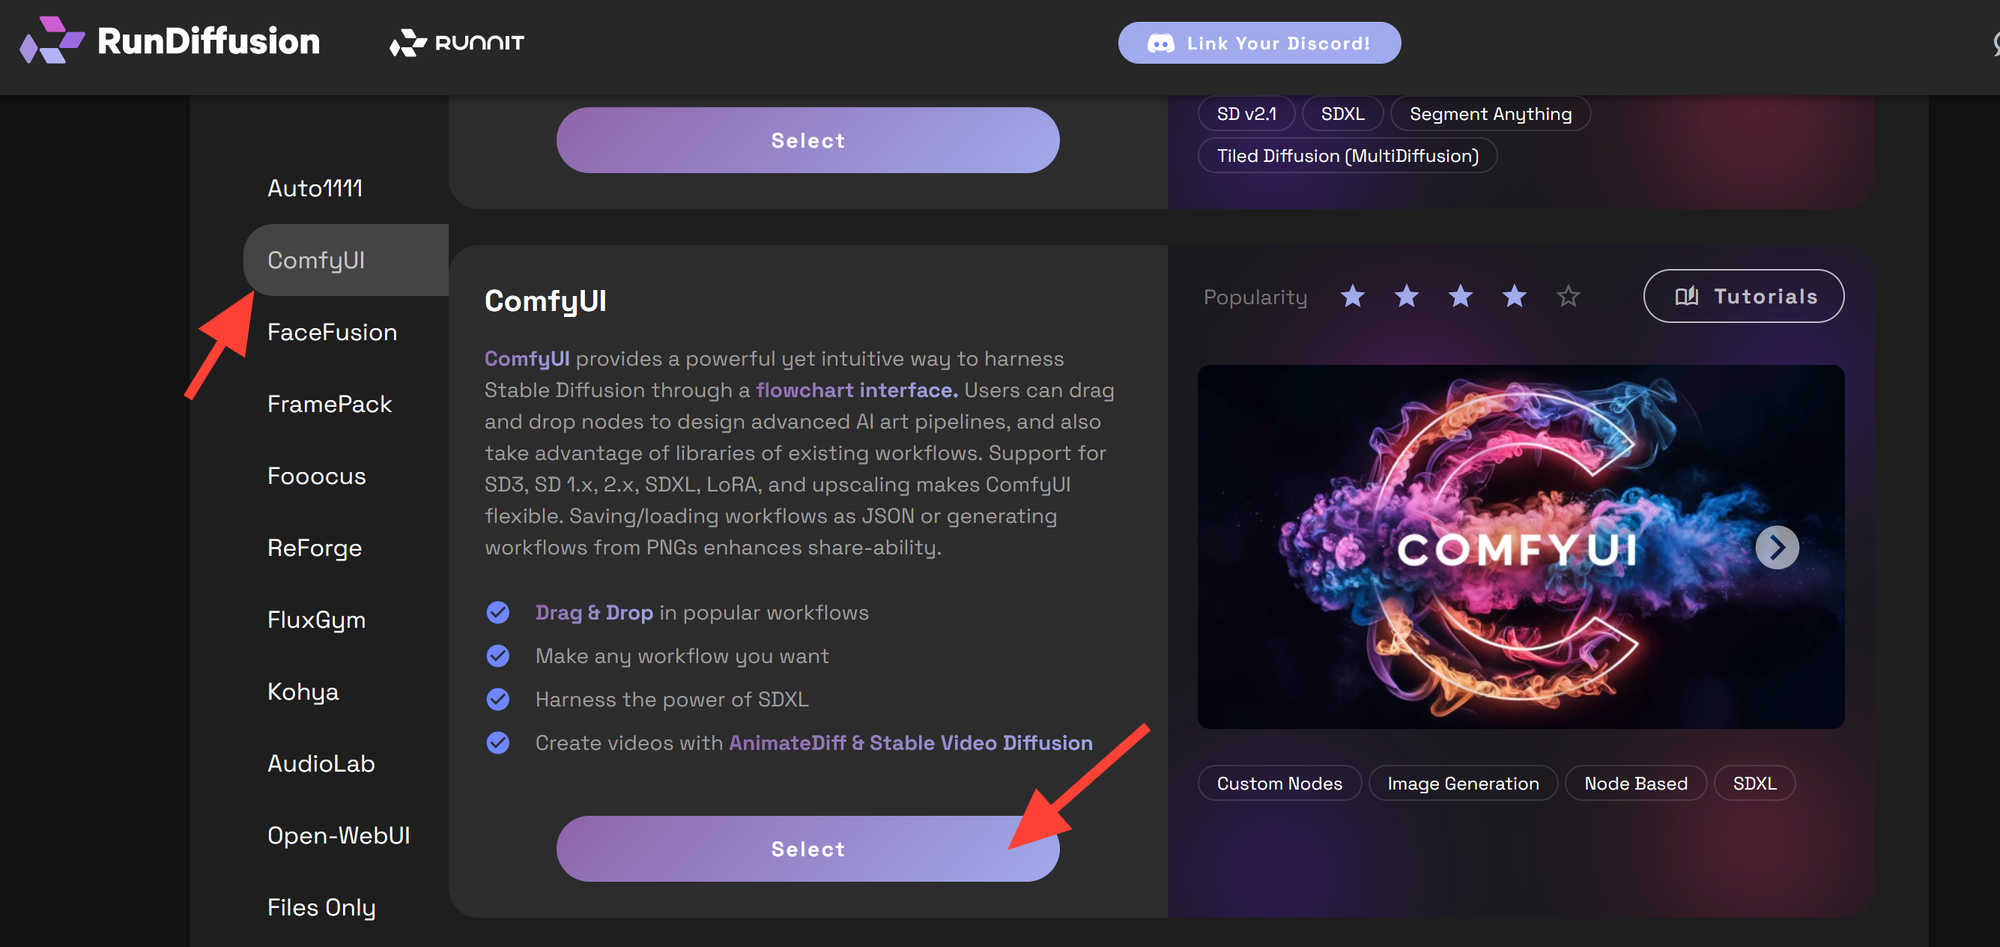
In the left sidebar, click Open Source Apps
Select ComfyUI and click Select
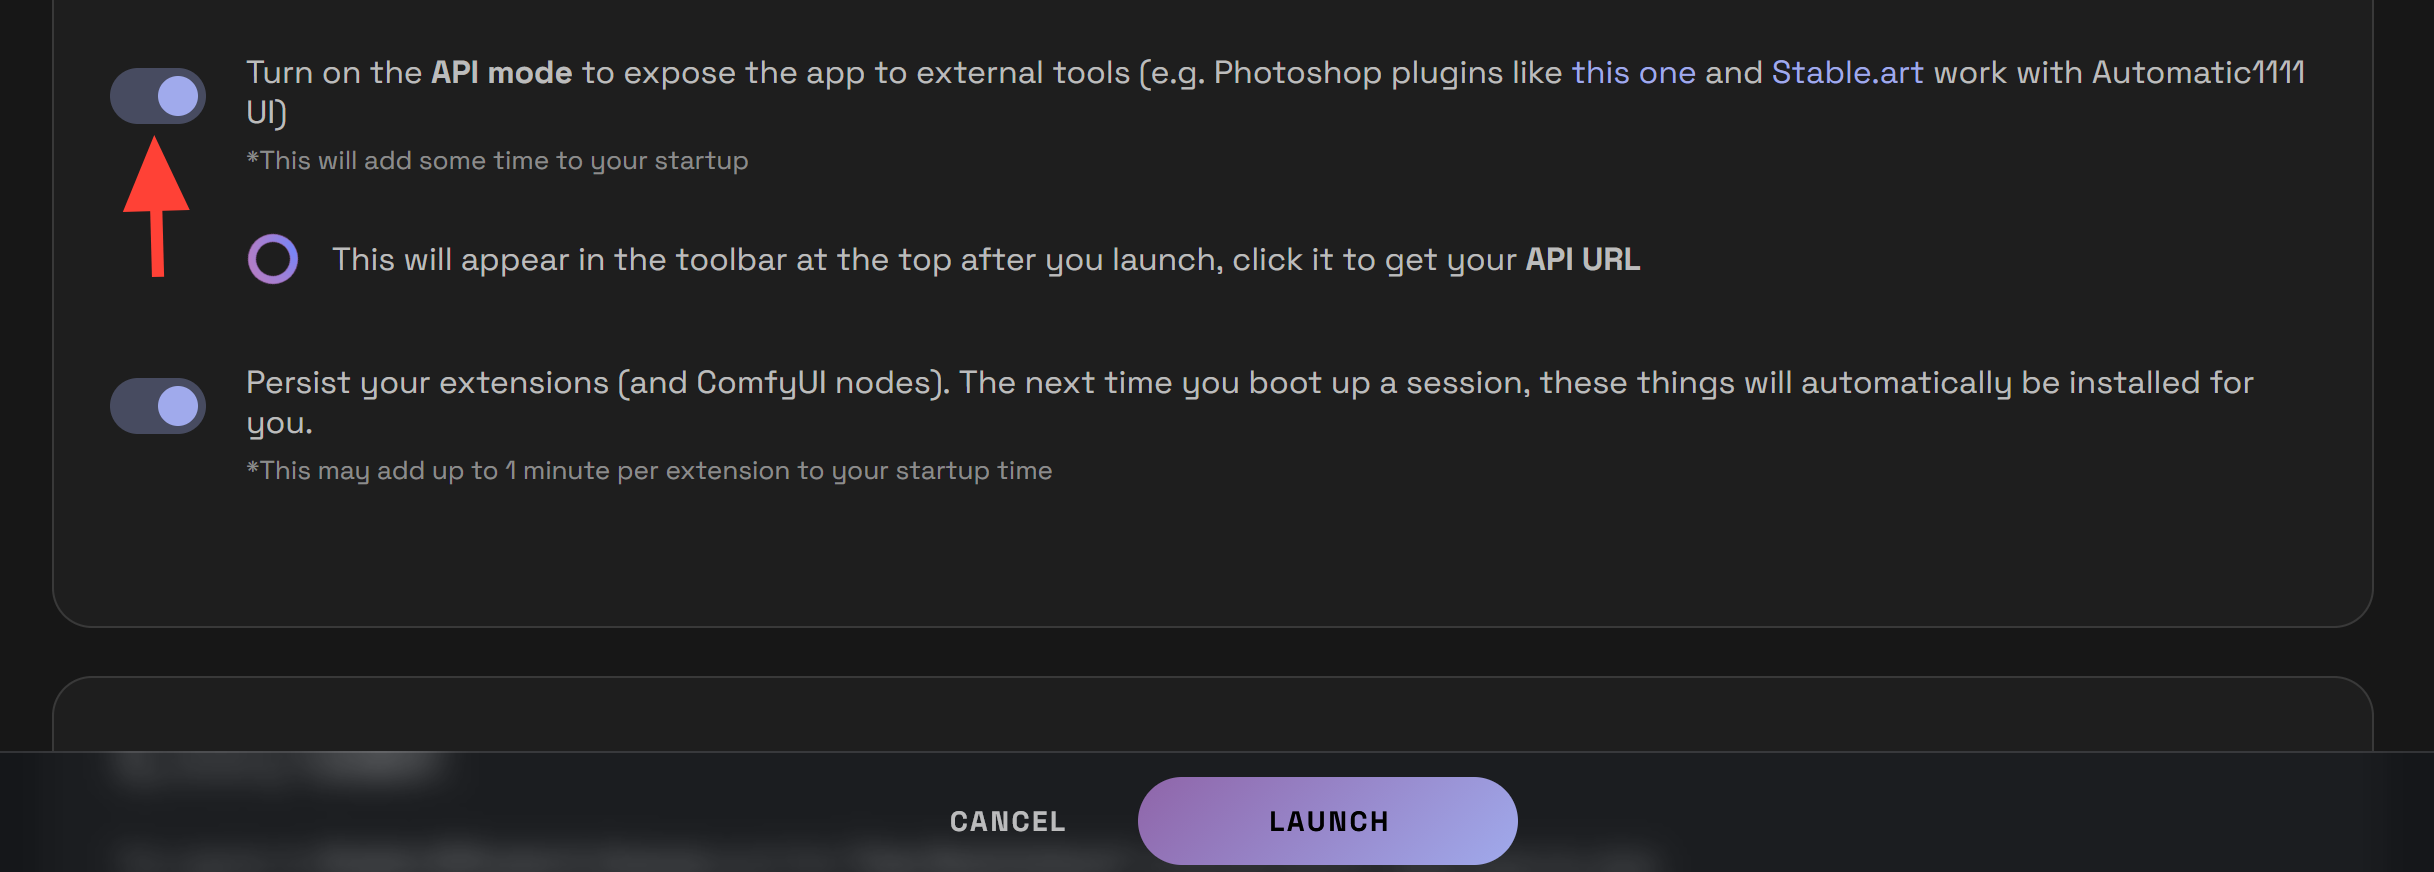
Configure and Launch ComfyUI in API Mode
On the ComfyUI Setup Session. Choose your preferred server size.
Scroll down and toggle API Mode ON
Click Launch

Copy the ComfyUI API URL
Look in the top right corner|
Click the API icon
Click Copy to copy your unique API URL

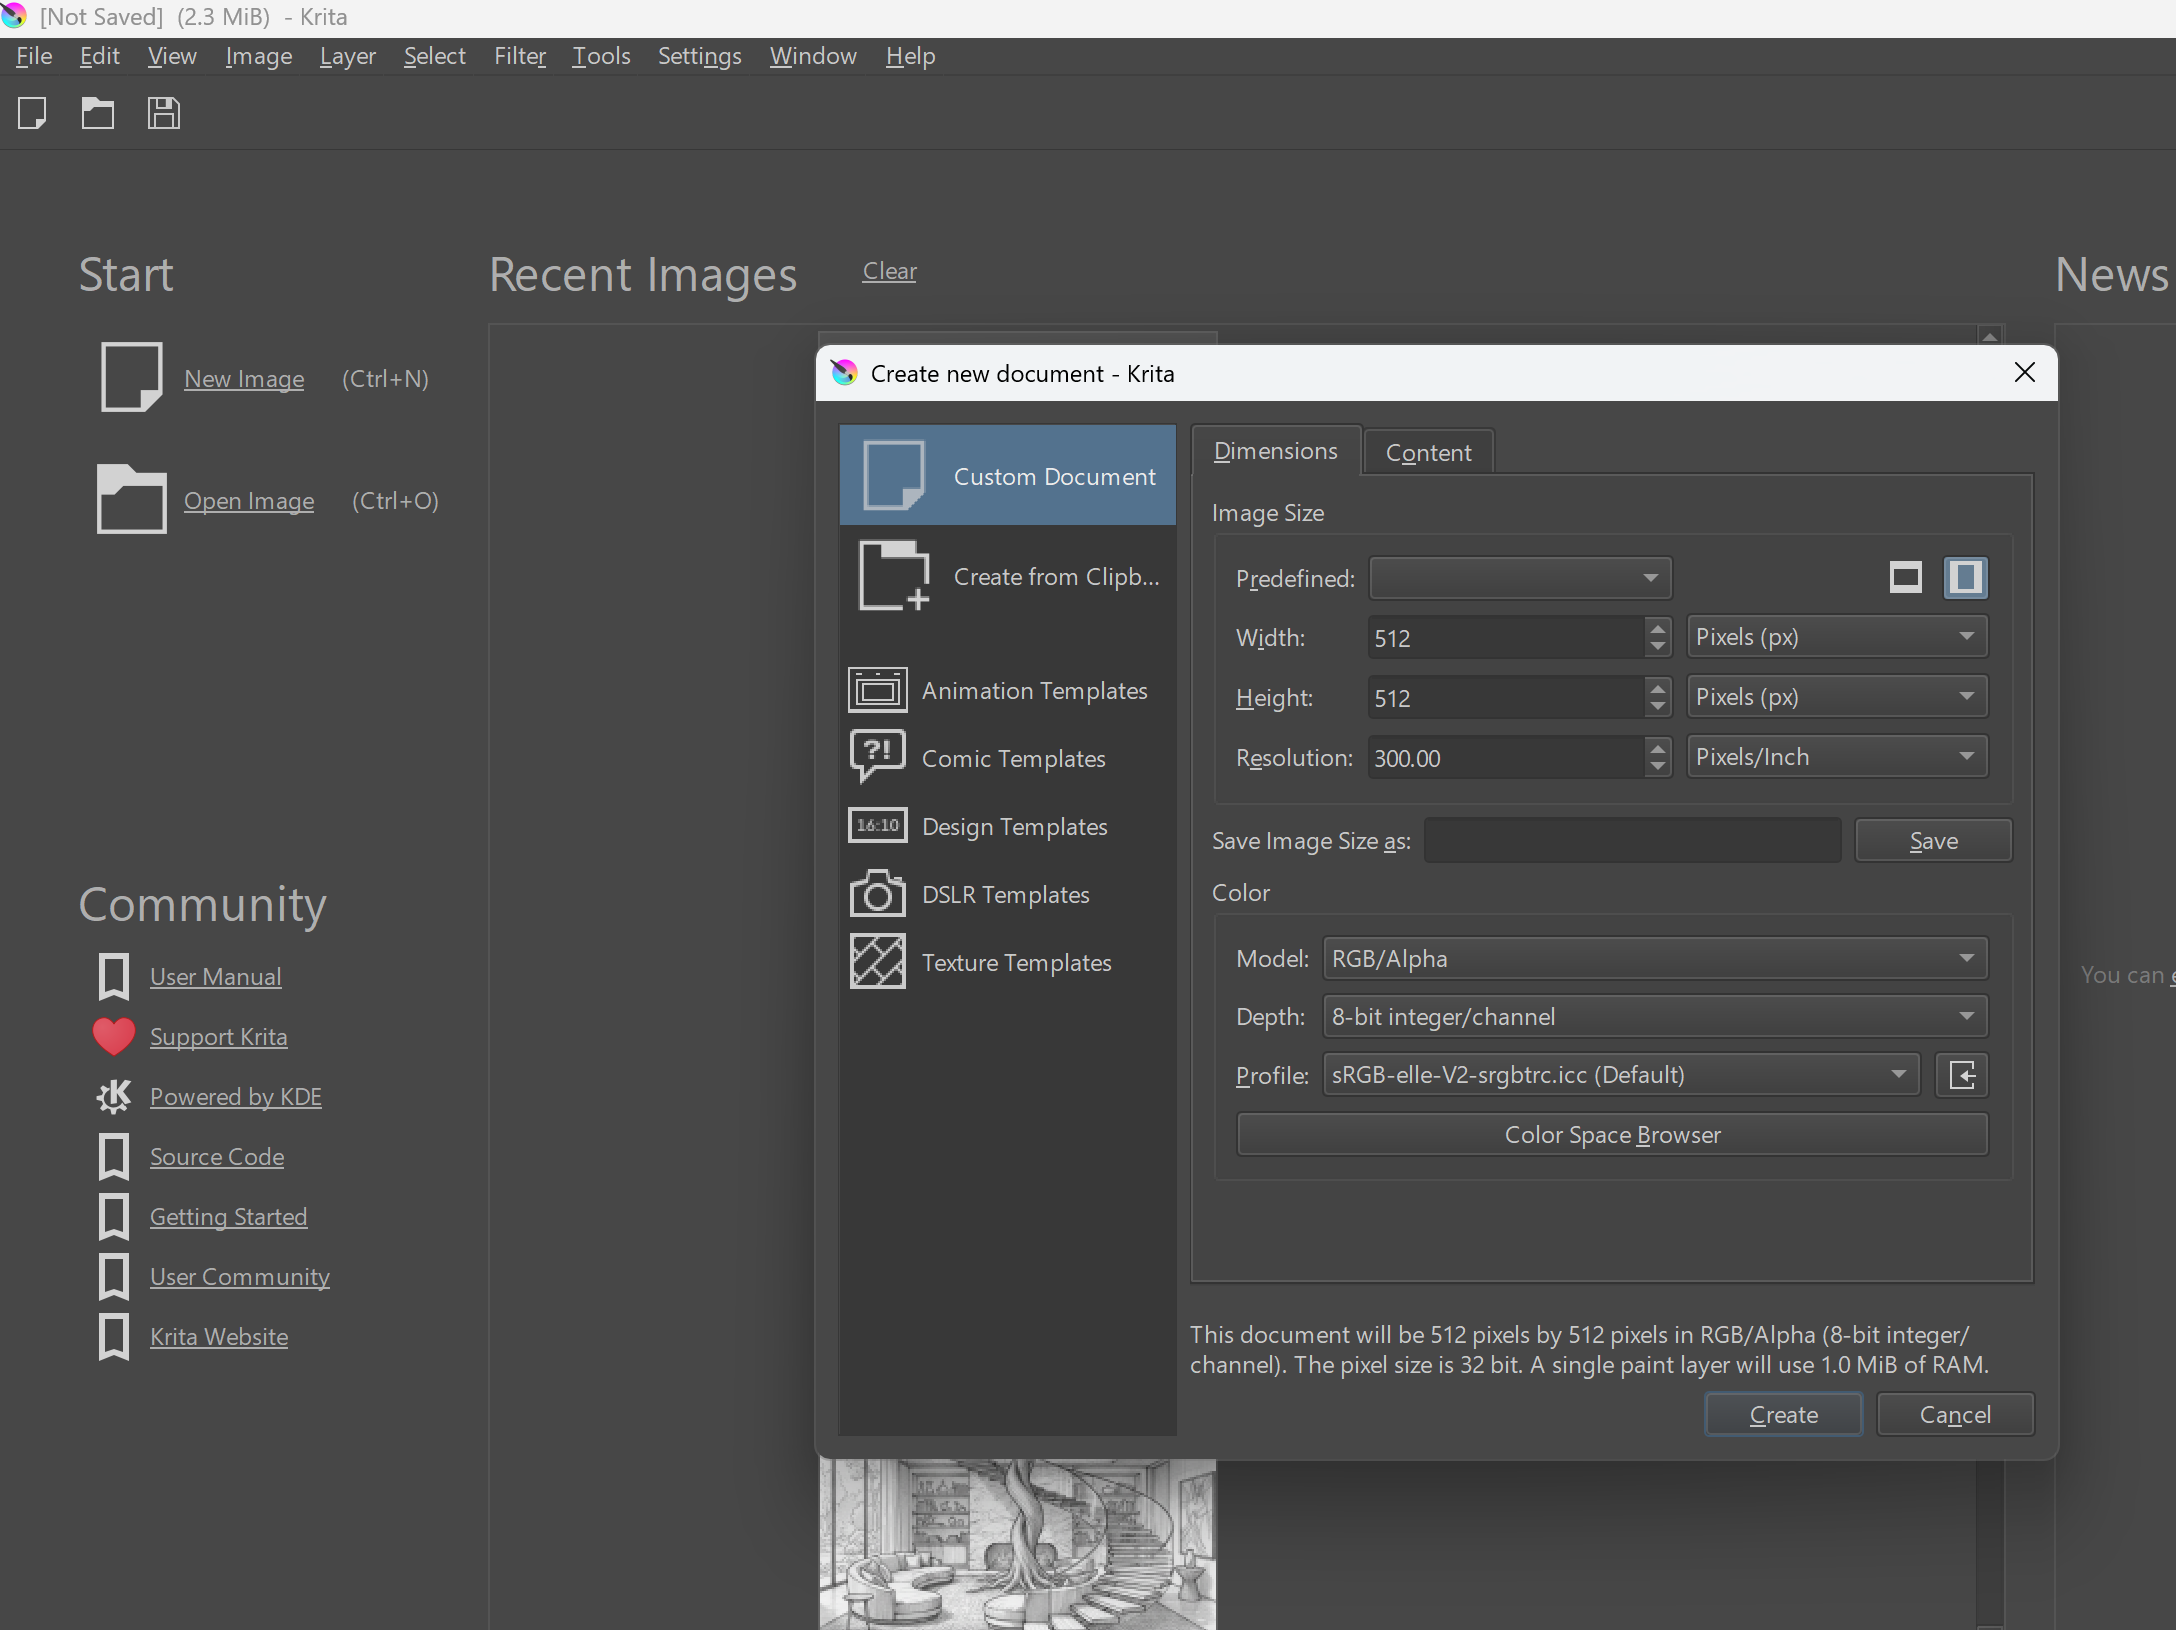
Open an Image in Krita
Return to Krita and Open an Image File with 512x512.
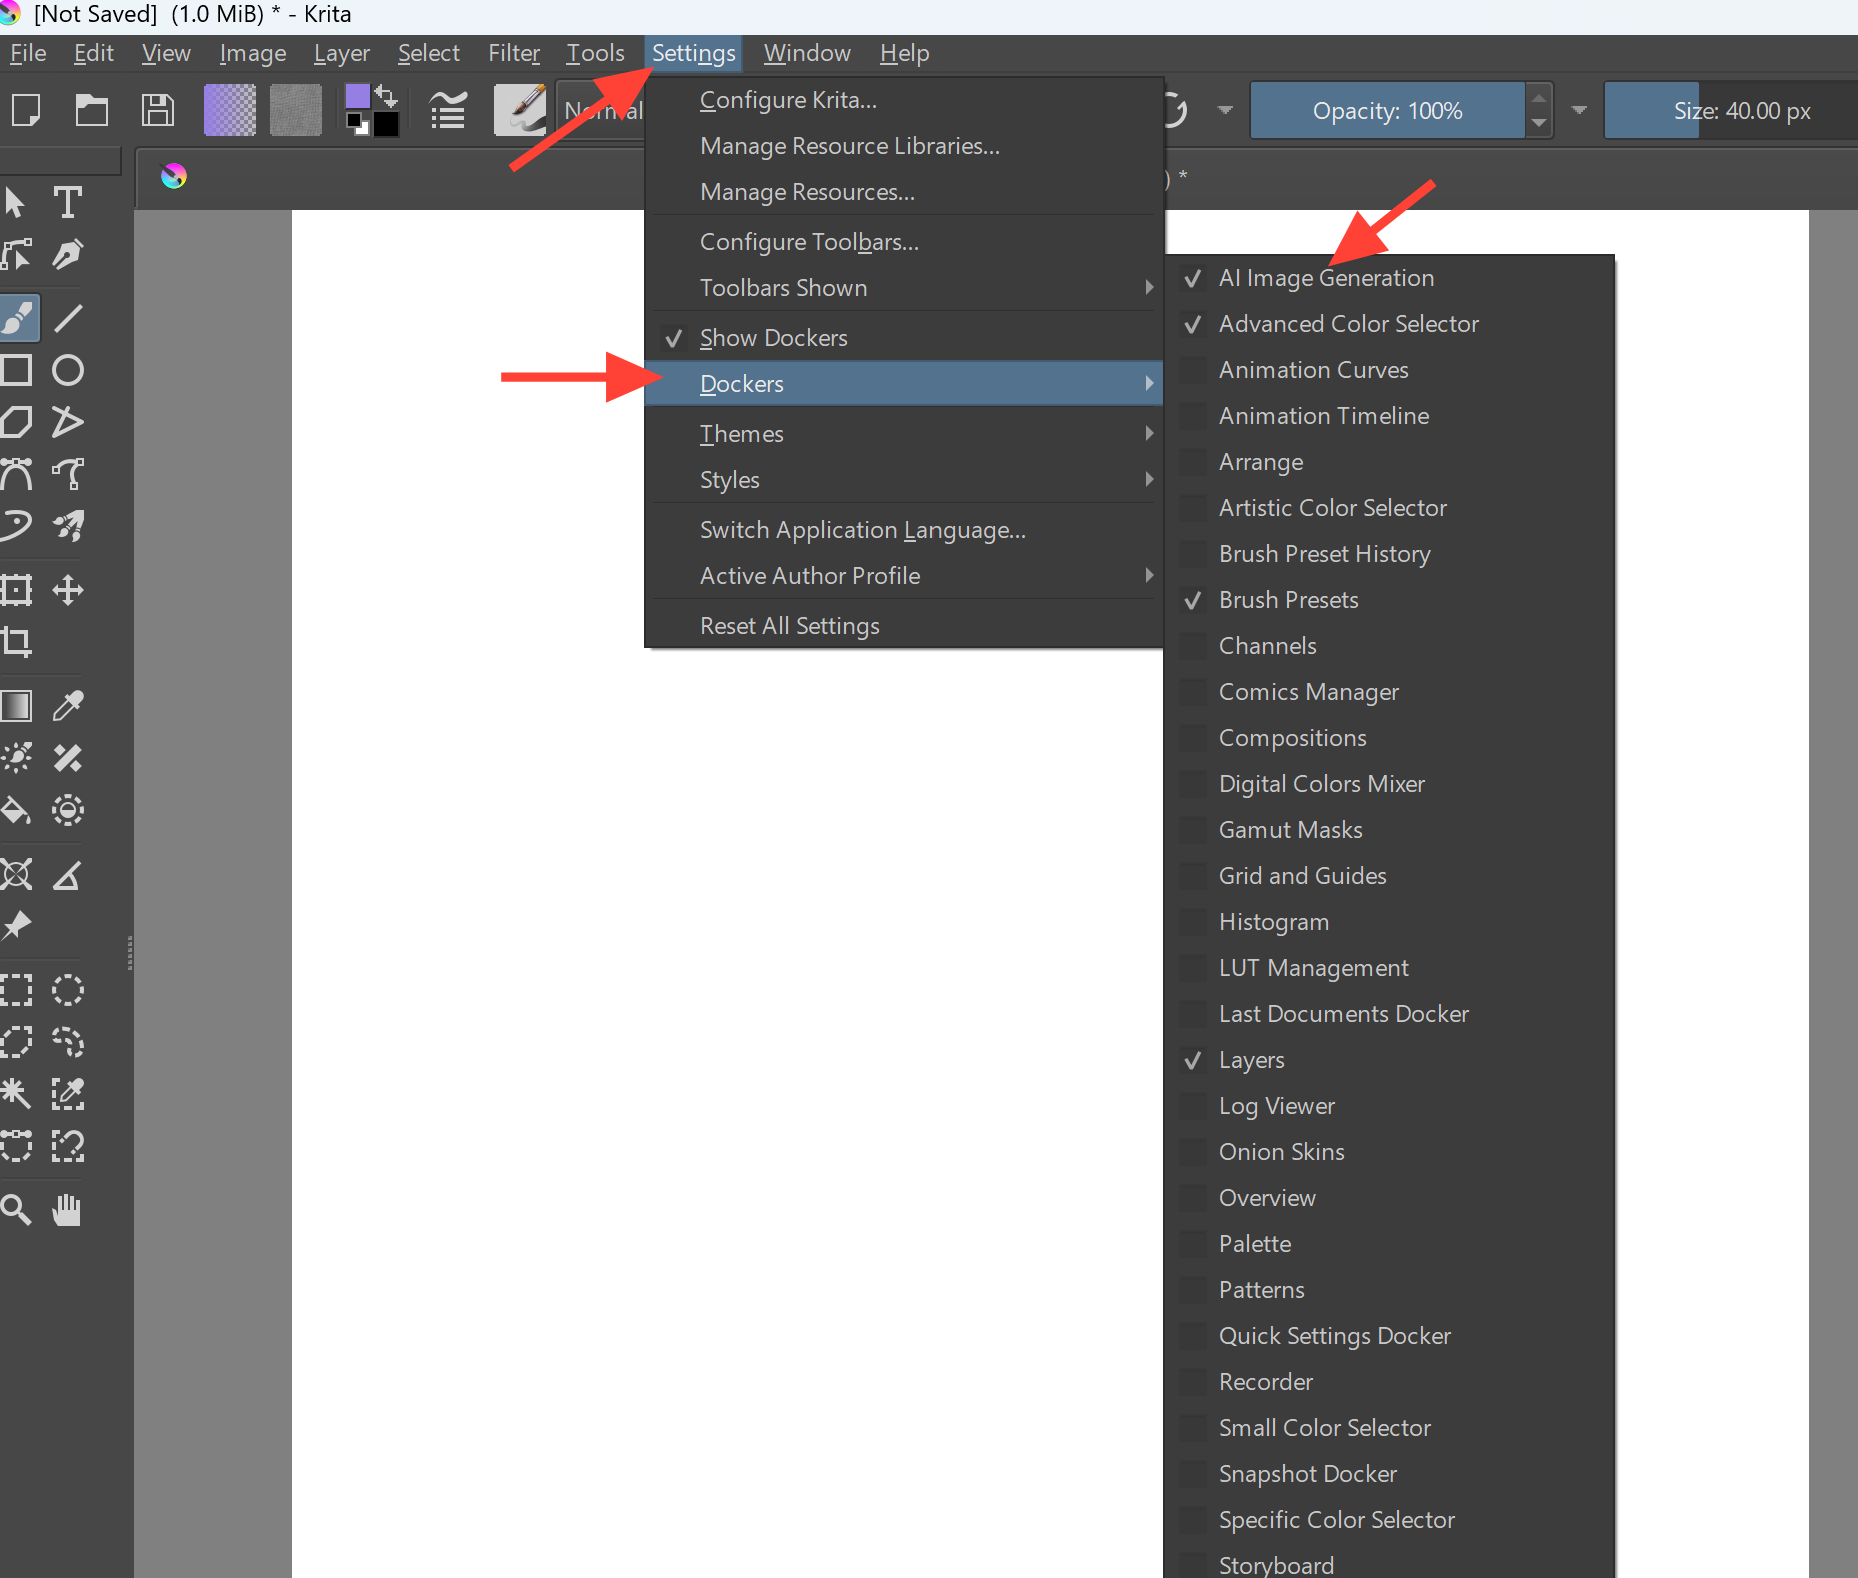
Enable the AI Image Generation Docker
Click on Settings then Dockers then AI Image Generation.
Connect Krita to RunDiffusion’s API
In the AI Image Generation docker, click the gear icon (Configure)
Go to the Connection tab
Select Custom Server
Paste the API URL you copied from ComfyUI
Click Connect

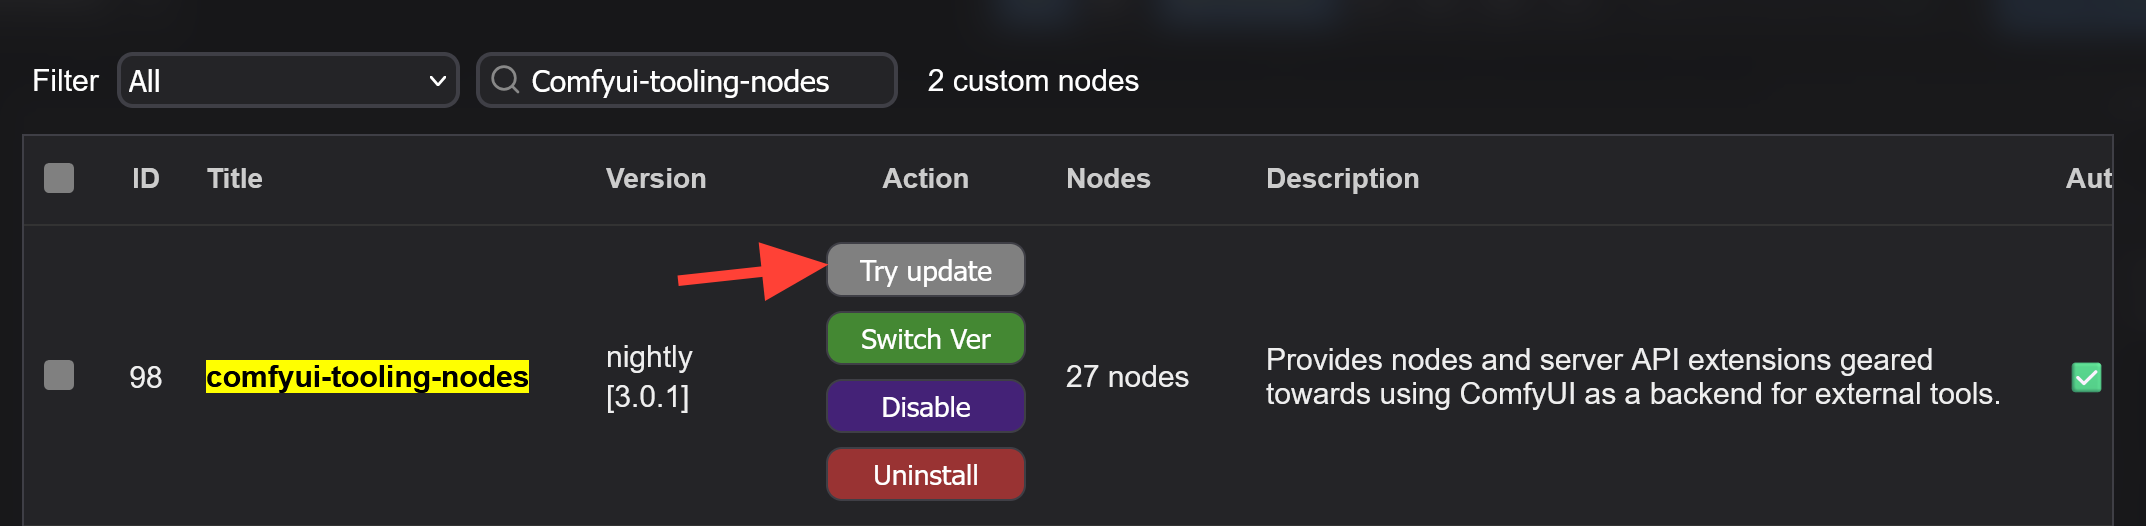
Troubleshooting Missing Nodes.
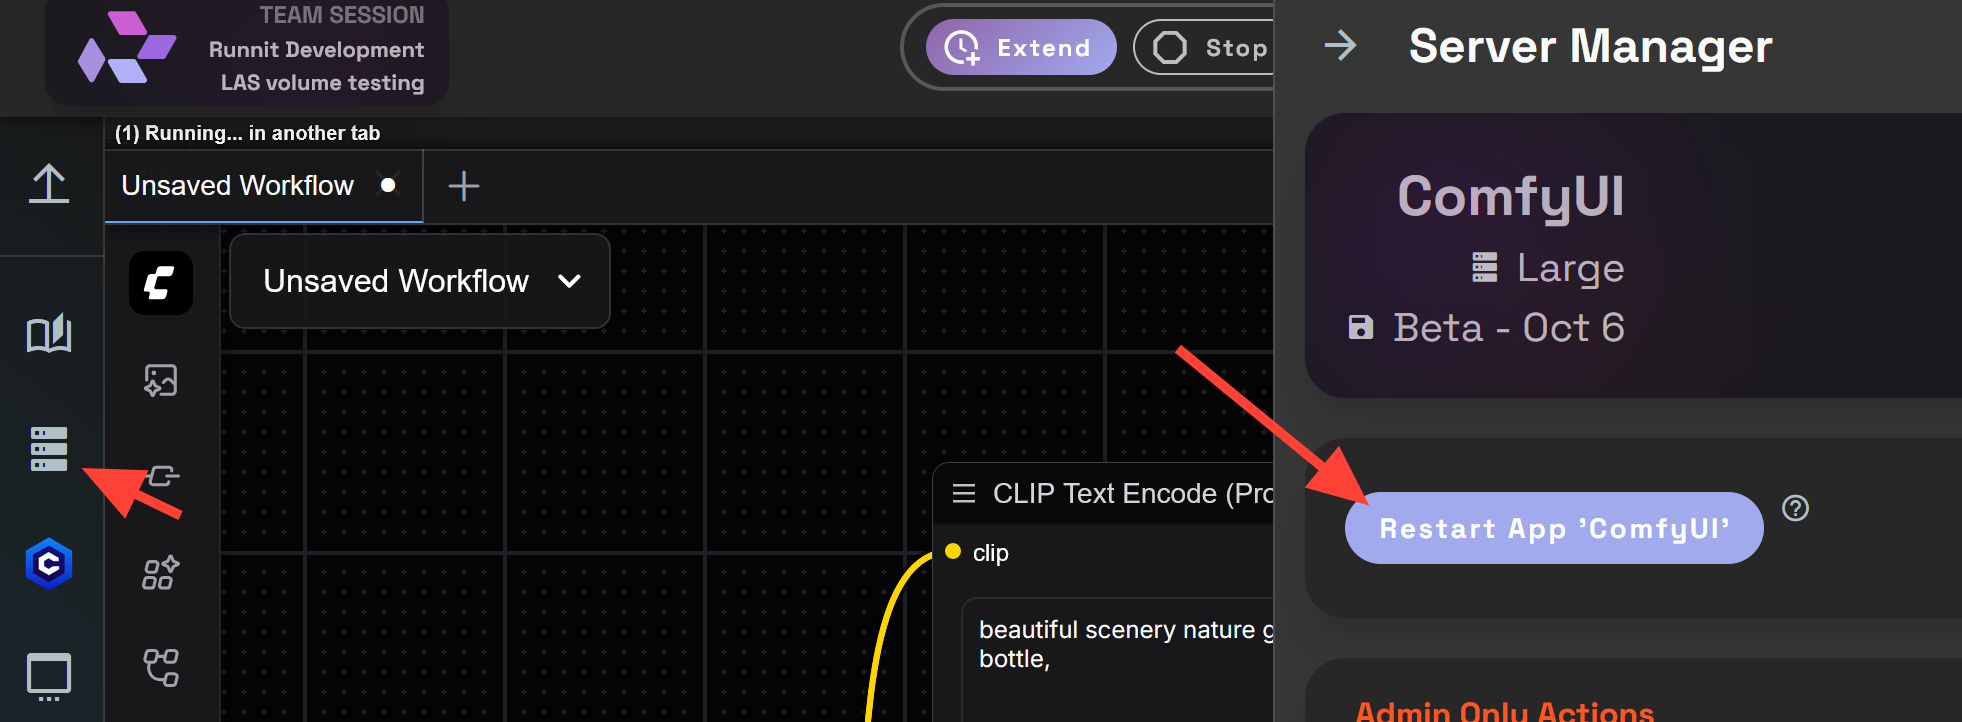
If you get an error that Comfyui-tooling-nodes are missing. Go to the Custom node manager and click Try Update. Then restart with the server manager.
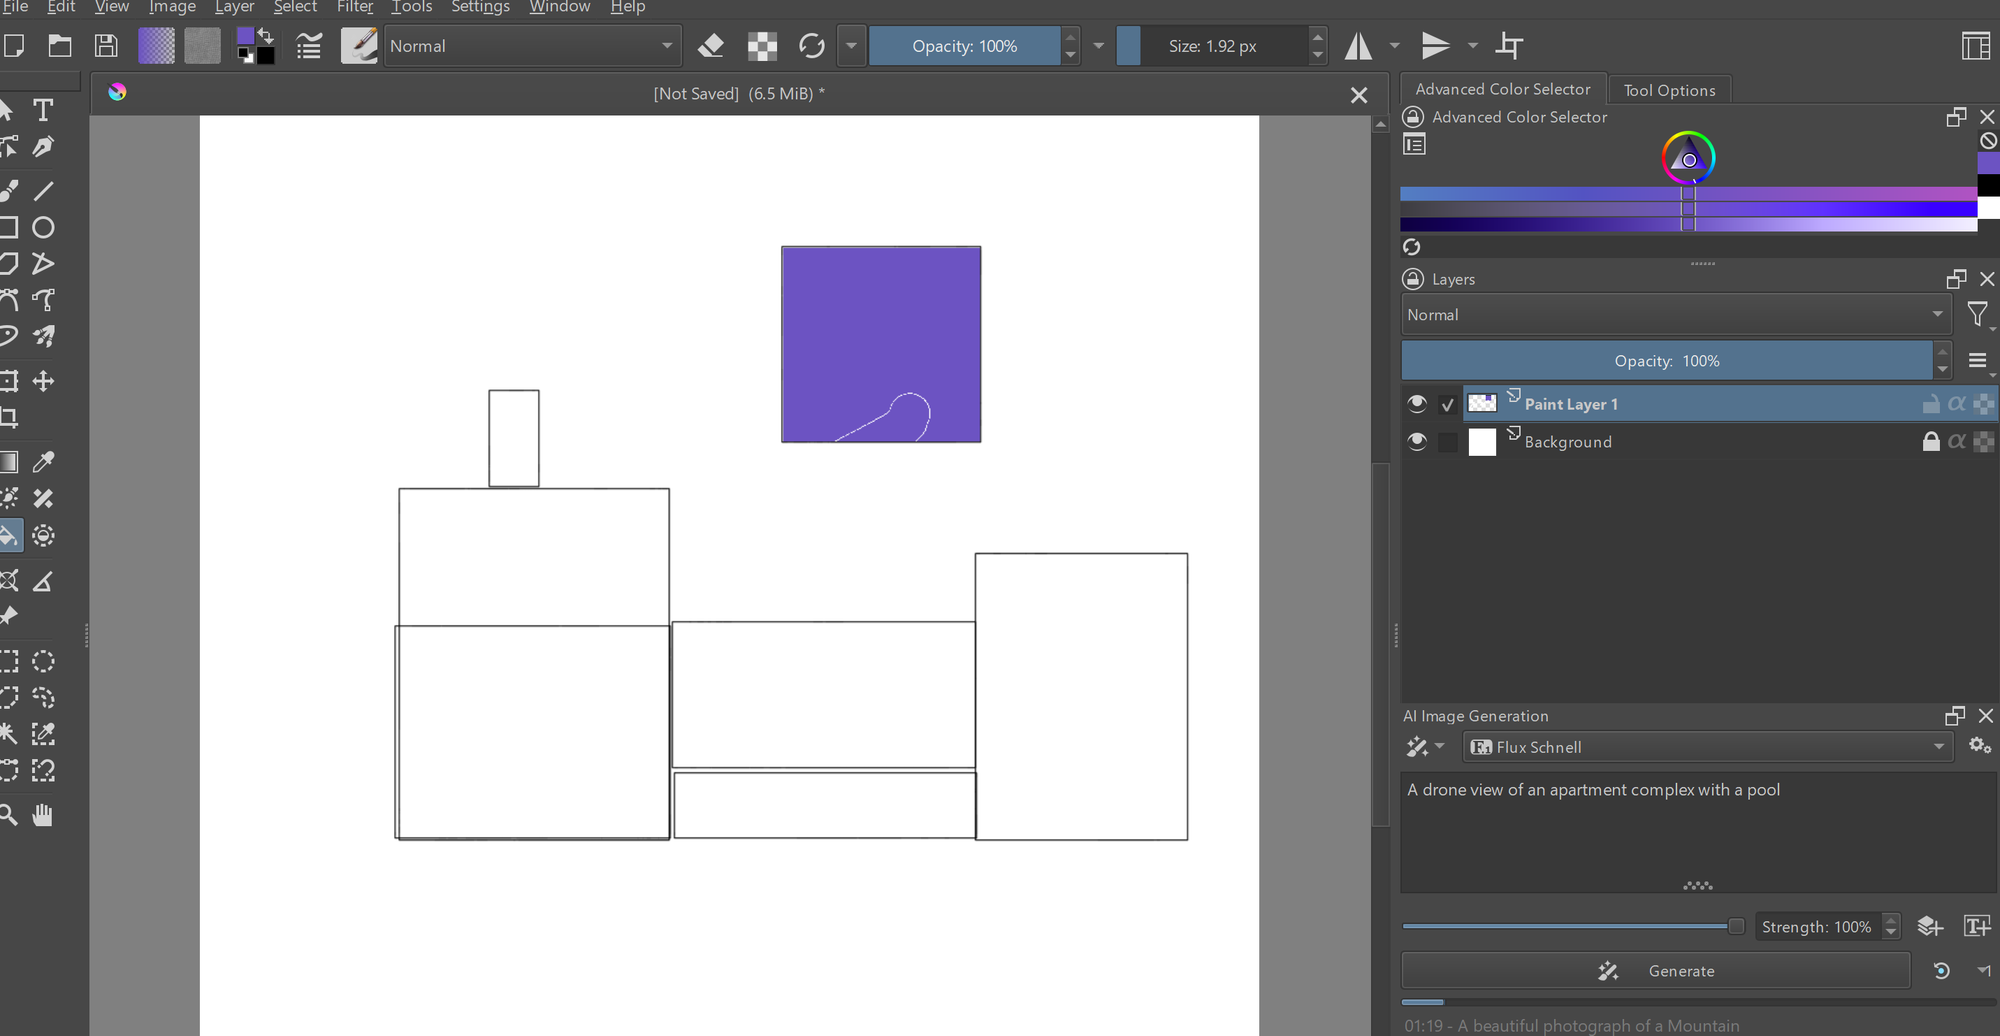
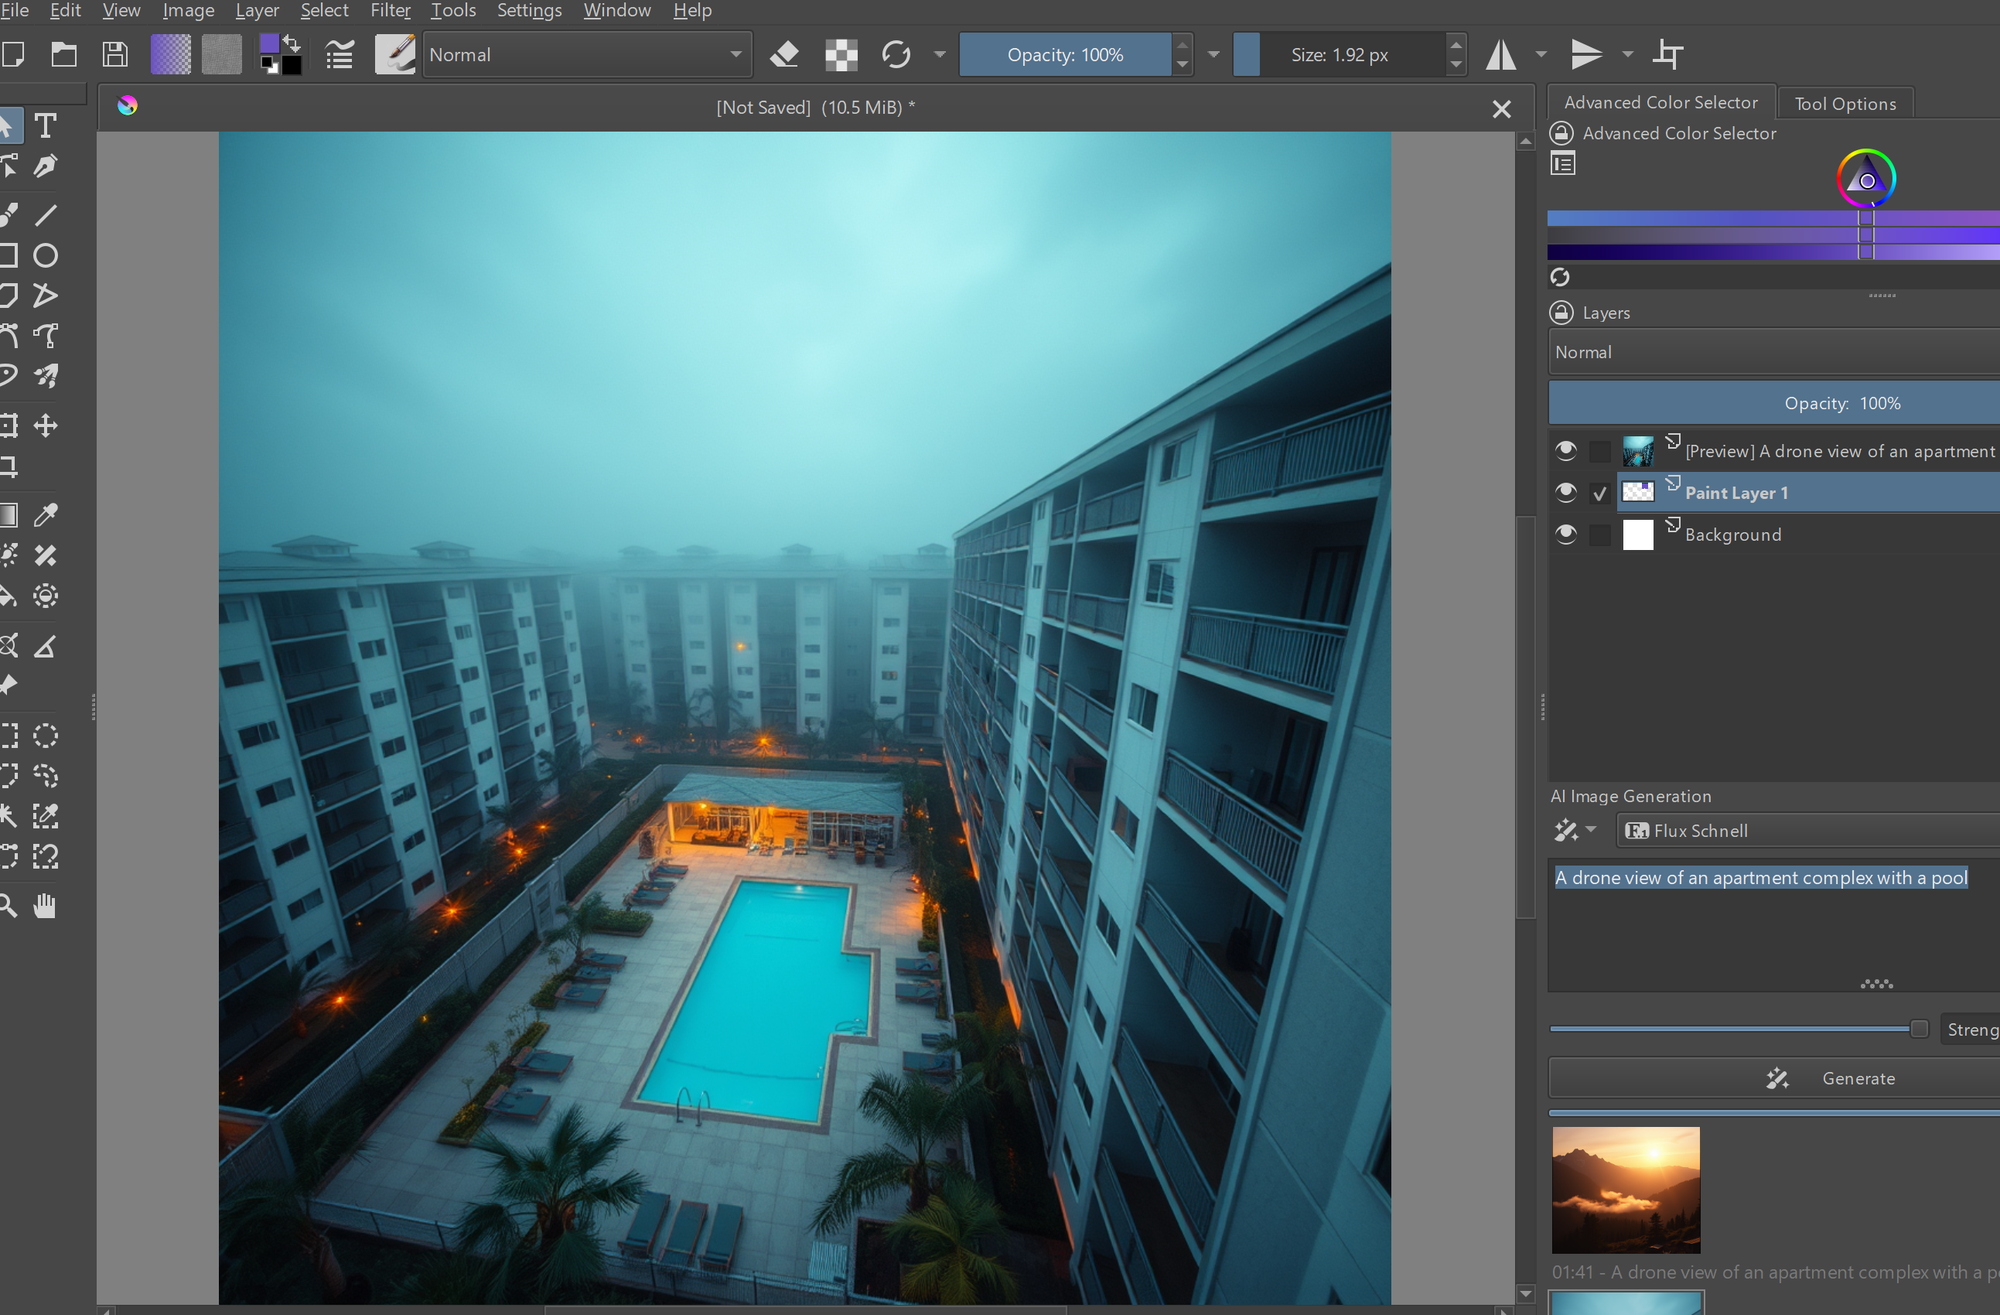
Examples
An example using Flux in Krita.
Prompt: A drone view of an apartment complex with a pool.