


AnimateDiff is an extension for Stable Diffusion, a popular AI that generates images from textual descriptions. It allows for the creation of animations and videos, either by transforming text into video (txt2vid) or by modifying one video into another (vid2vid).
For txt2vid, AnimateDiff uses a motion module and a series of configurations that define the animation's characteristics, like the number of frames and frames per second (FPS). The user provides a text prompt, and the module generates an animation, which can be configured to be a seamless loop with options like 'Close Loop' that make the last frame identical to the first one, or 'Reverse Frames' that adds a reverse playback effect to the end of the sequence.
For vid2vid, AnimateDiff can be used in conjunction with ControlNet, a tool that guides motion using a reference video. By enabling ControlNet and using a preprocessor like OpenPose, the user can direct AnimateDiff to follow the motion in the reference video, allowing for the creation of a new video that mimics the motion of the original but with the visual style generated by Stable Diffusion.
Additionally, the extension provides options for frame interpolation to enhance smoothness, and context batch size settings to control the temporal consistency of the animation. These features ensure that the generated video maintains quality and coherence throughout the animation.
ComfyUI
Inside ComfyUi we have multiple AnimateDiff workflows available in the "load" dropdown on the right-hand side. These include ADIFF-DWpose, ADIFF-latent upscale, ADIFF Pose ControlNet, ADIFF-txt2vid, SVD-txt2vid and SVD-img2vid.
Some of these workflows are complicated and require some knowledge of ComfyUI to understand how they work. Today We will be going over SVD-txt2vid and SVD-img2vid.
SVD-txt2vid
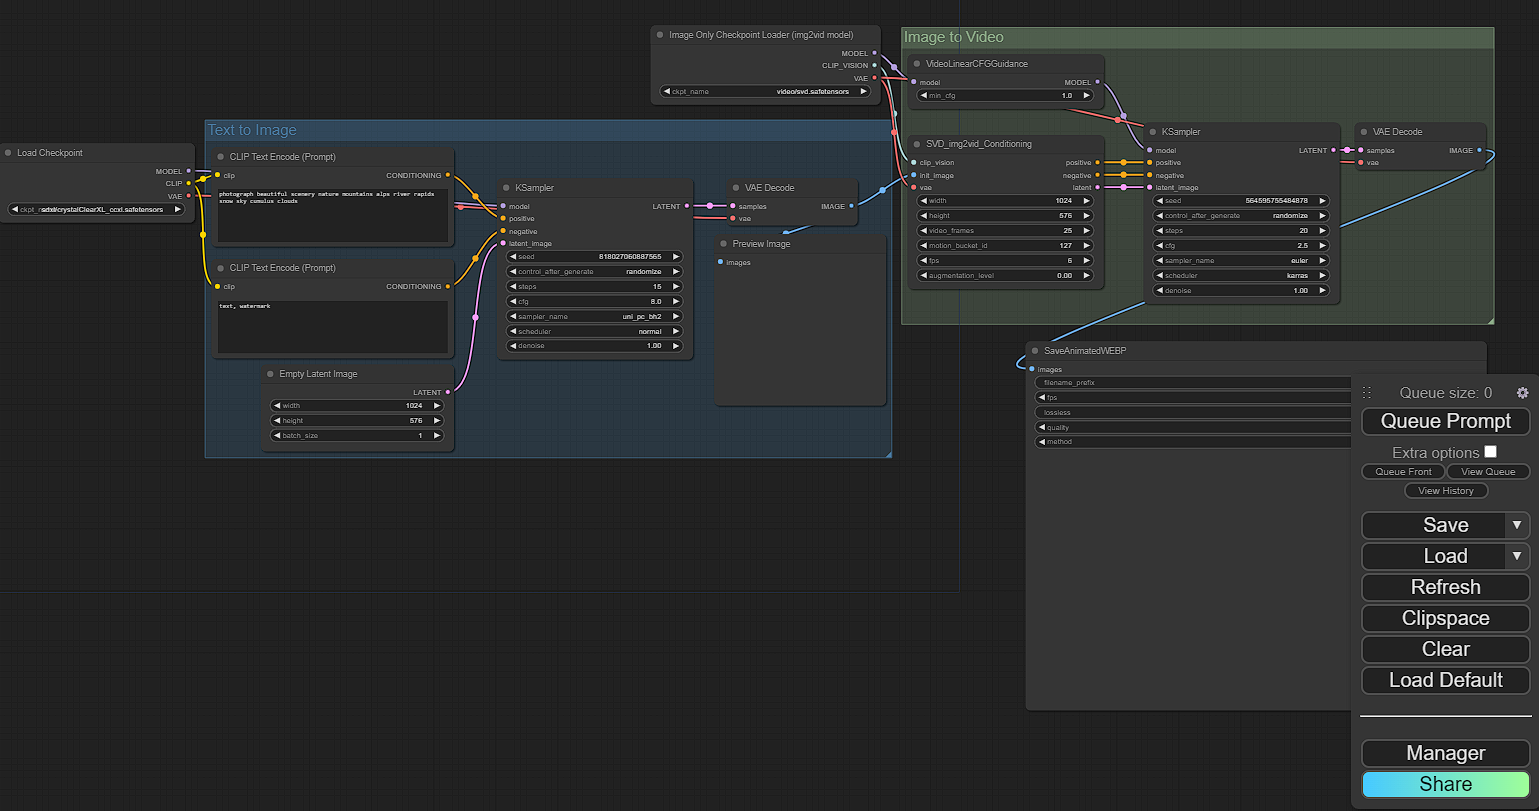
Starting from left to right.
Load Checkpoint - This is where you will load your desired checkpoint.
CLIP Text Encode - There will be two of these boxes. The top, for prompt and the bottom, for negative prompt.
Empty Latent Image - This is where you will select the image size.
Ksampler - This is where you can select the seed, steps, cfg, sampler, denoise, and scheduler.
Image-only checkpoint load - This can remain as default.
After all settings and prompts have been added, you can select "Queue Prompt"
Prompt - photograph beautiful scenery nature mountains alps river rapids snow sky cumulus clouds

SVD-img2vid
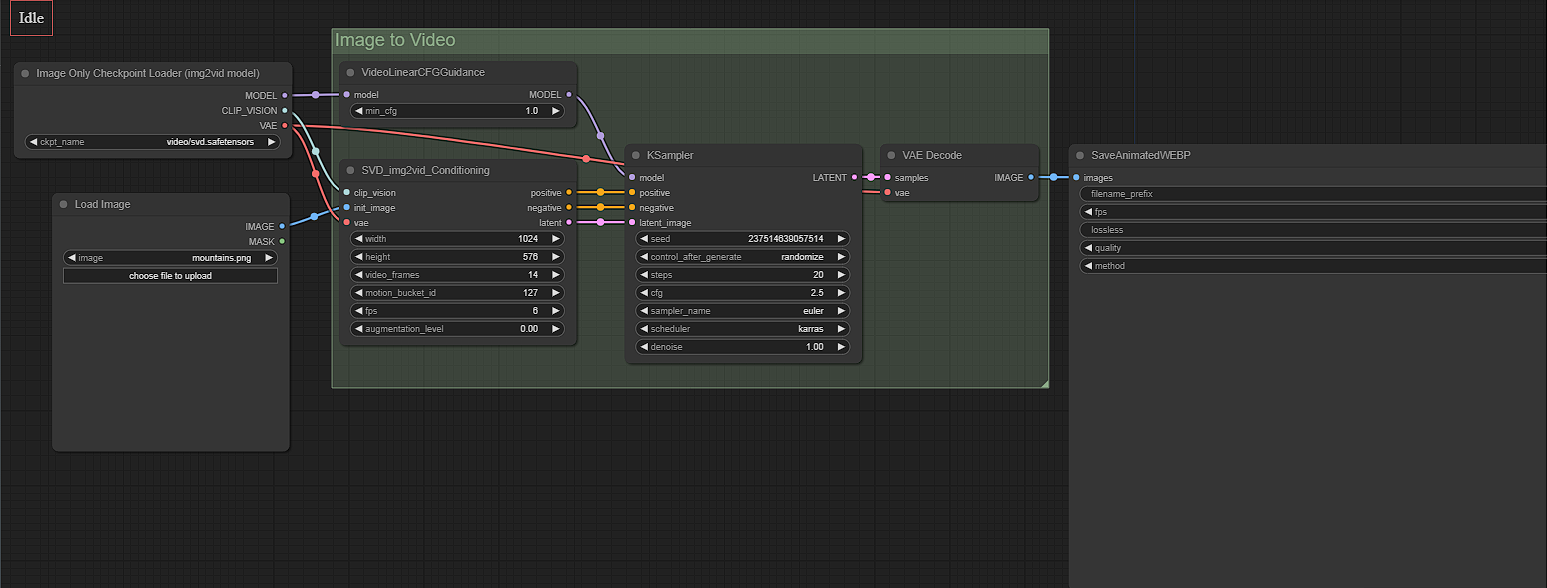
Starting from left to right.
Image-only checkpoint loader - This can remain on default.
Load image - This is where you can upload an image you are wanting to animate.
SVD_img2vid_Conditioning - Here you can select the video output size, number of frames and the FPS.
Ksampler - This is where you can select the seed, steps, cfg, sampler, denoise, and scheduler.
After all settings and prompts have been added, you can select "Queue Prompt"
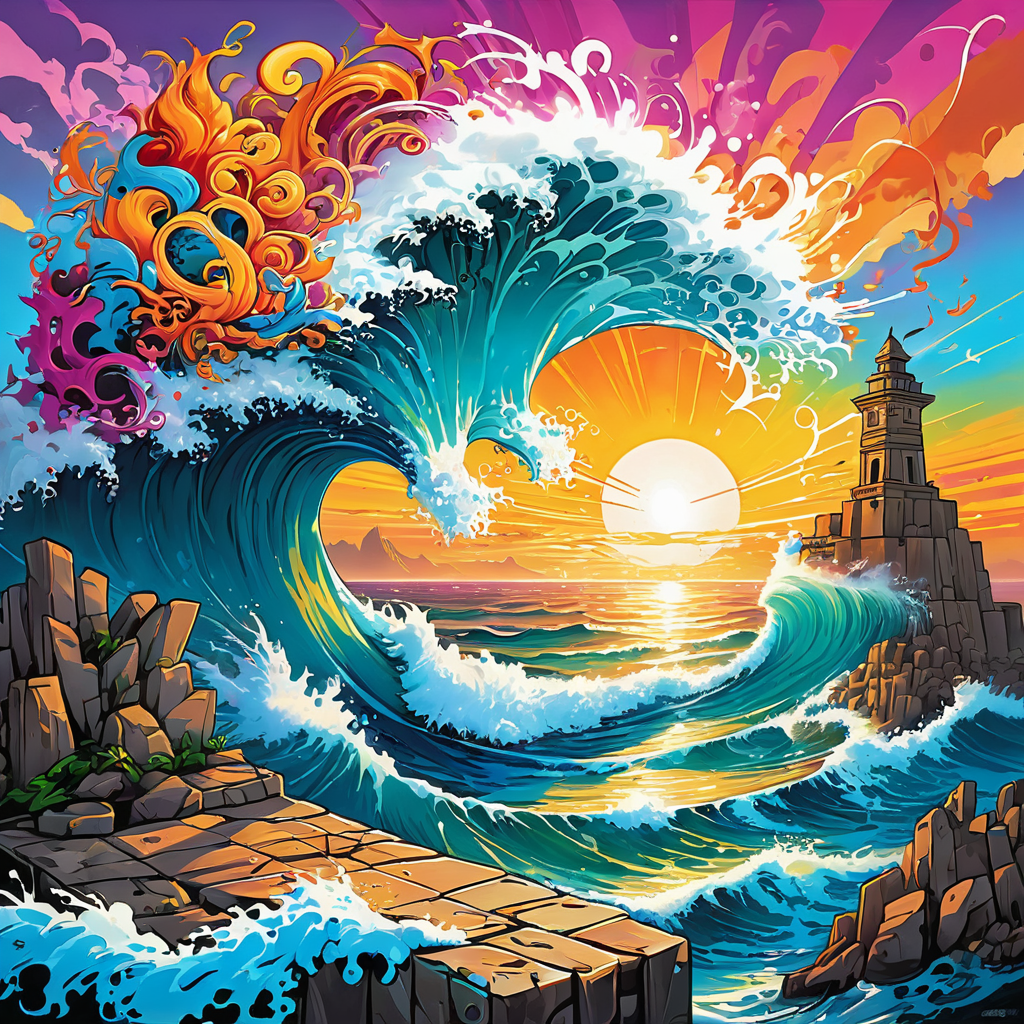
Input img -
Output vid -

This is a guide to help you get going with AnimateDiff in ComfyUI. After you are comfortable with the workflows, feel free to explore the other AnimateDiff workflows we have available. We can't wait to see what you create!
