


Update January 1, 2026: This tutorial is more advanced than the Basic LoRa Kohya and Flux Lora Tutorial which come with a premade configuration file. This tutorial walks you through more settings to get a better understanding of Kohya. If you are a beginner we recommend using the RunDiffusion Standard trainer instead of Kohya.
Getting Started
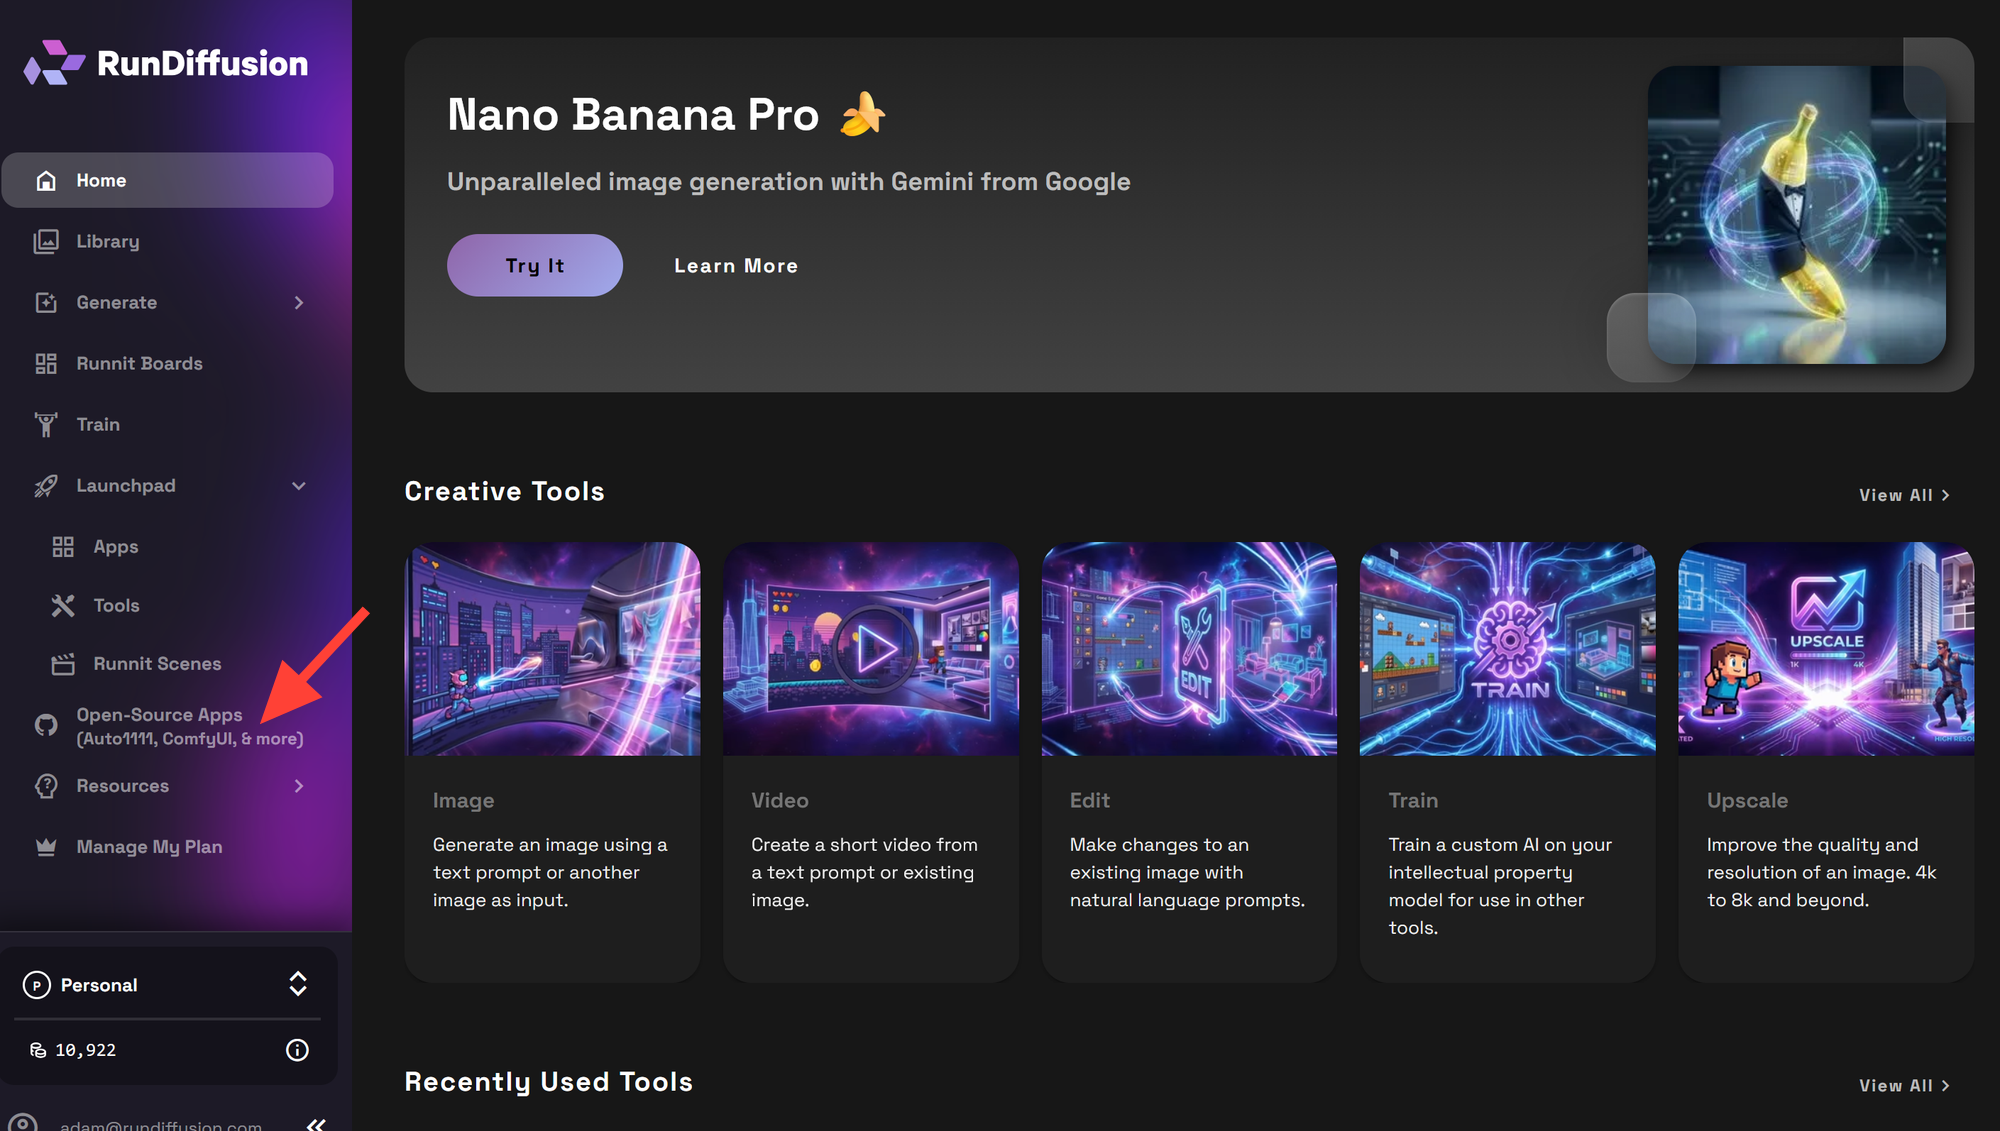
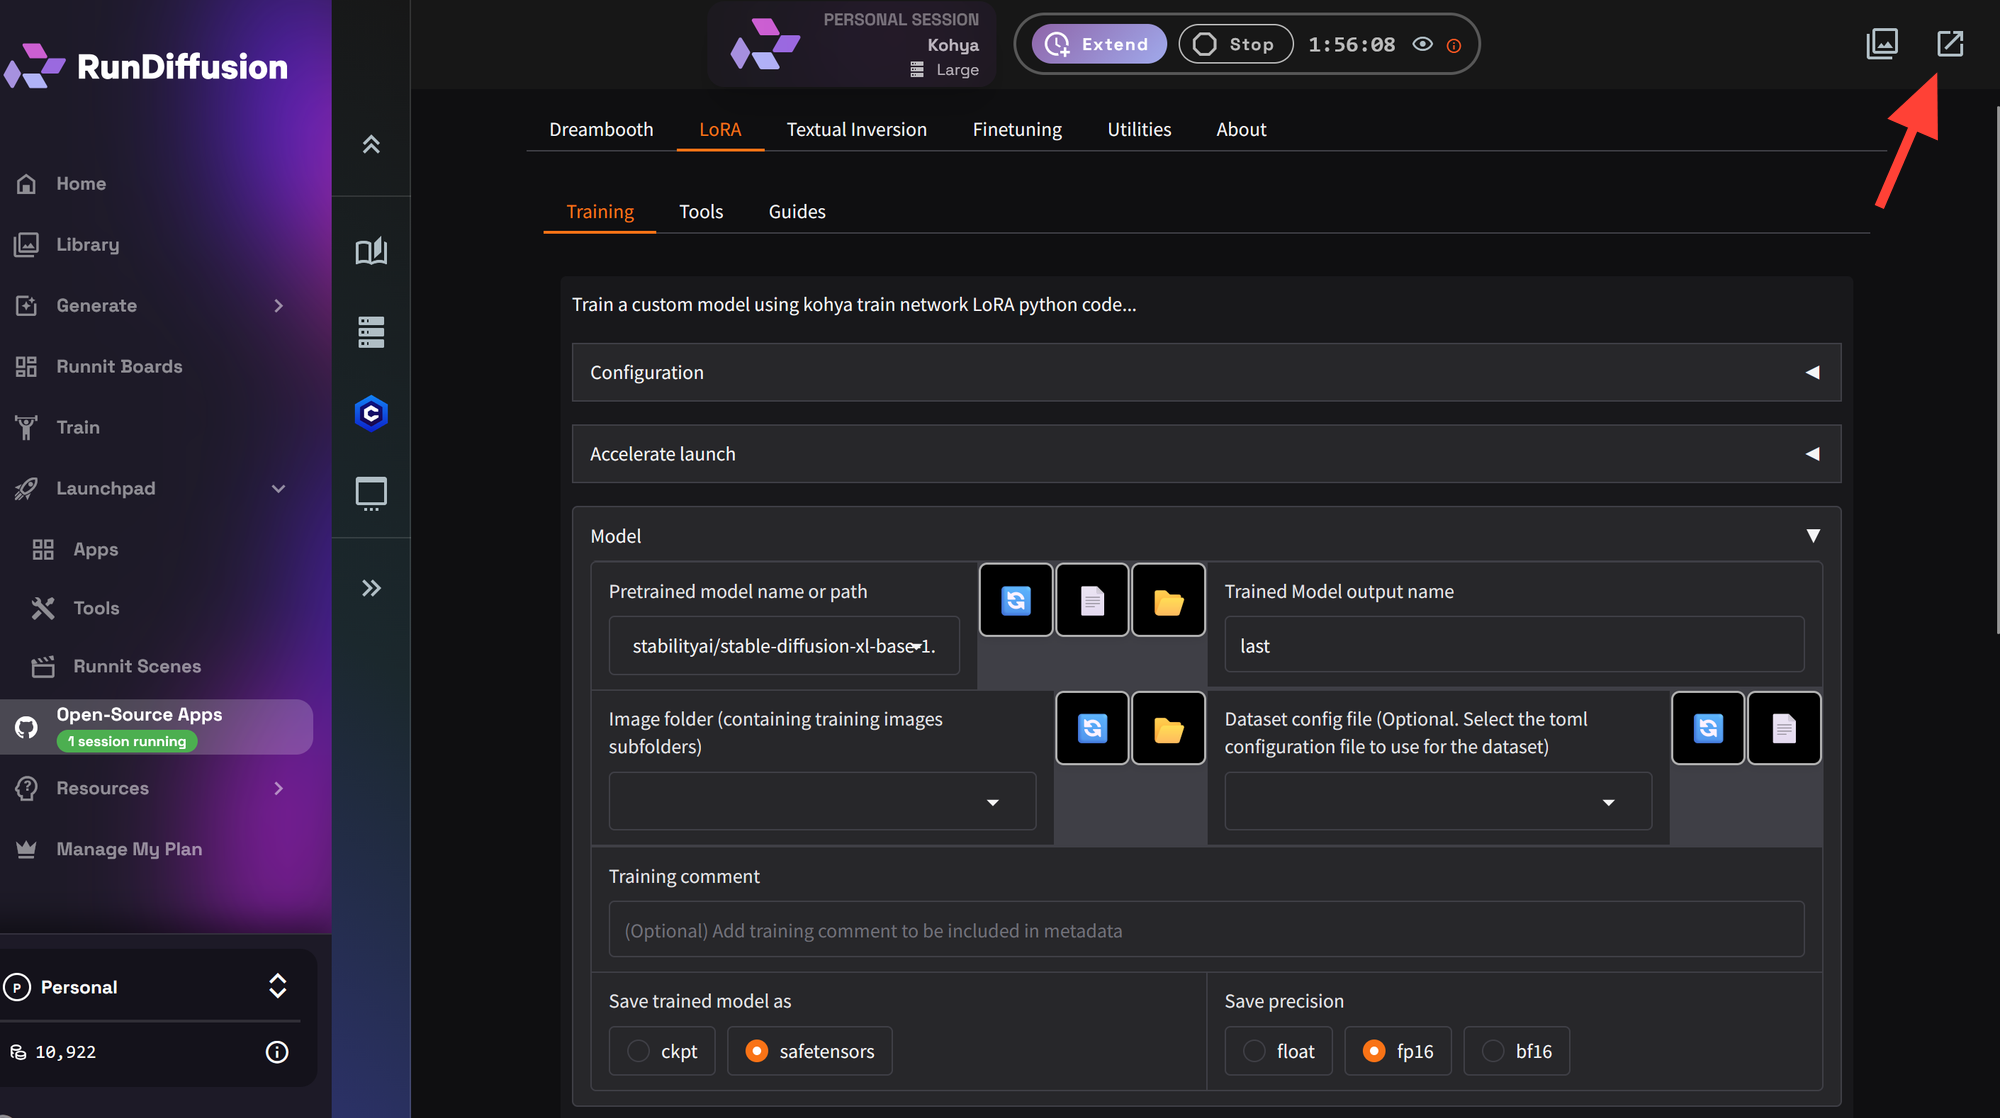
Once logged in on the left sidebar click on OpenSource Applications.
Click on Kohya on the Opensource application list then click Select.
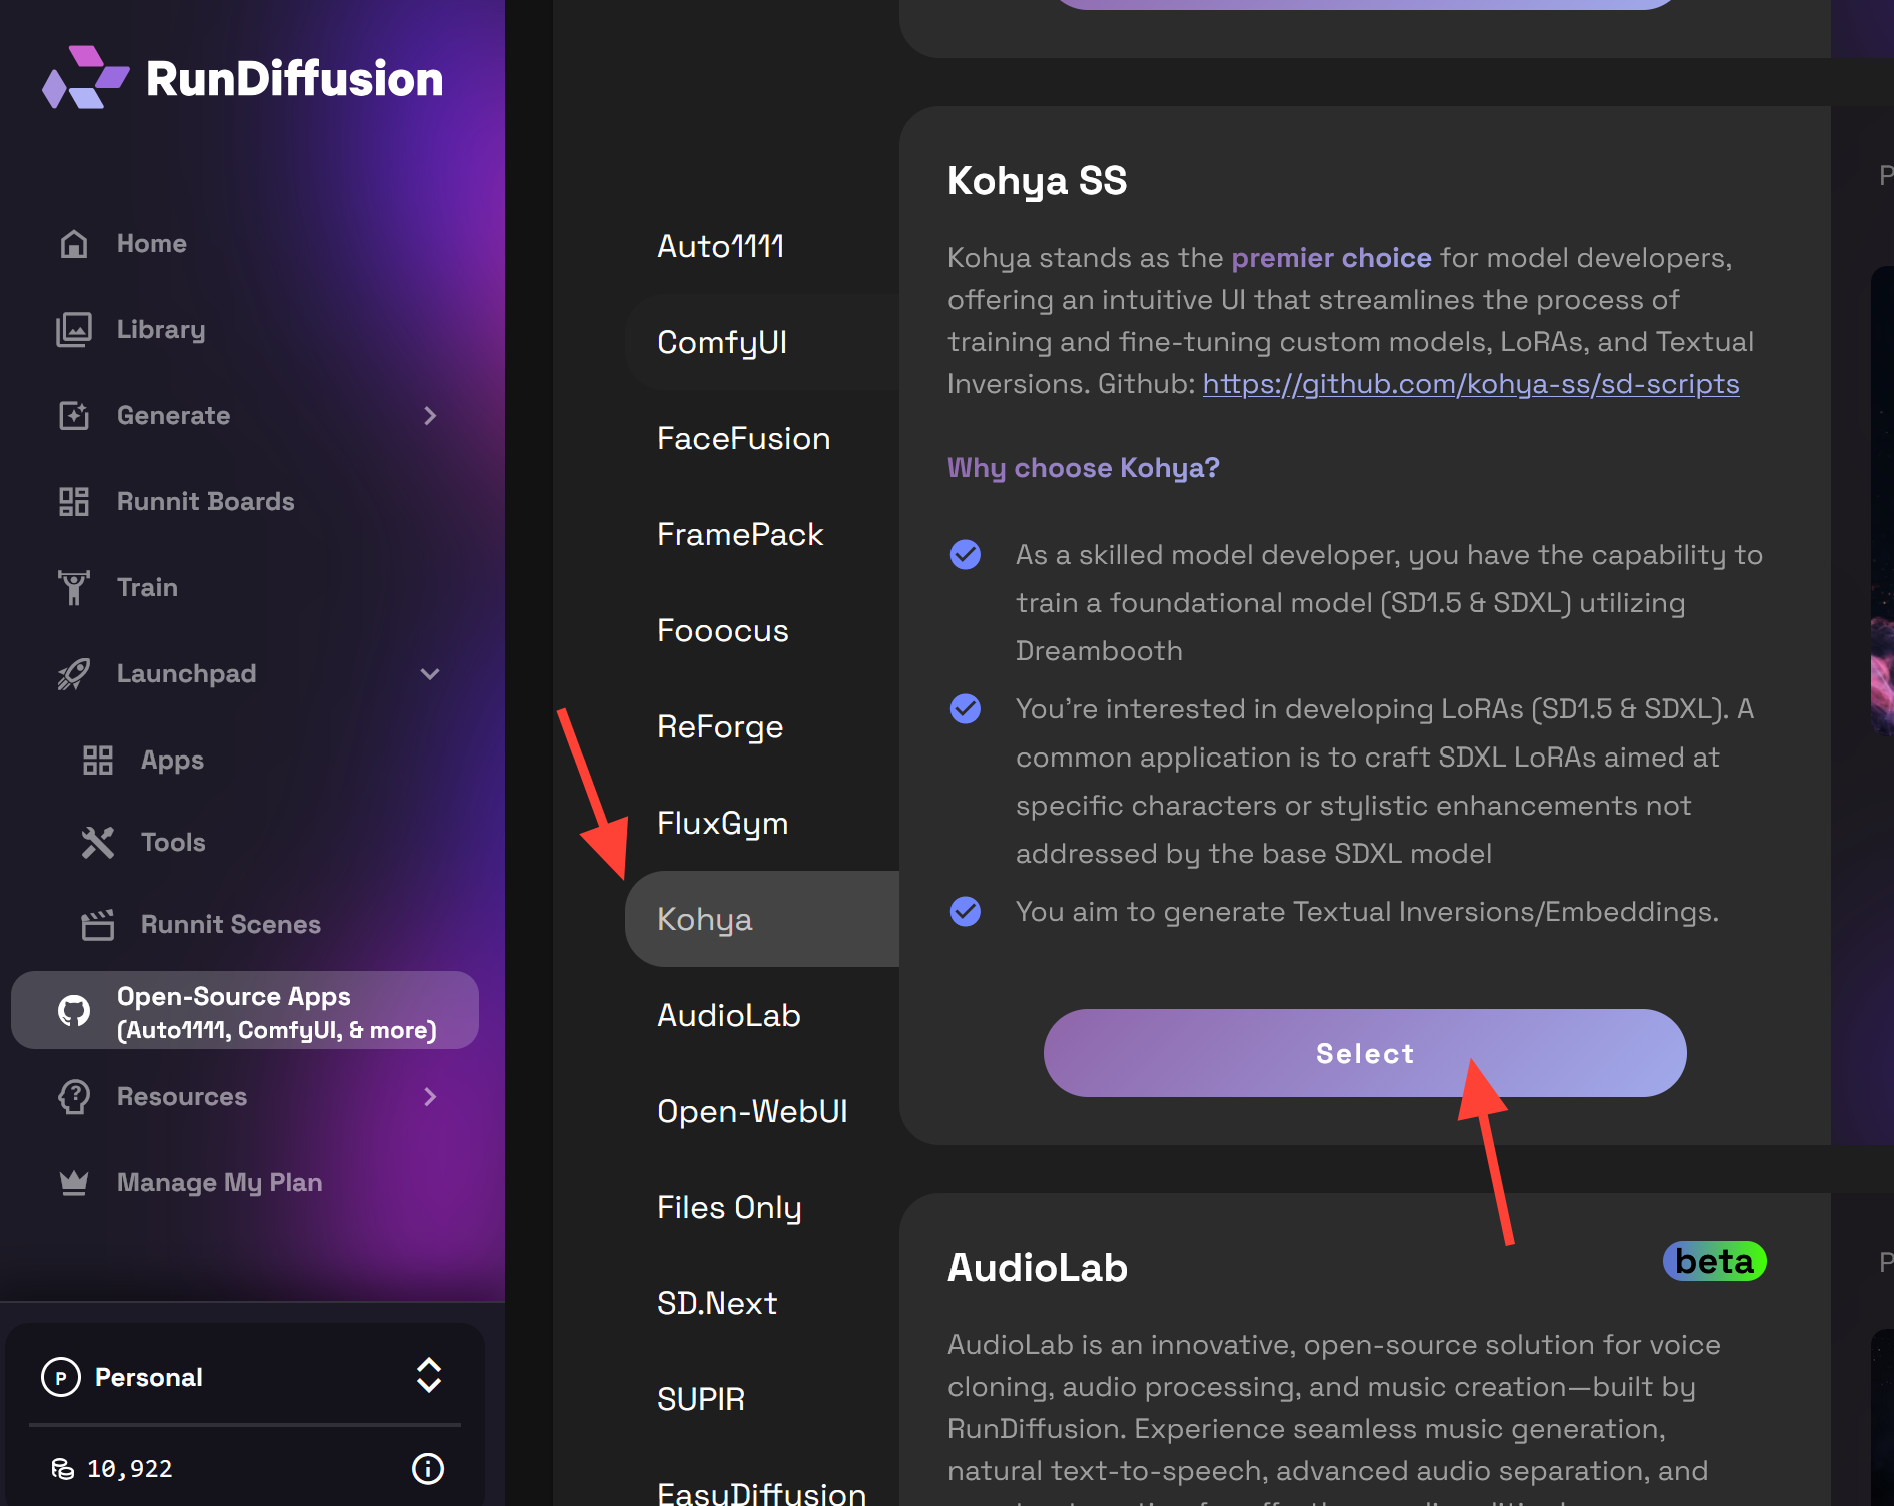
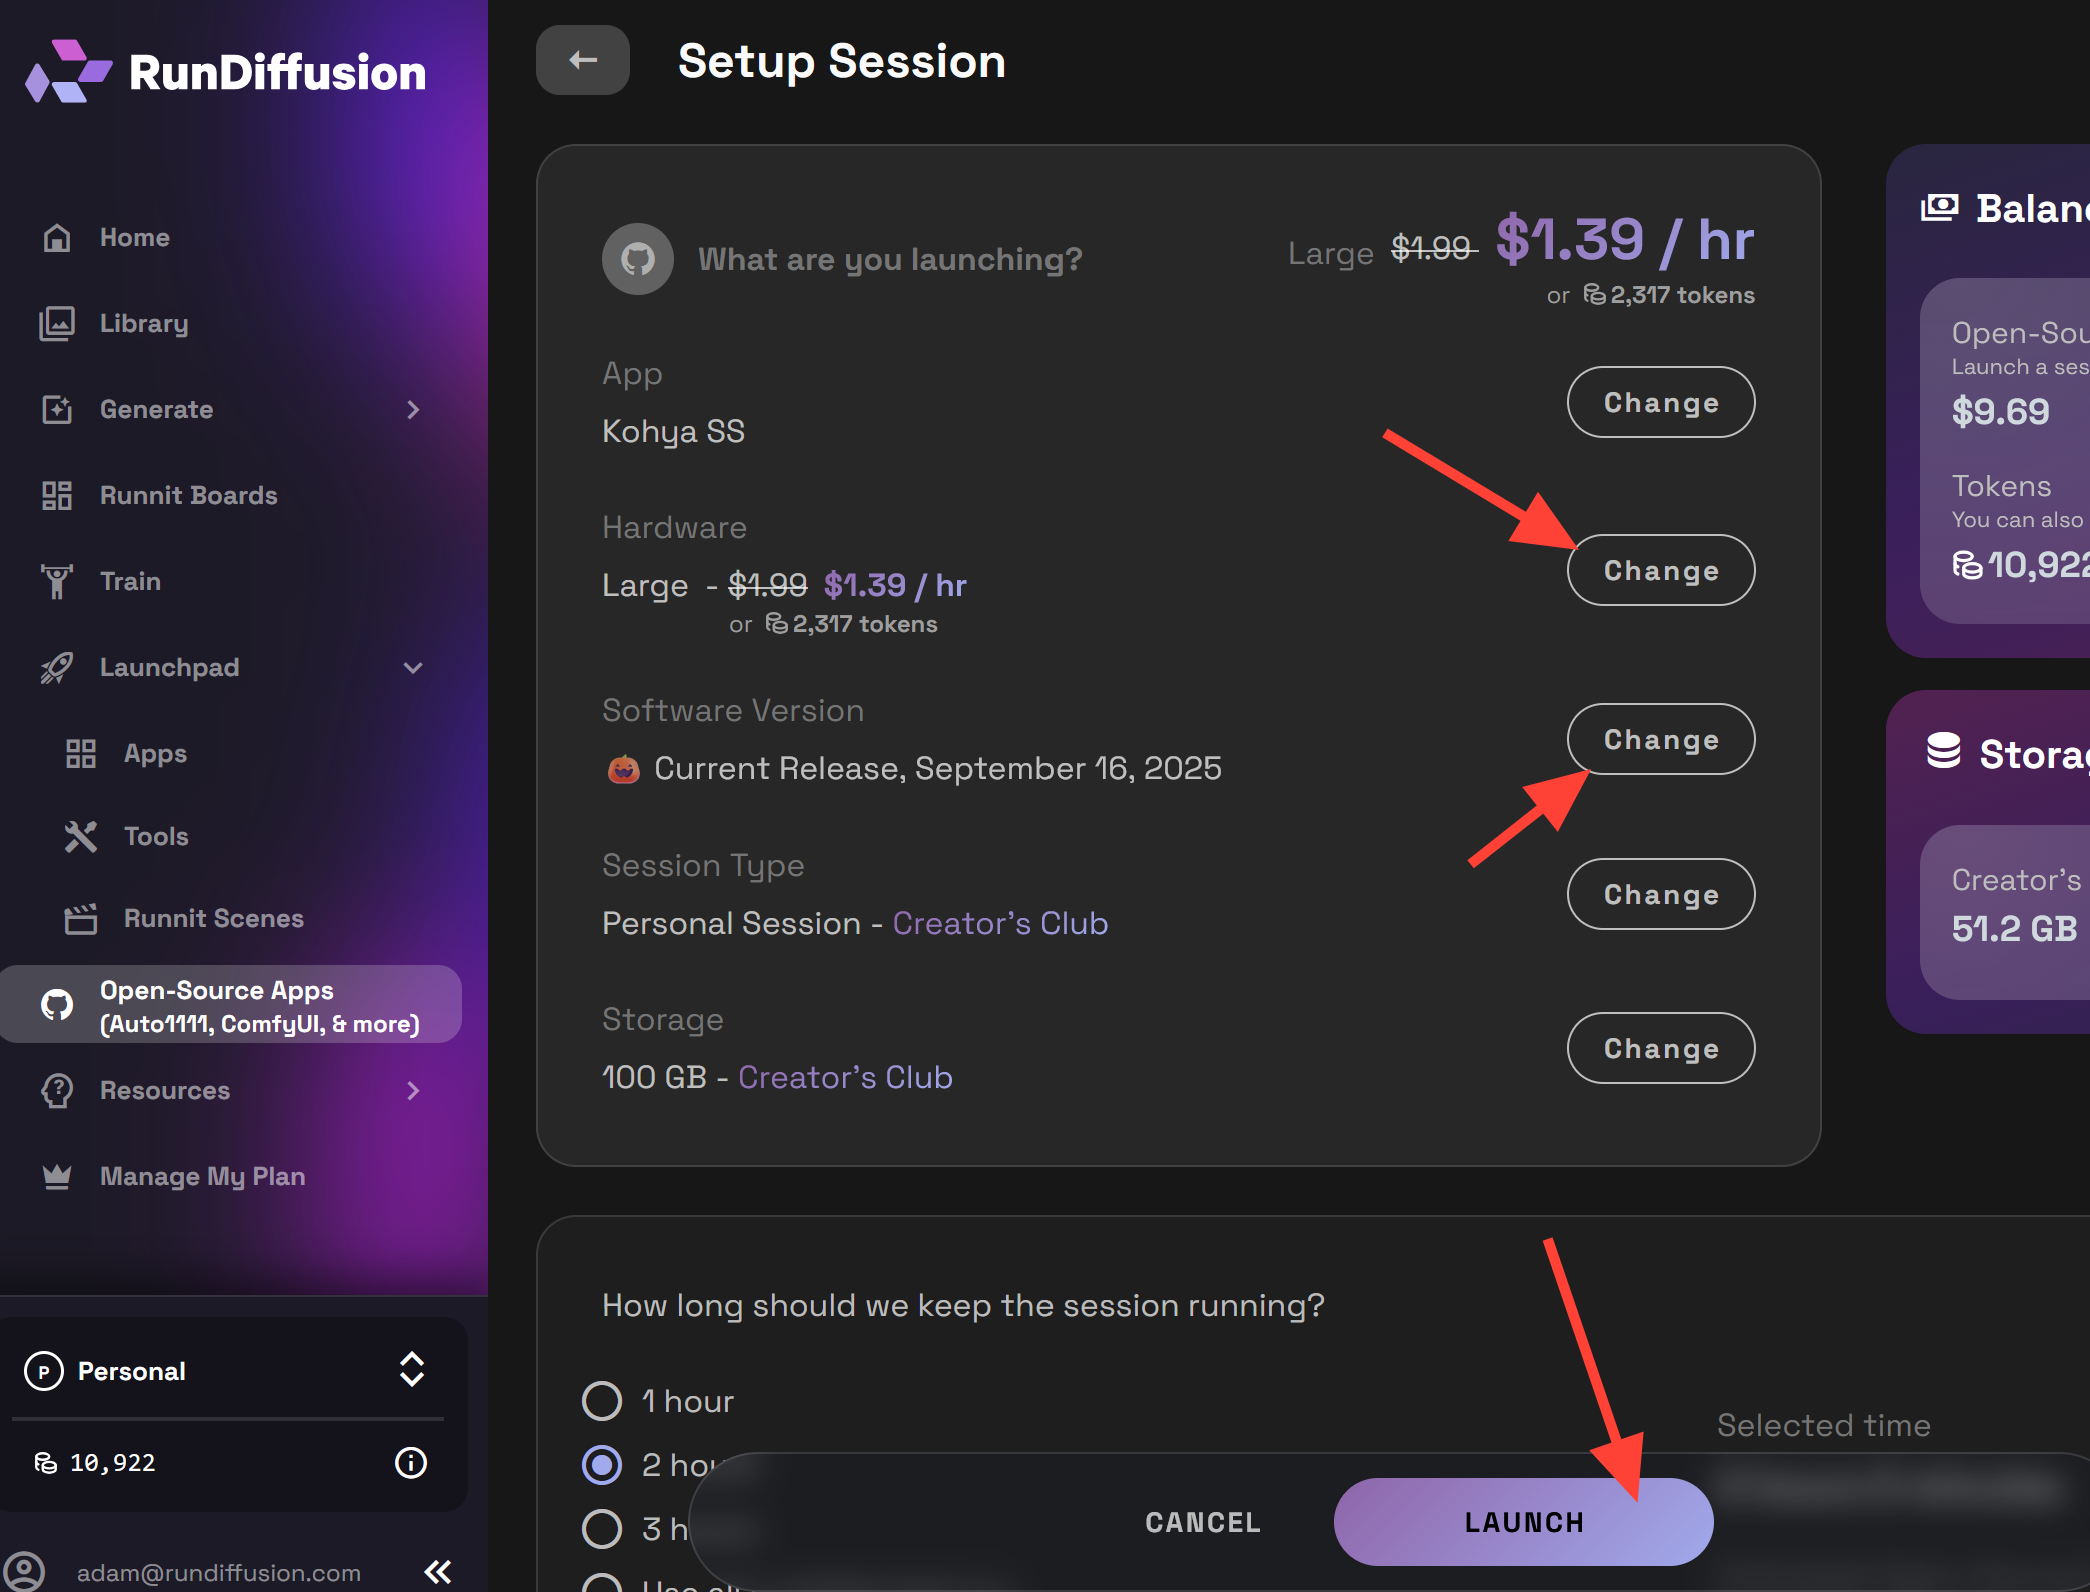
For Hardware select Large or Max. Use Current Release, September 16, 2025 or later. Then click Launch. Training LoRa requires a lot of storage so we recommend having a Creators Club Subscription. Then click Launch.
Go to the LoRa tab at the top.
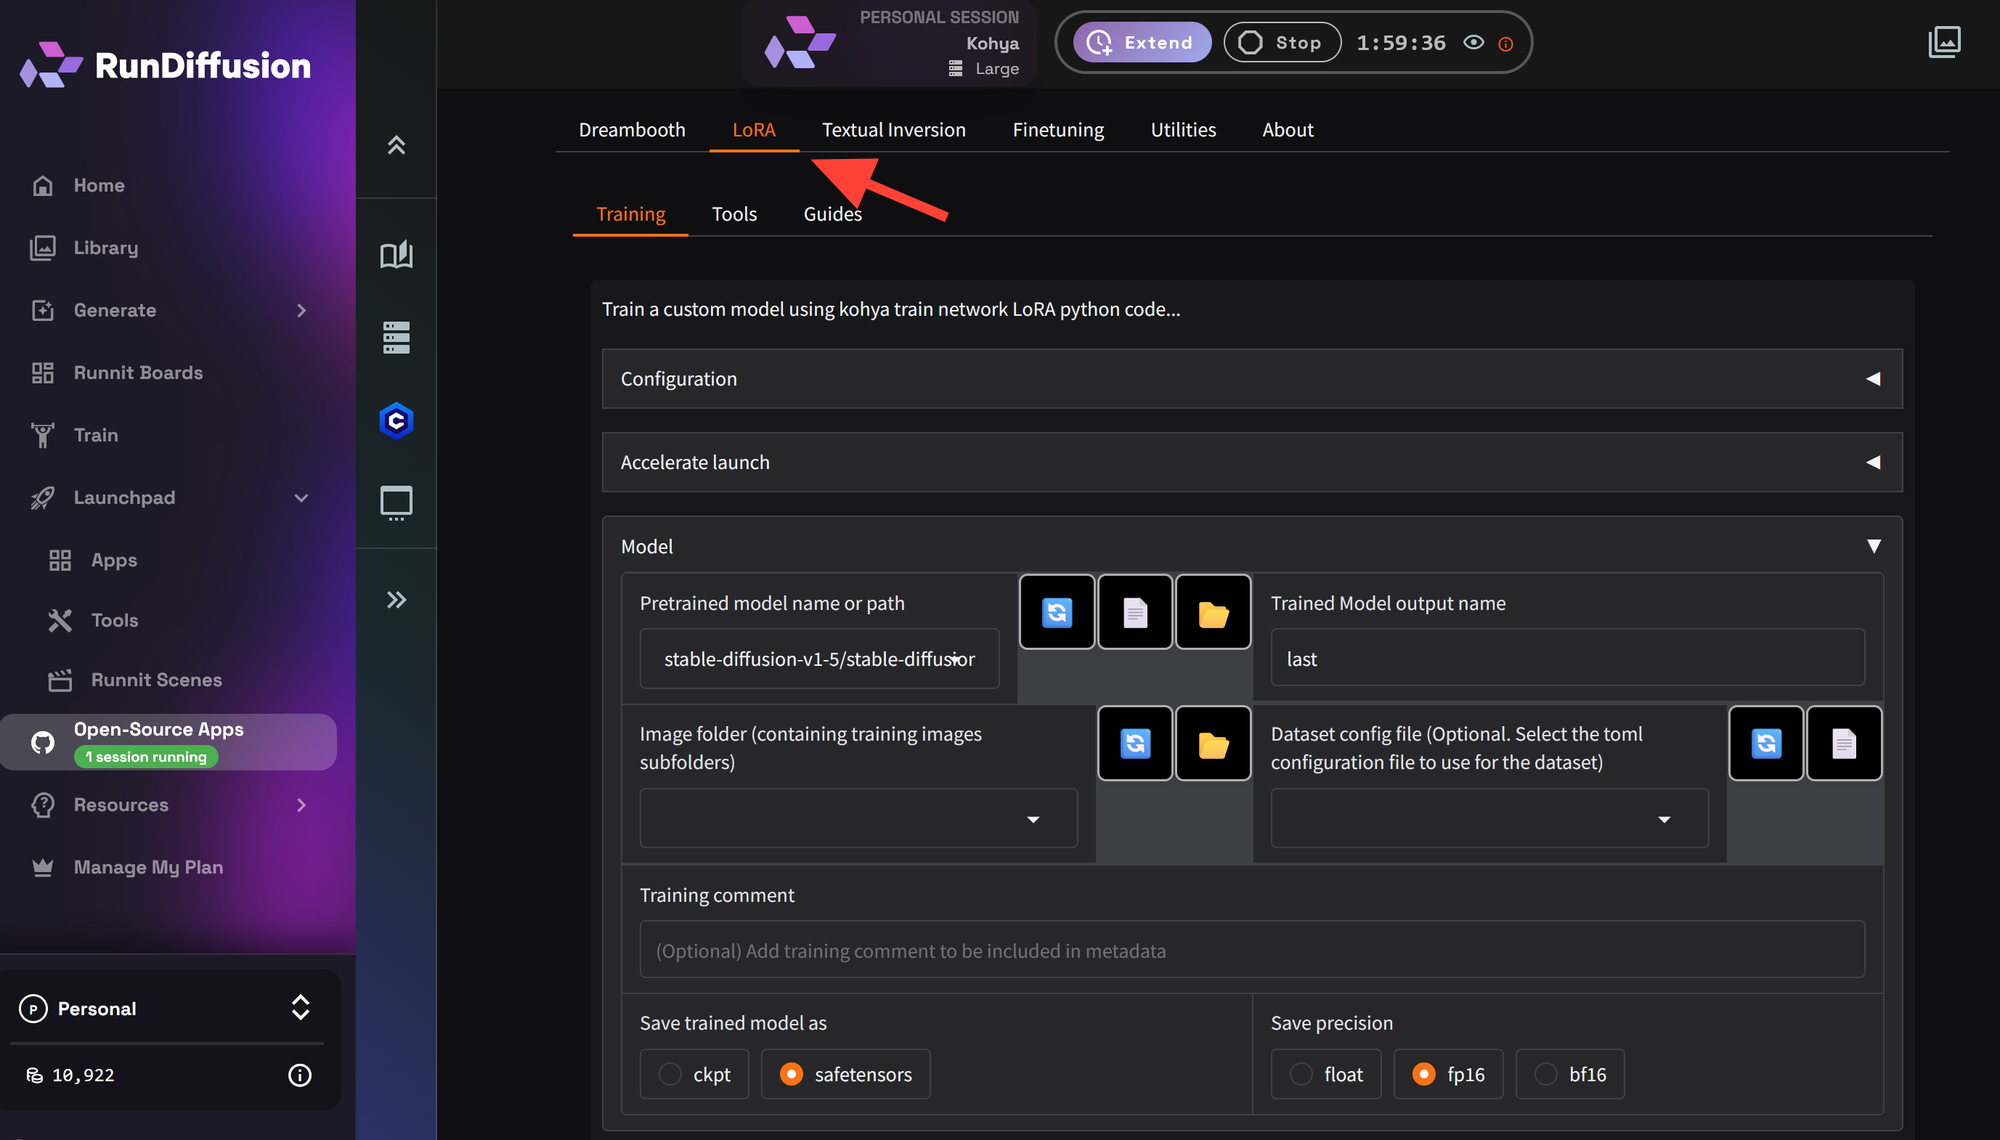
Change Model to Stable-diffusion-xl-base-1.0
Filebrowser
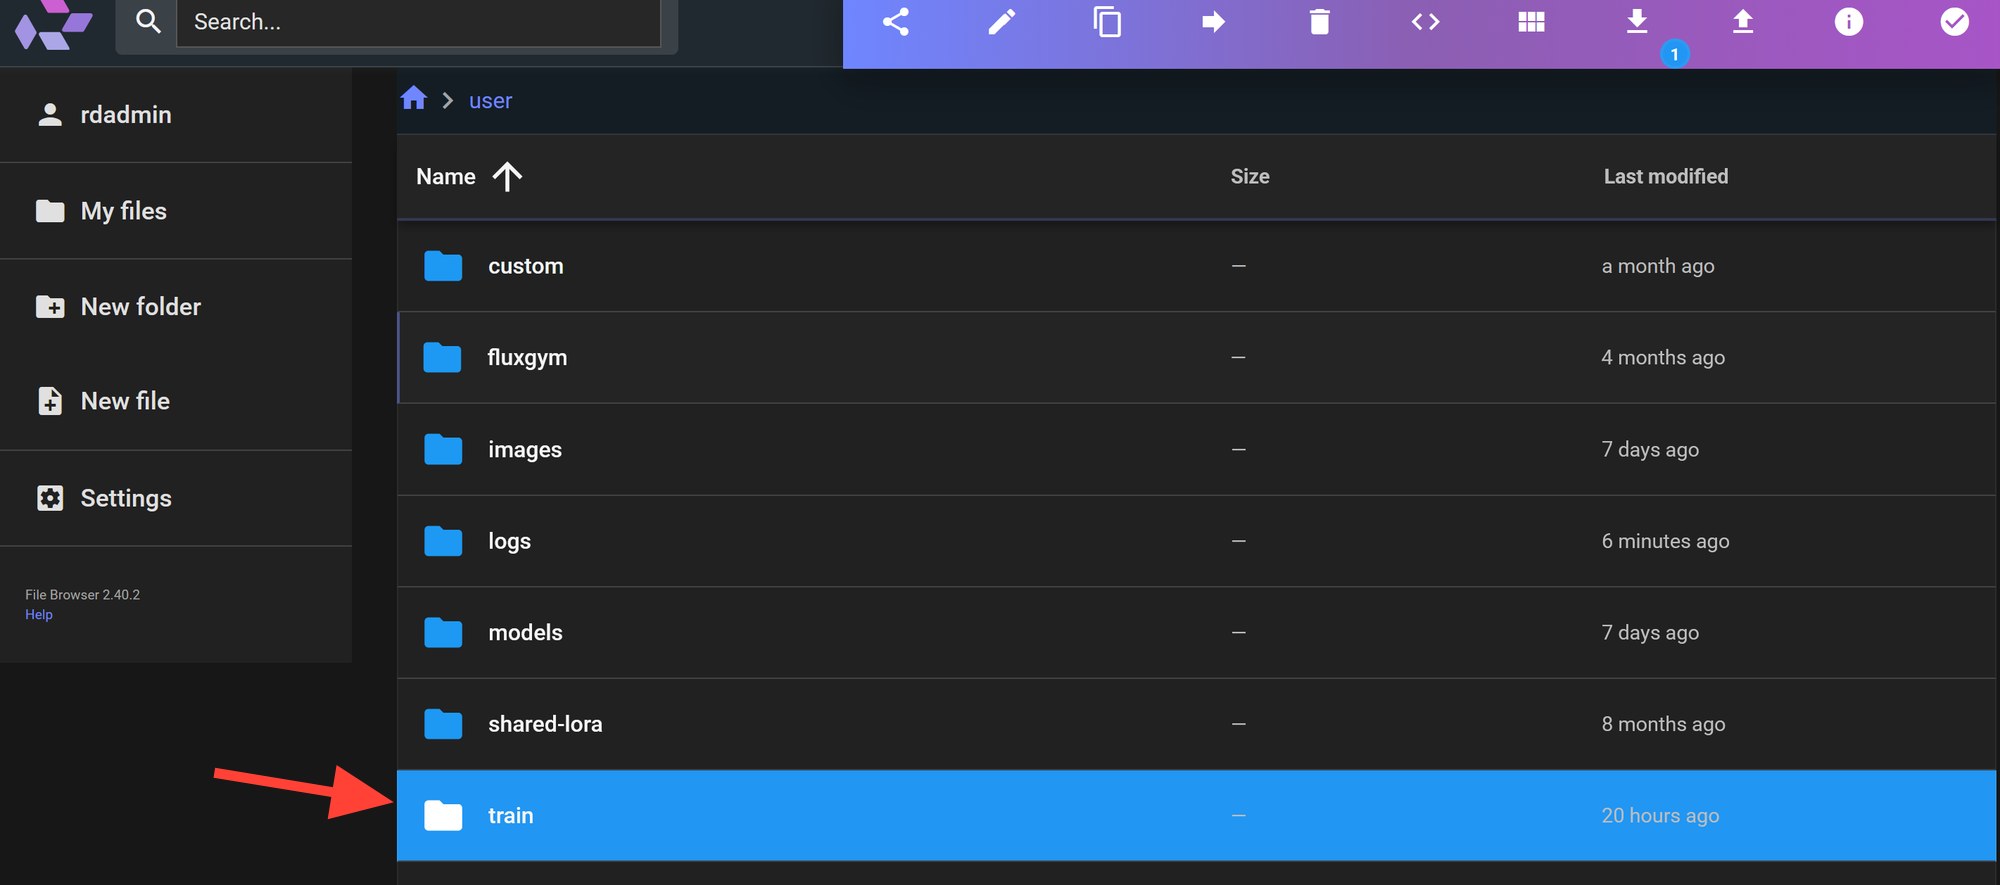
Open your Filebrowser by clicking on the arrow in the top right.
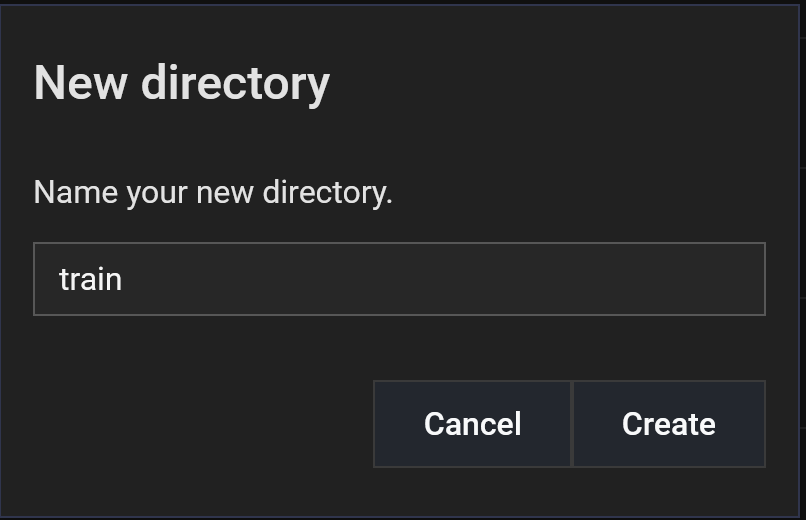
Click on New Folder on the left side.
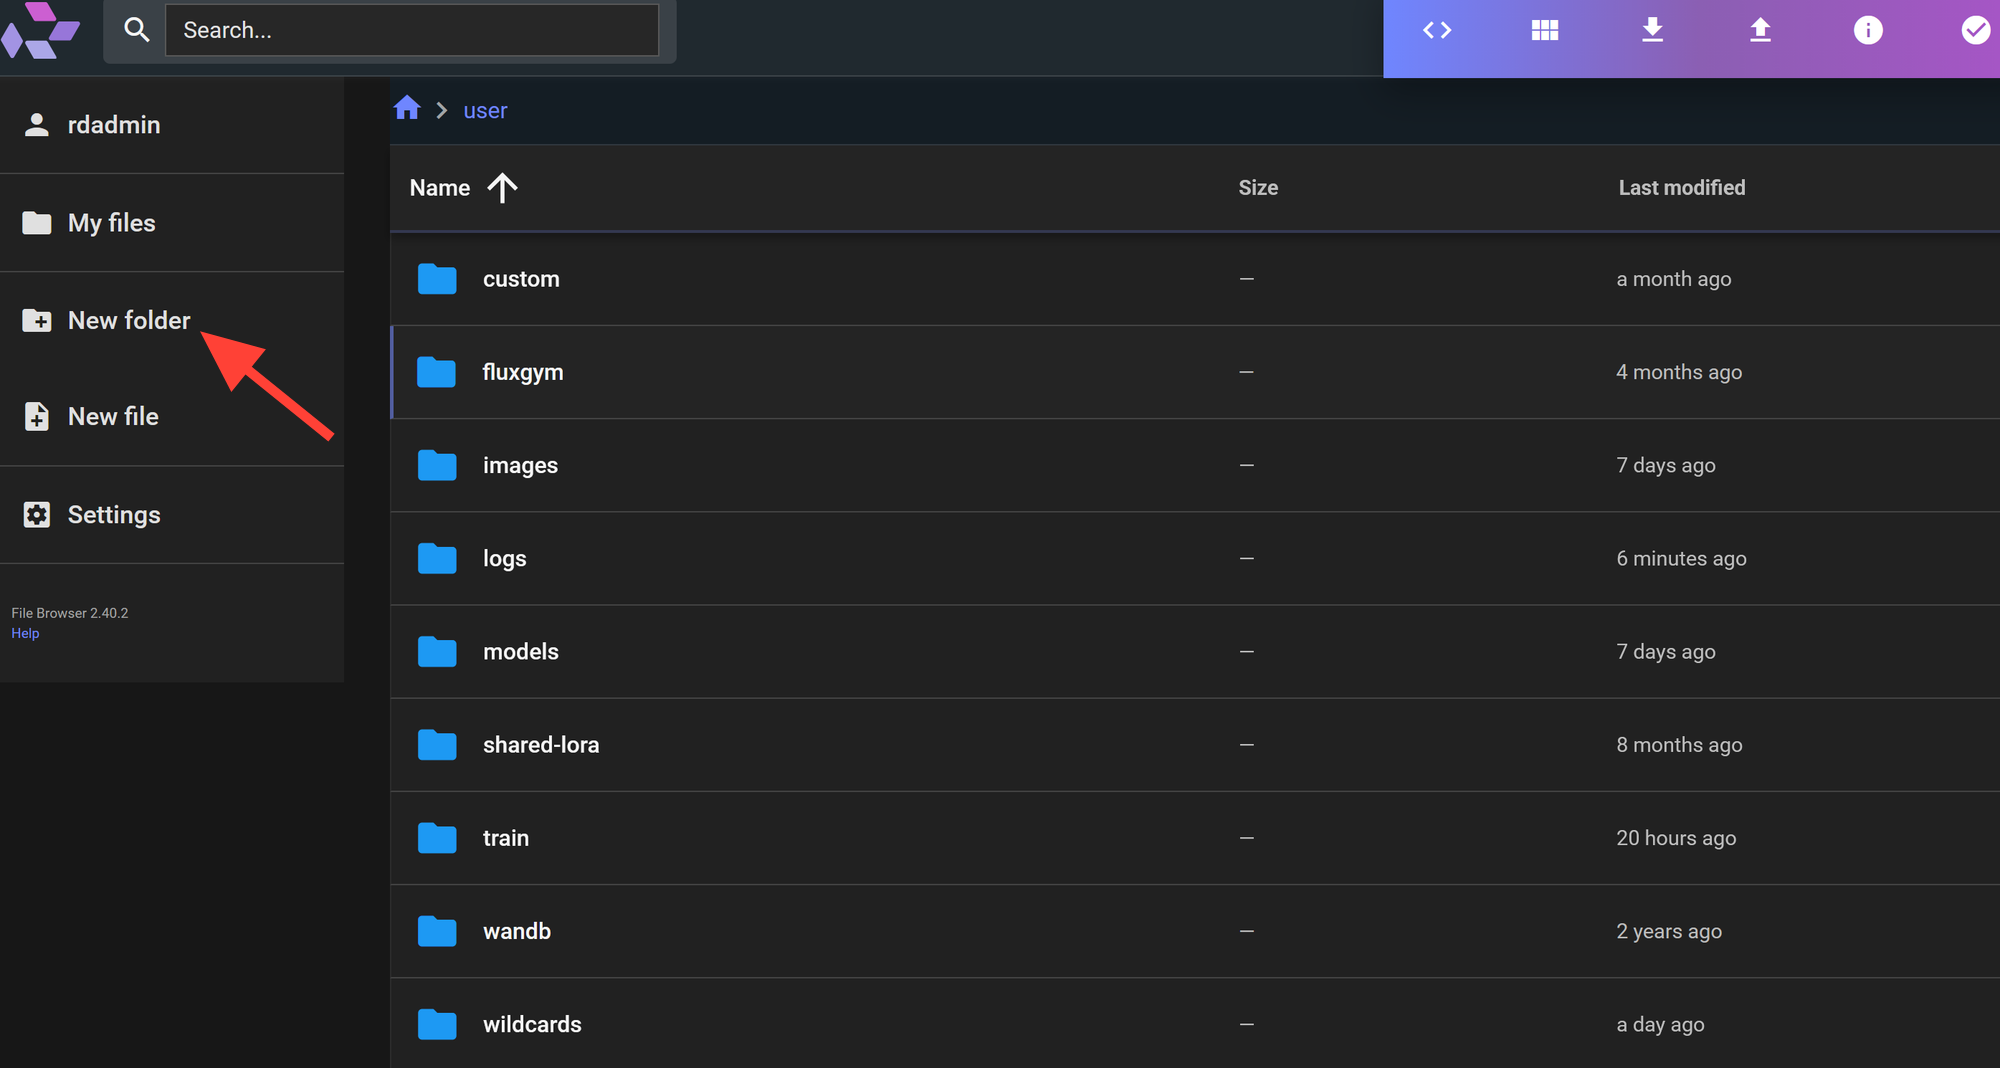
Type train and click create.
Open the train Folder you just created.
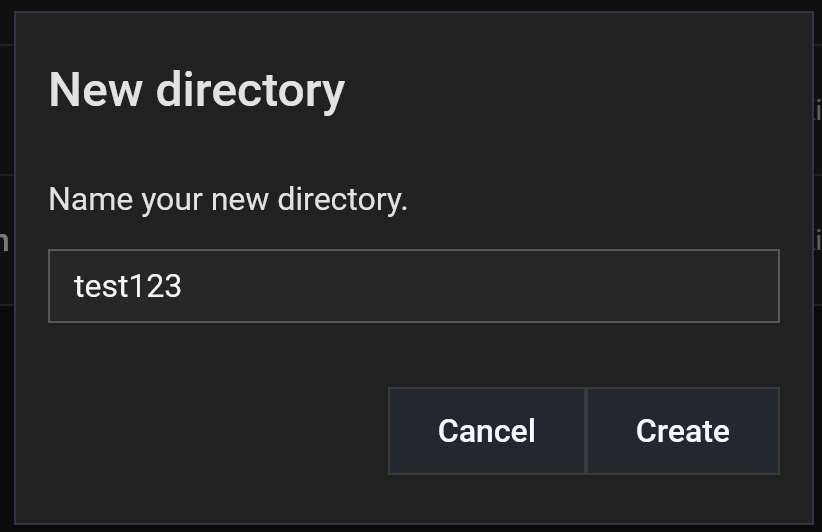
Inside the train folder you can create another folder to upload your dataset which should include images and txt files.
Dataset Preparation
Scroll down to the Dataset Preparation section.

Instance Prompt: This is the token you will use when prompting later with your Lora.
Class Prompt: Person, Style, etc
Training Images: /mnt/private/train/(Your dataset Folder name)/
Repeats: Let’s select 20 for now.
Destination directory: /mnt/private/train/
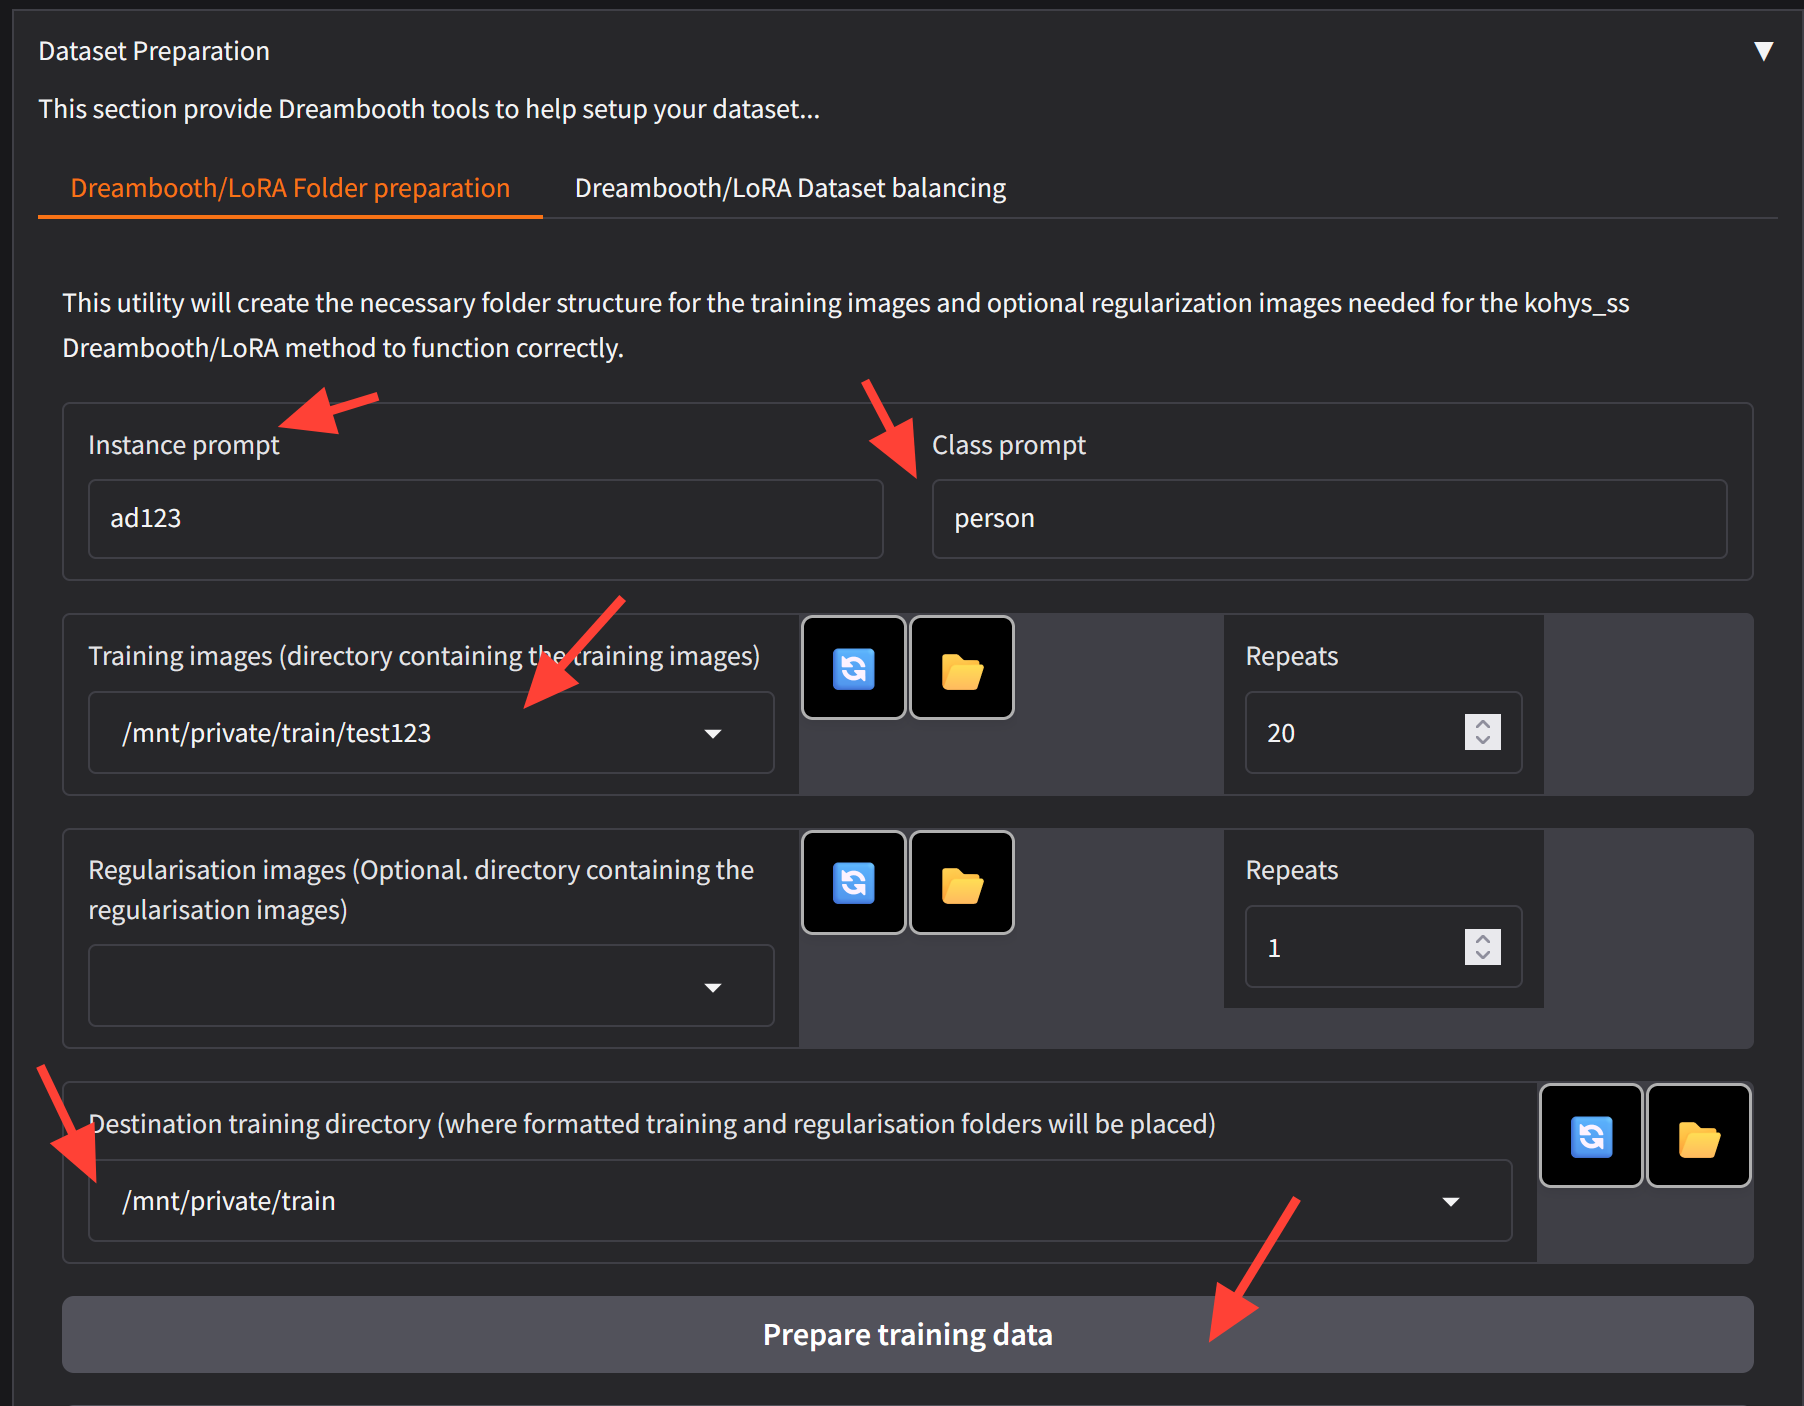
Once you click prepare training data check your folder in your file browser to be sure the folders were created. The Kohya is not responsive so it may look like nothing has happened. File browser doesn't automatically refresh so go to the parent directory and click on the train folder again.
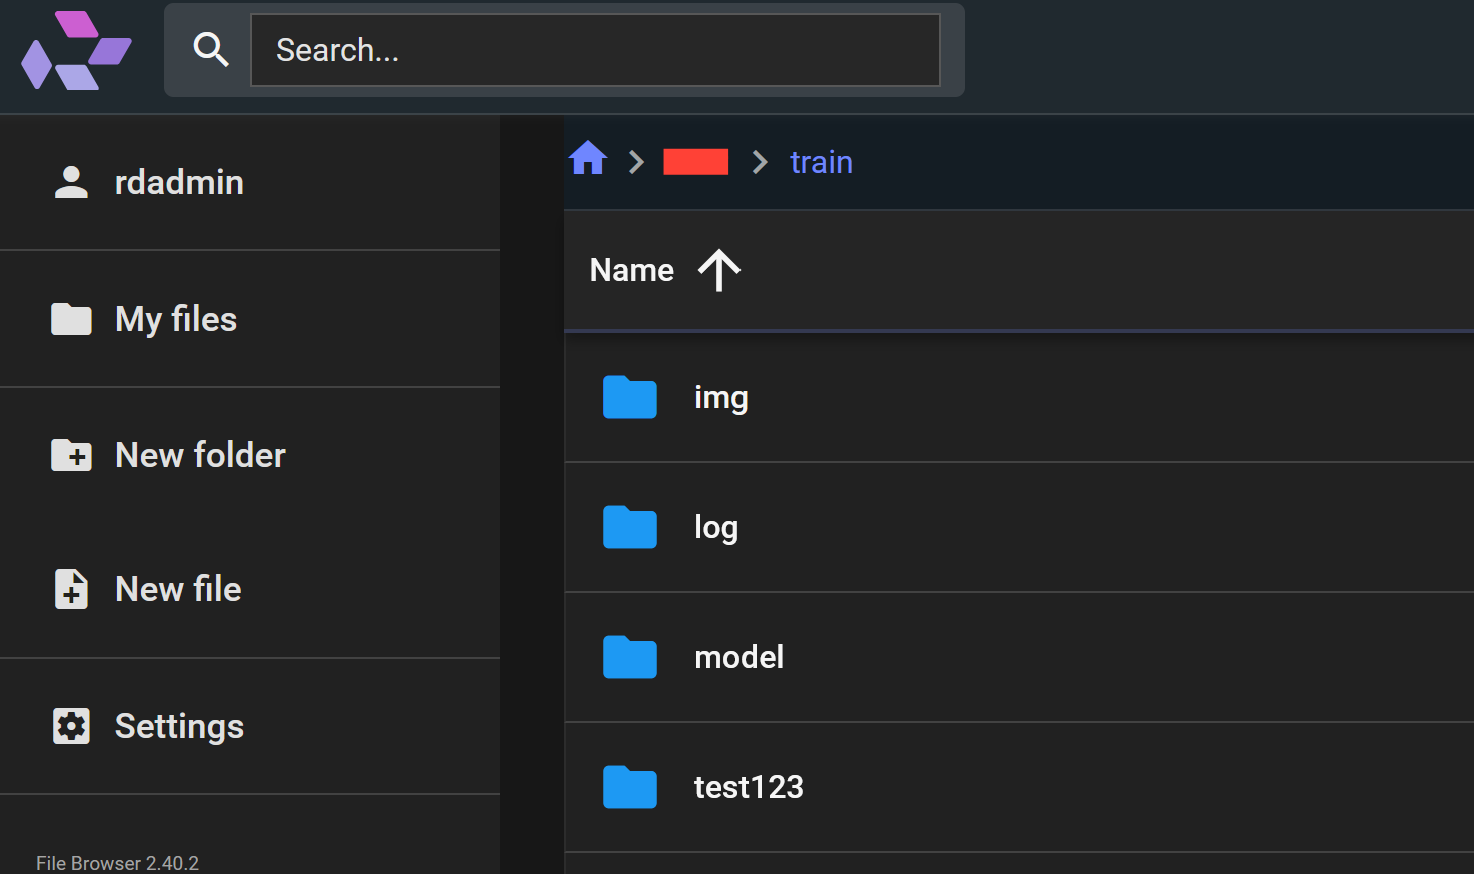
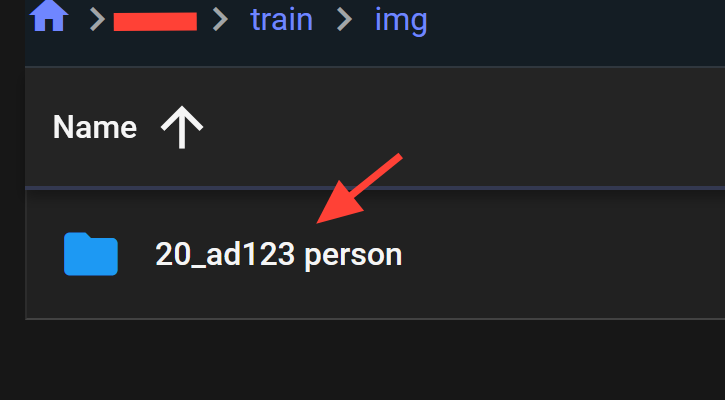
Click on the img folder and you will be able to see the newly created folder and images prepared for your training.
Utilities
Next let's go to the Utilities Tab. If you haven't already added the instance to your dataset this is a way you can add a token to your dataset.
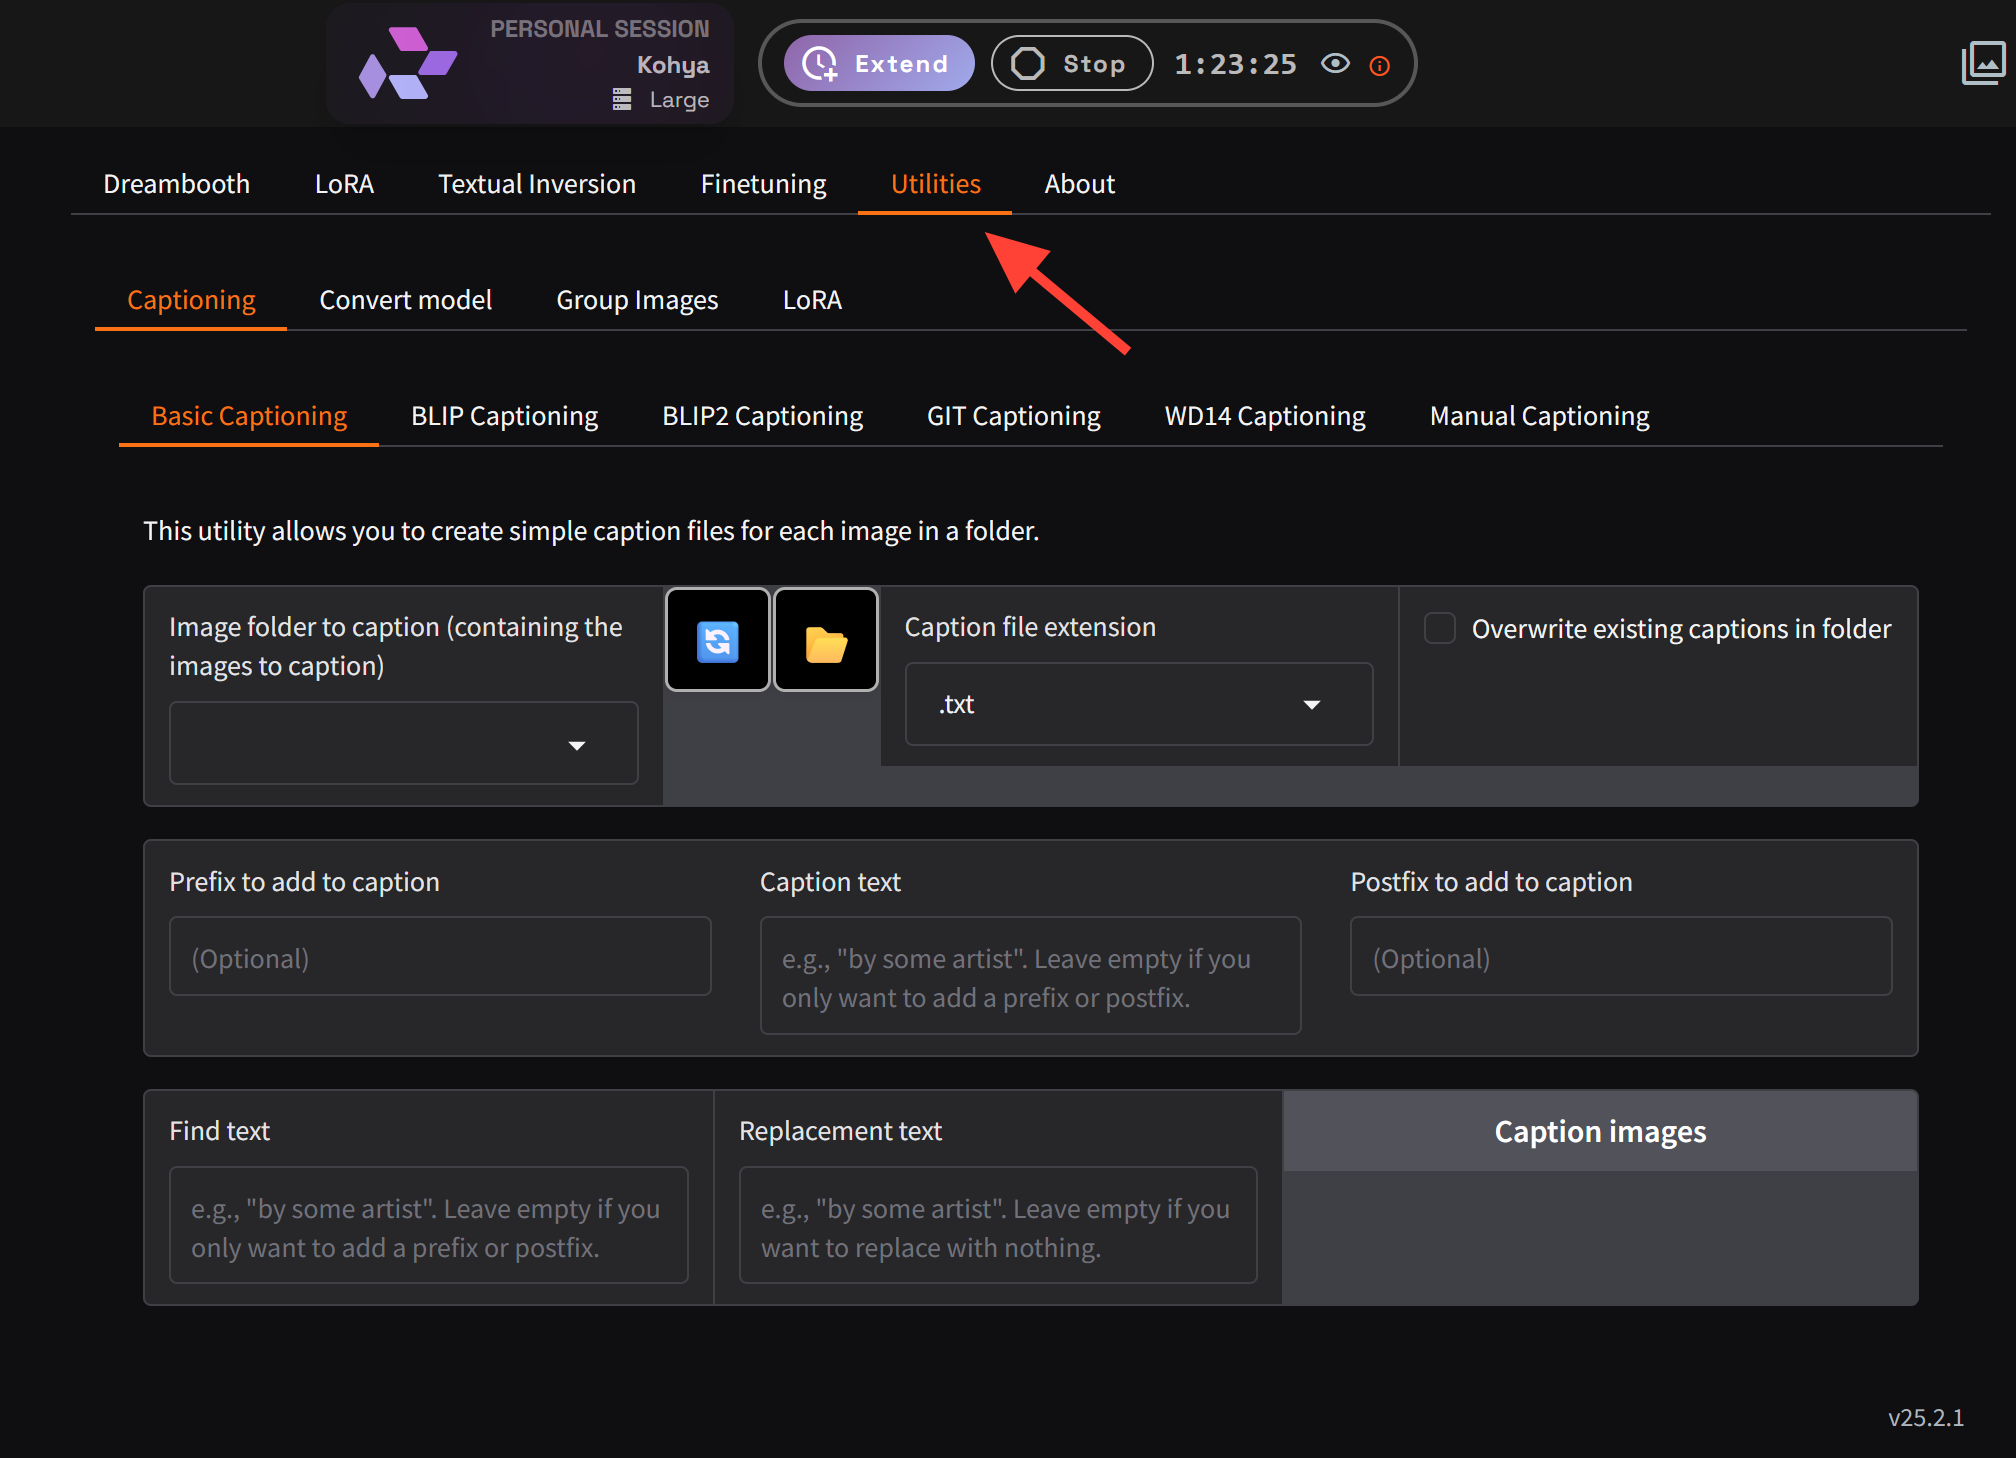
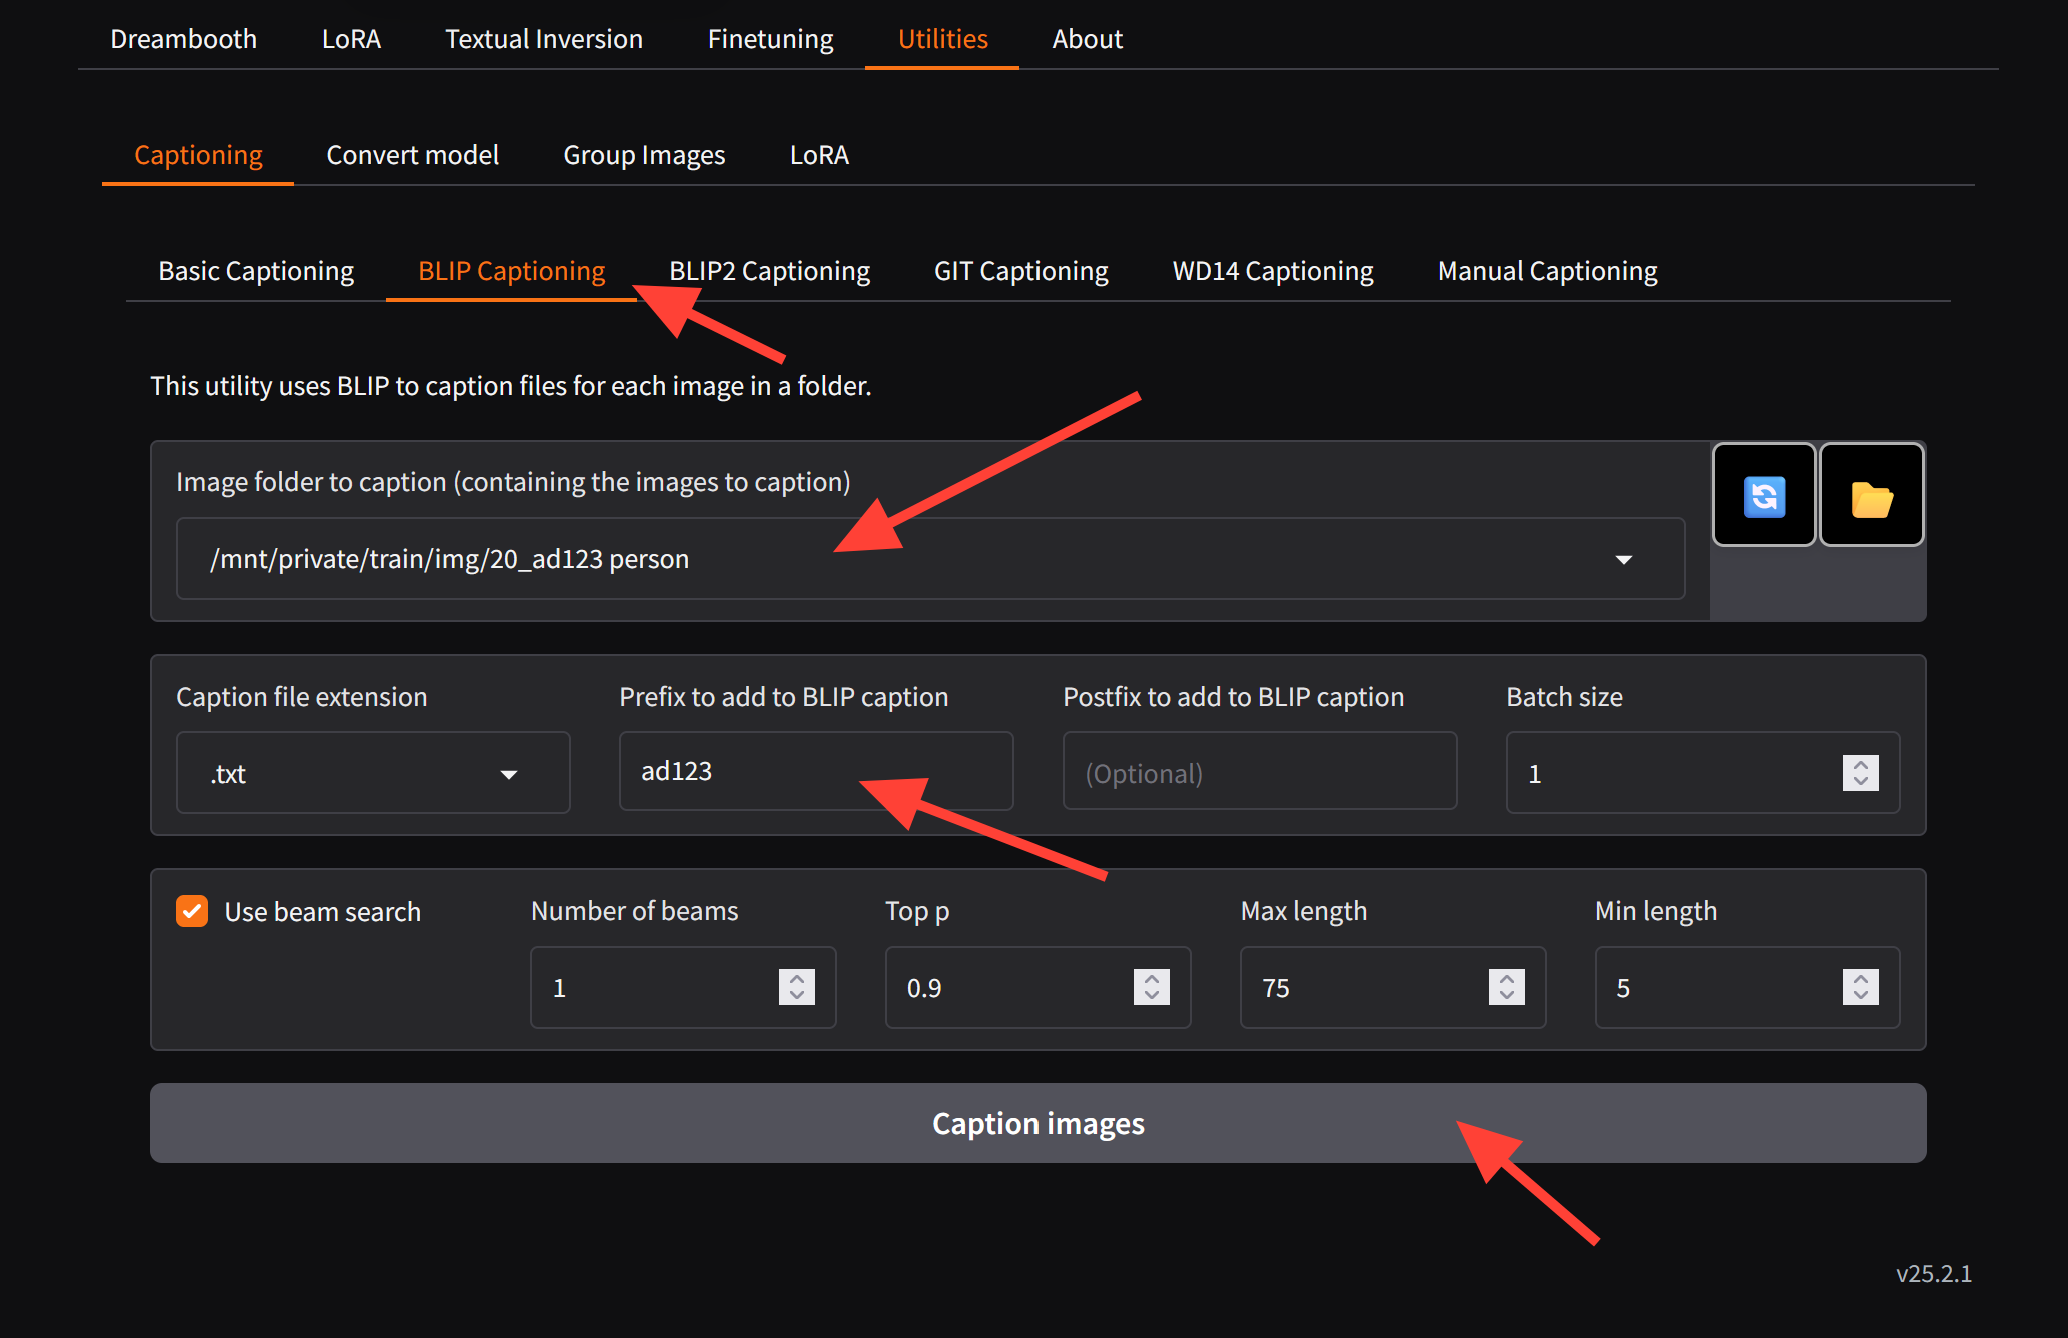
Select Blip Captioning. Then add the token in the Prefix to Add to BLIP caption. Then select caption images. You can also use Manual and other ways to caption.
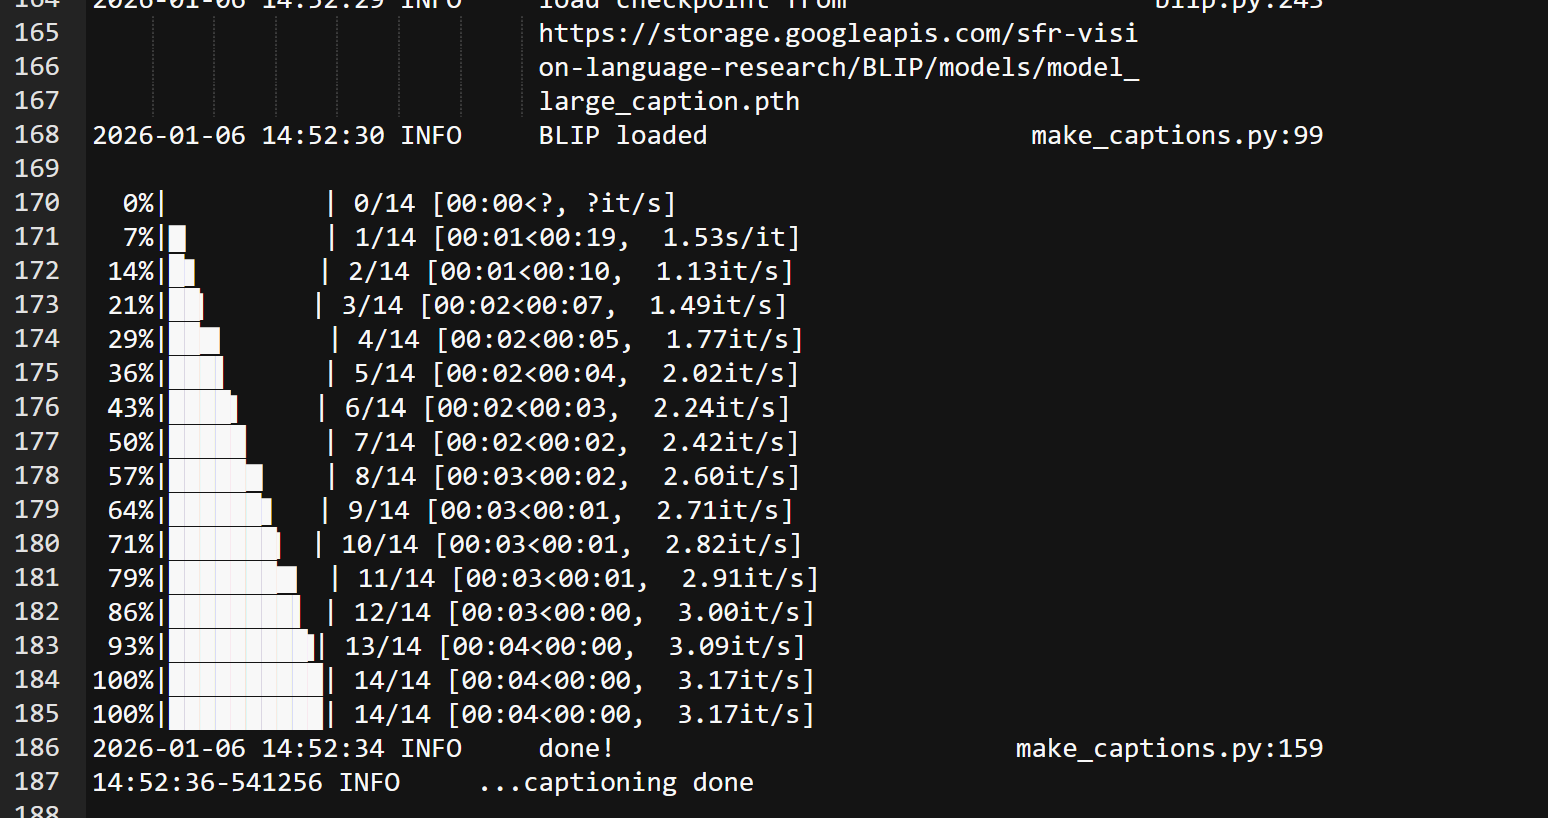
You can check your main Kohya Log to be sure the captioning has completed before continuing to the next step. If you need help on how to access logs you can use this tutorial. A common error is mistyping the folder path.
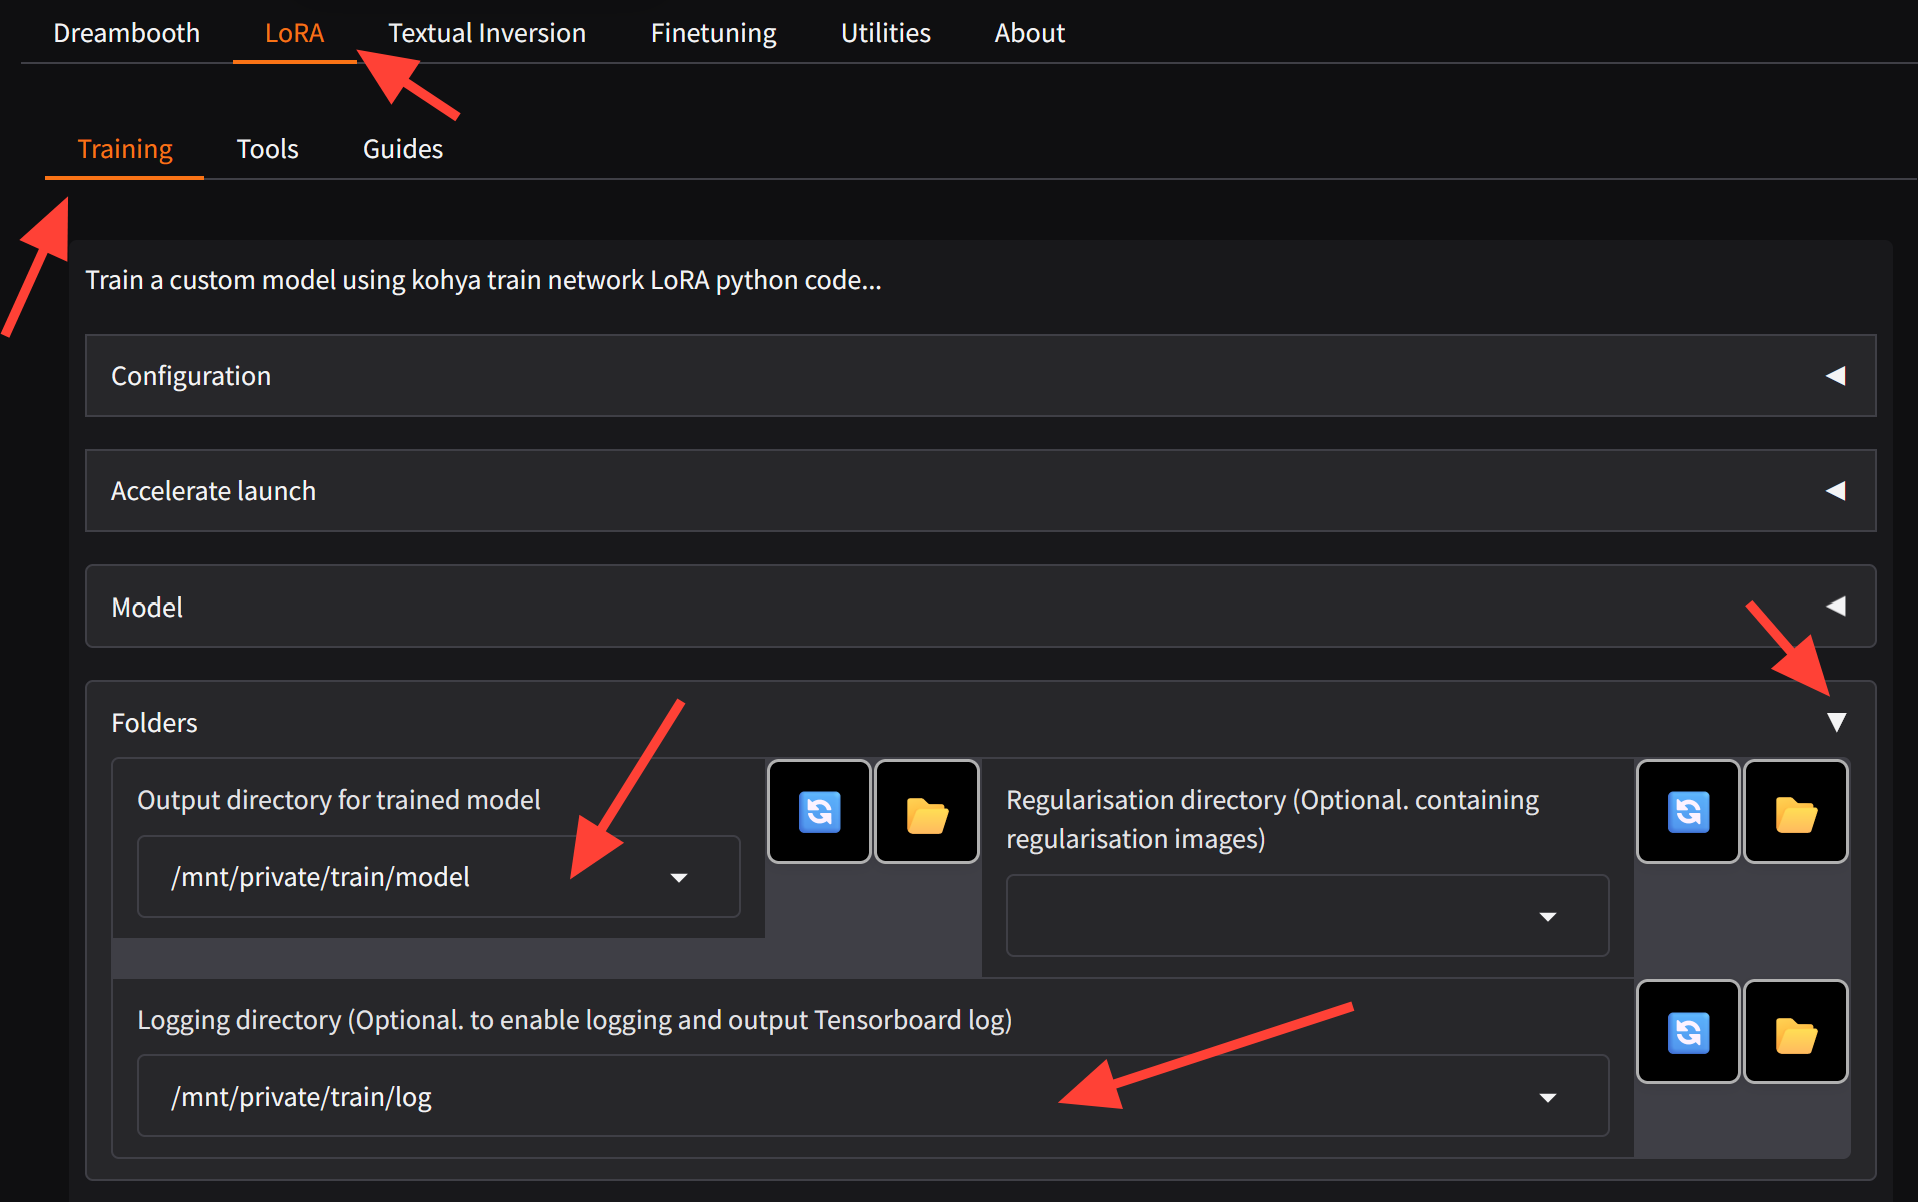
Folders Tab
Return to the Lora Tab and click on the Folders drop down. Enter your Output and Logging Directory.
Output Directory for trained model: /mnt/private/train/model/
Logging Directory: /mnt/private/train/log/
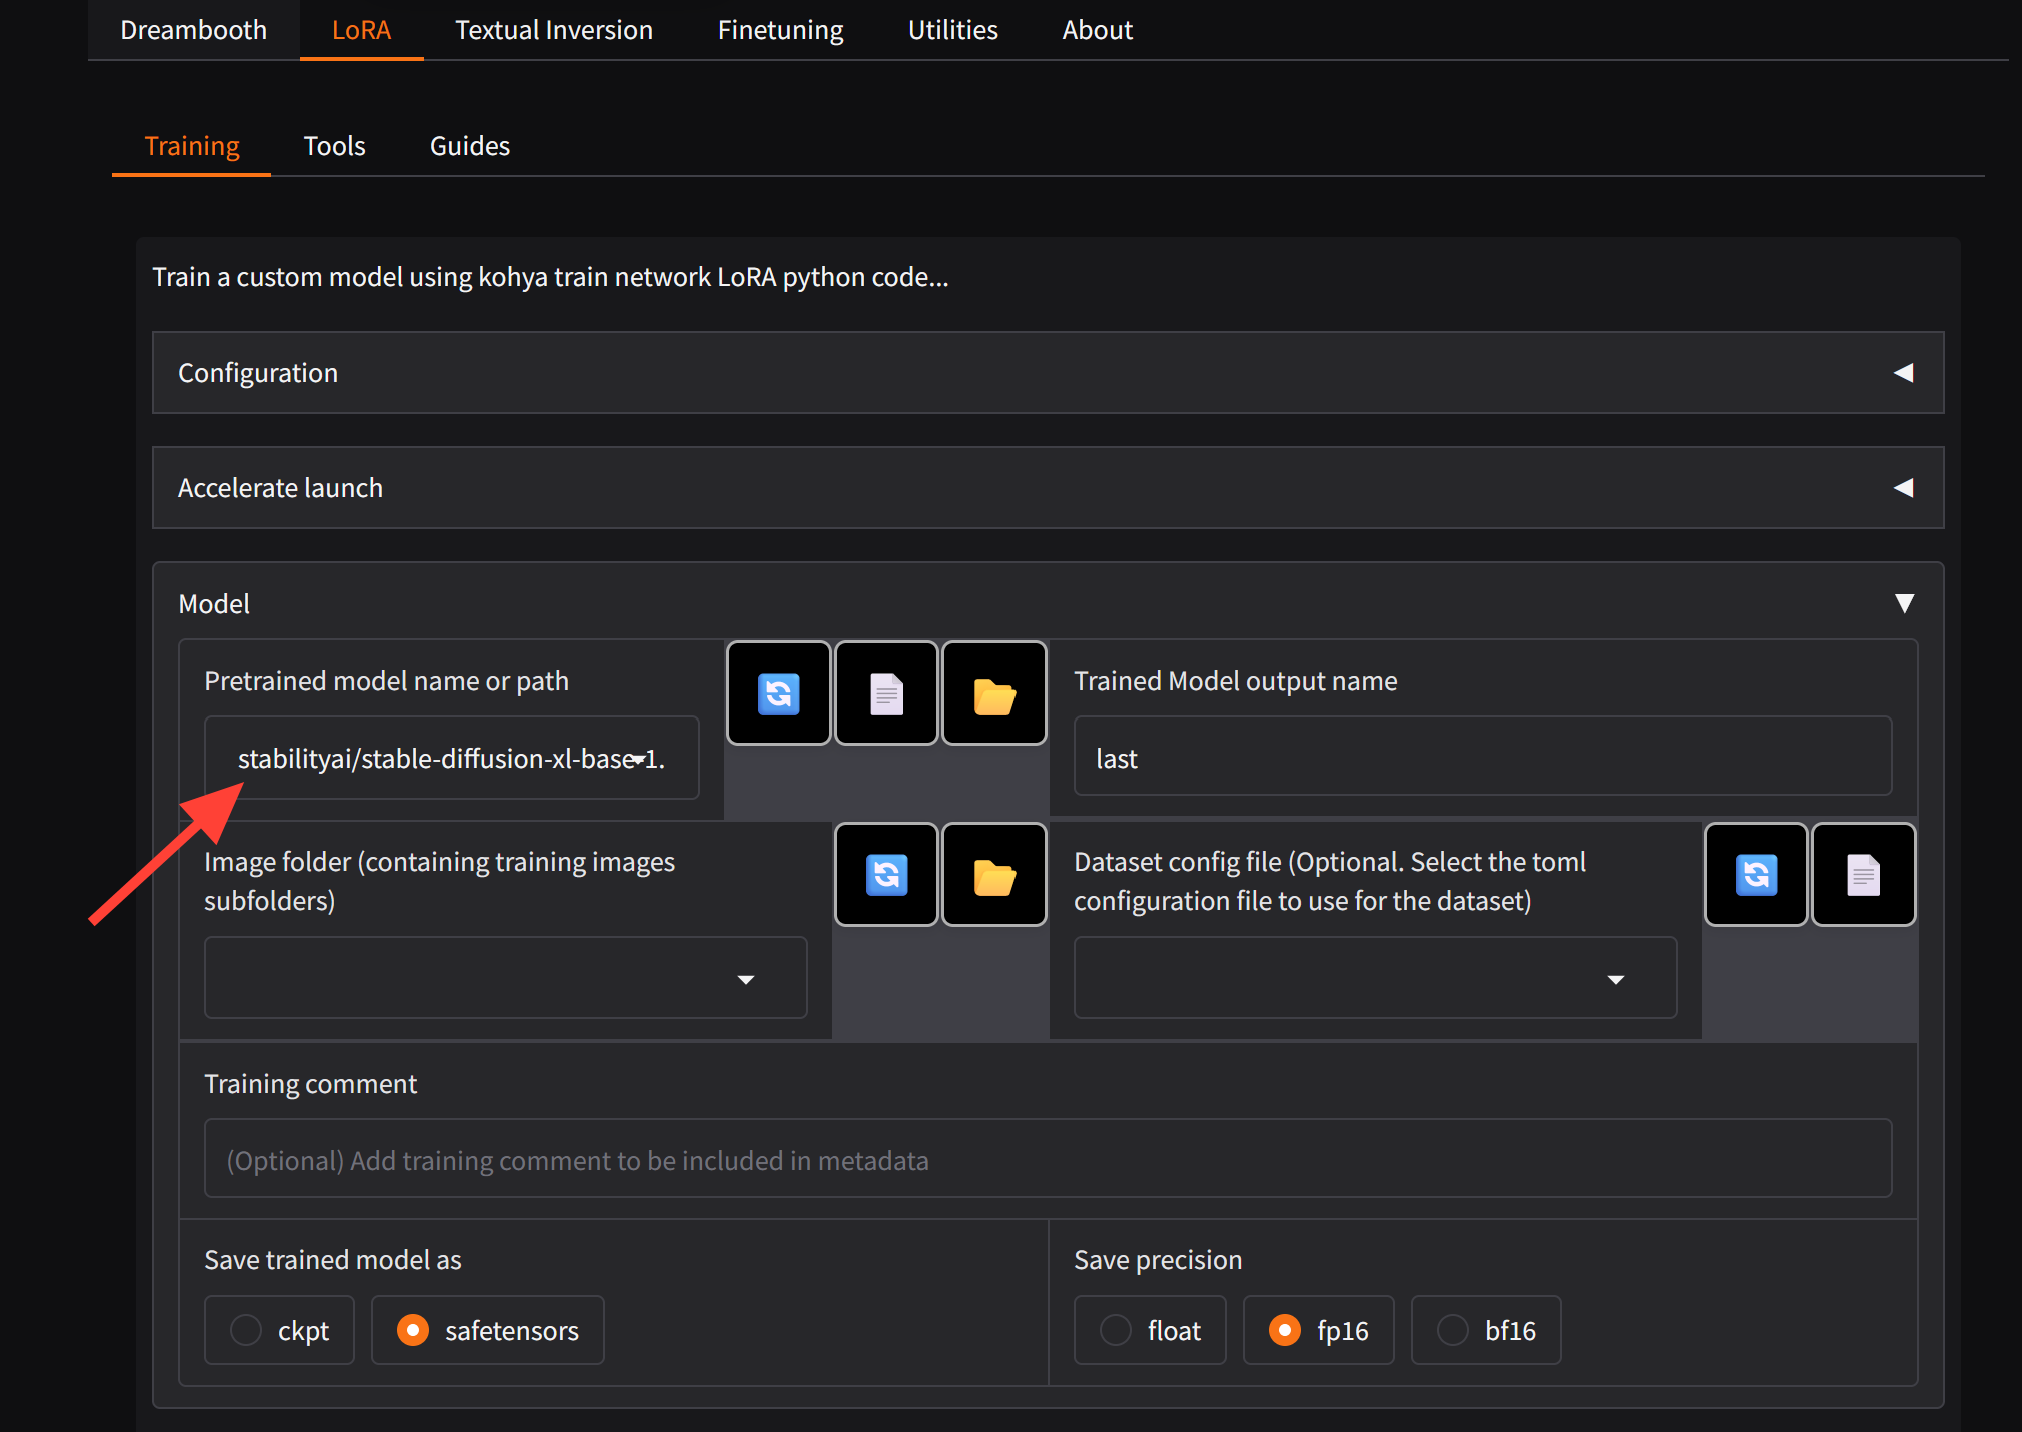
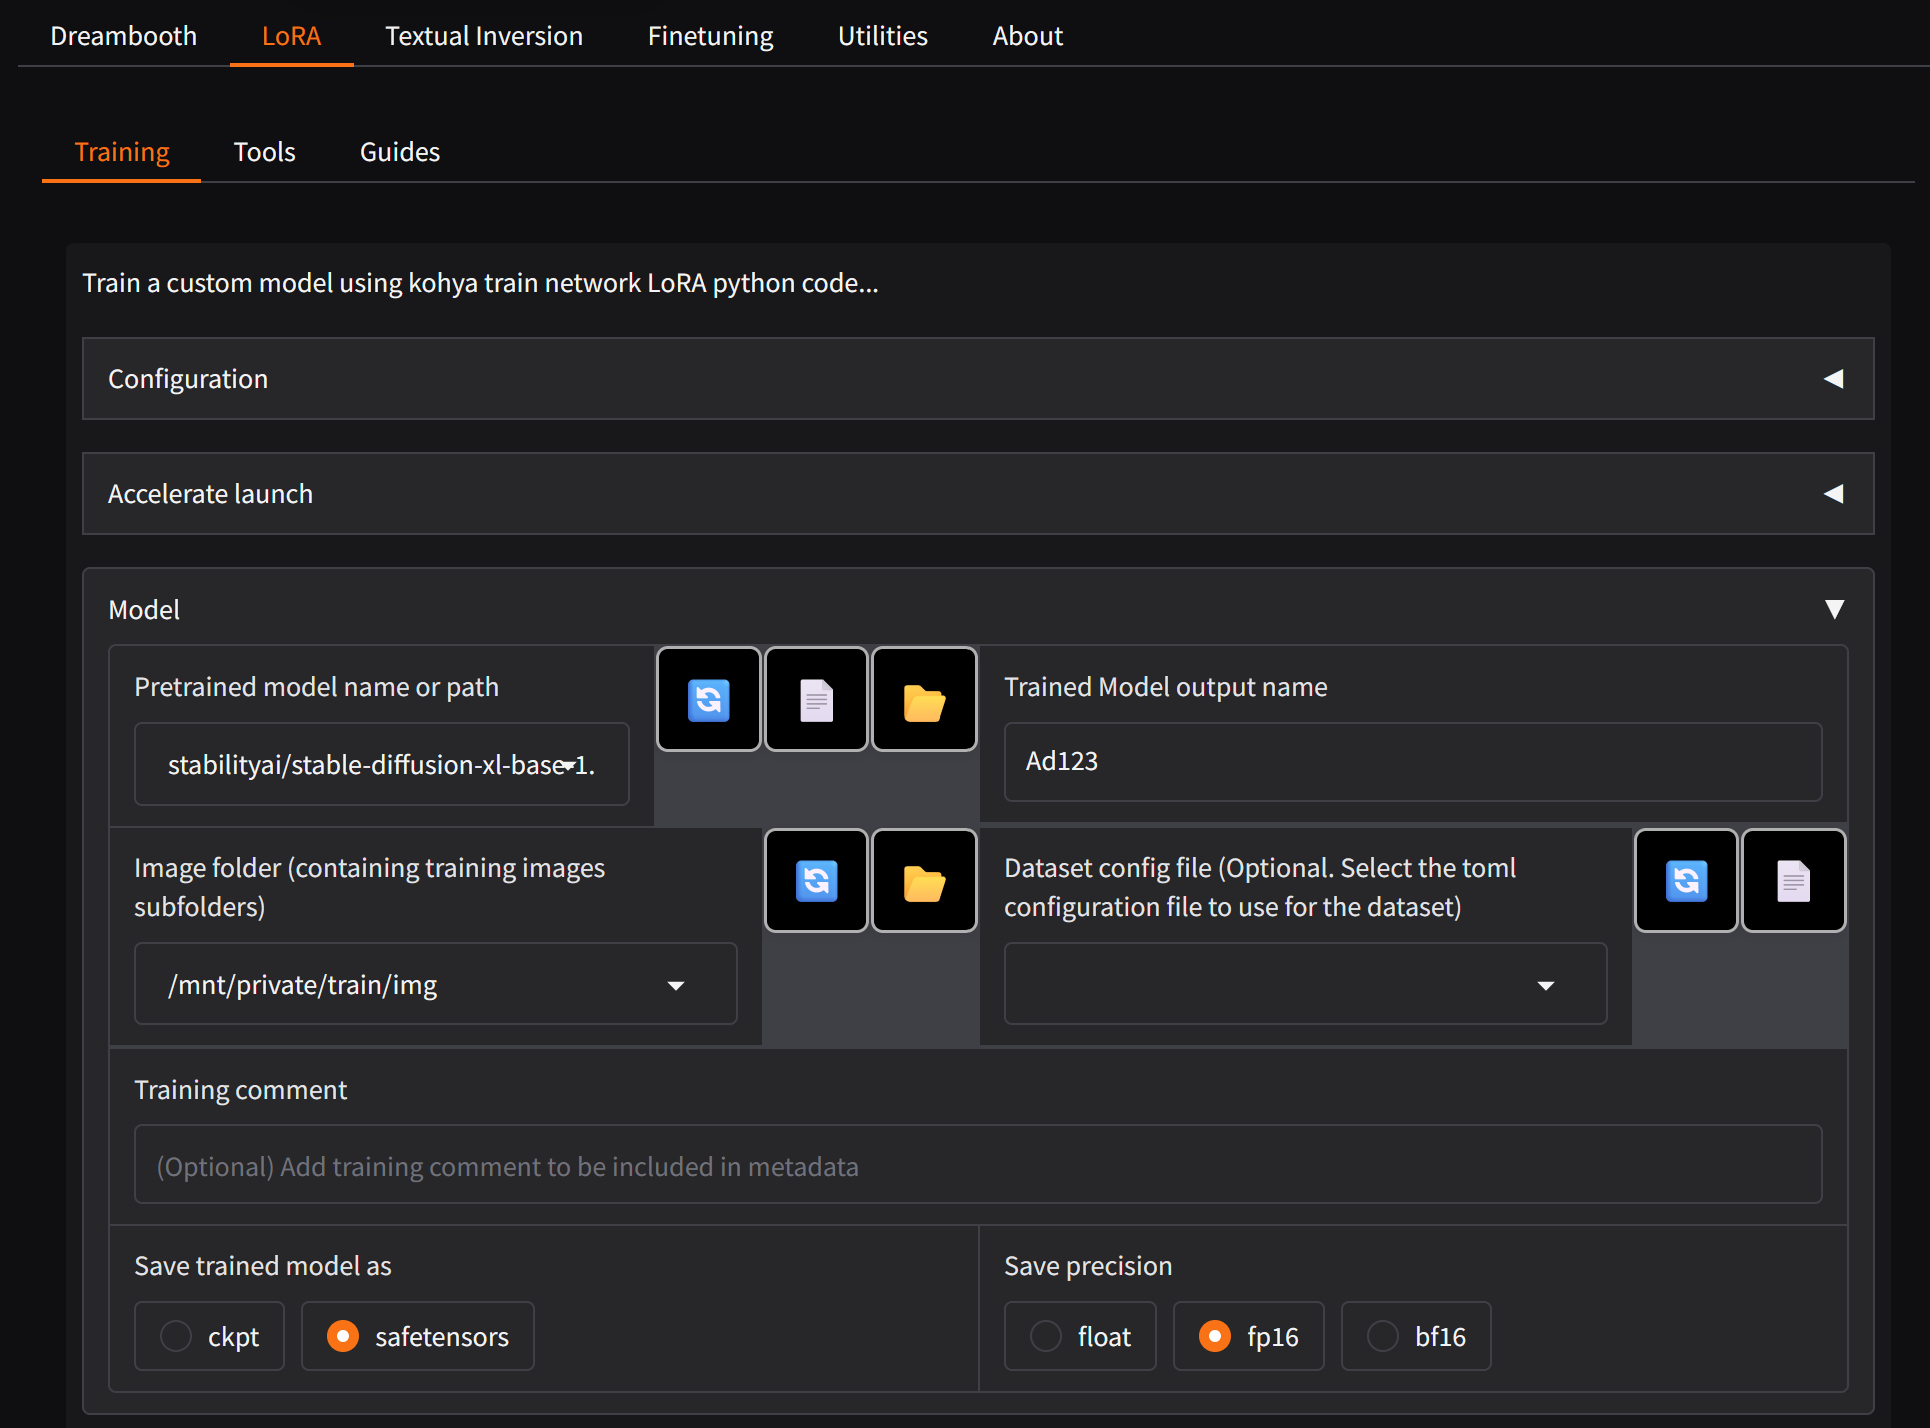
Model Tab
Next expand the Model section. Make sure you have stable-diffusion-xl-base-1.0 selected.
Pretrained Model Name: stabilityai/stable-diffusion-xl-base-1
Image Folder: /mnt/private/train/img
Trained Model Output Name: Your desired model name
Training Comment: Any additional reminders like trigger words
Parameters Tab
Presets: SDXL -Lora AI_Now prodigy v1.0 (Should fill out most of the information for us)
Epochs: Take Max Steps you want, divide that by the number of images you have, and divide that by 20. Or just put a small number like 4-6. An Epoch is one pass through all your images and classification images (if you are using them).
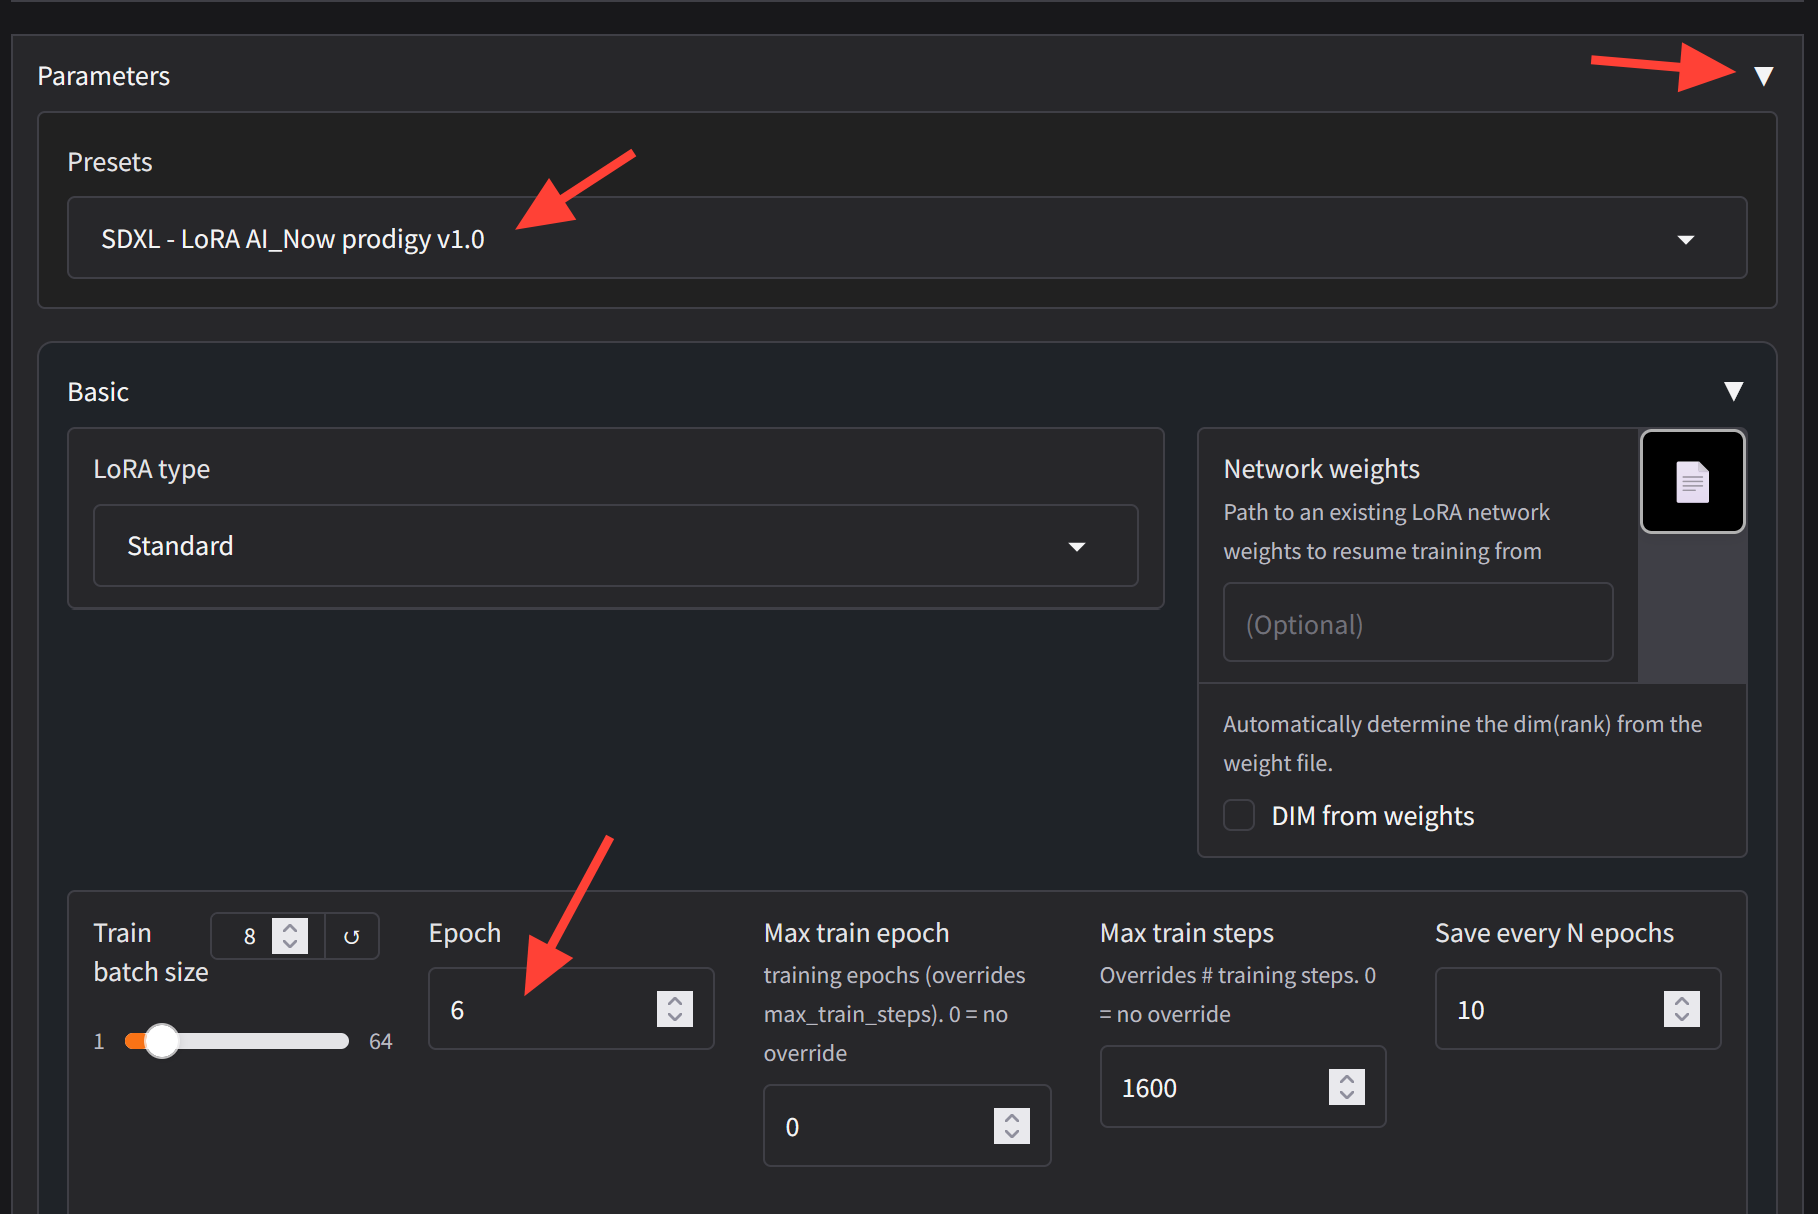
Network Rank: 64 / Network Alpha: 32
The higher your network rank and network alpha, the larger your lora will be, so the less loras you will be able to save without filling up your storage. Although it may be compelling to raise these settings, note that many trainers have found that larger does not necessarily mean better, it's a case of diminishing returns.

We recommend batch size 1 for smaller datasets (under 30-50 images) as it will improve the accuracy. The higher the batch size, the more general the training will be. Note that higher batch sizes need more VRAM, so you may see CUDA errors when you raise the batch size over 1 depending on which server size you are using. We recommend a large server.
Advanced Parameters
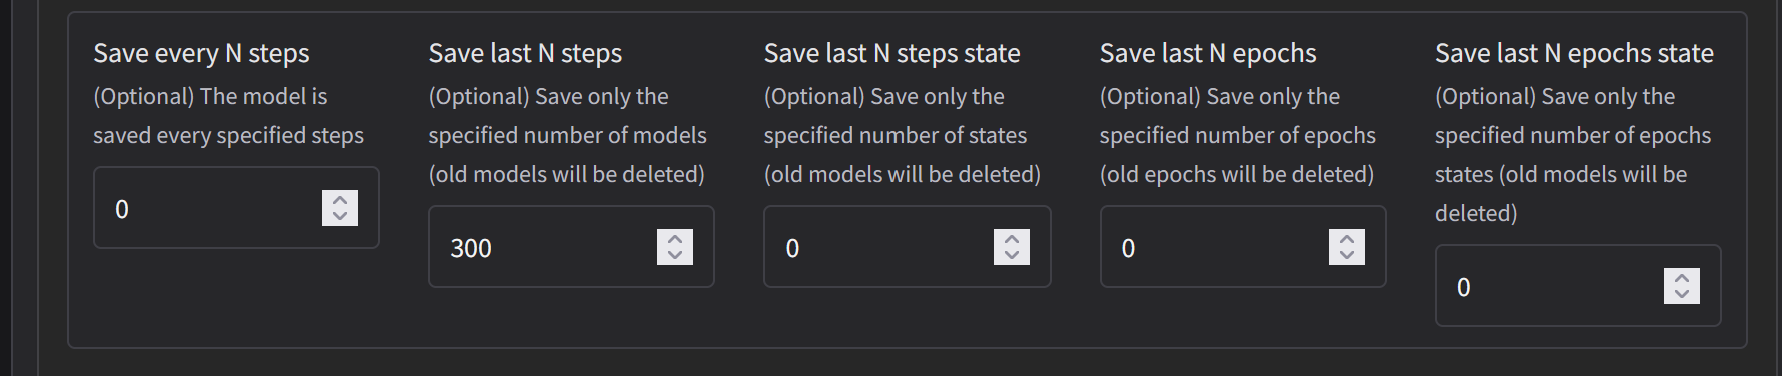
Scroll down under the Parameters section to the Advanced Section.

Go to Save every N Steps. And put a number of how often you want it to save the Lora. This is up to preference and your storage. In the example shown we have Save last N Steps set to 300.
Note: If you run out of storage the training will stop. We recommend a Creators Club plan for the 100gbs of persistent storage.
You can also instead use "Save Every N Epochs" if you prefer.
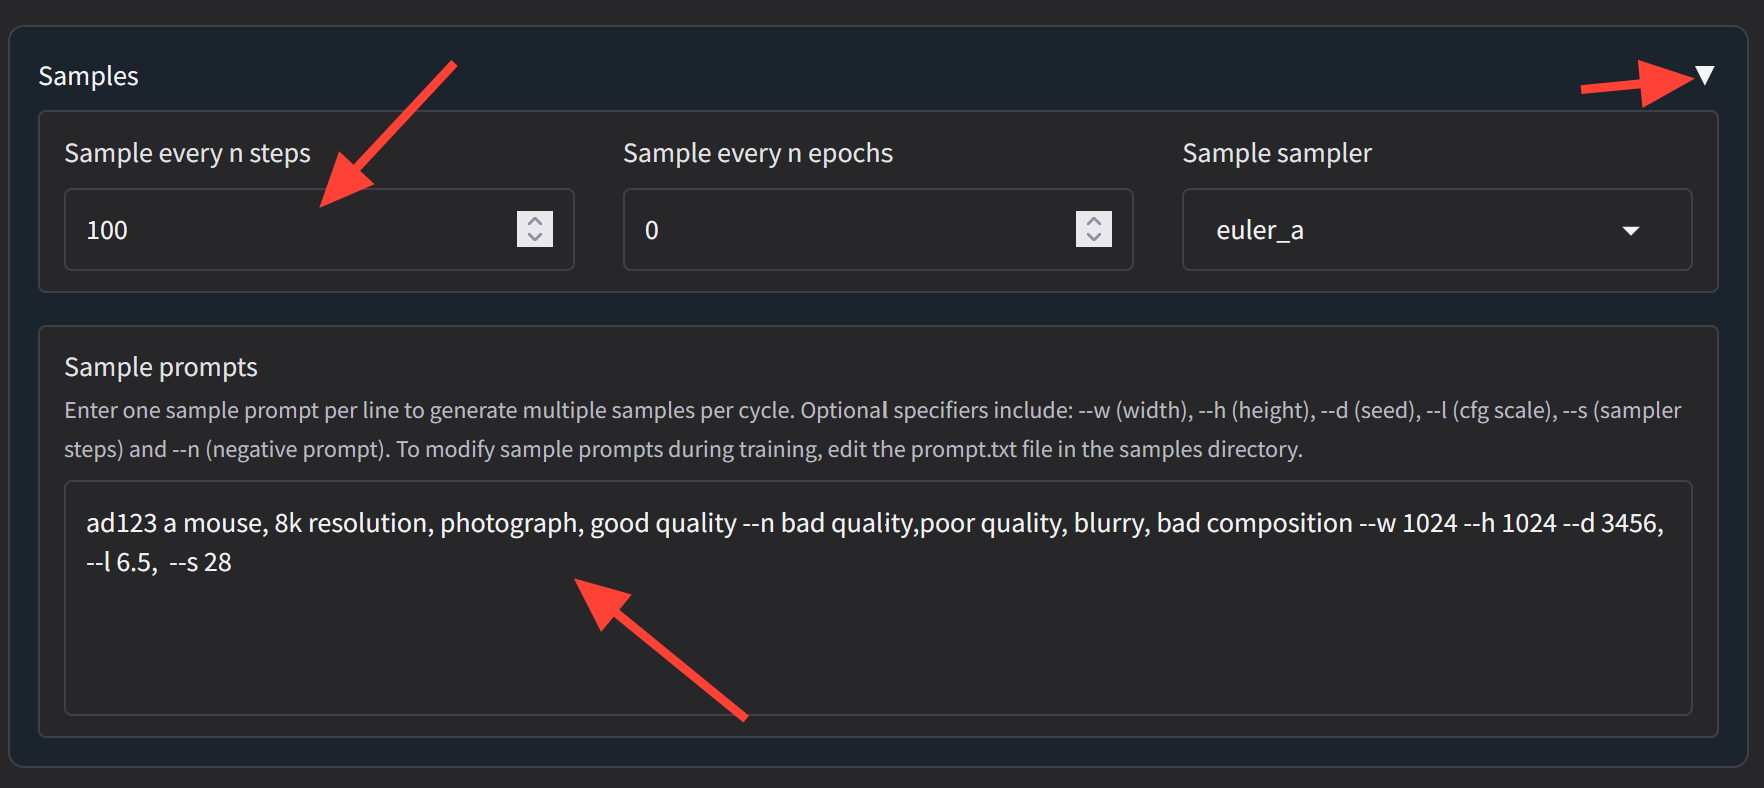
Sample
Scroll down to the Sample section
The sample should be something you would prompt to generate an image so you can view samples throughout the training process.
Example Prompt: gloom_shadows a mouse, 8k resolution, photograph, good quality --n bad quality,poor quality, blurry, bad composition --w 1024 --h 1024 --d 3456, --l 6.5, --s 28
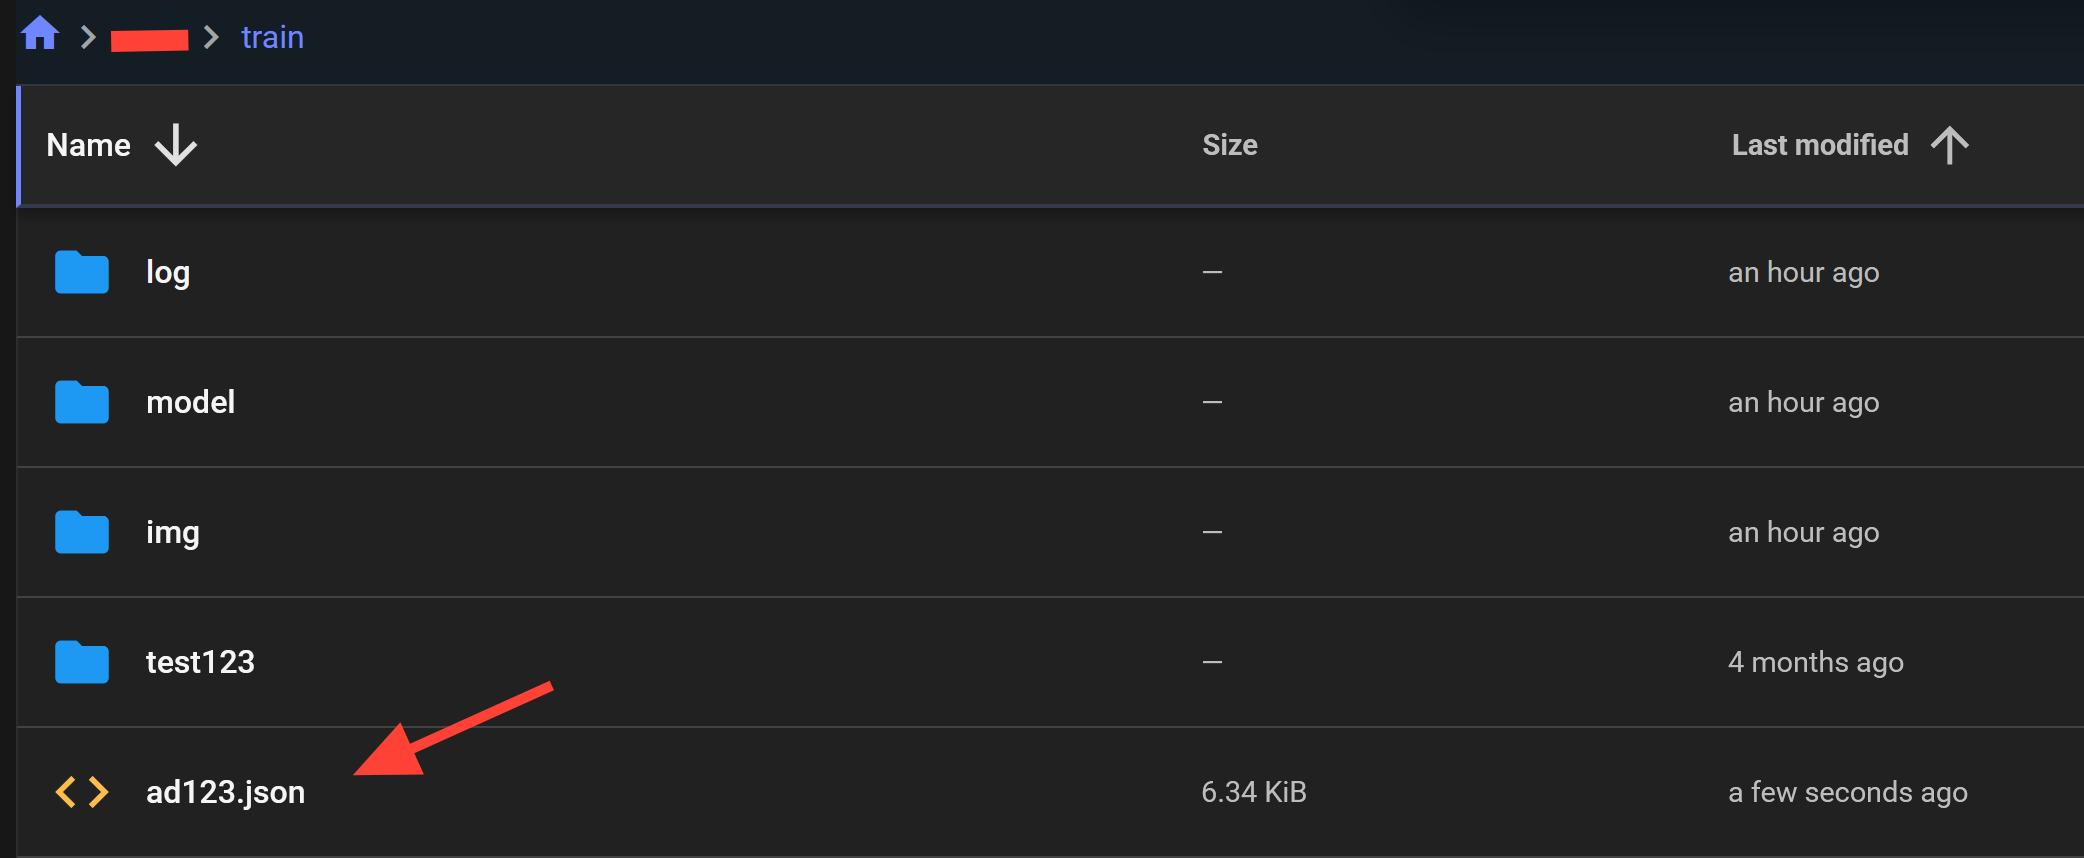
Configuration
Go back to the Source Model Tab and save your config. Type out the full path ala /mnt/private/train/myconfig.json
Confirm in your train folder the file has saved correctly.
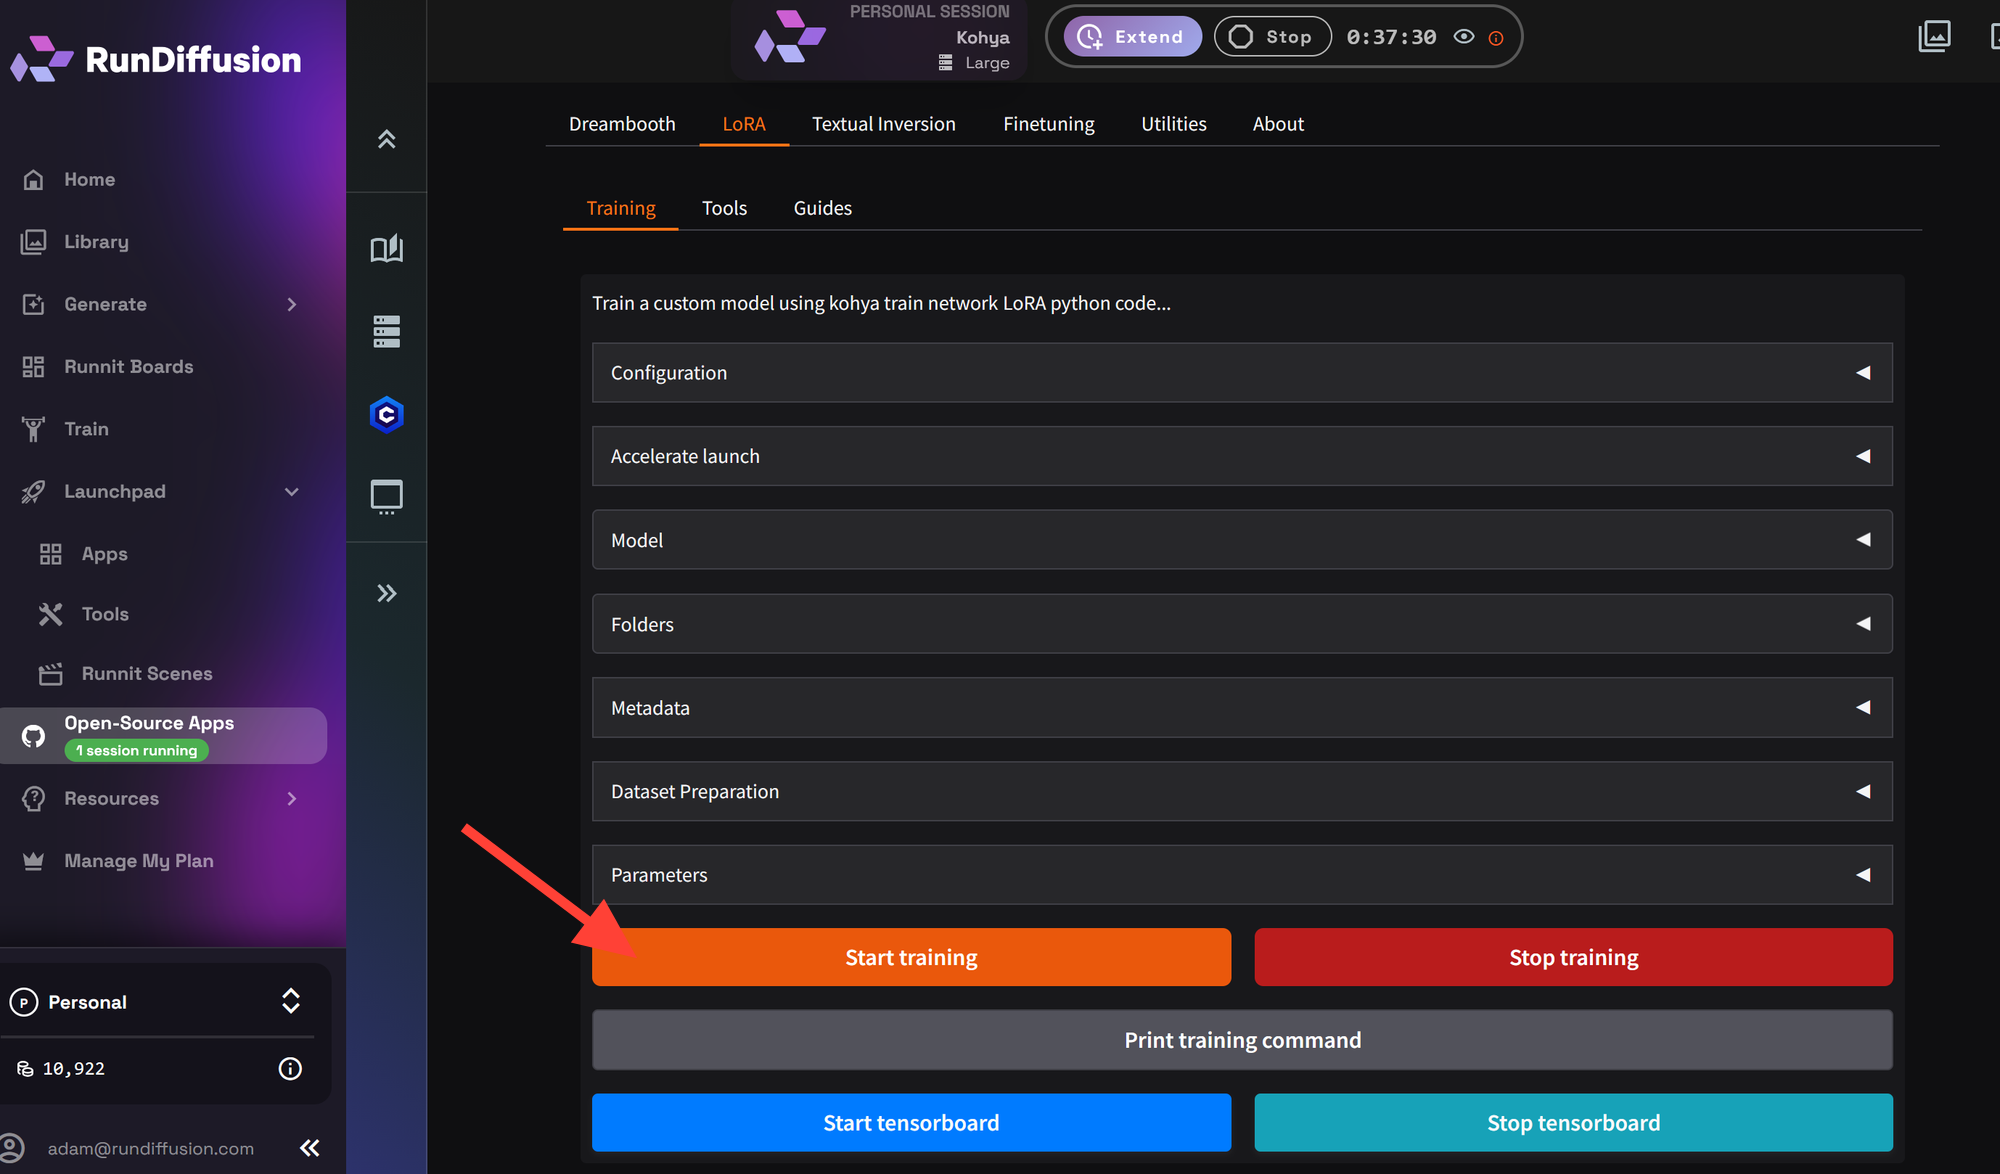
Start Training
Click Start Training. Be aware that the Kohya UI is not responsive. Click it one time then once again check your log file. If you need help finding your opensource log files please use this tutorial.
Checking your logs you can see training has started. The most common errors are incorrect pathing.

Once you have completed your training you will want to test your results using one of our other opensource applications such as Automatic1111, Reforge and ComfyUI.
Frequently Asked Questions (FAQ)
Is this tutorial suitable for beginners?
No. This tutorial is considered advanced and assumes familiarity with LoRa concepts, dataset preparation, and Kohya’s interface. Beginners are strongly encouraged to start with the RunDiffusion Standard Trainer, which provides a guided workflow and premade configuration files.
What is the difference between this tutorial and the Basic Kohya or Flux LoRa tutorials?
The Basic tutorials rely on premade configurations and fewer adjustable parameters. This guide walks through additional Kohya settings to help you understand how training works at a deeper level and gives you more control over the final LoRa output.
What hardware should I select when launching Kohya?
Training SDXL LoRAs is resource intensive. You should select Large or Max hardware. Smaller server sizes may result in CUDA or out-of-memory errors, especially if you increase batch size or network rank.
Why is a Creators Club subscription recommended?
LoRa training generates large intermediate files, multiple checkpoints, logs, and sample images. A Creators Club plan provides up to 100 GB of persistent storage, which helps prevent training from stopping due to insufficient disk space.
Why does Kohya appear unresponsive after clicking certain buttons?
This is expected behavior. Kohya does not provide real-time UI feedback for many actions. Always verify progress by checking the file browser or reviewing the Kohya log files rather than repeatedly clicking buttons.
What is an Instance Prompt, and why is it important?
The Instance Prompt is your unique trigger token. It is the word or phrase you will use later when prompting with the trained LoRa. Choosing a unique, uncommon token helps prevent conflicts with existing concepts in the base model.
What should I use for the Class Prompt?
The Class Prompt defines the general category of what you are training, such as person, style, or object. This helps the model generalize correctly and avoid overfitting.
Why do I need both images and text files in my dataset?
The text files contain captions that guide the training process. If captions are missing, Kohya will not know how to associate your images with language concepts. You can generate captions automatically using BLIP captioning or create them manually.
What is BLIP Captioning, and when should I use it?
BLIP Captioning automatically generates captions for your images. It is useful when you do not already have text files or want to quickly add a token prefix across your dataset. Always confirm completion in the logs before proceeding.
How do I know if dataset preparation completed successfully?
After clicking Prepare Training Data, check your file browser. Navigate out of the folder and back into it to refresh. You should see a newly created img directory with processed images. If nothing appears, check the logs for path errors.
How do I choose the number of epochs?
A simple approach is to use a small number such as 4–6 epochs, especially when starting out. An epoch represents one full pass through your dataset. More epochs increase the risk of overfitting, particularly with small datasets.
What do Network Rank and Network Alpha control?
These values determine the capacity of your LoRa. Higher values increase model size and storage usage but do not guarantee better results. Many trainers observe diminishing returns beyond moderate settings such as Rank 64 and Alpha 32.
Why is batch size set to 1 for small datasets?
Batch size 1 improves precision and helps the model learn fine details when training with fewer images. Larger batch sizes require more VRAM and may cause CUDA errors on smaller servers.
What does “Save every N Steps” do?
This setting controls how often Kohya saves intermediate LoRa checkpoints. Saving more frequently allows you to test different stages of training but increases storage usage. Adjust based on your storage limits and testing needs.
What happens if I run out of storage during training?
Training will stop immediately. To avoid this, monitor storage usage and limit how often checkpoints are saved. A Creators Club plan significantly reduces this risk.
Why should I include a sample prompt?
Sample prompts allow Kohya to generate preview images during training. These samples help you visually assess progress, convergence, and overfitting without stopping the training run.
Why do I need to save a configuration file?
Saving your configuration allows you to reuse, modify, or rerun the training later without re-entering all settings. Always verify the config file path and confirm it exists before starting training.
How do I know training has actually started?
After clicking Start Training, check the Kohya log file. The UI may not change, but the logs will show initialization steps, dataset loading, and training progress.
Where can I test my trained LoRa?
After training completes, you can test your LoRa using other open-source applications on RunDiffusion, such as Automatic1111, Reforge, or ComfyUI.
