


Introduction
Outpainting is a fascinating technique in the world of AI art generation that extends the boundaries of an existing image. It allows artists to expand their creations beyond the initial canvas, adding new elements seamlessly. Fooocus, a powerful tool available on RunDiffusion, makes this process easier and more accessible. In this guide, we will walk you through the steps to outpaint using Fooocus on RunDiffusion, enabling you to create stunning, expanded artworks.
What is Outpainting?
Outpainting is the process of filling in missing parts of an image or extending the image's boundaries while maintaining a coherent and visually appealing result. This technique is particularly useful.
Why You May Want to Use Outpainting
- Maintains consistent style across a larger canvas.
- Adjusts framing and improves overall composition.
- Completes partially cropped or damaged images.
- Creates larger marketing materials without losing detail.
- Enhances product presentations with expansive visuals.
- Enables innovative and experimental art projects.
- Assists in restoring and preserving old artworks.
- Recreates historical scenes for educational purposes.
- Saves time with AI-driven automated expansion.
- Scales small originals into high-quality large-format visuals.
- It's fun and a creative way to create new works of art.
Getting Started with FOOOCUS on RunDiffusion
Before diving into the outpainting process, ensure you have an account on RunDiffusion and access to the FOOOCUS tool. If you haven't already, sign up at RunDiffusion and explore the various AI tools available.
Step-by-Step Guide to Outpainting Using Fooocus
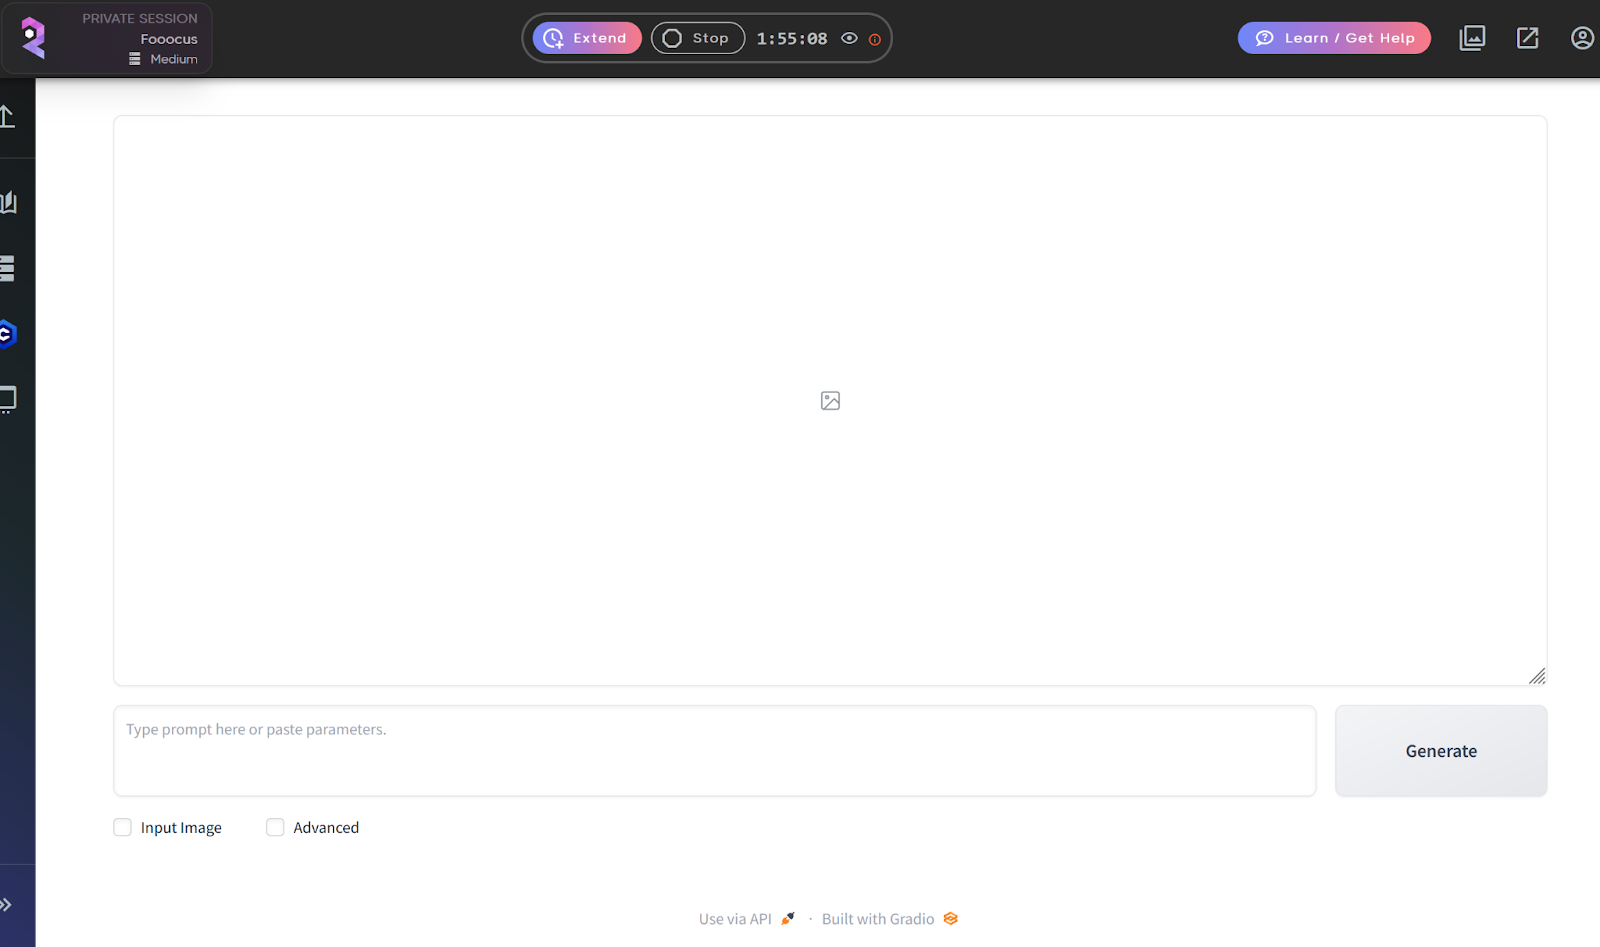
Step 1: Upload Your Image
- Log in to your RunDiffusion account.
- Navigate to the Fooocus tool in the dashboard.
Select the size of server and build you need for your project. This may vary depending on the size of the image you want to outpaint.

Step 2: Let's Outpaint!
- First check the box titled Input Image in the bottom left.
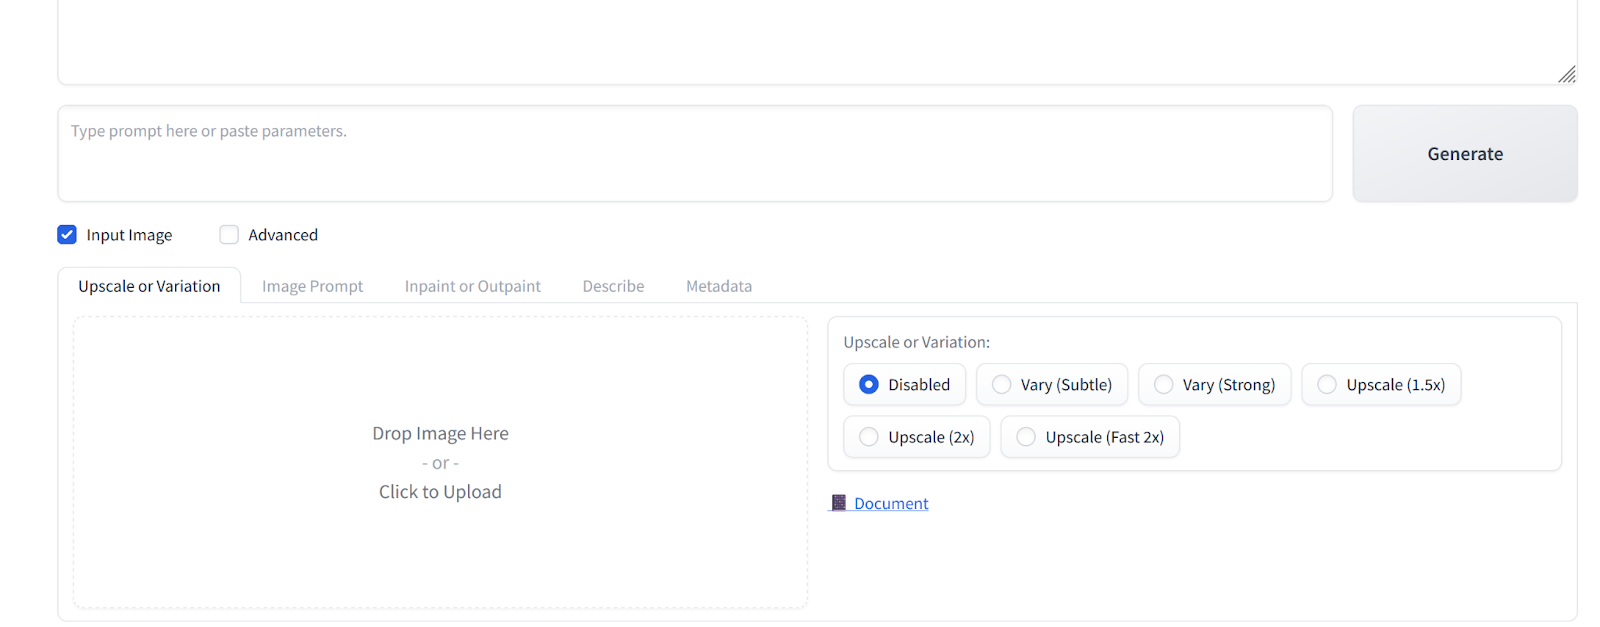
- Now you have expanded options. You can see one of the tabs is titled Inpaint or Outpaint. Select this tab.
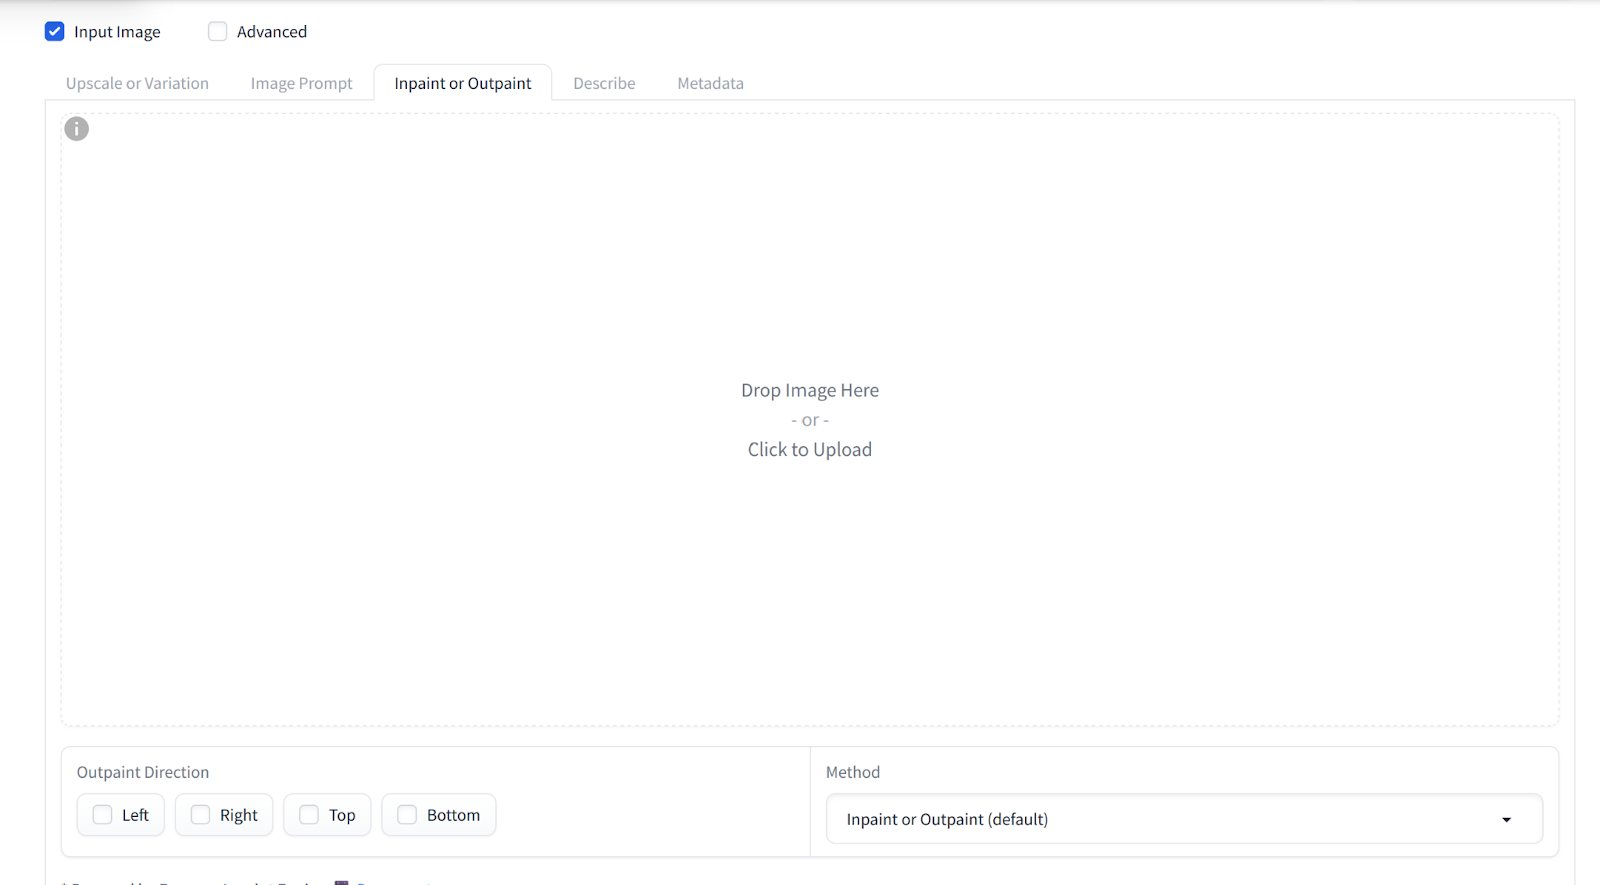
- Now Drop and Image on the center box or click to upload from your hard drive.
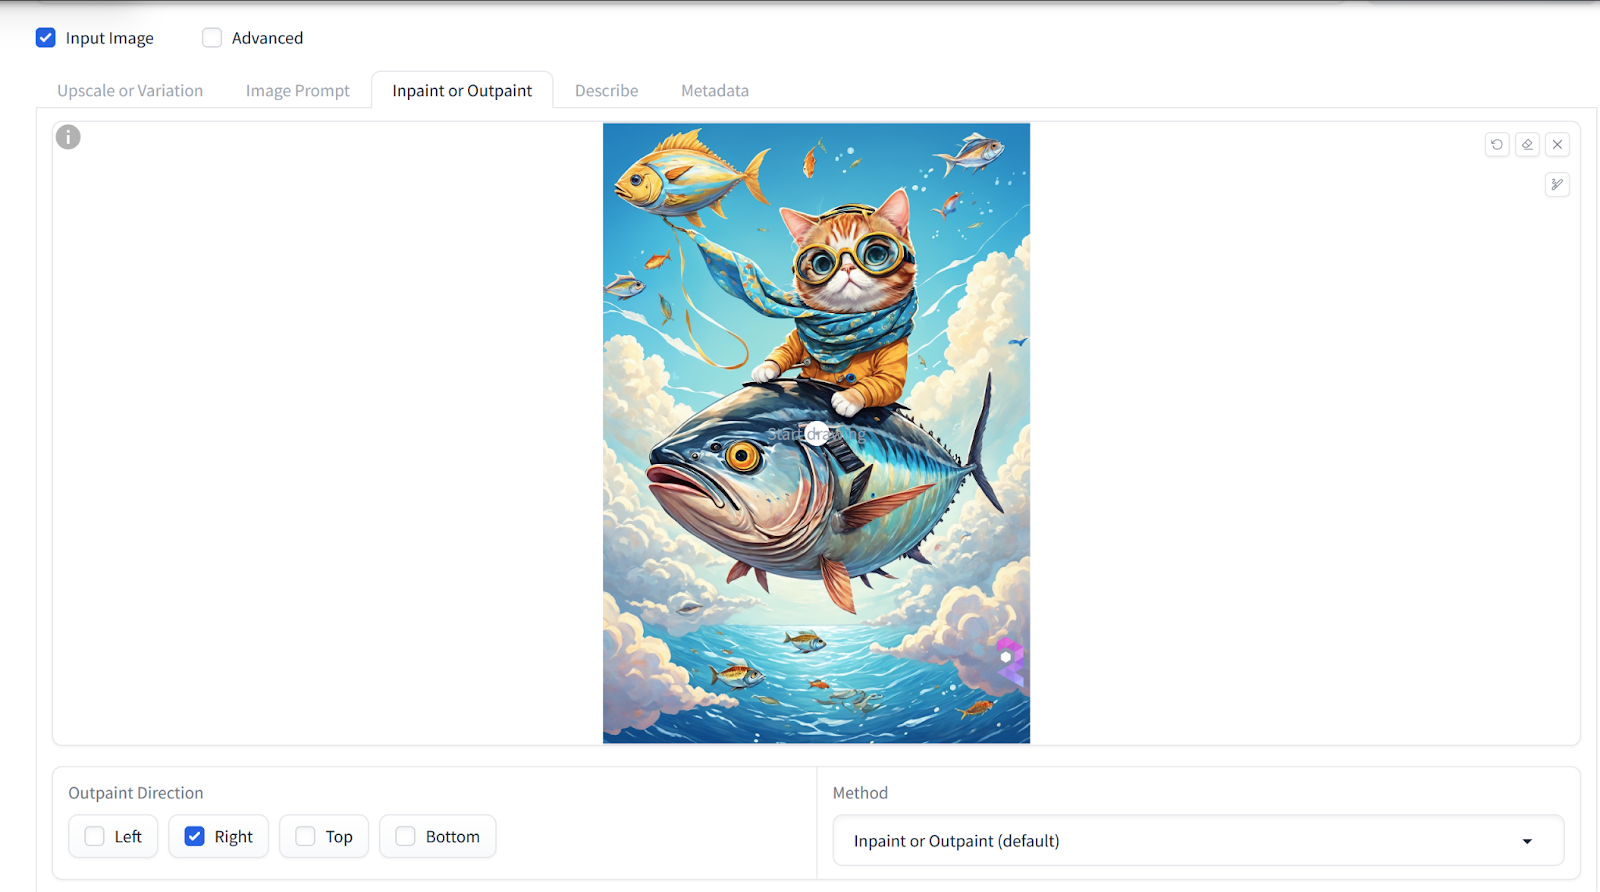
- In the bottom left you can see a section titled "Outpaint Direction". Select which area the AI should outpaint. For this example I will select right.
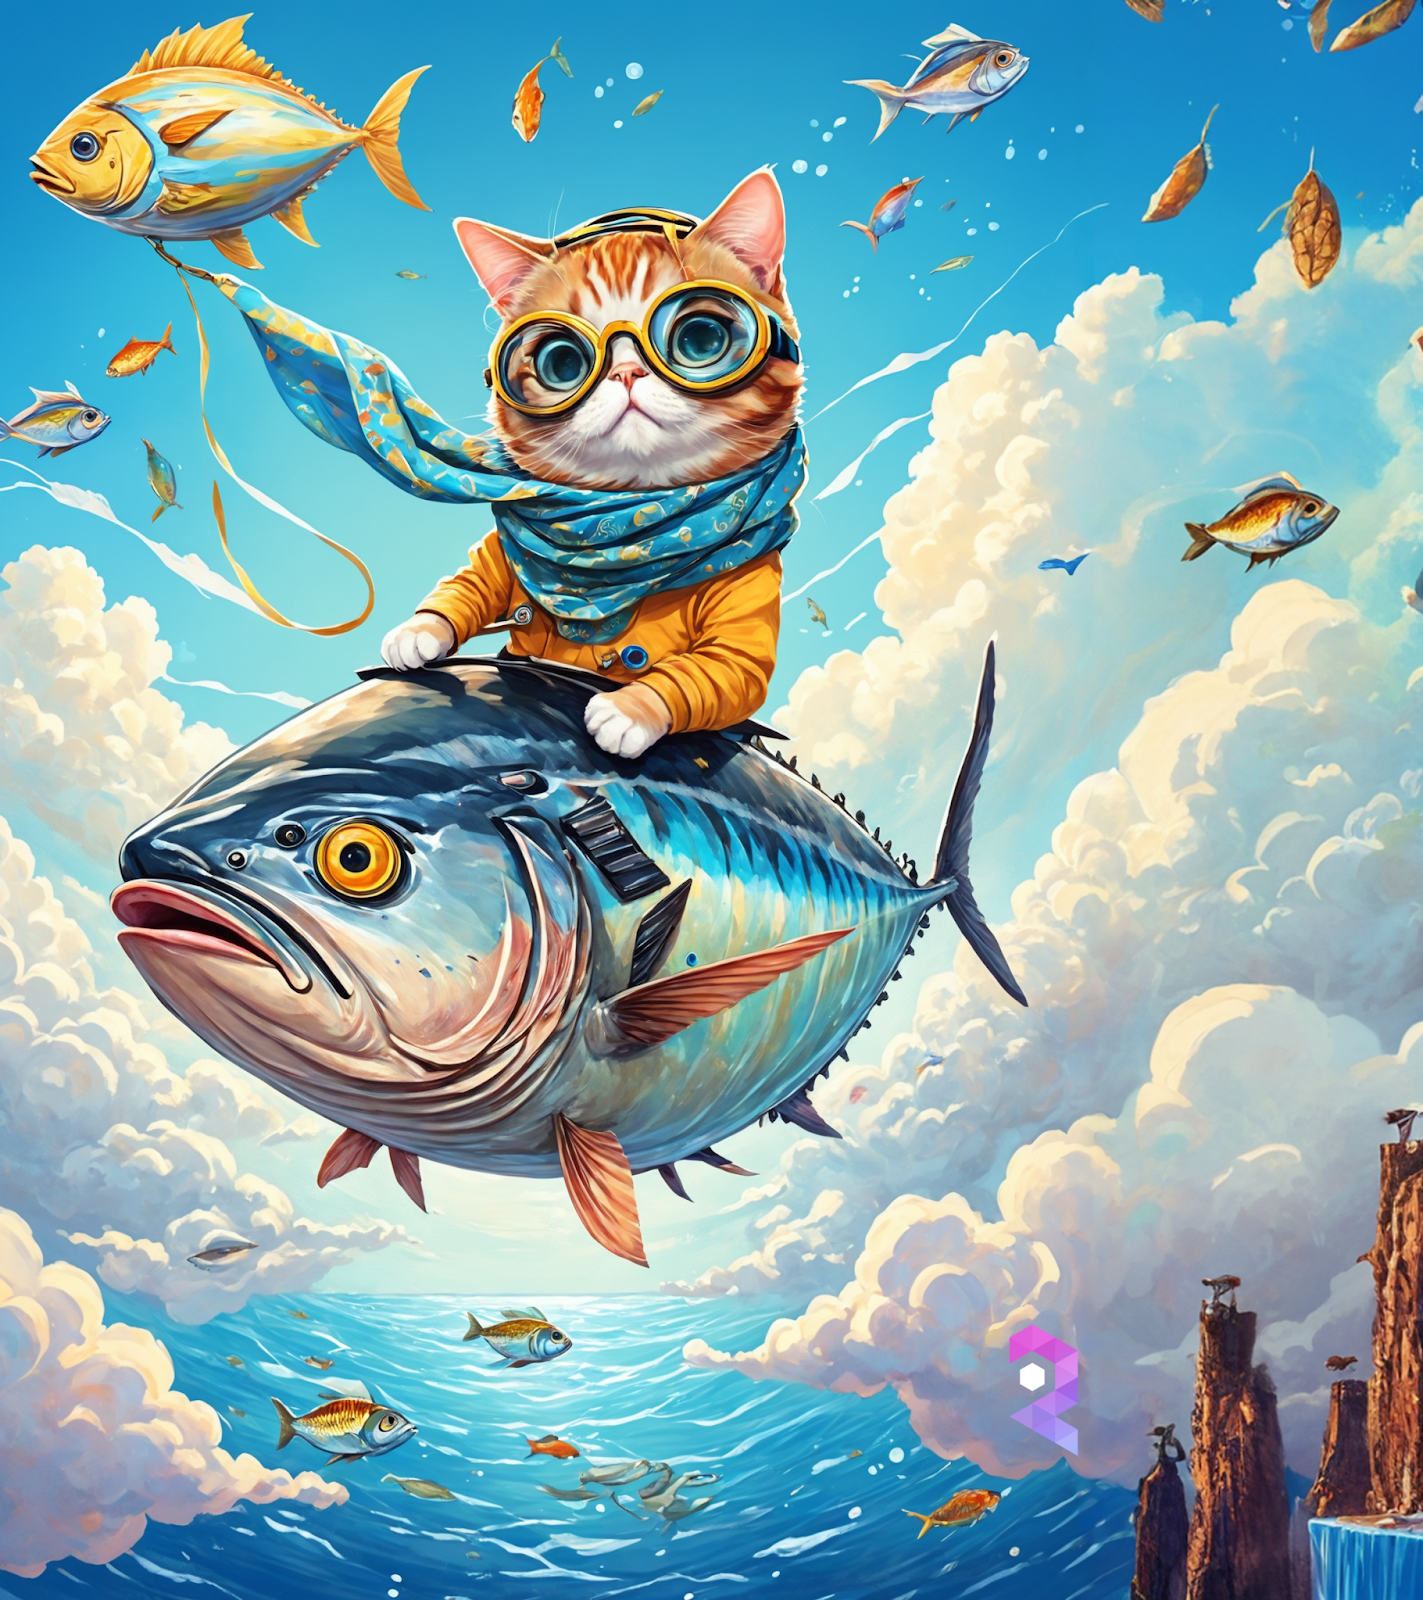
- Now click on Generate and wait. The AI will slowly draw and try to match the style of your original image.
- You may also add a prompt to your scene. Select another photo.

- Type a prompt in and then select generate. In this example I chose a surreal elephant. Then click generate again!


Step 7: Save your new masterpiece! And share on socials. Don't forget to tag us when you share images on social media.
Conclusion
Outpainting using Fooocus on RunDiffusion opens up a world of creative possibilities. By following this guide, you can easily extend your artworks, add new dimensions to your photos, and explore the full potential of AI-assisted image editing. Start your outpainting journey today on RunDiffusion and discover the endless possibilities that await you.
For more detailed guides and tips, check out our other articles:
