


From Image Generation to Video
Runnit Boards in Runnit allow you to seamlessly move from image generation to inpainting and finally to video creation, all within a structured workflow. This guide will walk you through setting up a Runnit Board that will:
✅ Generate an AI image
✅ Edit and refine it using inpainting
✅ Animate it into a video
Step 1: Setting Up Your Runnit Board
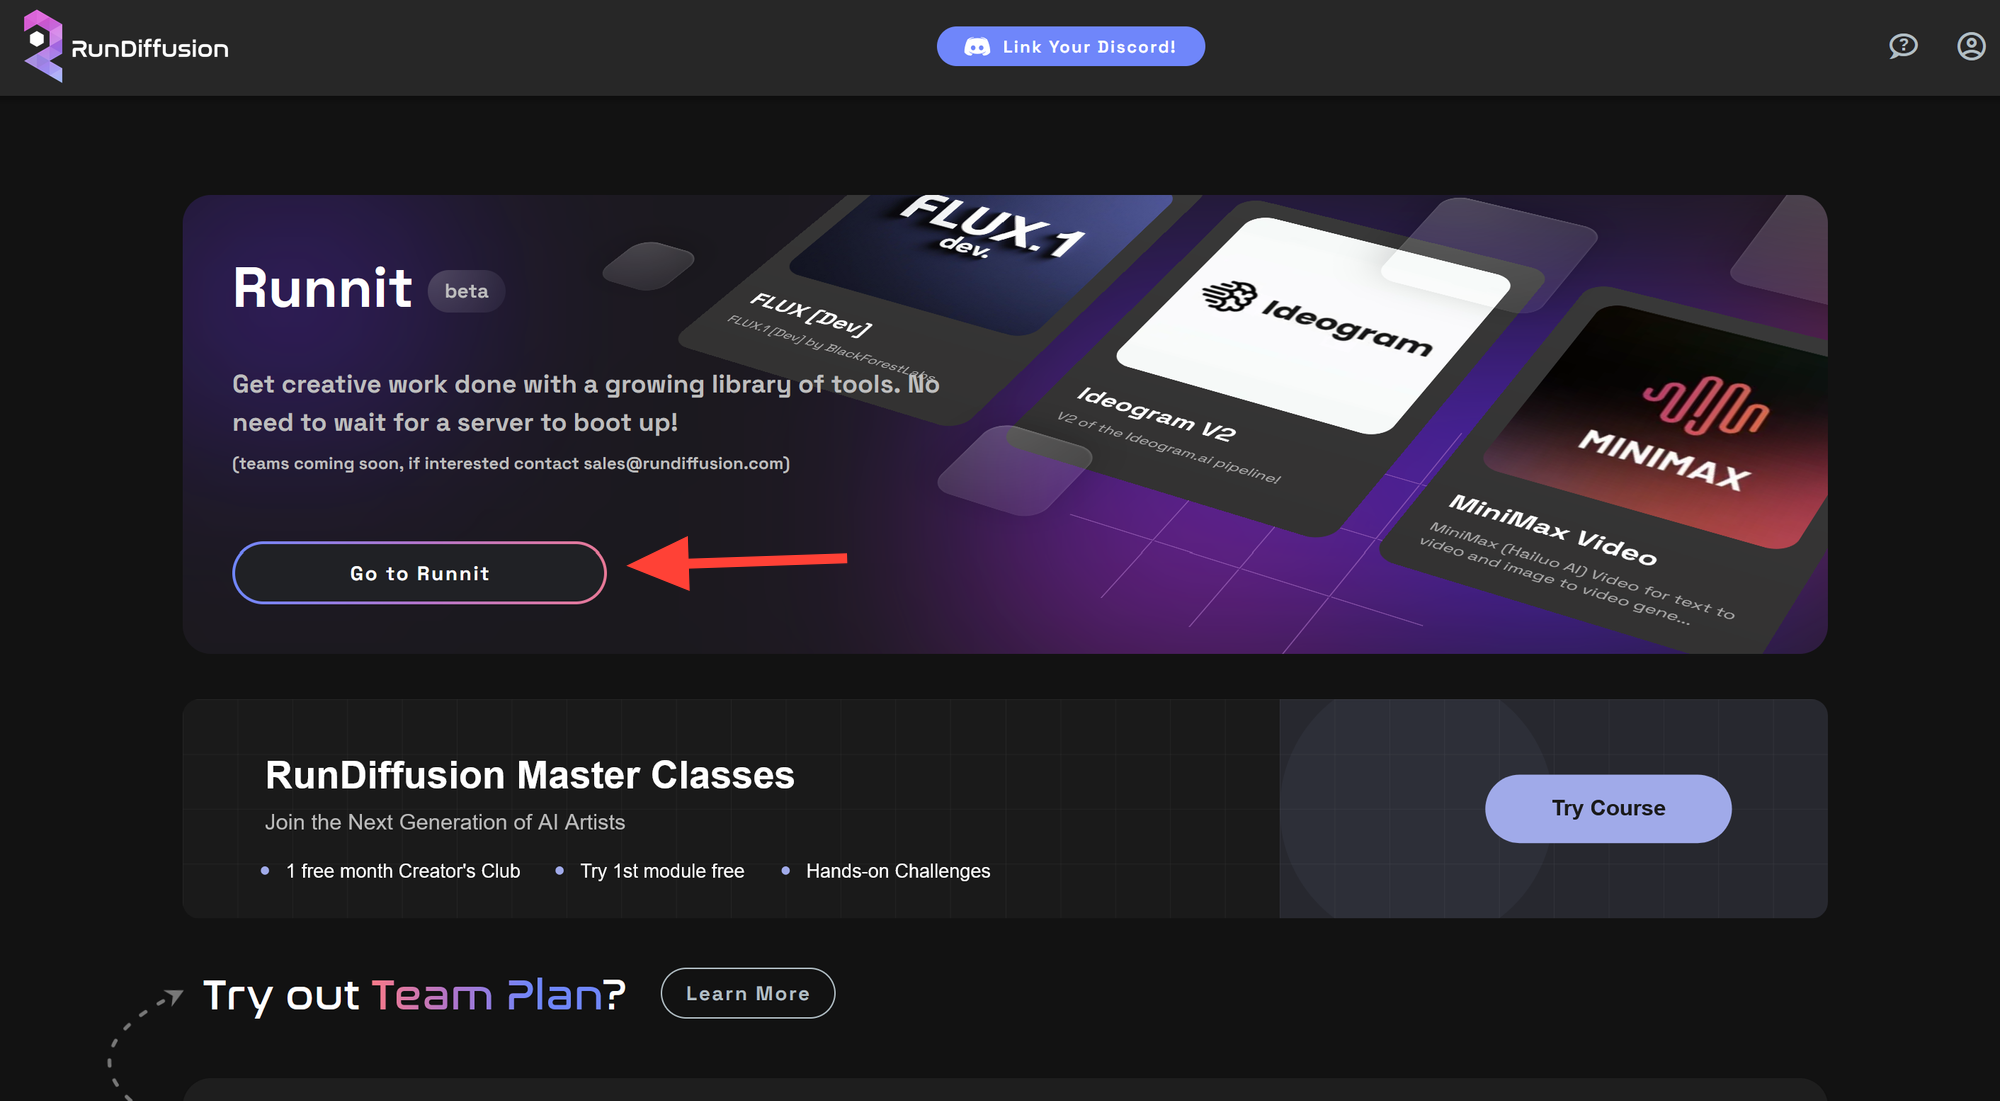
To begin, navigate to Runnit from the RunDiffusion website. If you don’t have an account yet, you’ll need to create one and log in. Click Go to Runnit to access the Runnit interface.
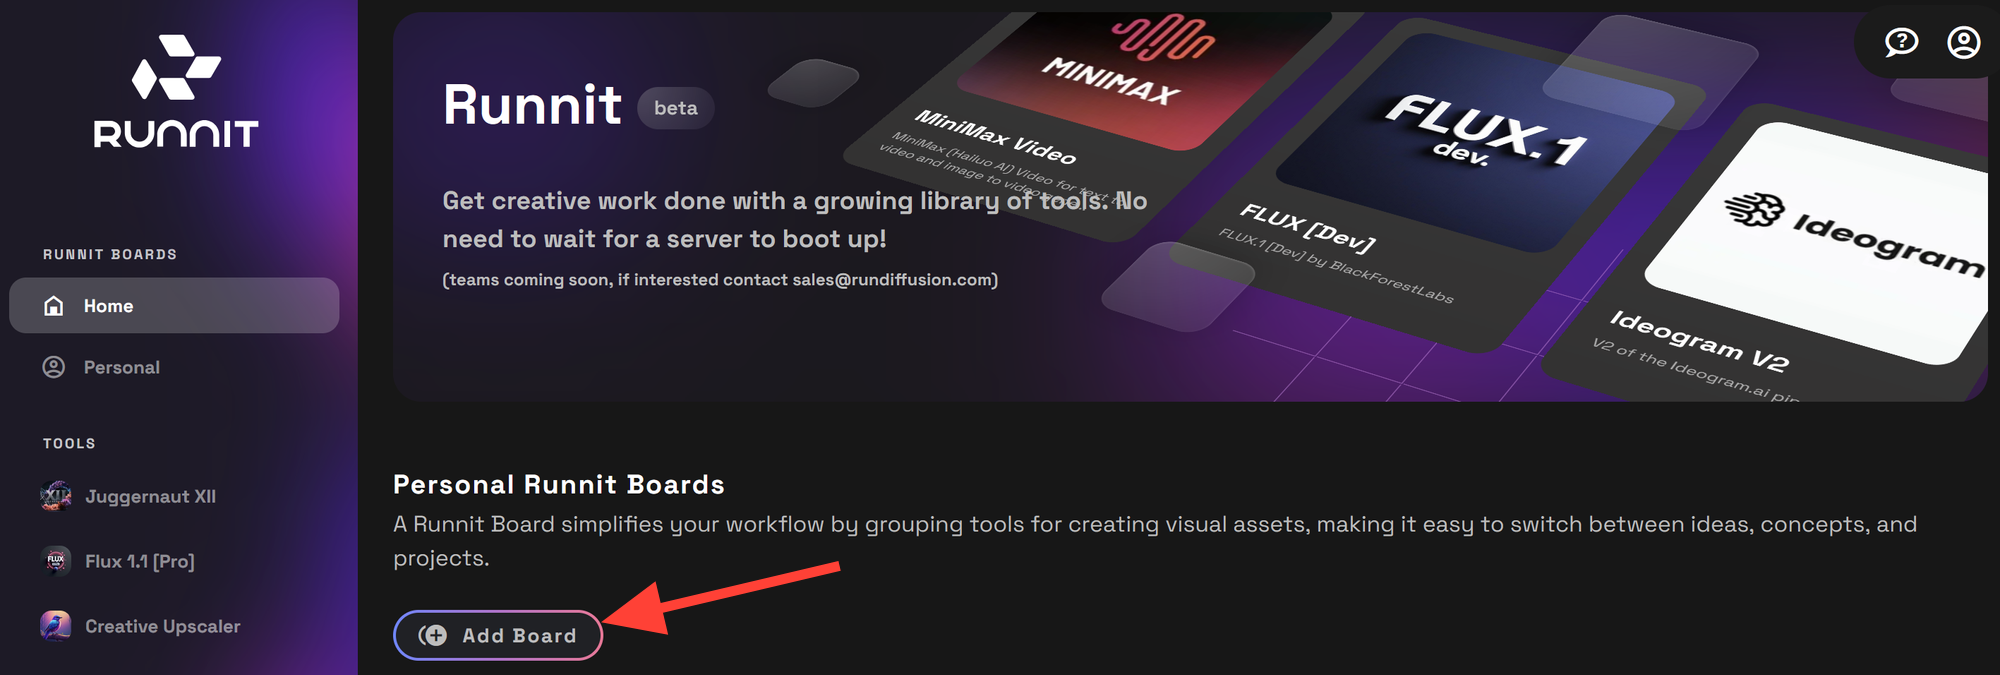
Click Add Board to create a new Runnit Board.
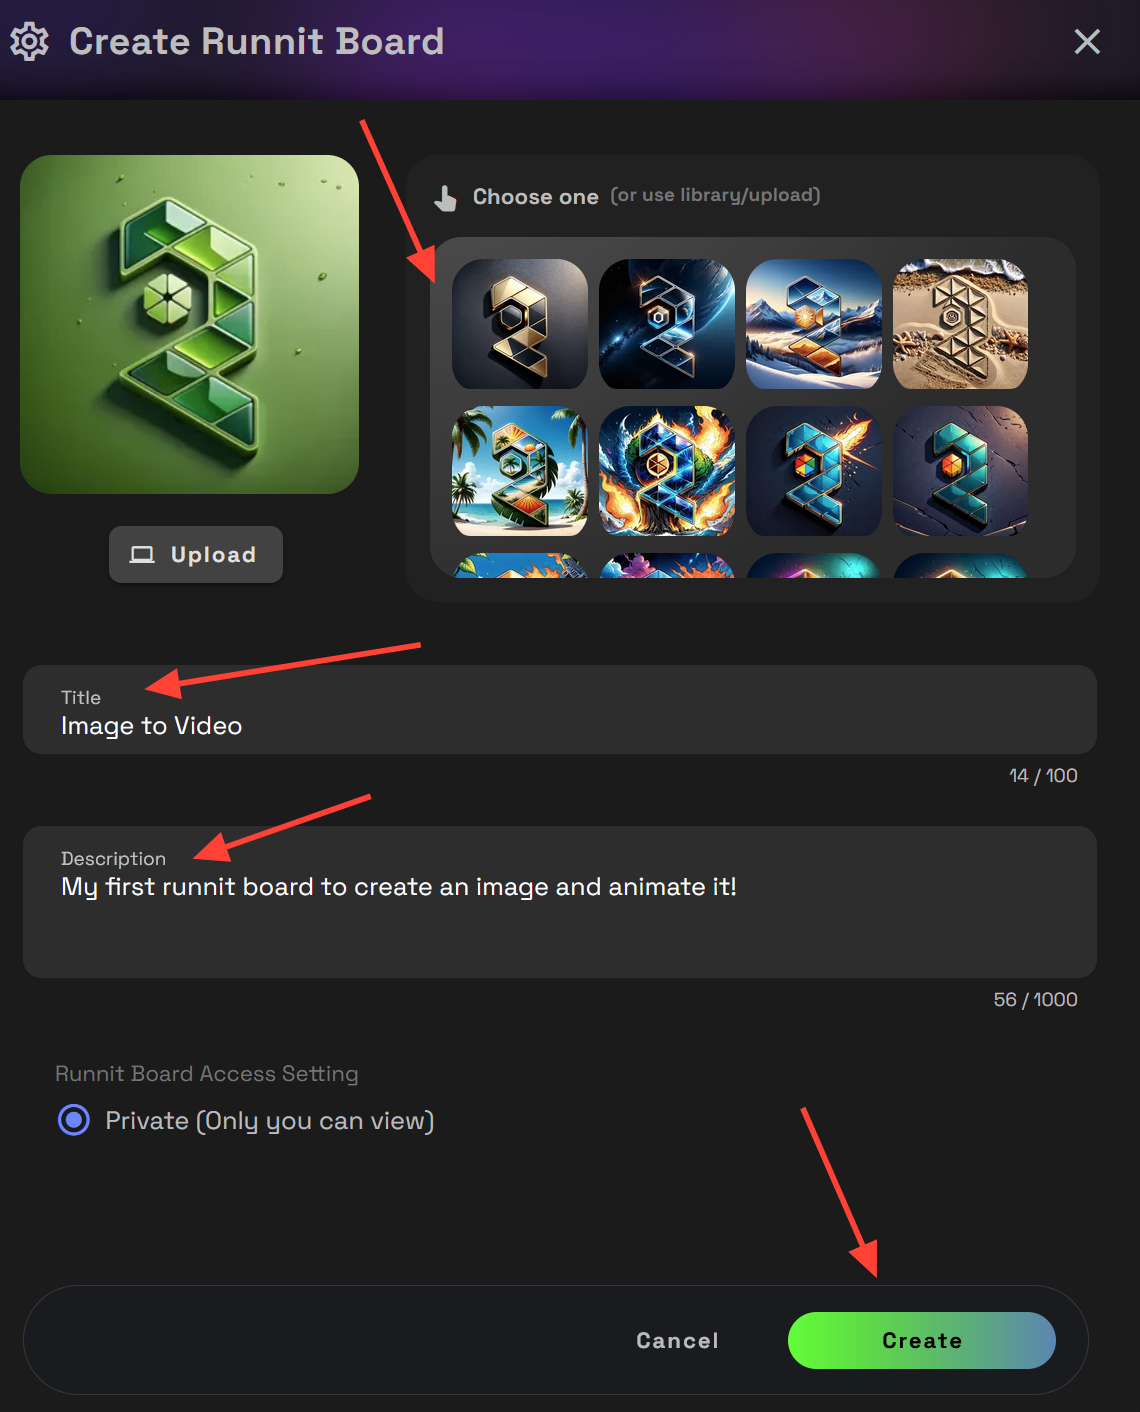
Customize your board by: Selecting or uploading an image, Adding a title and Writing a short description. Click Create to finalize your board setup.
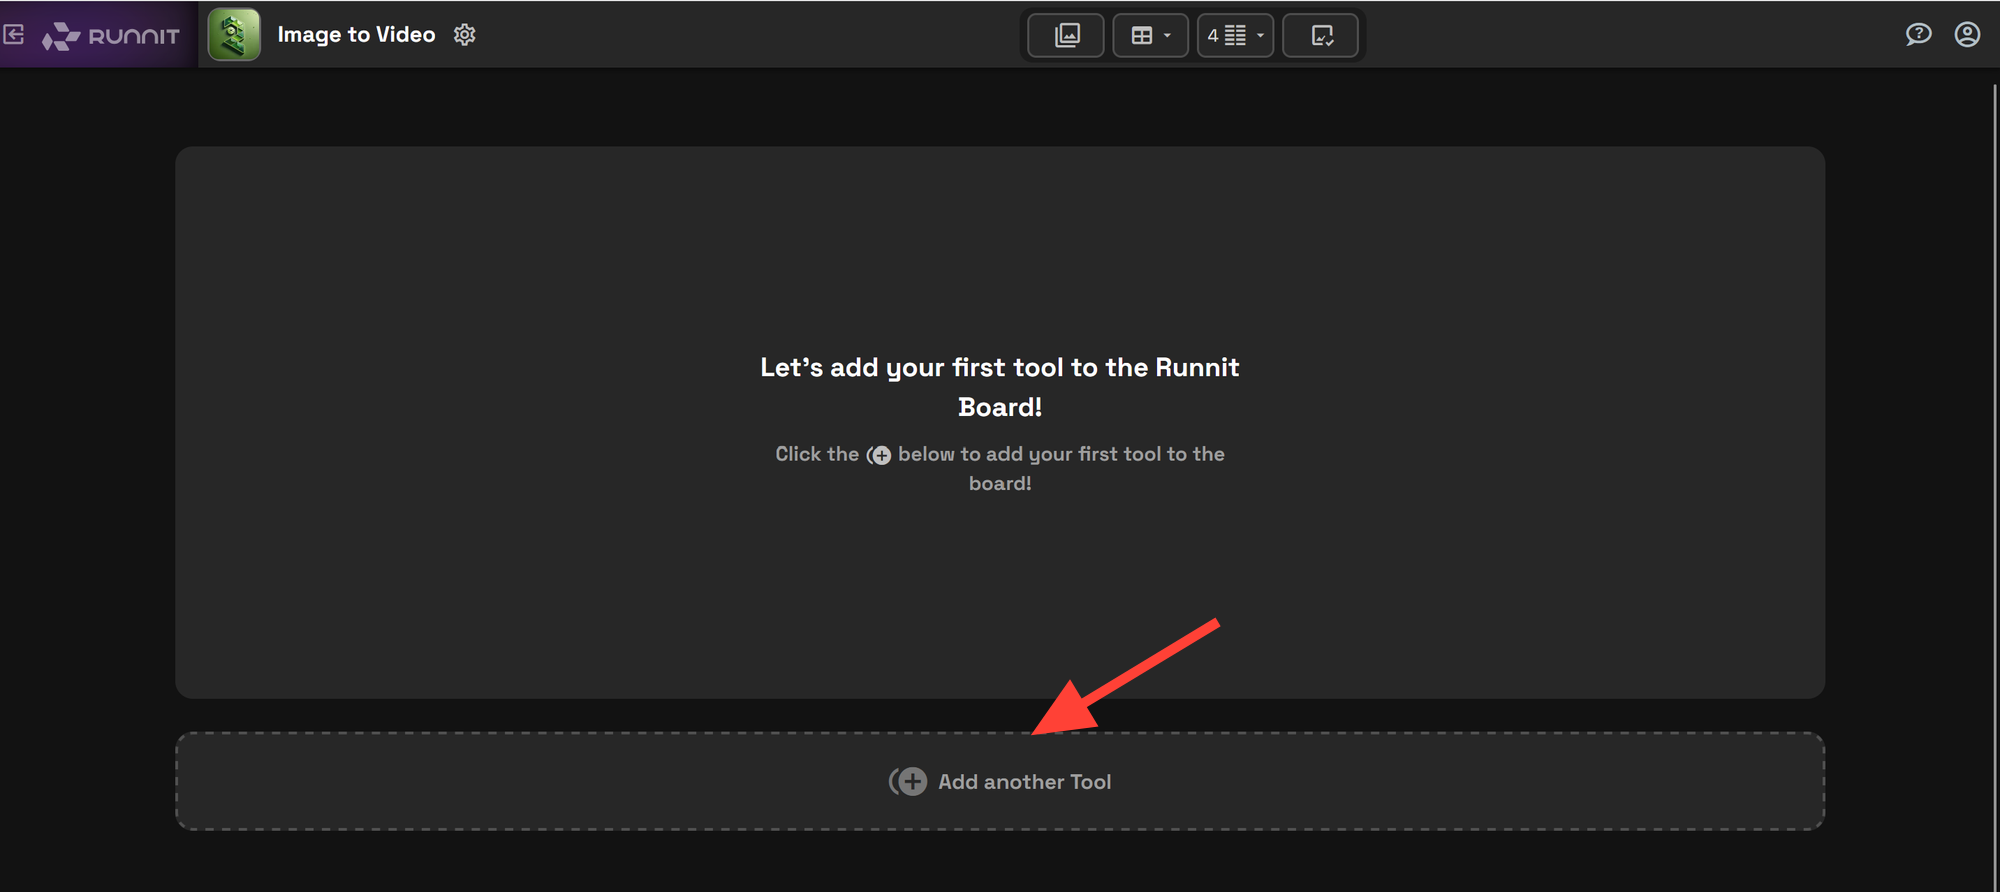
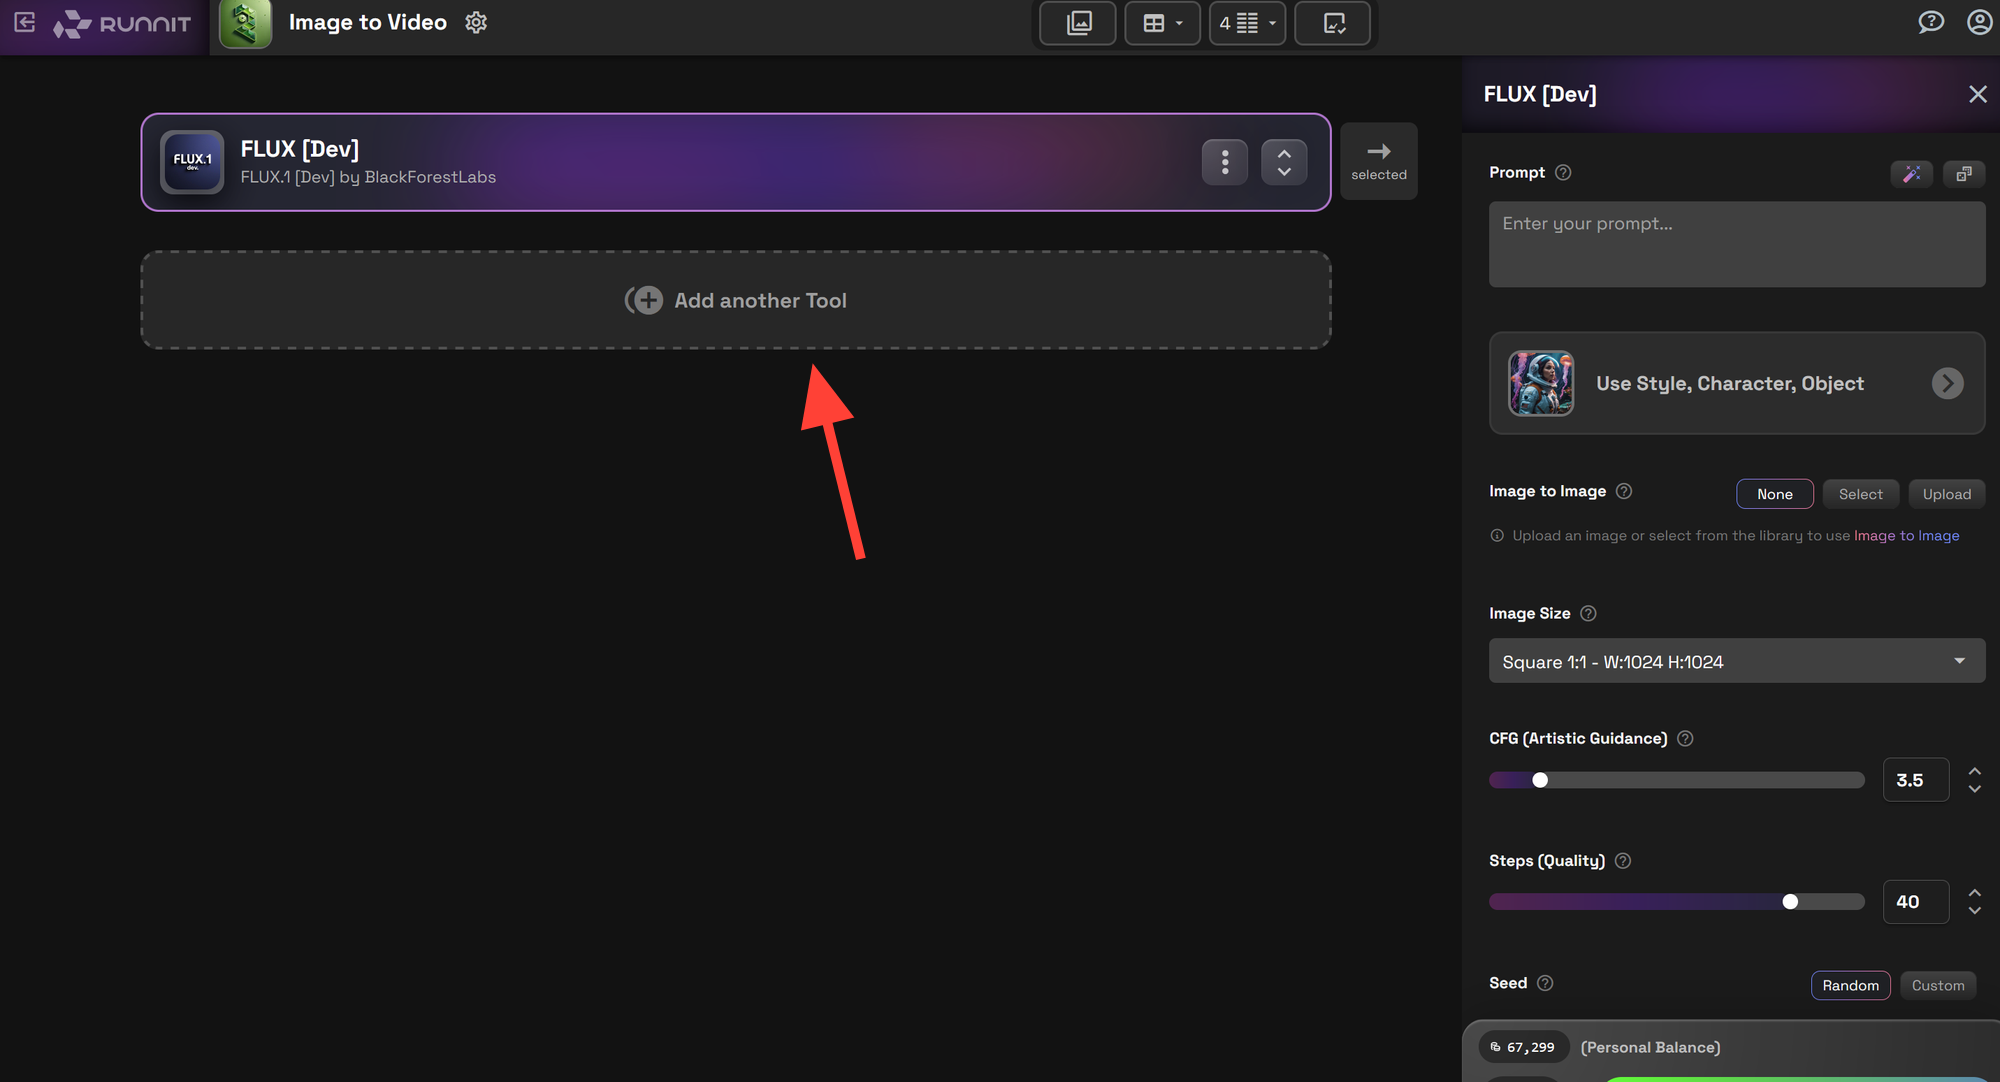
You now have a blank Runnit Board. To build your workflow, you’ll need to add tools. Click Add Another Tool to proceed.
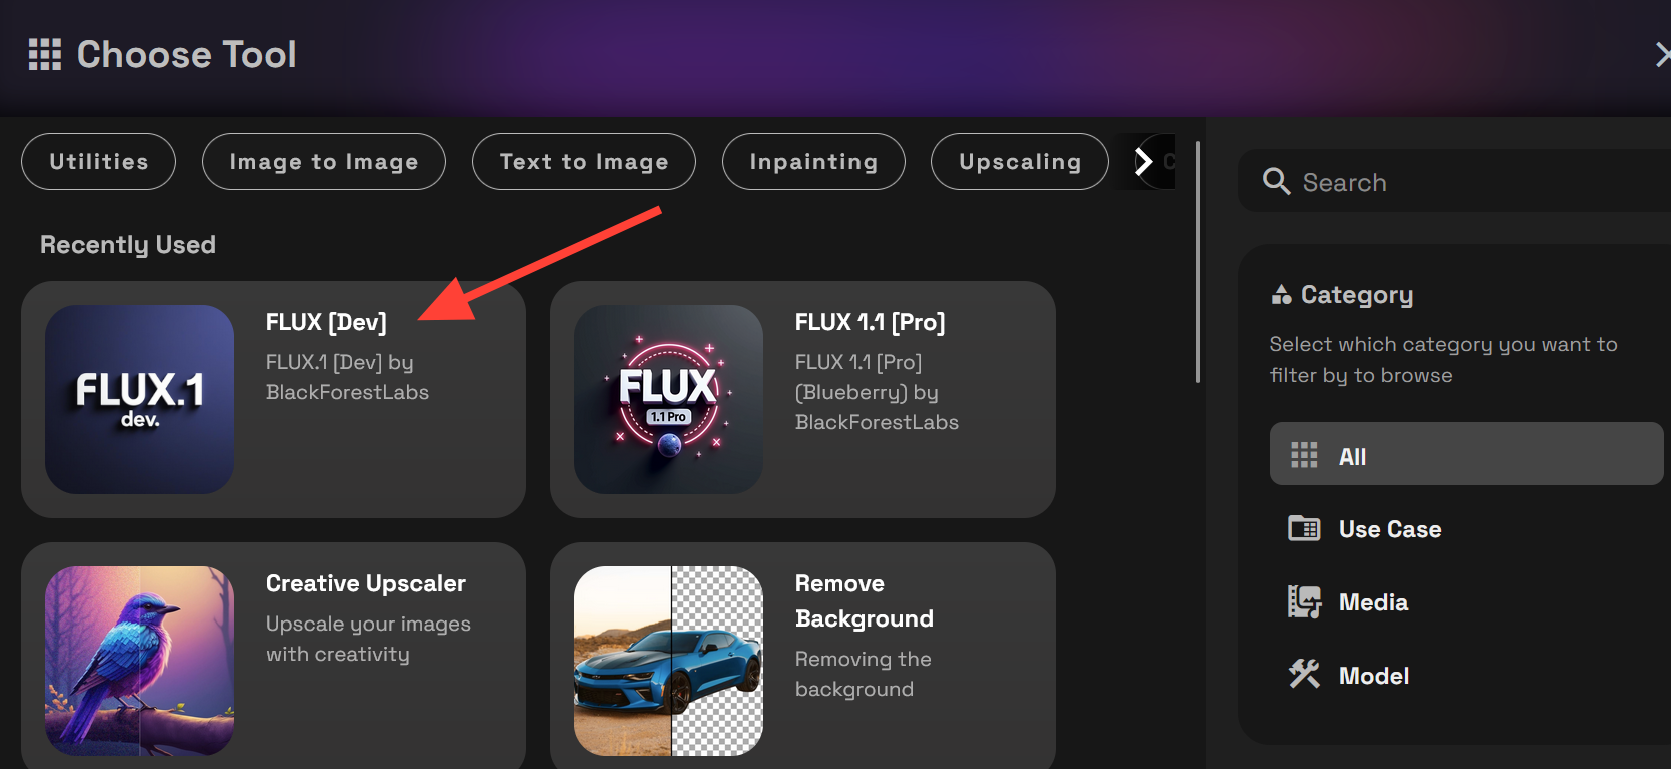
On the Choose Tool screen: For image generation, select Flux.1 Dev (or choose Juggernaut XII or another available tool).
Click Add Another Tool again.
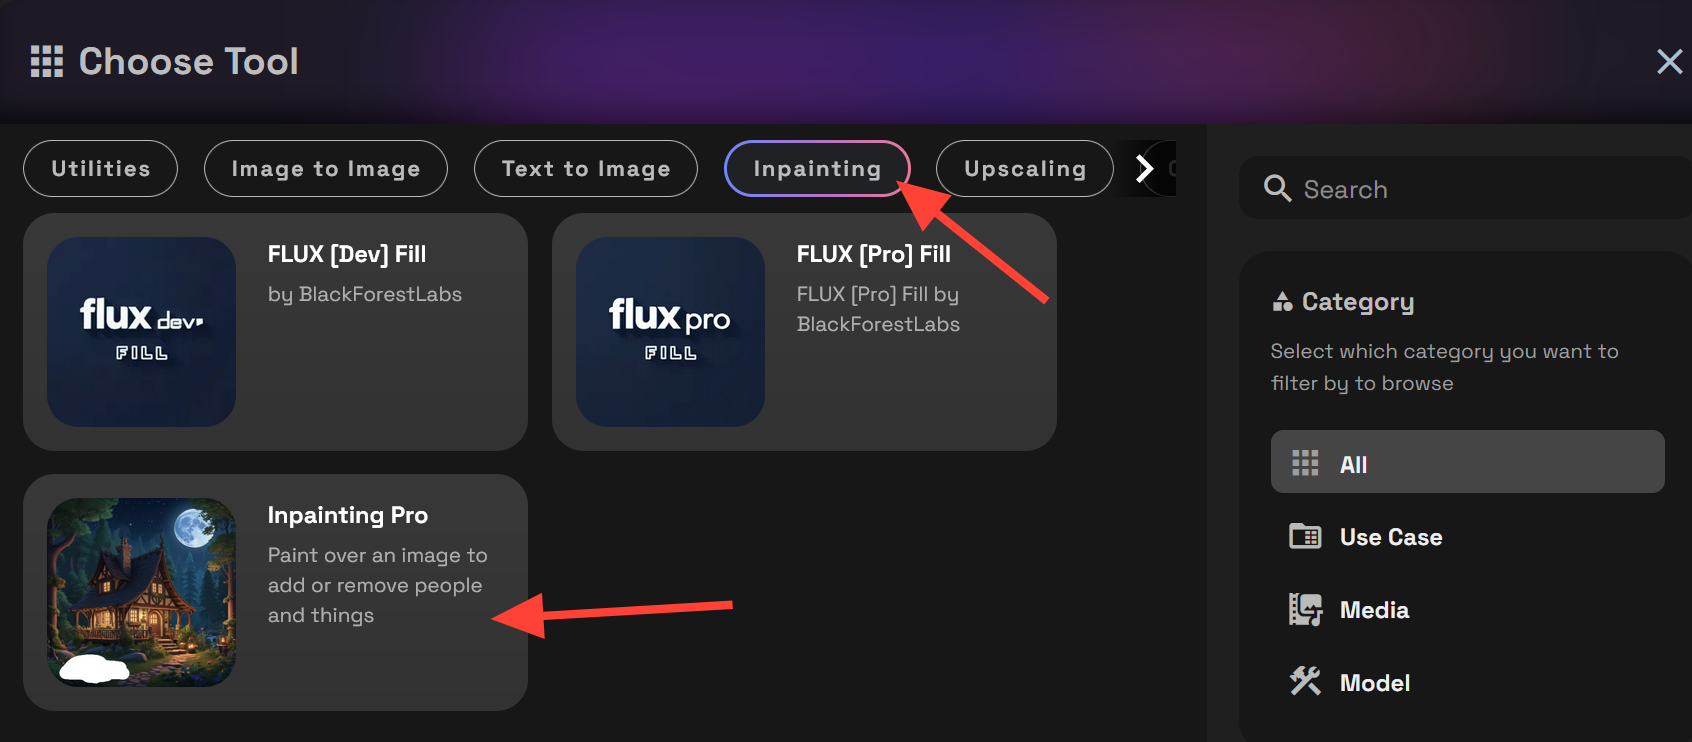
Select Inpainting Pro from the Inpainting filter at the top.
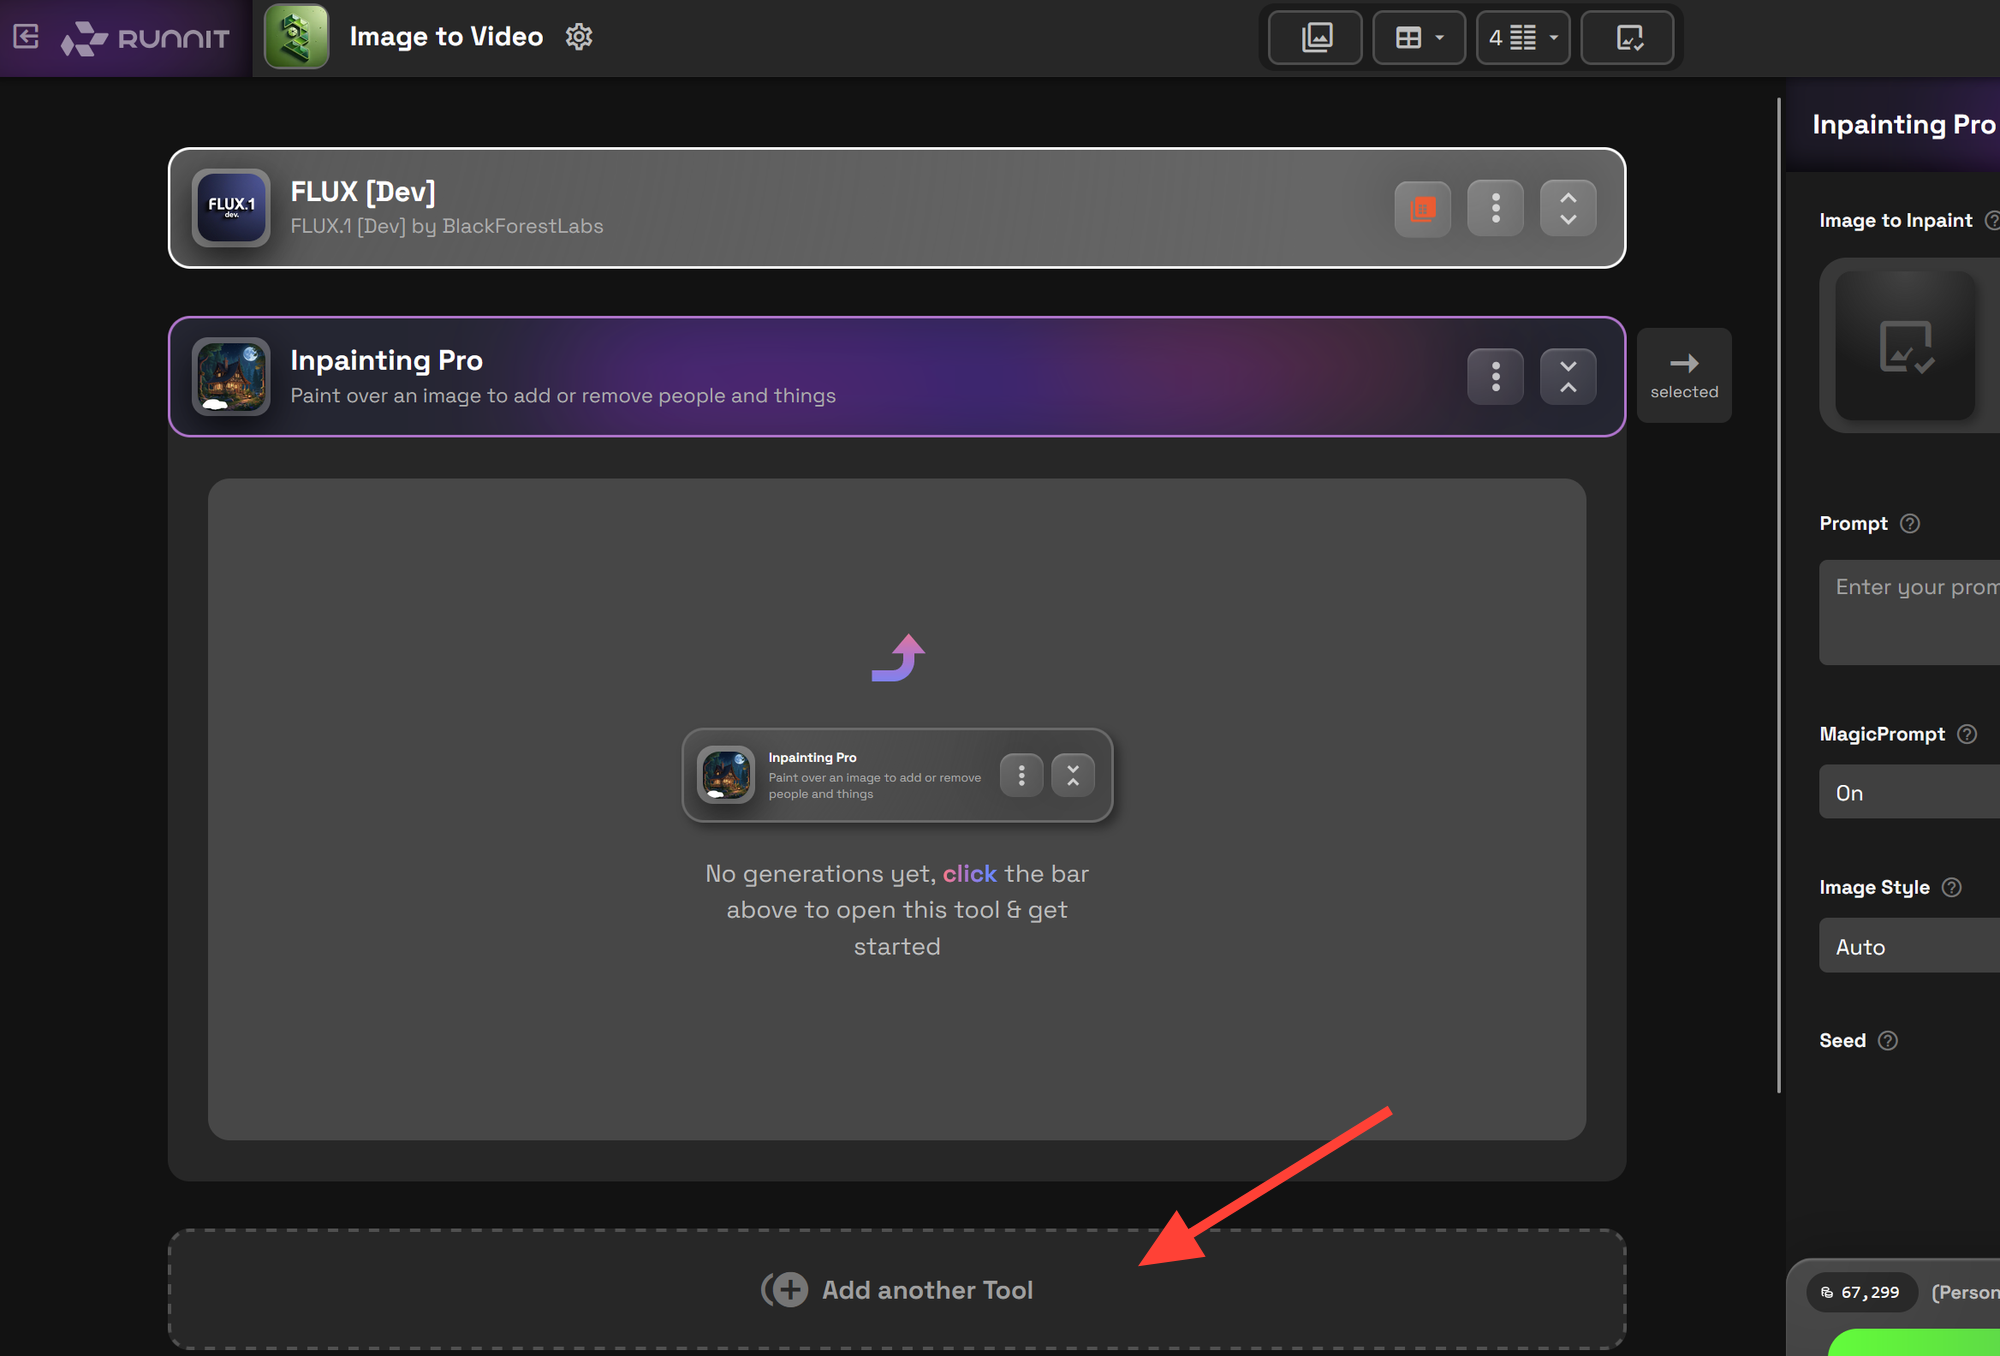
Let's click on Add another Tool one more time.
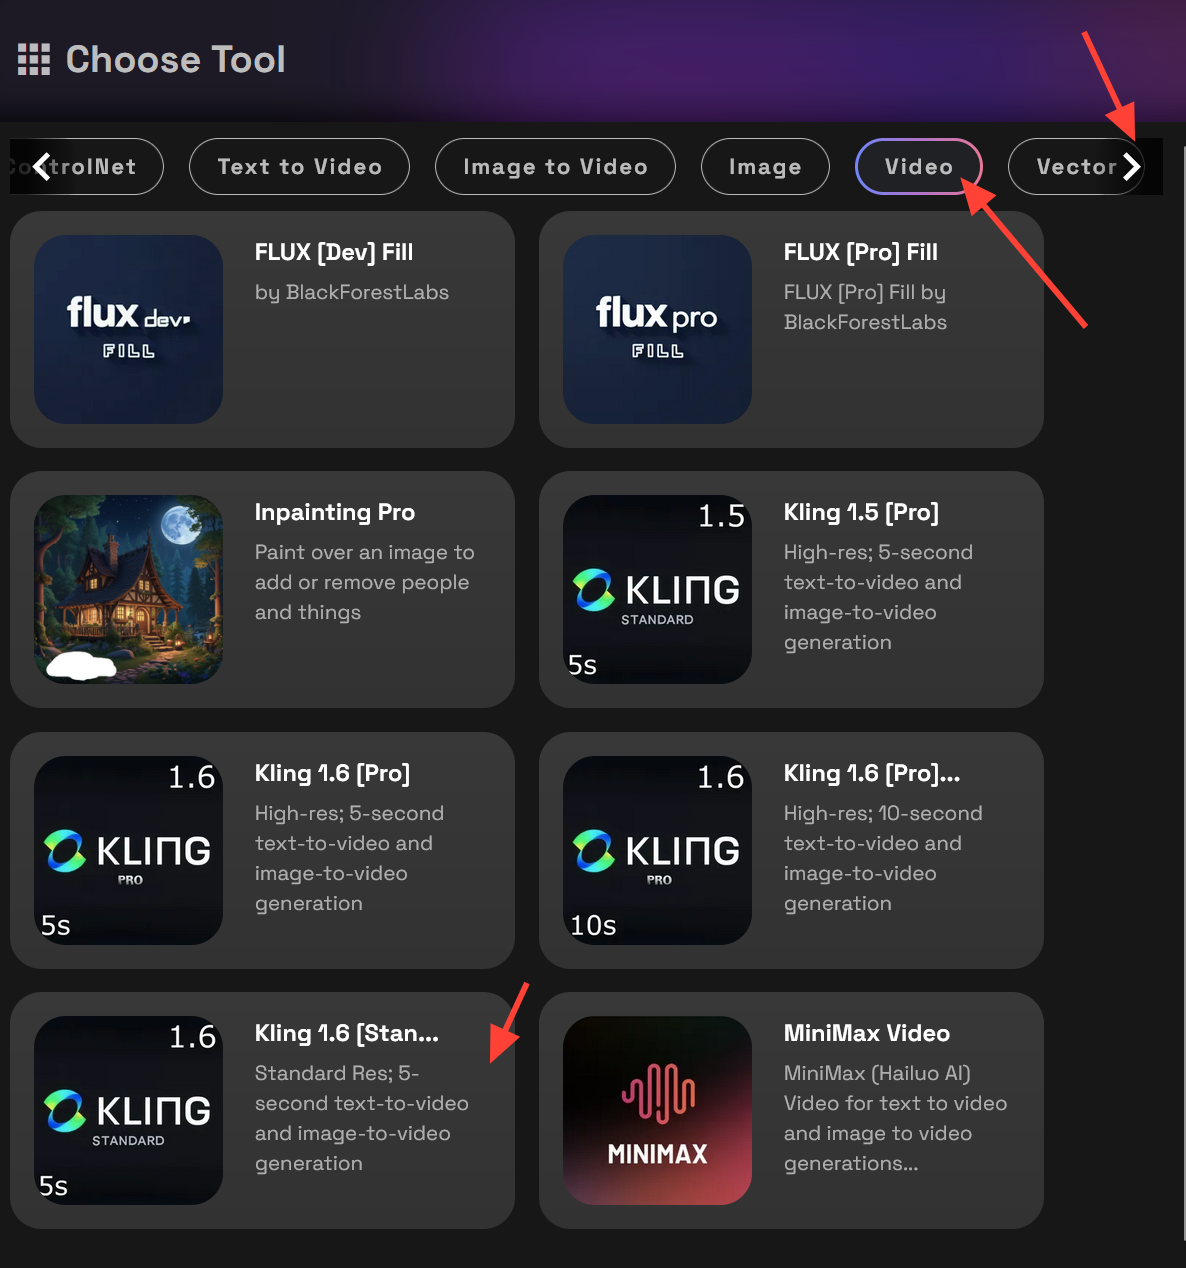
Use the side arrows to navigate to the Video filter. Select a video tool of your choice.
Your Image-to-Video Runnit Board is now fully set up! 🎉
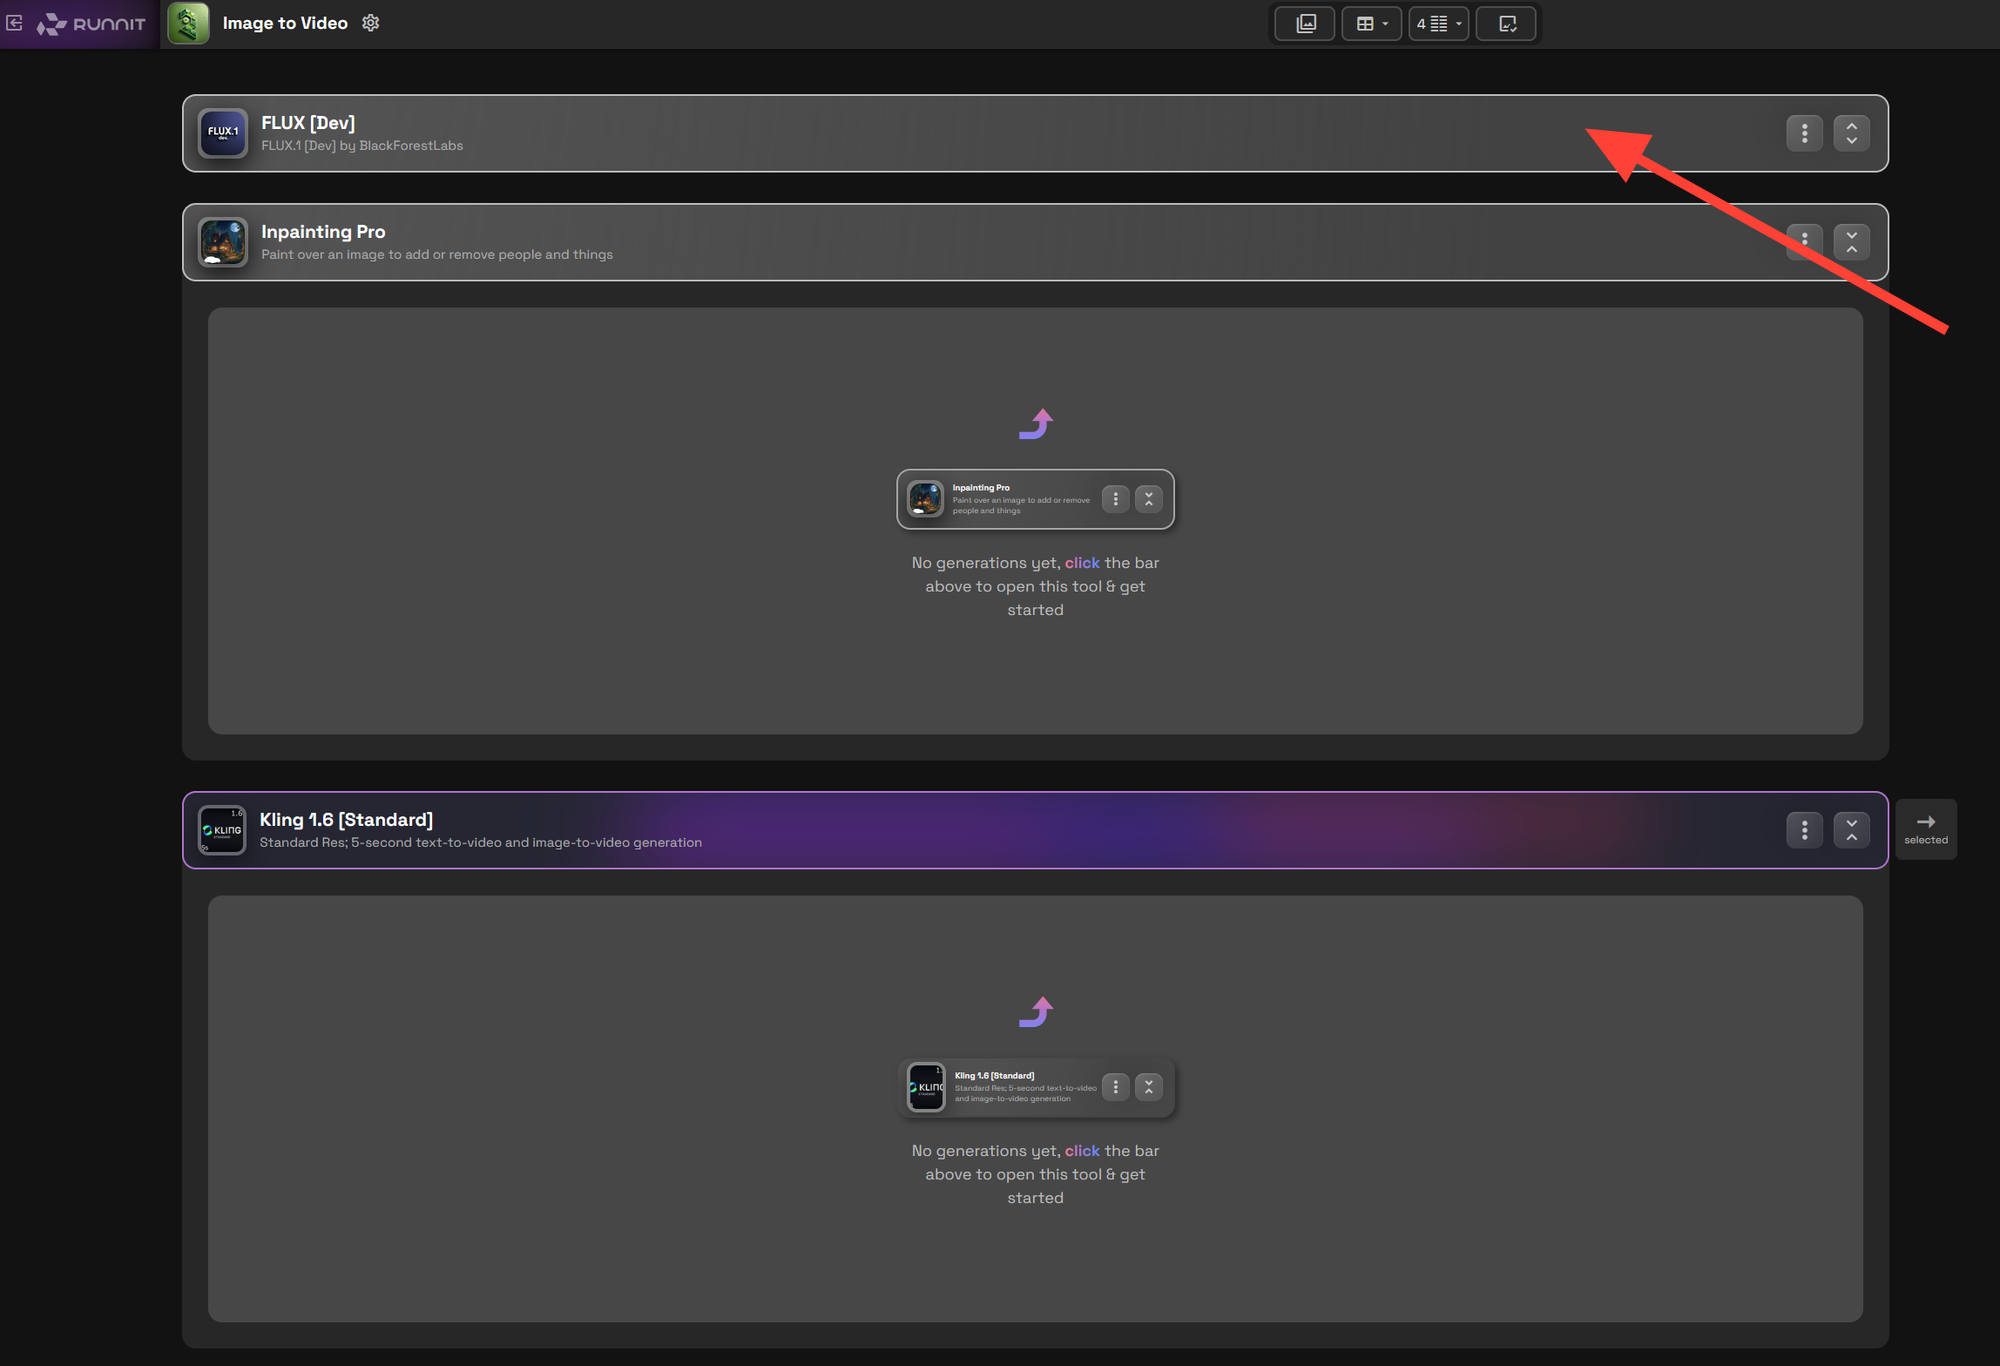
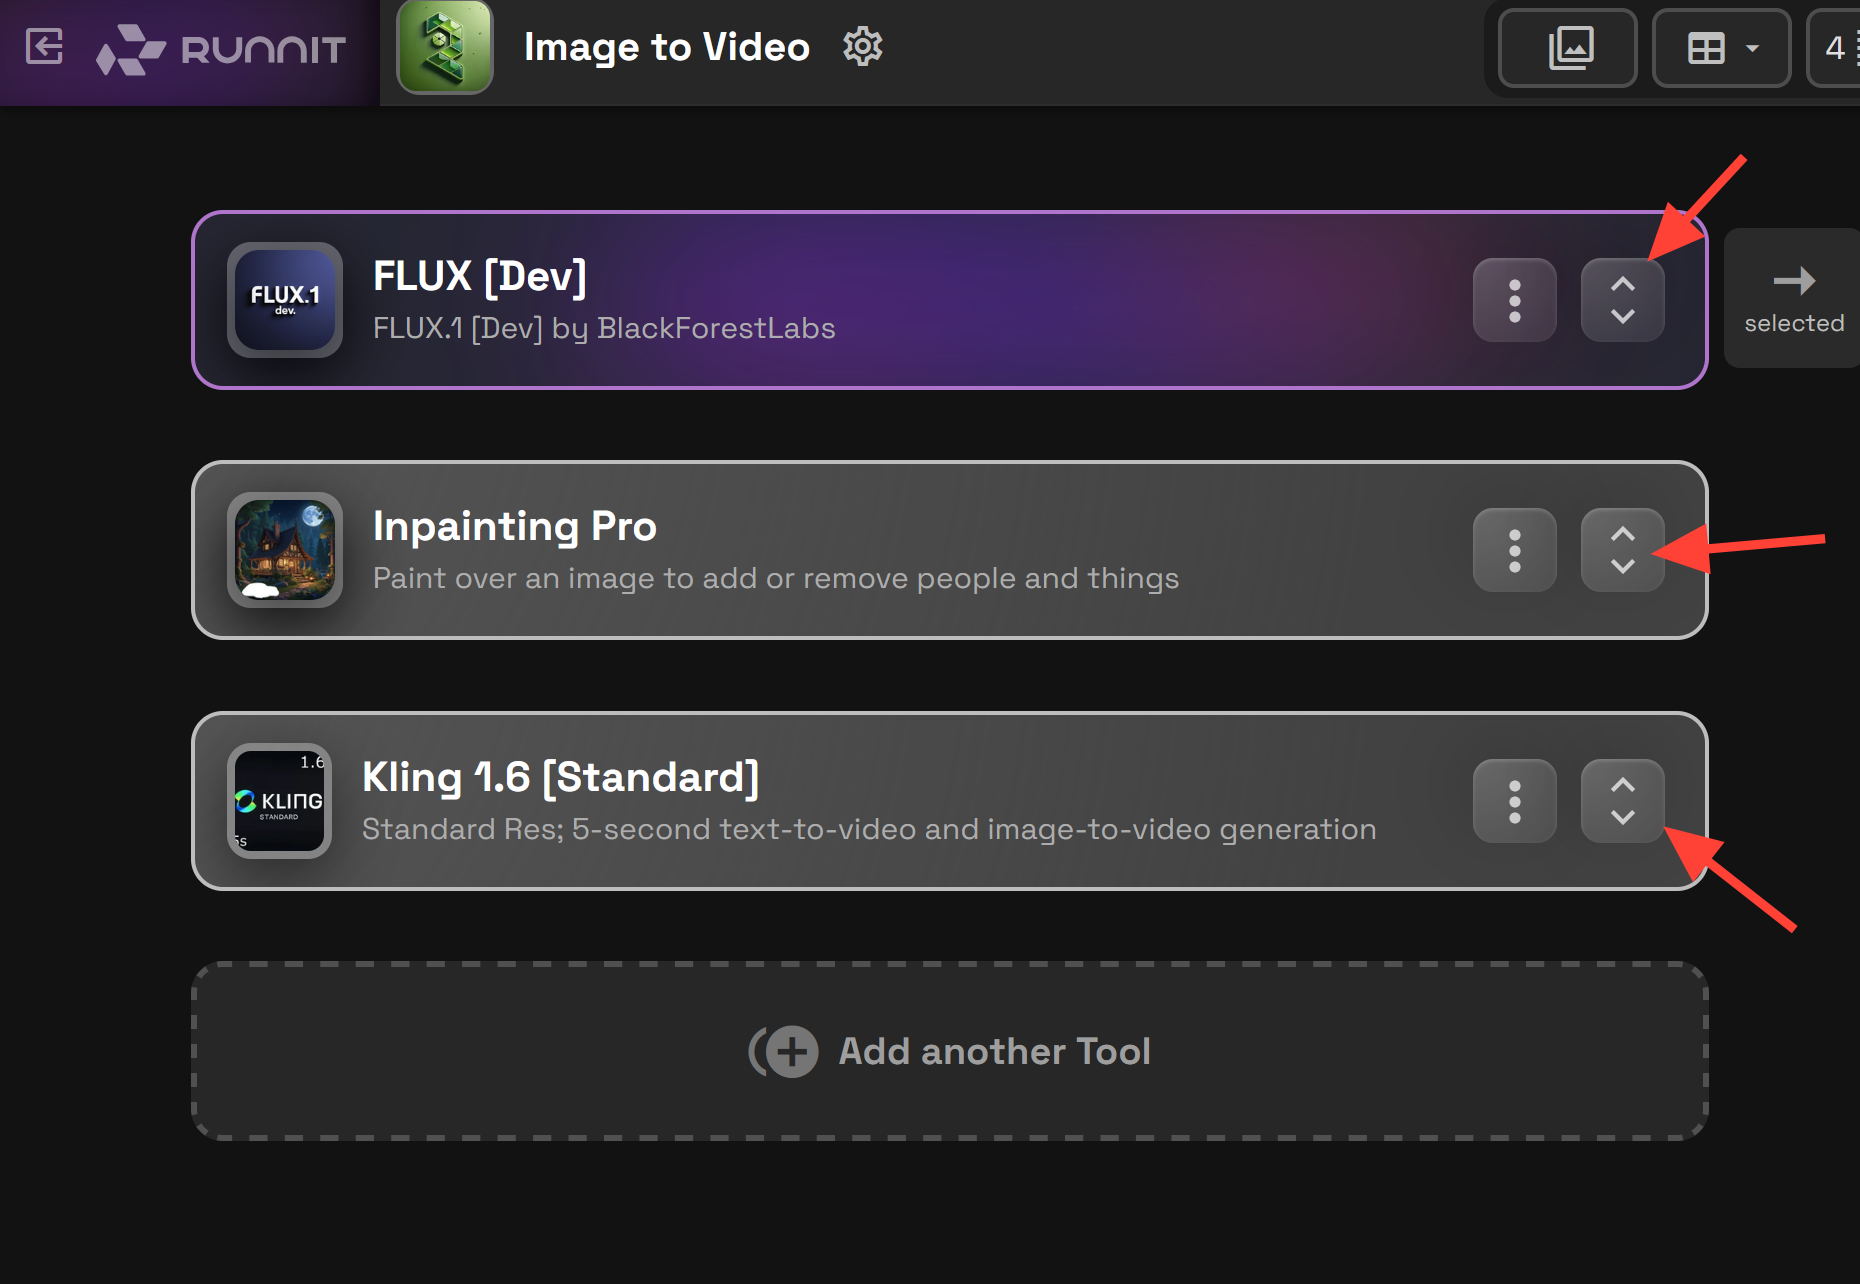
You can minimize and maximize tools using the arrows on the right of each tool panel.
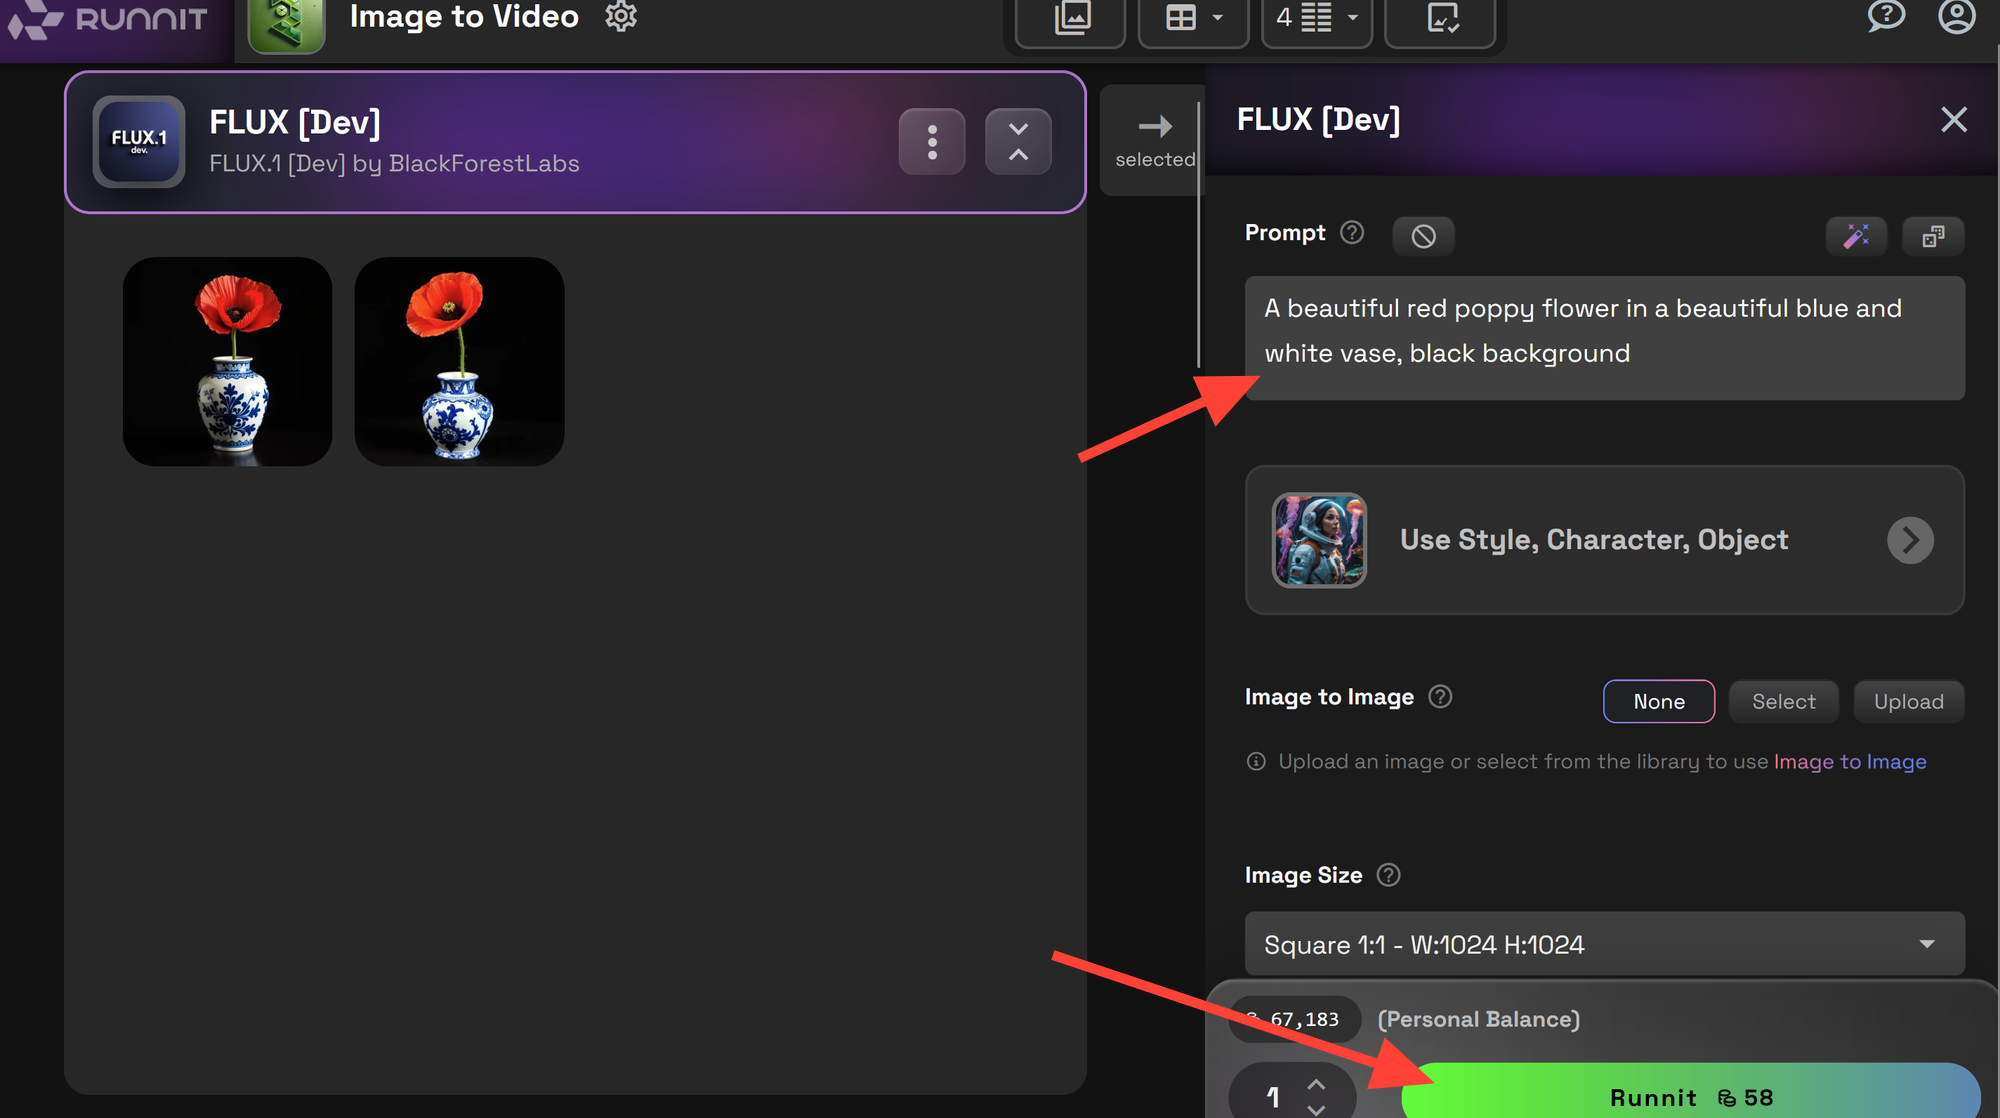
Step 2: Generating the Image
Type a prompt into the text box. Click Runnit to generate your image. Your generated image will appear on the left side of the tool panel.
Step 3: Refining with Inpainting
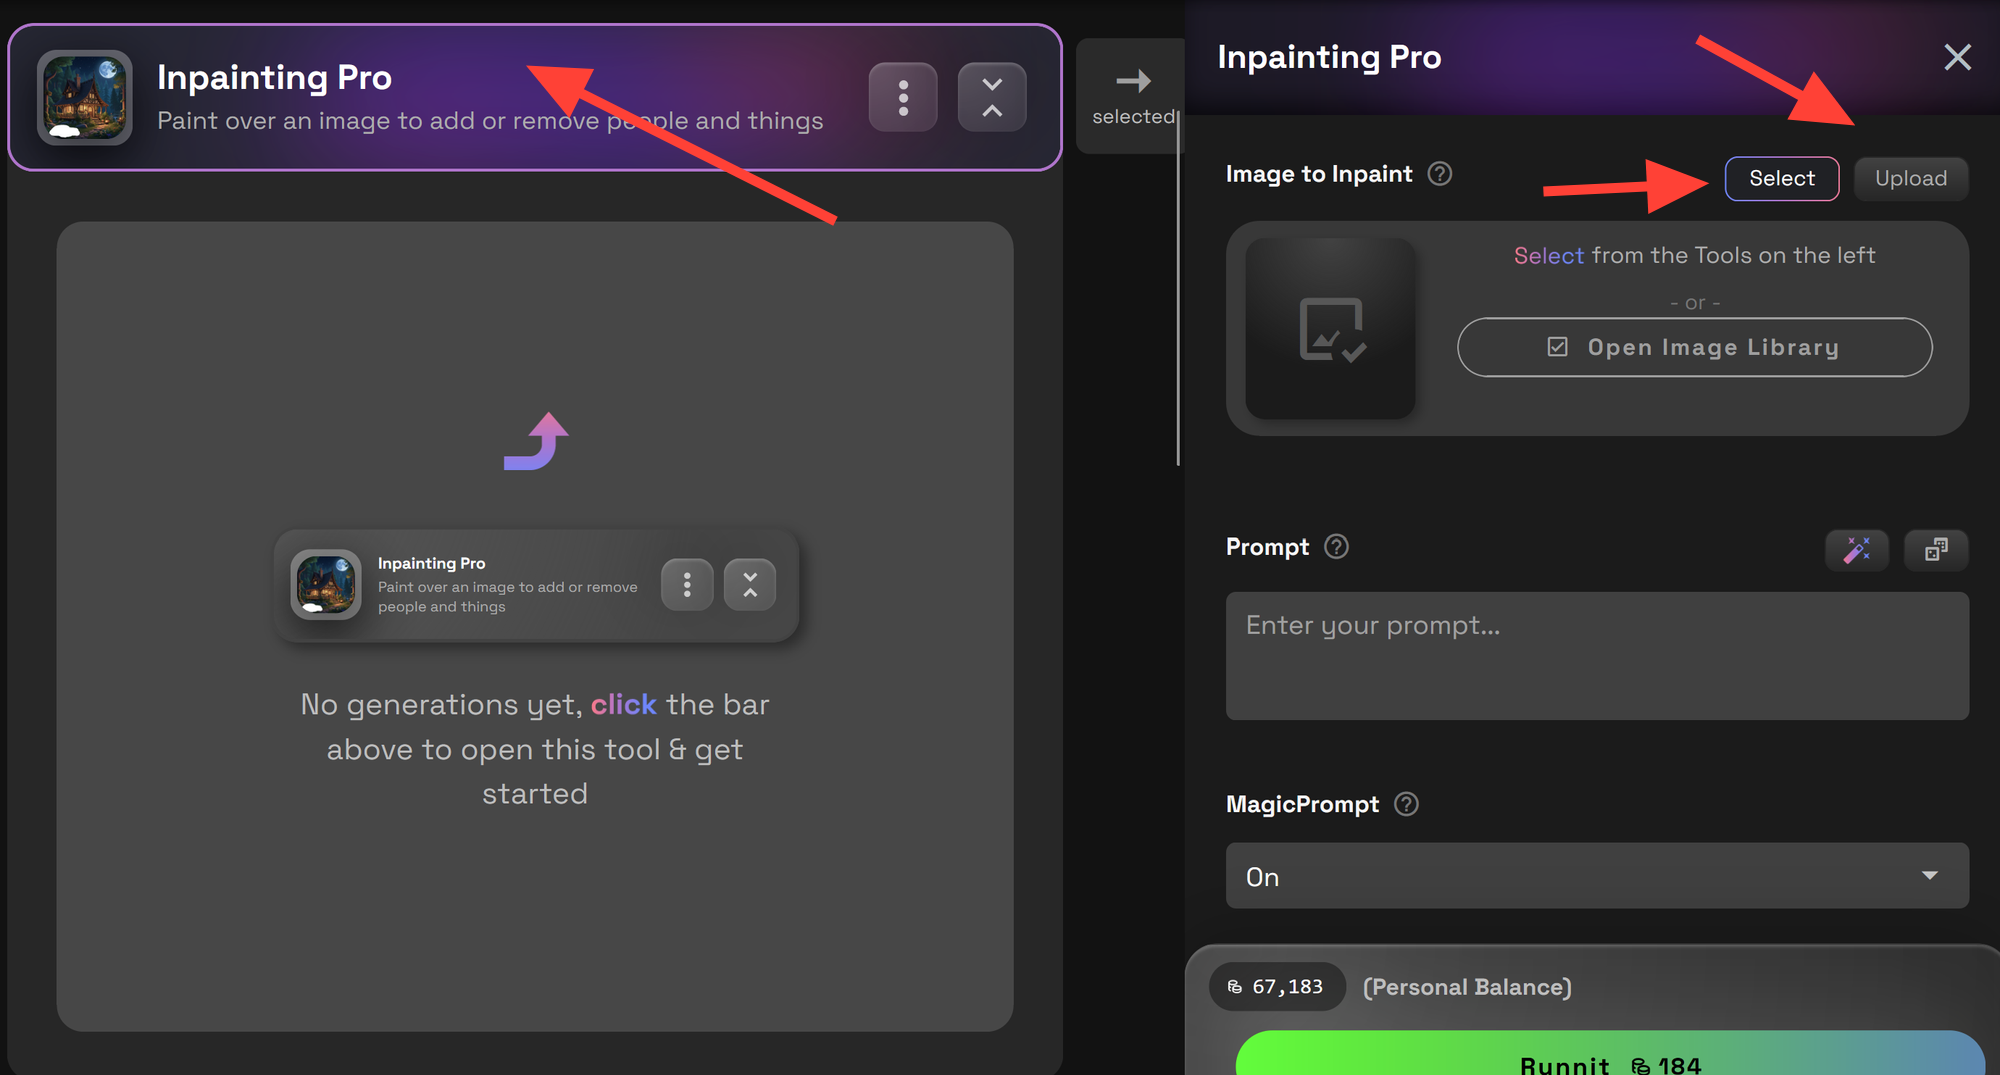
Minimize the image generation tool and expand the Inpainting Pro tool. Click Upload or Select, choose Select since we just generated an image. Click Open Image Library.
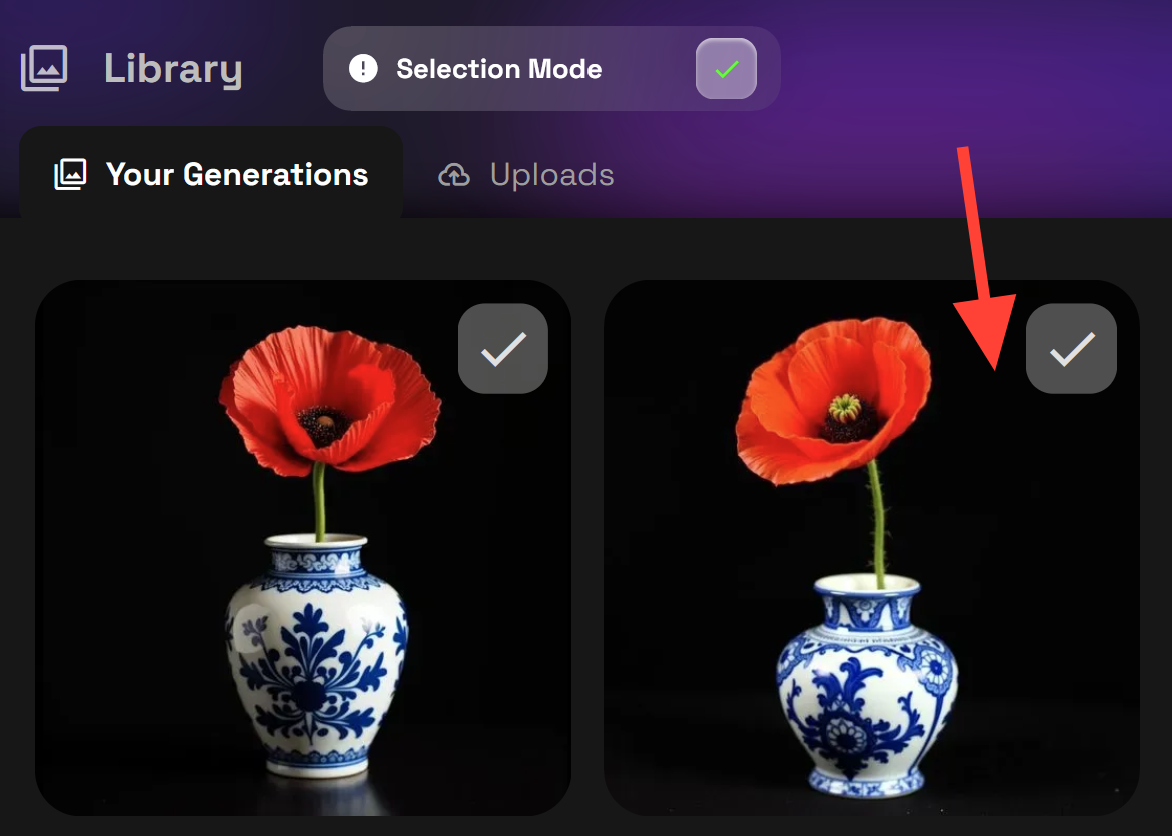
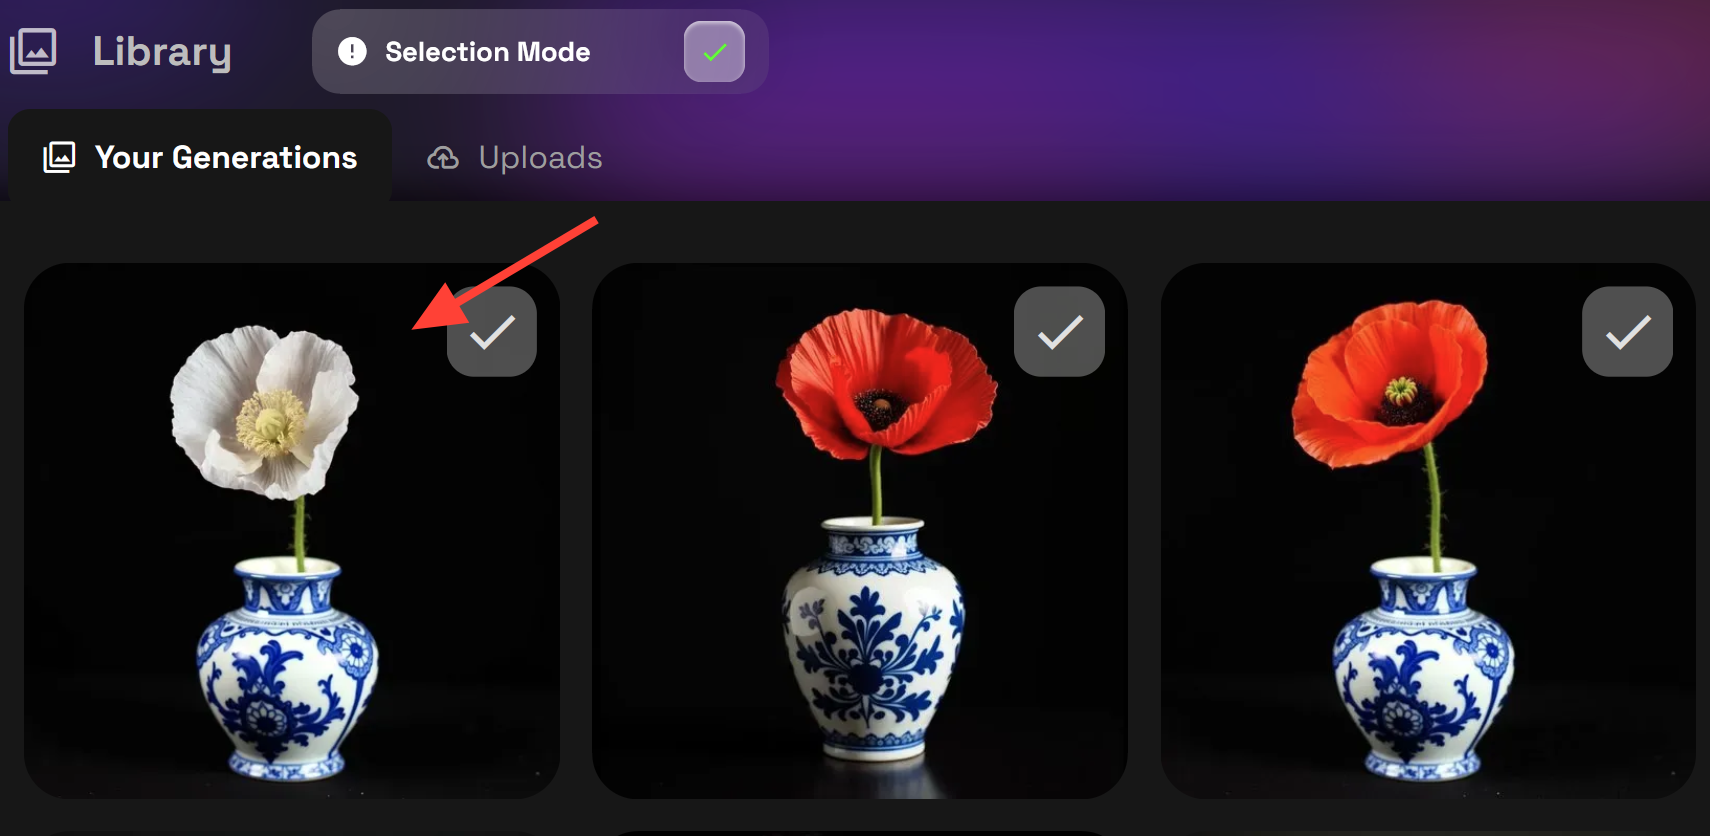
The Image Library will open. Select the image you want to refine.
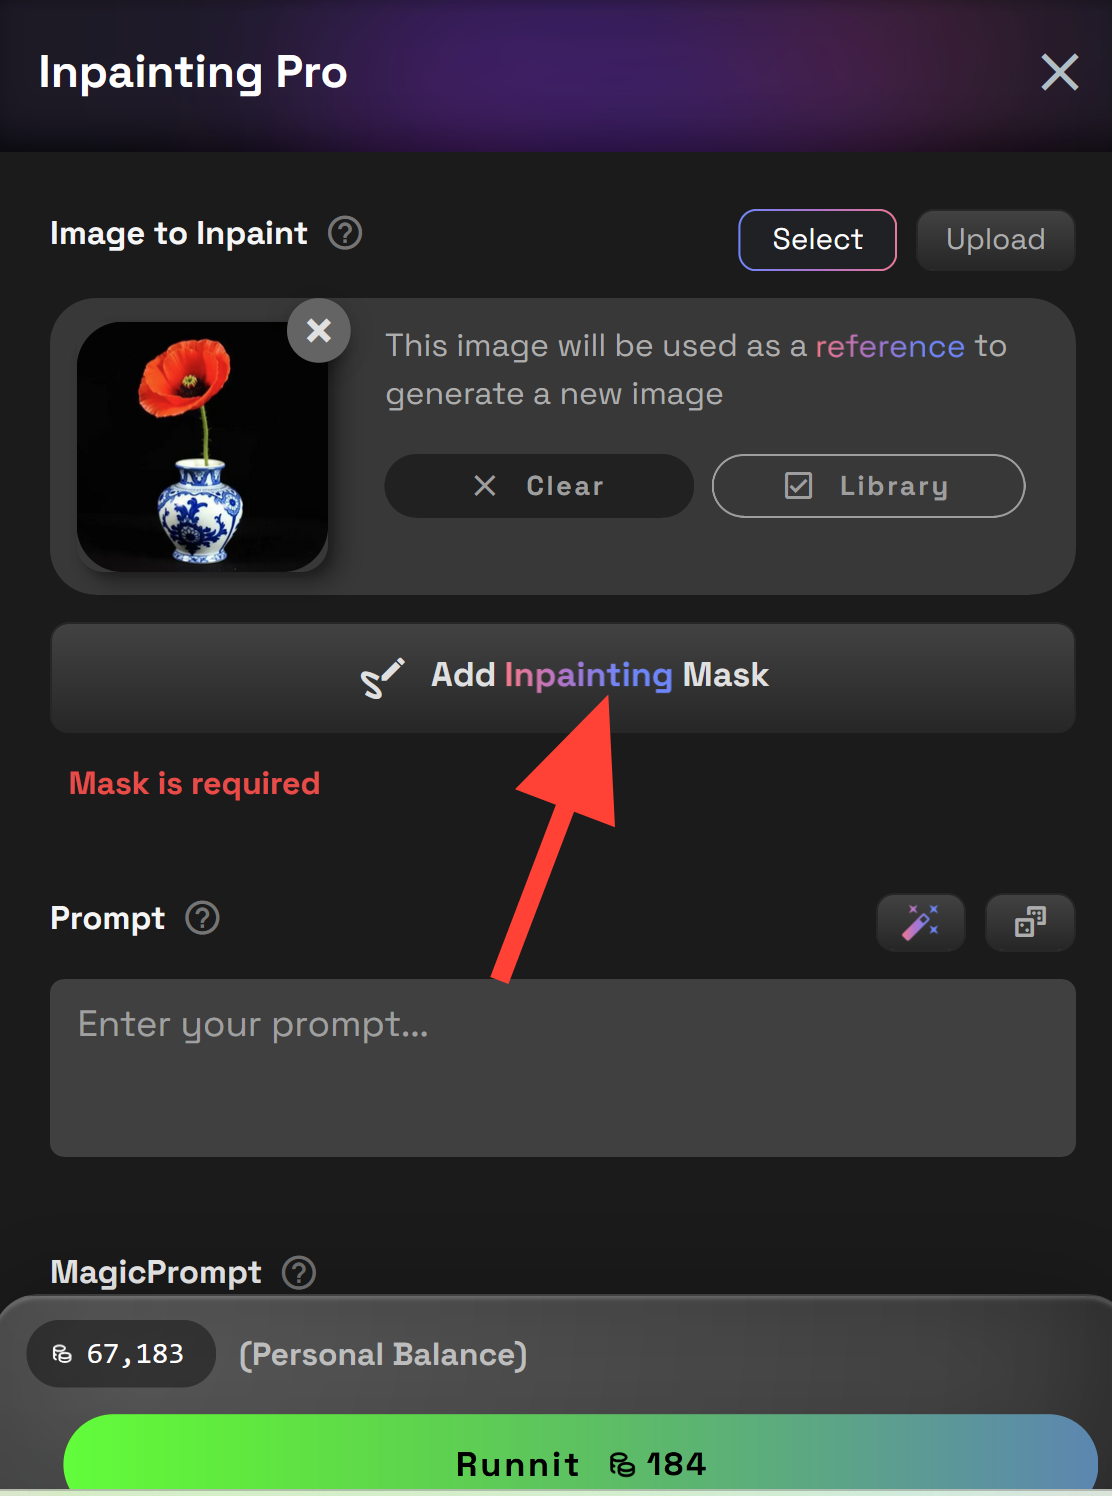
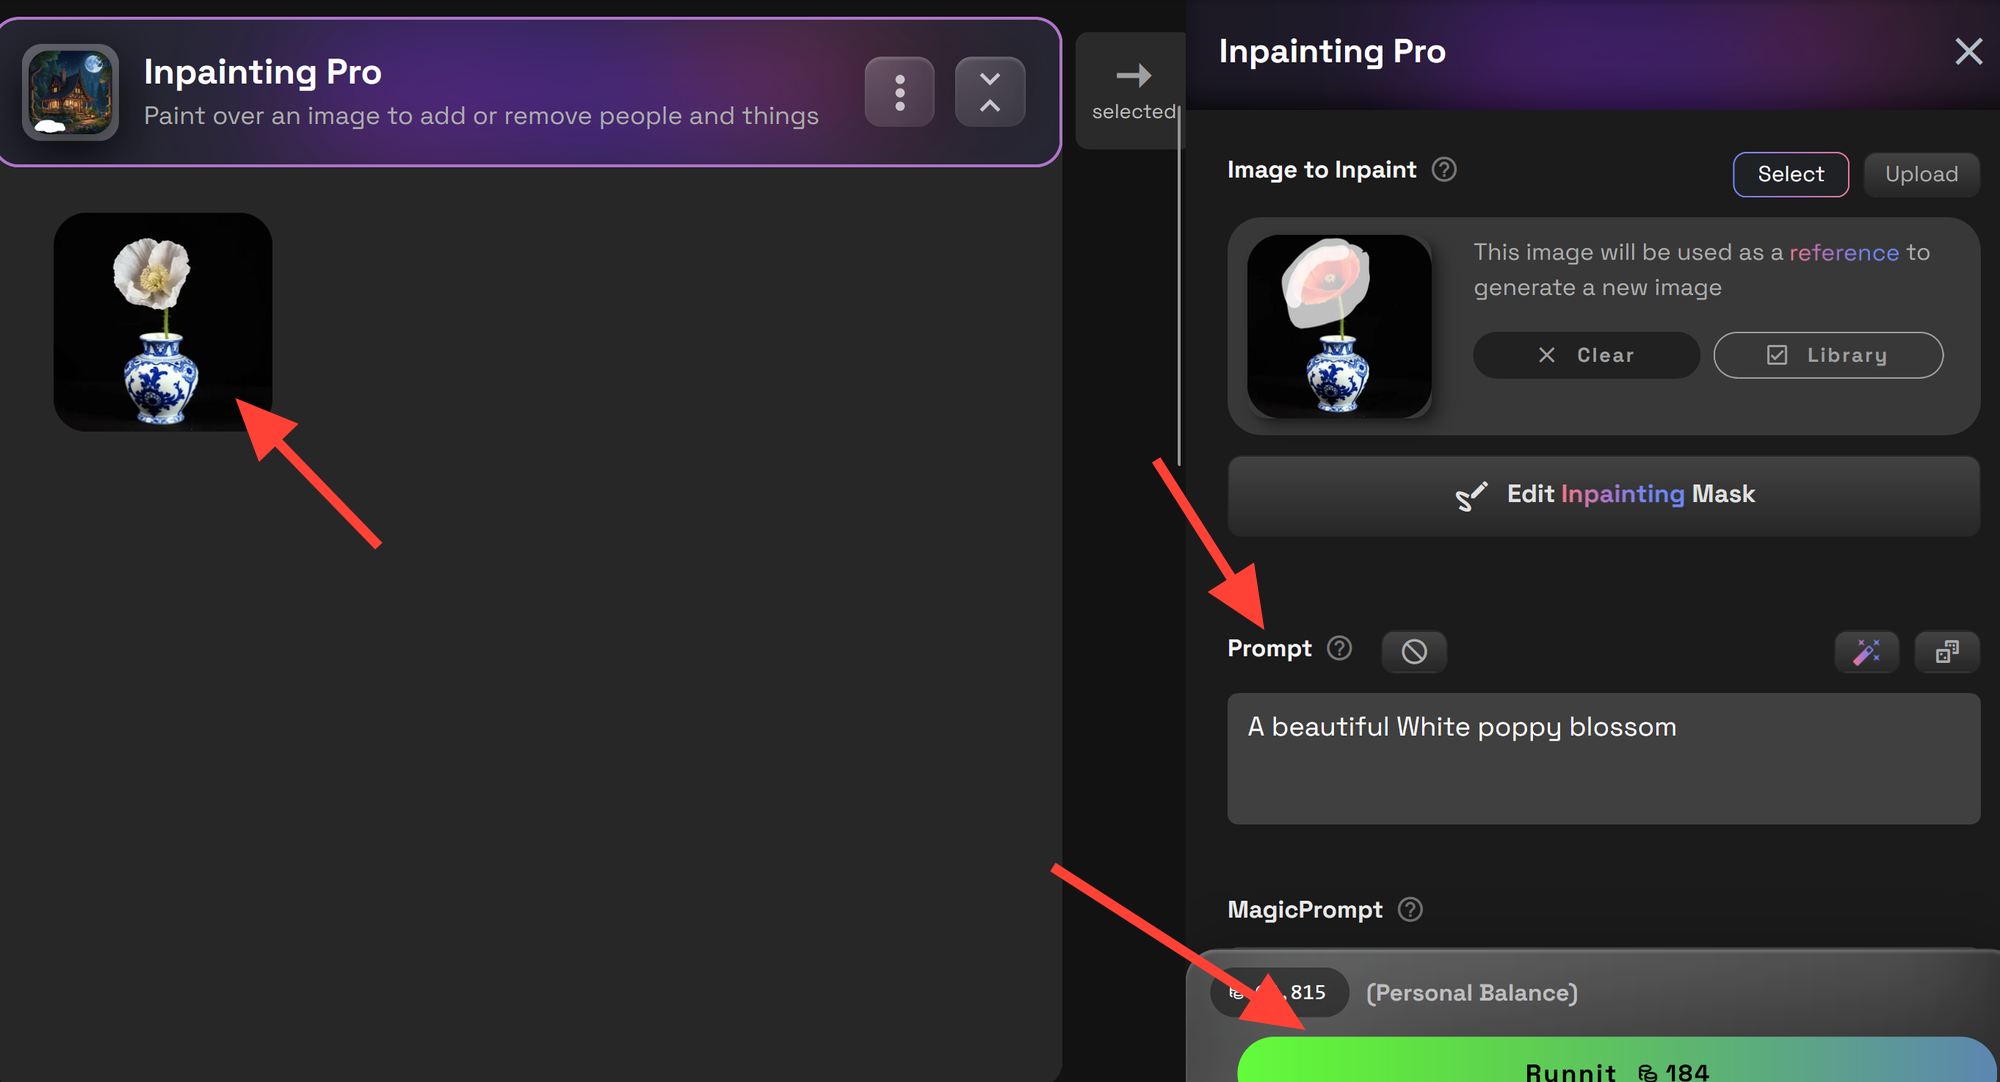
Click Add Inpainting Mask to highlight the area you want to modify.
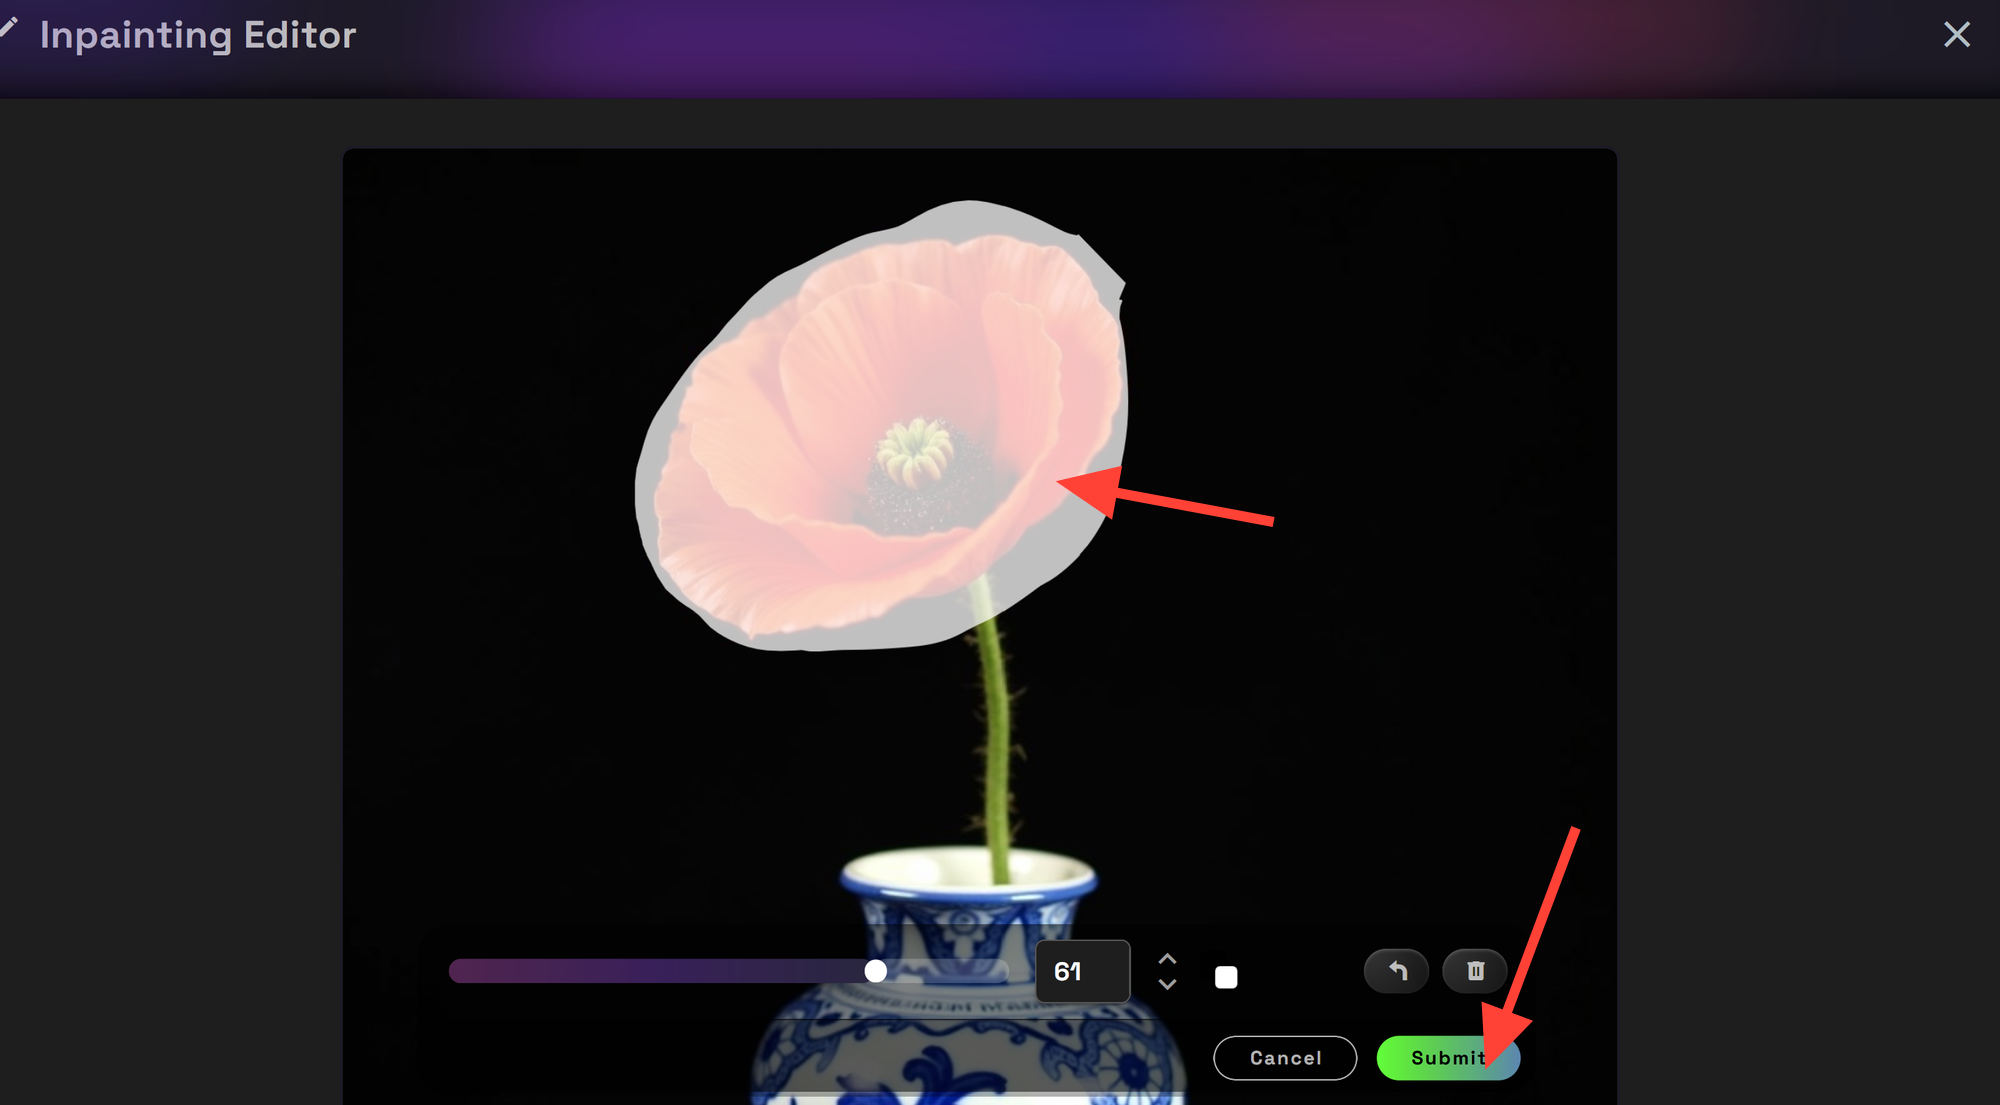
Use the Inpainting Editor to draw a mask over the section you wish to edit, then click Submit.
Enter a prompt describing the changes and click Runnit. Your edited image will appear on the left side of the tool panel.
Step 4: Creating a Video from the Image
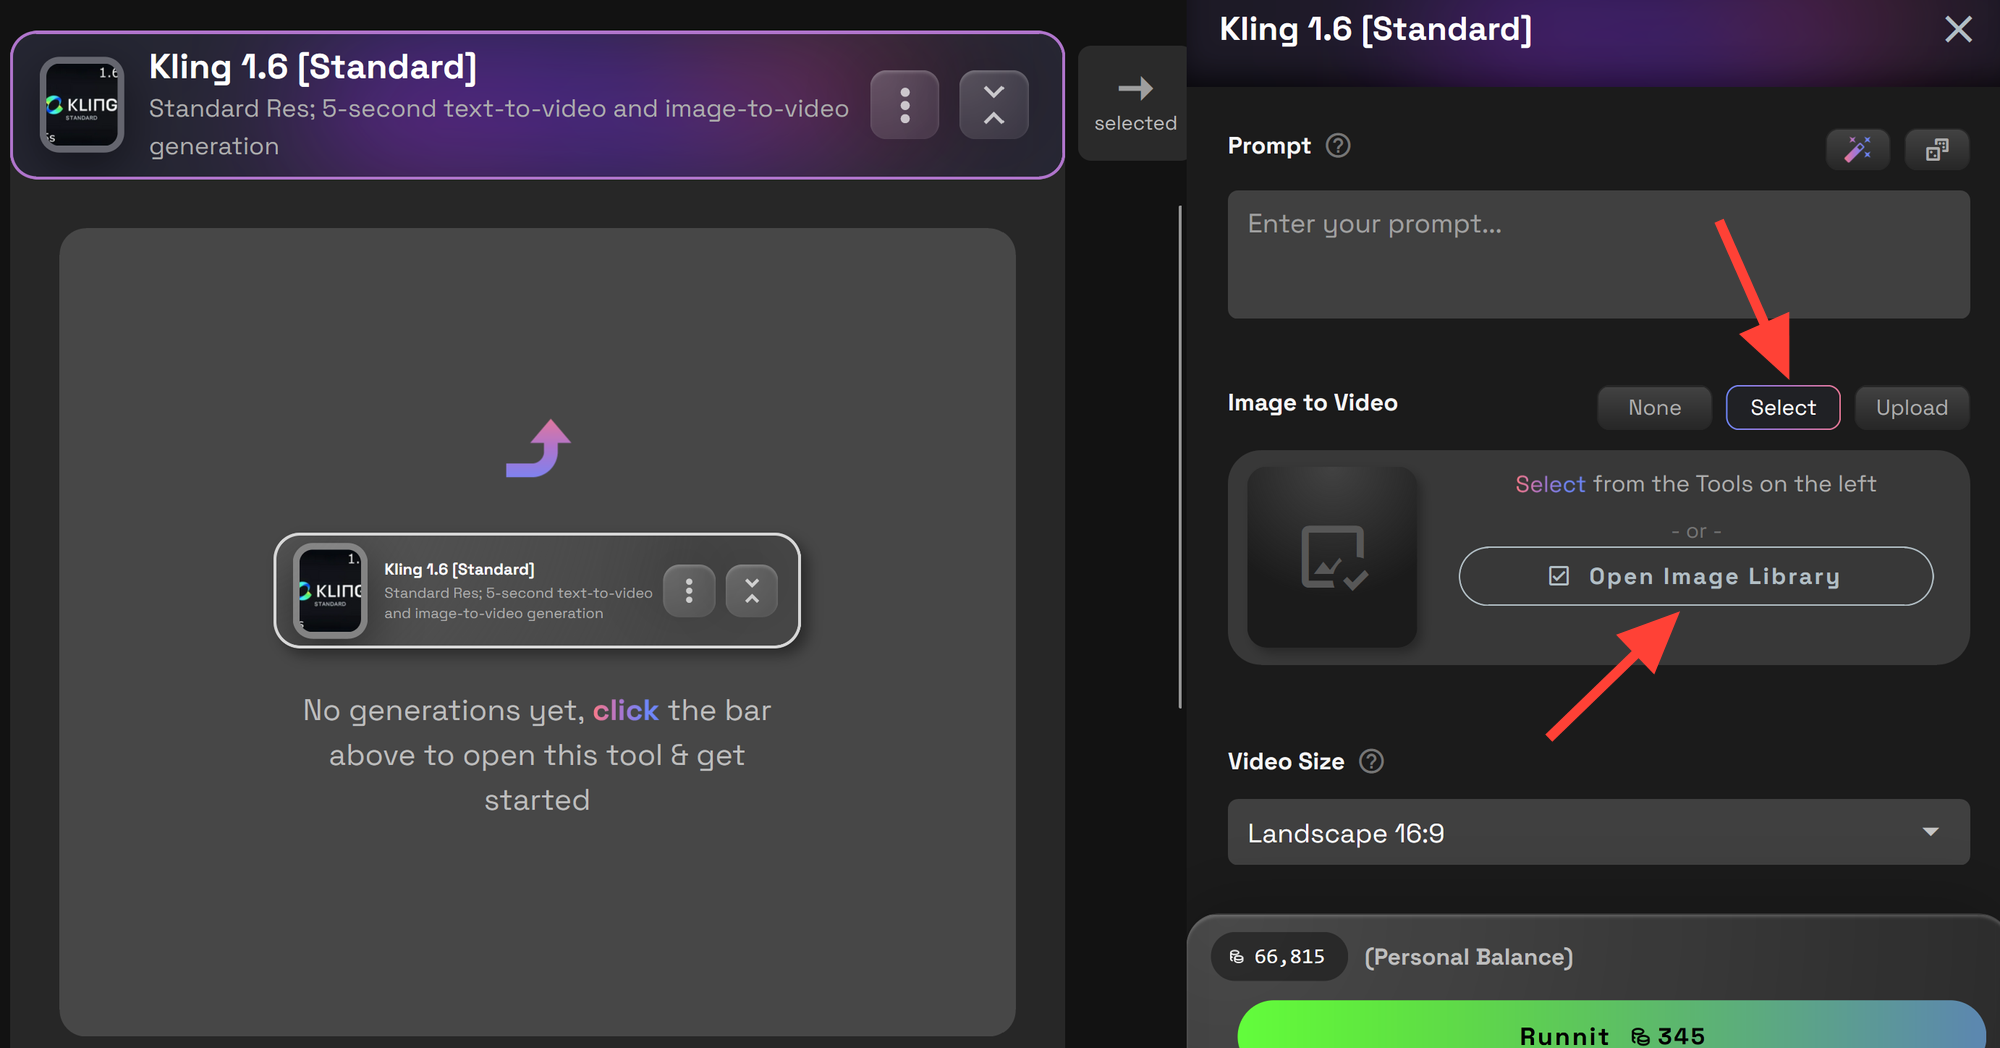
Minimize the other tools and expand the video tool (in this case, Kling 1.6 [Standard]). Click Select, then open the Image Library.
Choose the newly inpainted image.
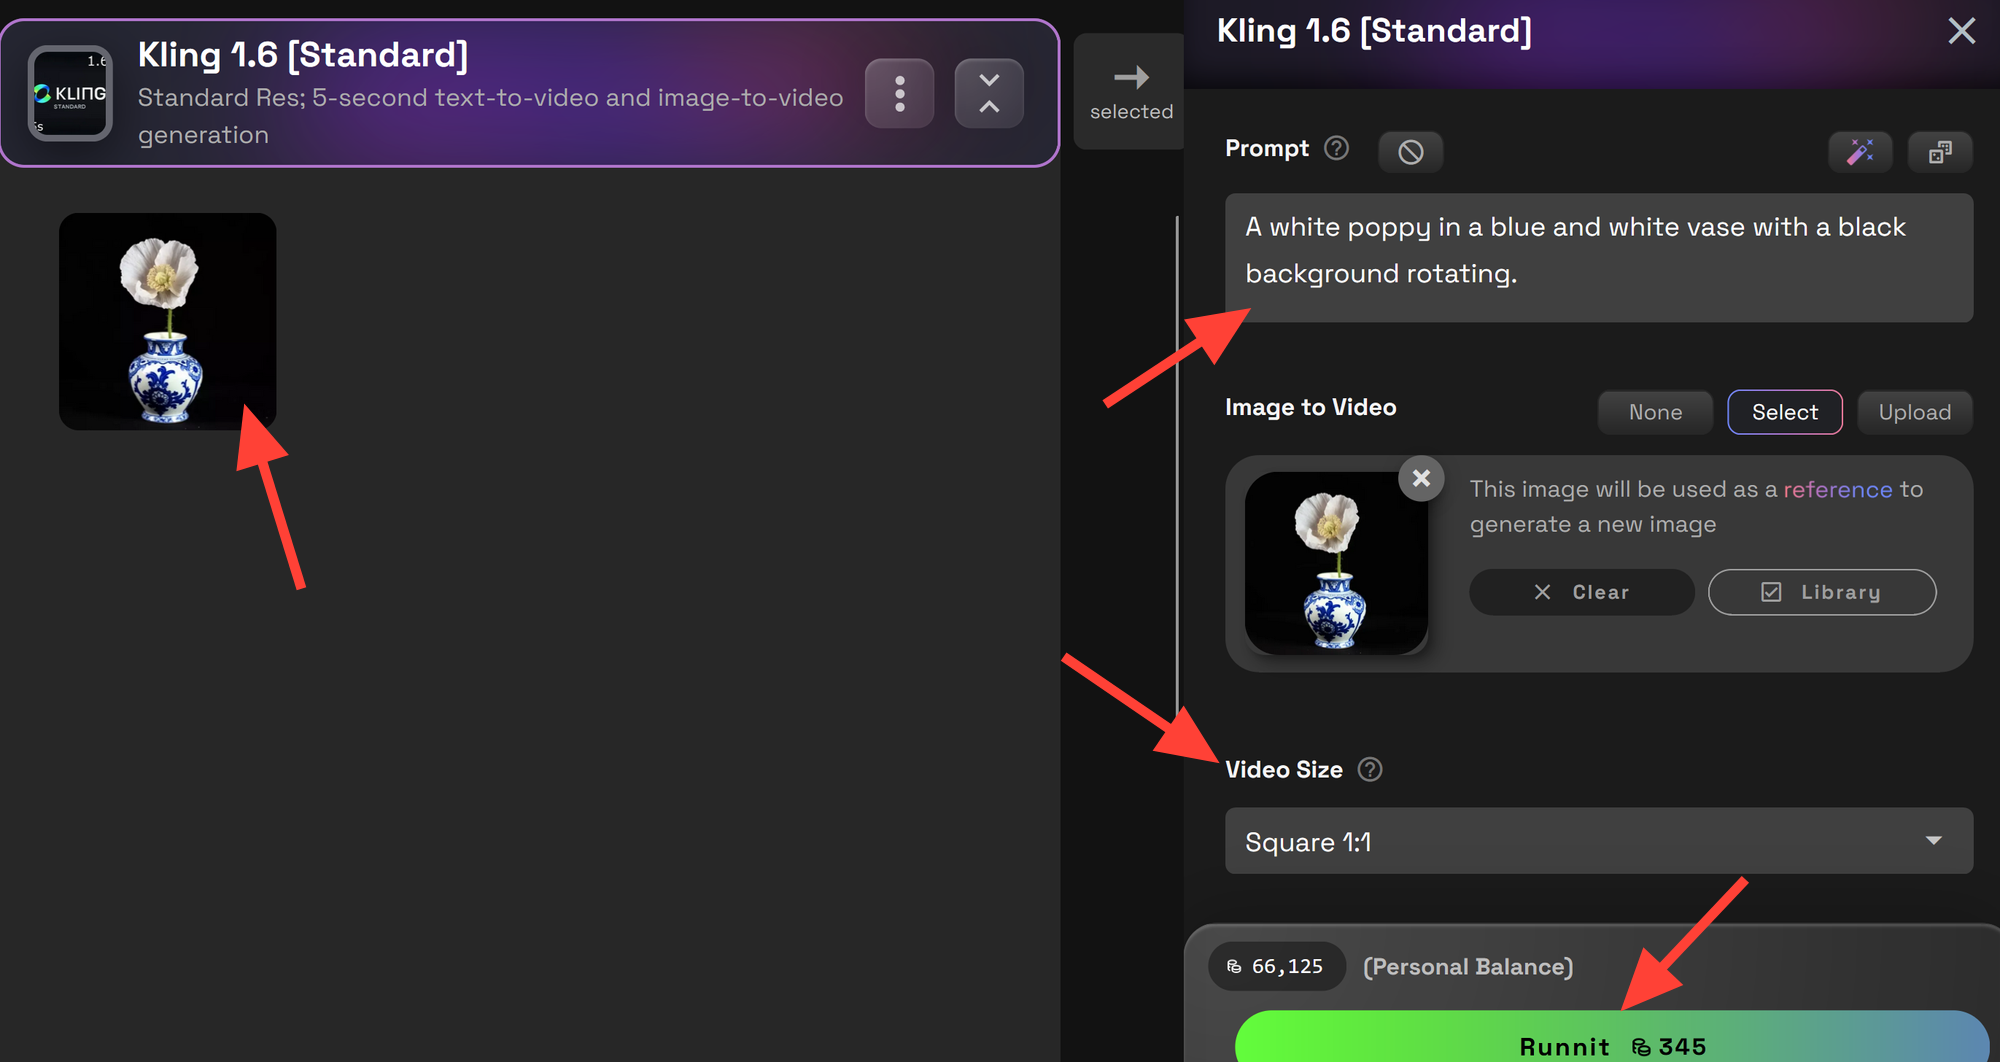
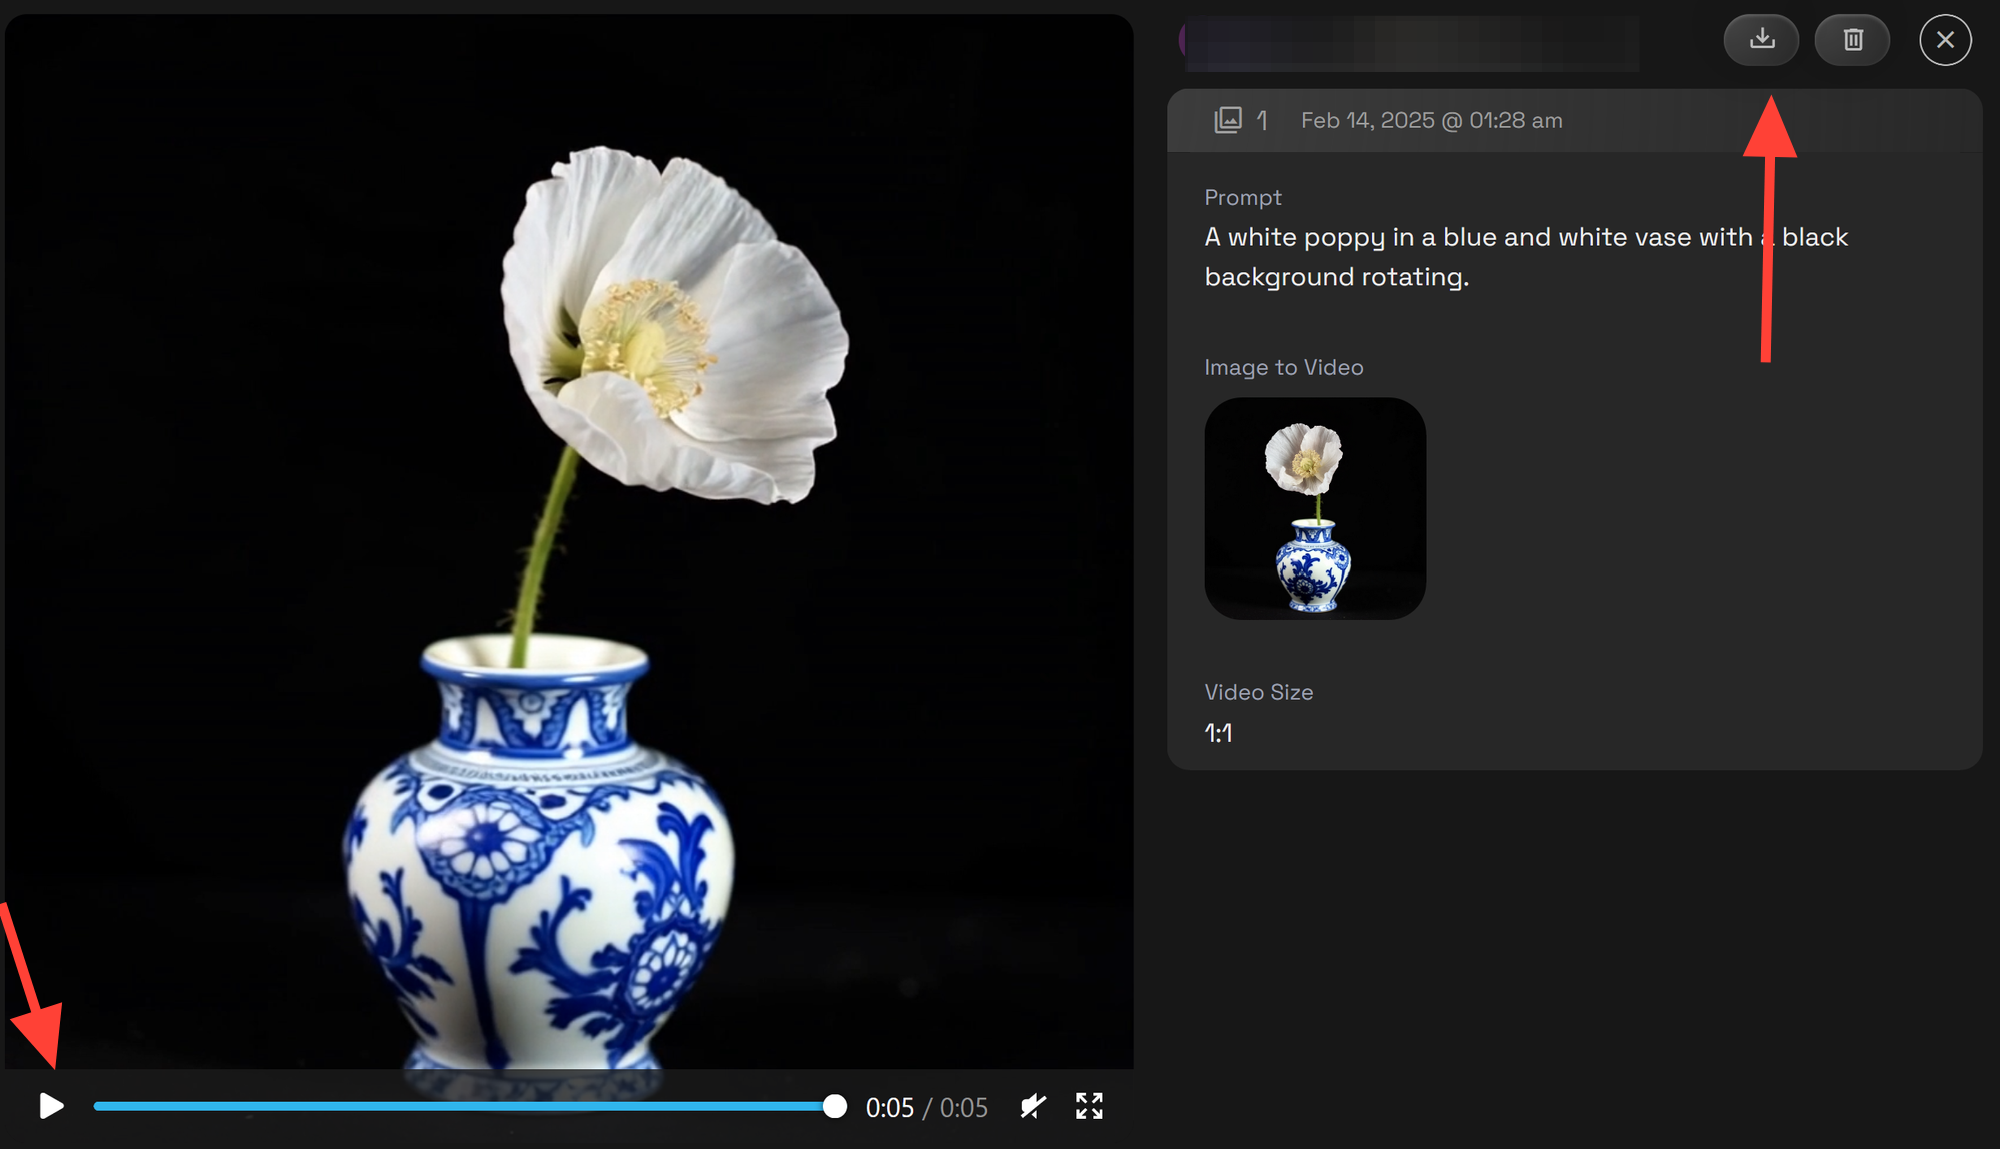
Enter a prompt to guide the animation. Click Video Size, then select Square 1:1 to match the image dimensions. Click Runnit to generate the video. Once the video is processed, click on it from the left panel to preview it.
You can now play or download your video.
Final Thoughts
Congratulations! 🎉 You’ve successfully created your first Runnit Board, transforming an AI-generated image into a refined, animated video. Experiment with different prompts, inpainting styles, and animation settings to fine-tune your workflow.
Further Reading
AI Videos with Runnit
Inpainting Pro in Runnit
Runnits Overview
