Runnit are your next-level artist workspace for AI media generation, designed to streamline creative workflows for creating generative AI assets. This guide serves as an introduction to using Runnit, with a step-by-step process to help you create and customize them .
Runnit are workspaces where tools are organized in a vertical layout for straightforward access, enabling you to locate and activate each tool with ease. While you can run multiple tools simultaneously to support parallel workflows, they currently function independently rather than in direct combination. This setup allows for efficient and flexible project management as you develop and refine your visual assets.
Personal and Team Accounts
Before starting this tutorial, make sure you’ve selected the correct account. Your storageteam or personal account. The available Runnit can differ depending on whether you are part of a team, using Pay-As-You-Go, or are a Creator Club member. You can switch between Personal and Team a by using the panel located i
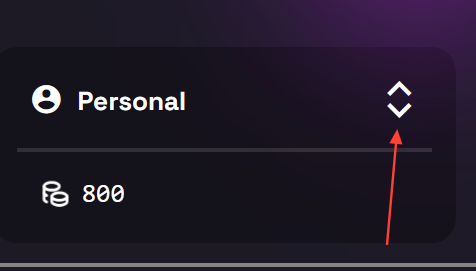

Step-by-Step Guide to Creating Runnit
Step 1: Click on Go to Runnit

Step 2: Select Add Runnit
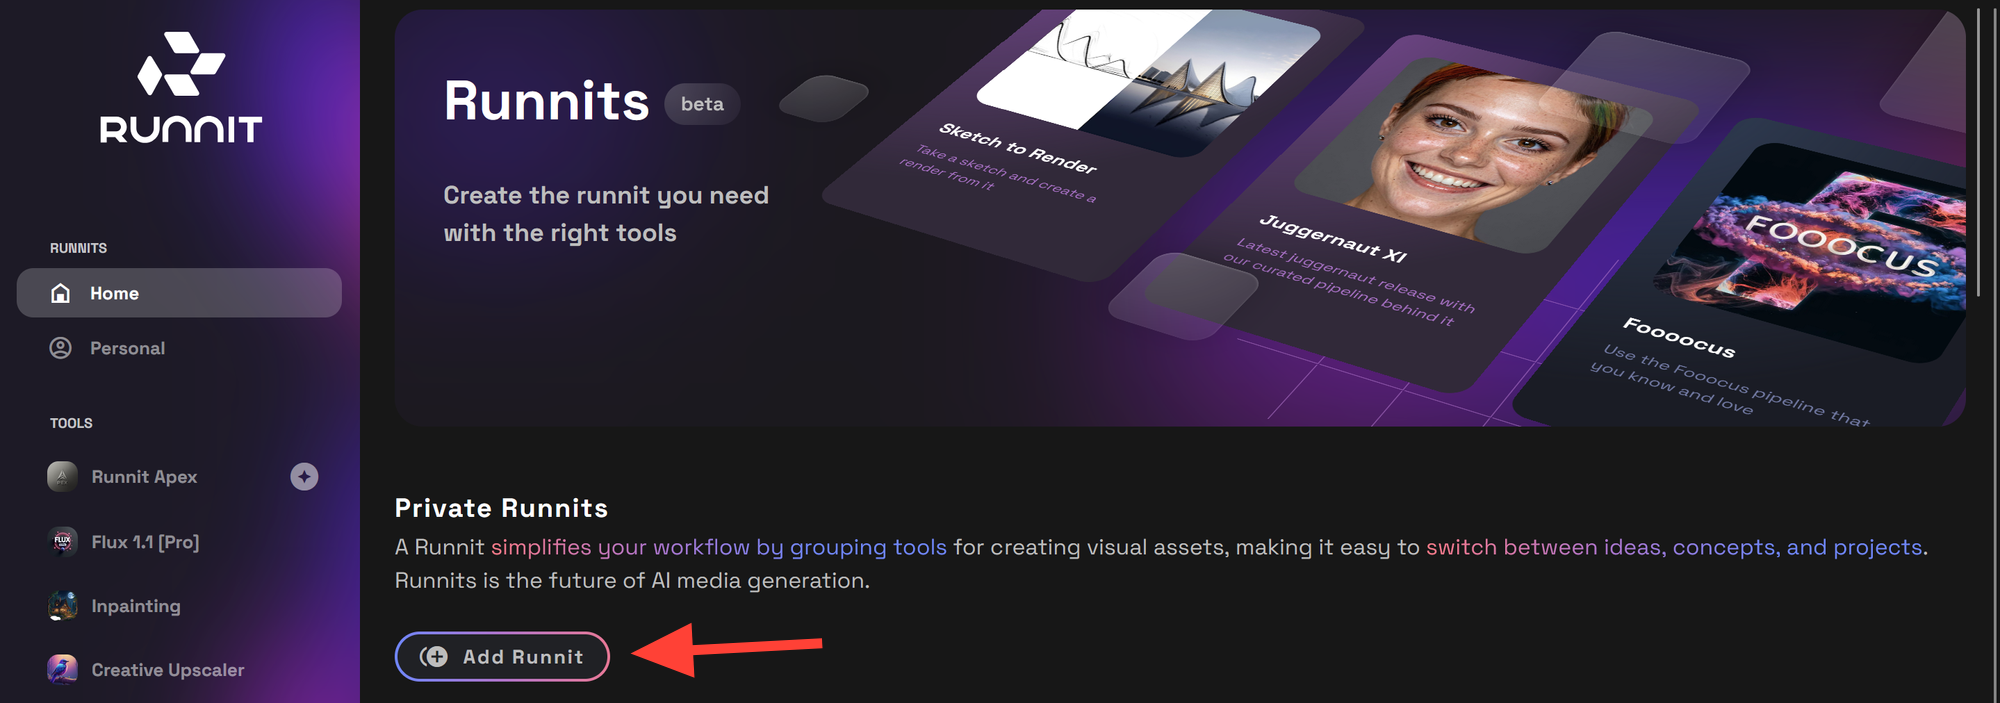
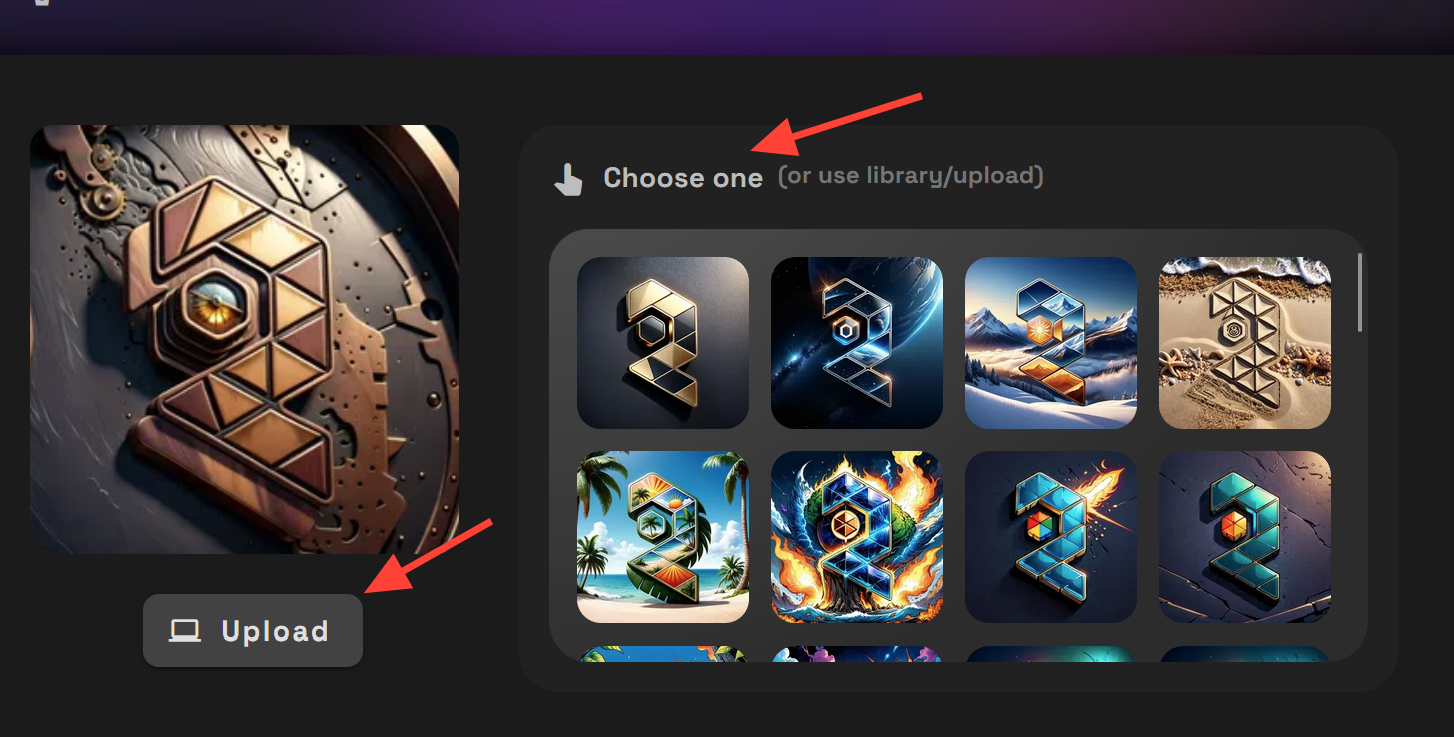
Step 3: Create a Runnit
Select an Image or Upload an image..
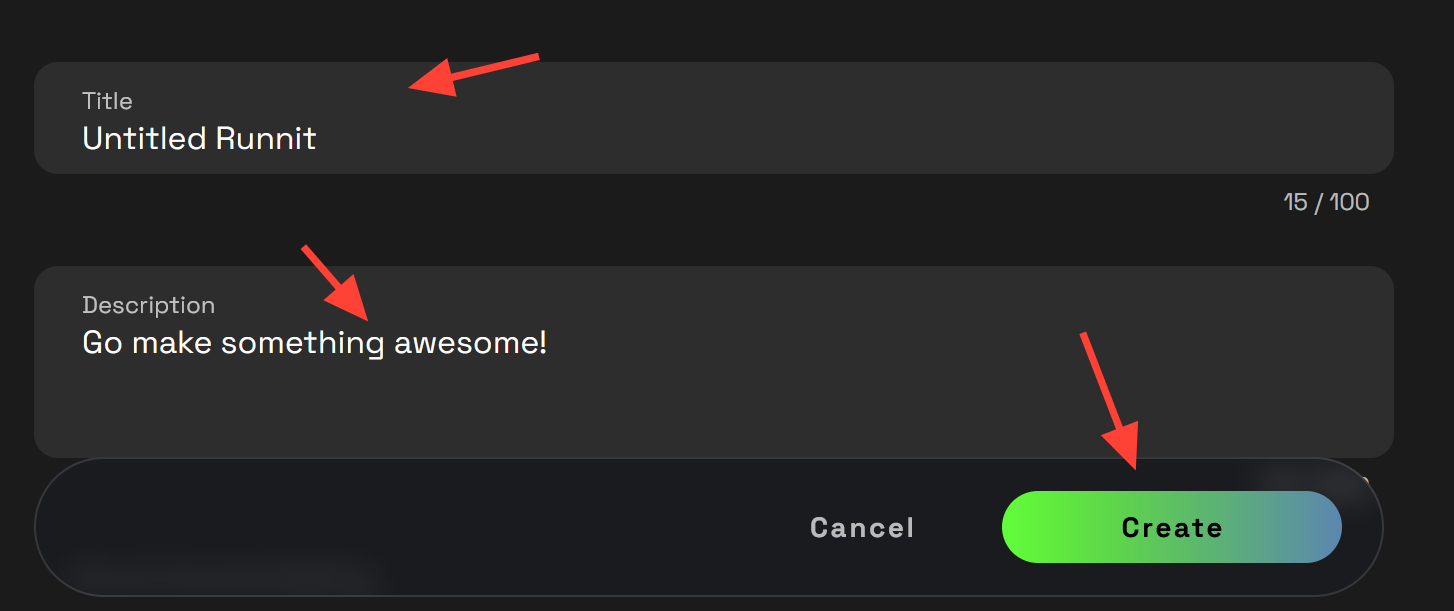
Title your Runnit and add a Description. Then select Create.

Step 4: Add Your First Tool
Click Add Another Tool to start building your Runnit with the necessary tools for your project.
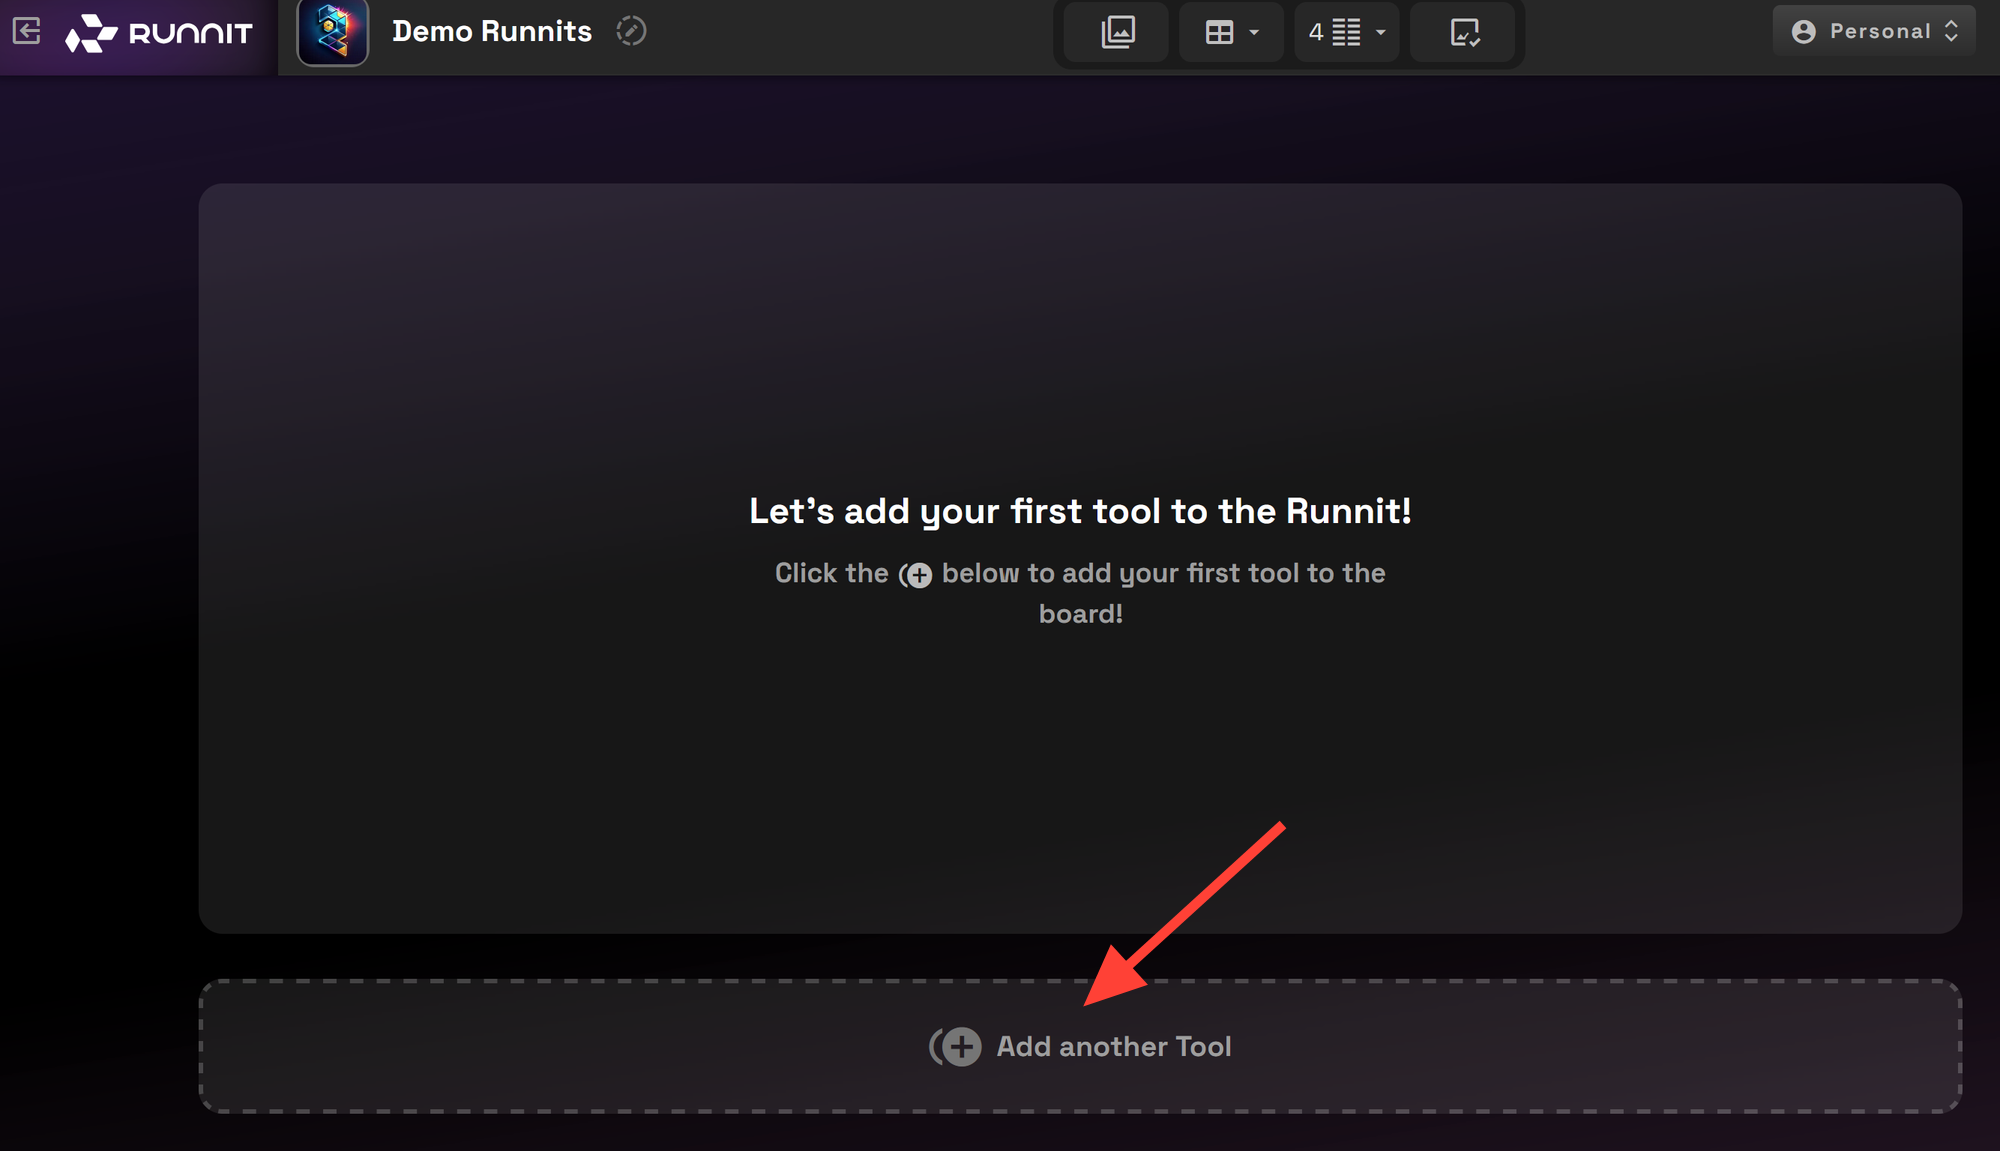
Step 5: Choose Which Tool
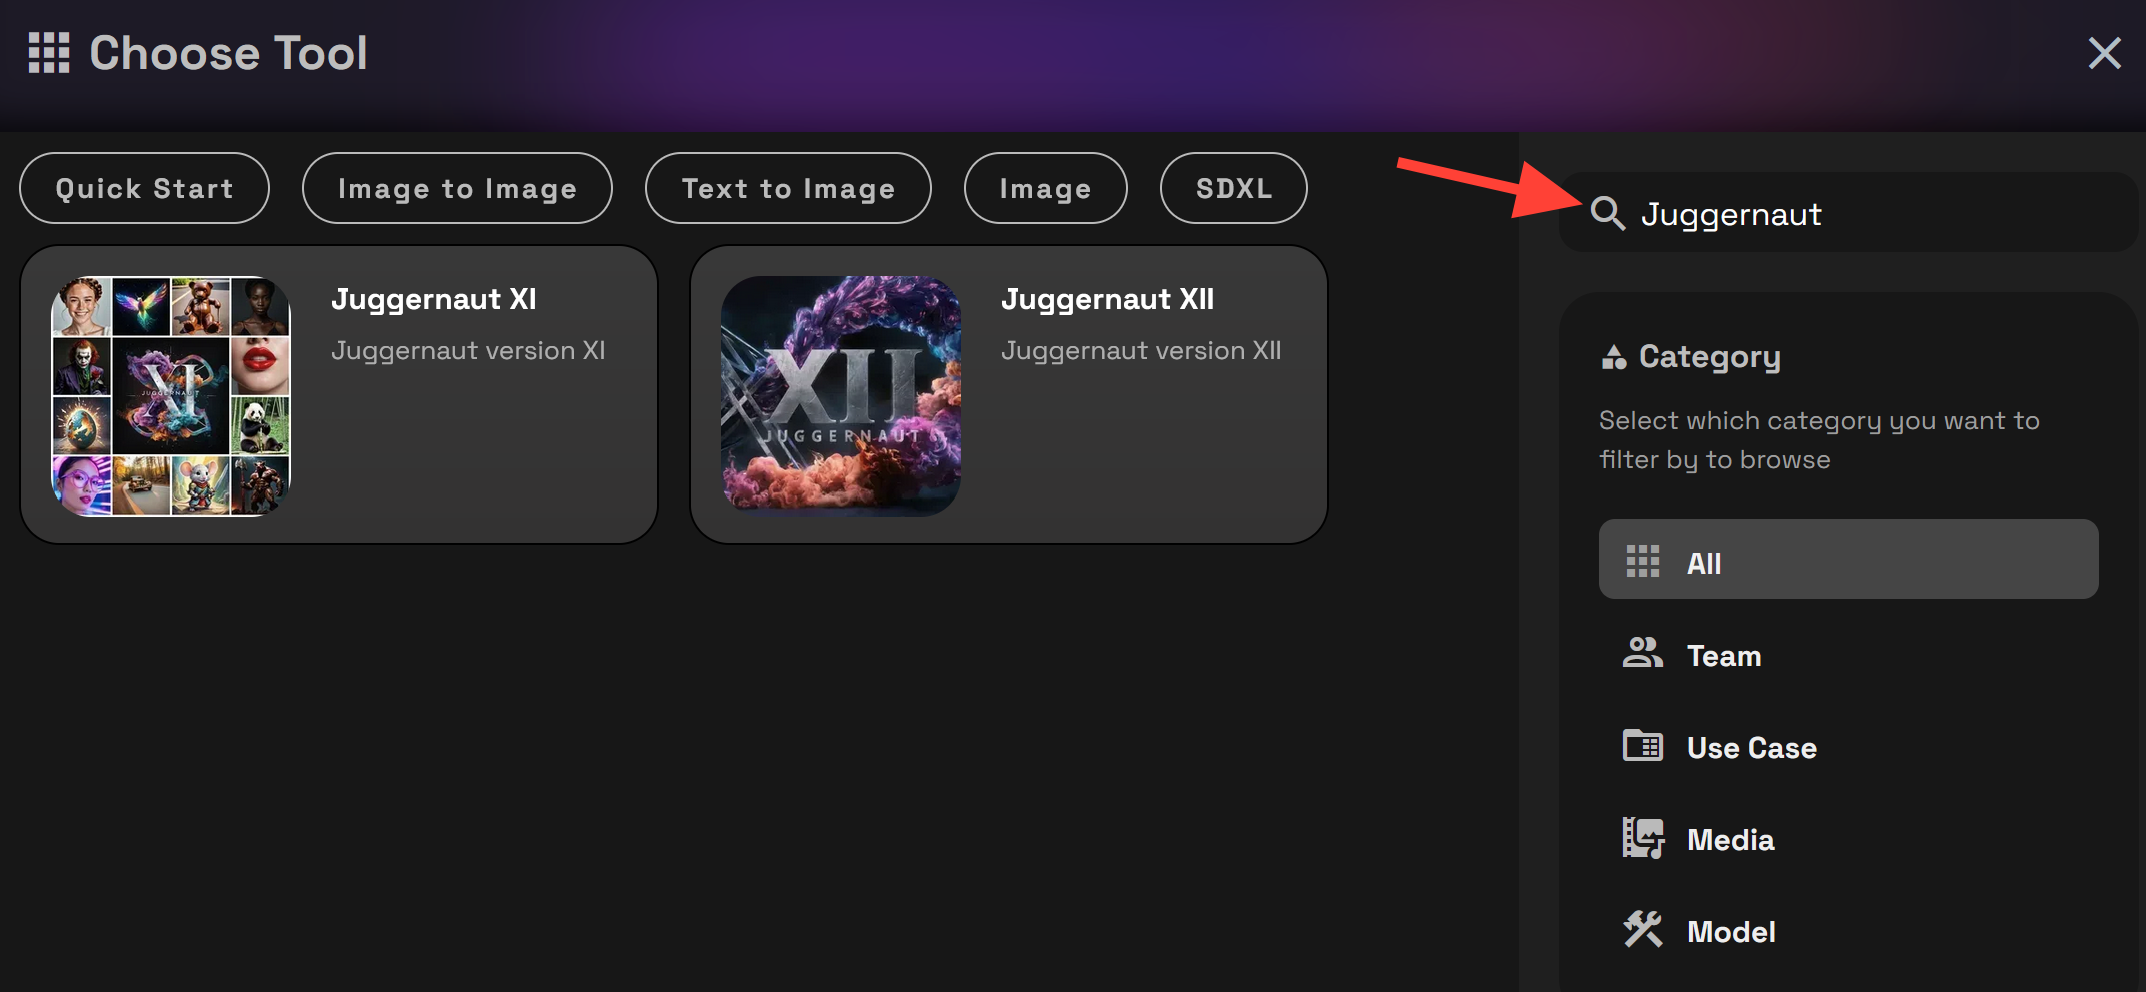
For this example we'll add a Juggernaut text to image tool. In the search box on the top right type Juggernaut.
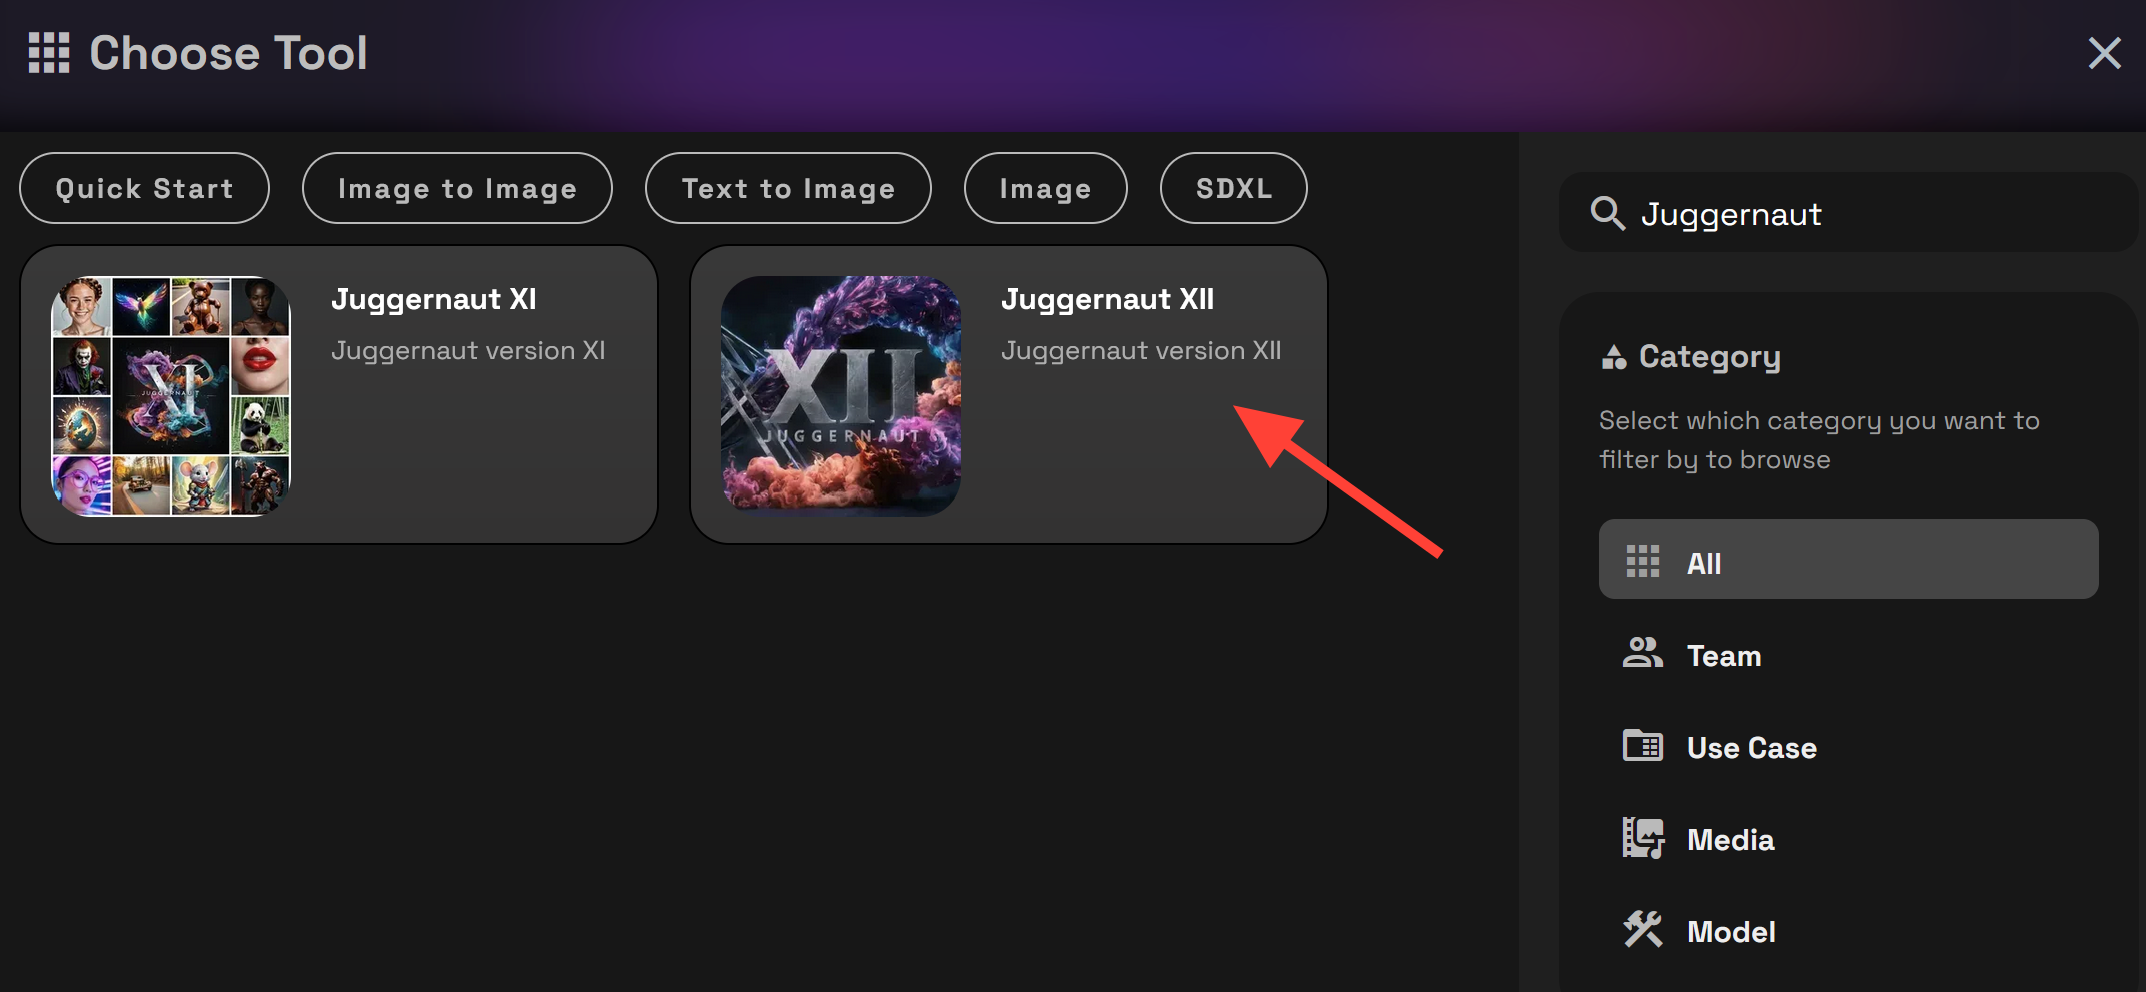
Then select Juggernaut XII.
Juggernaut XII has now been added to your Runnit

Step 6: Testing Your Tool
In the top-right corner, enter a Prompt. The other settings can remain as default for now.
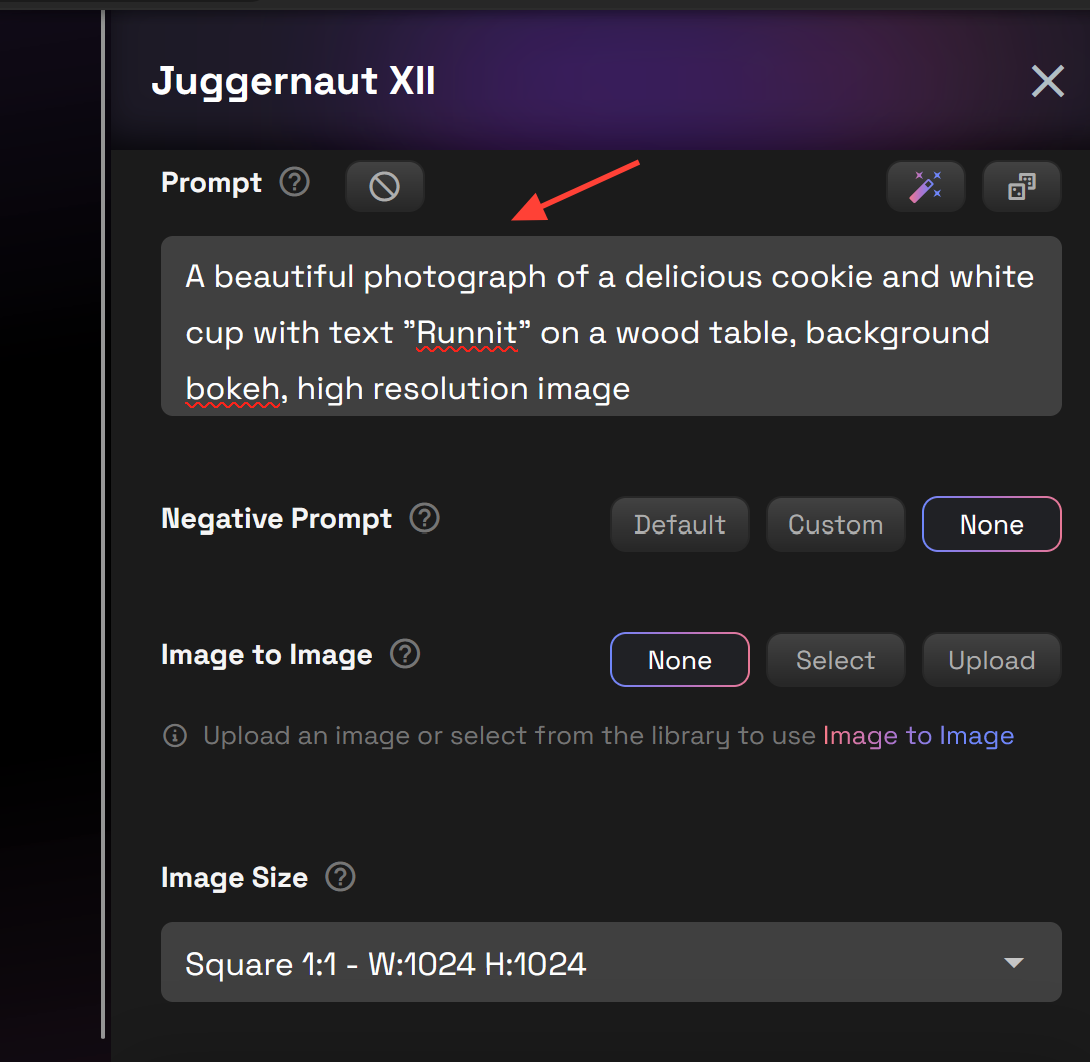
When ready, click on Runnit! to generate the first image.

After selecting Runnit button your images will be created and accessible under your tool.
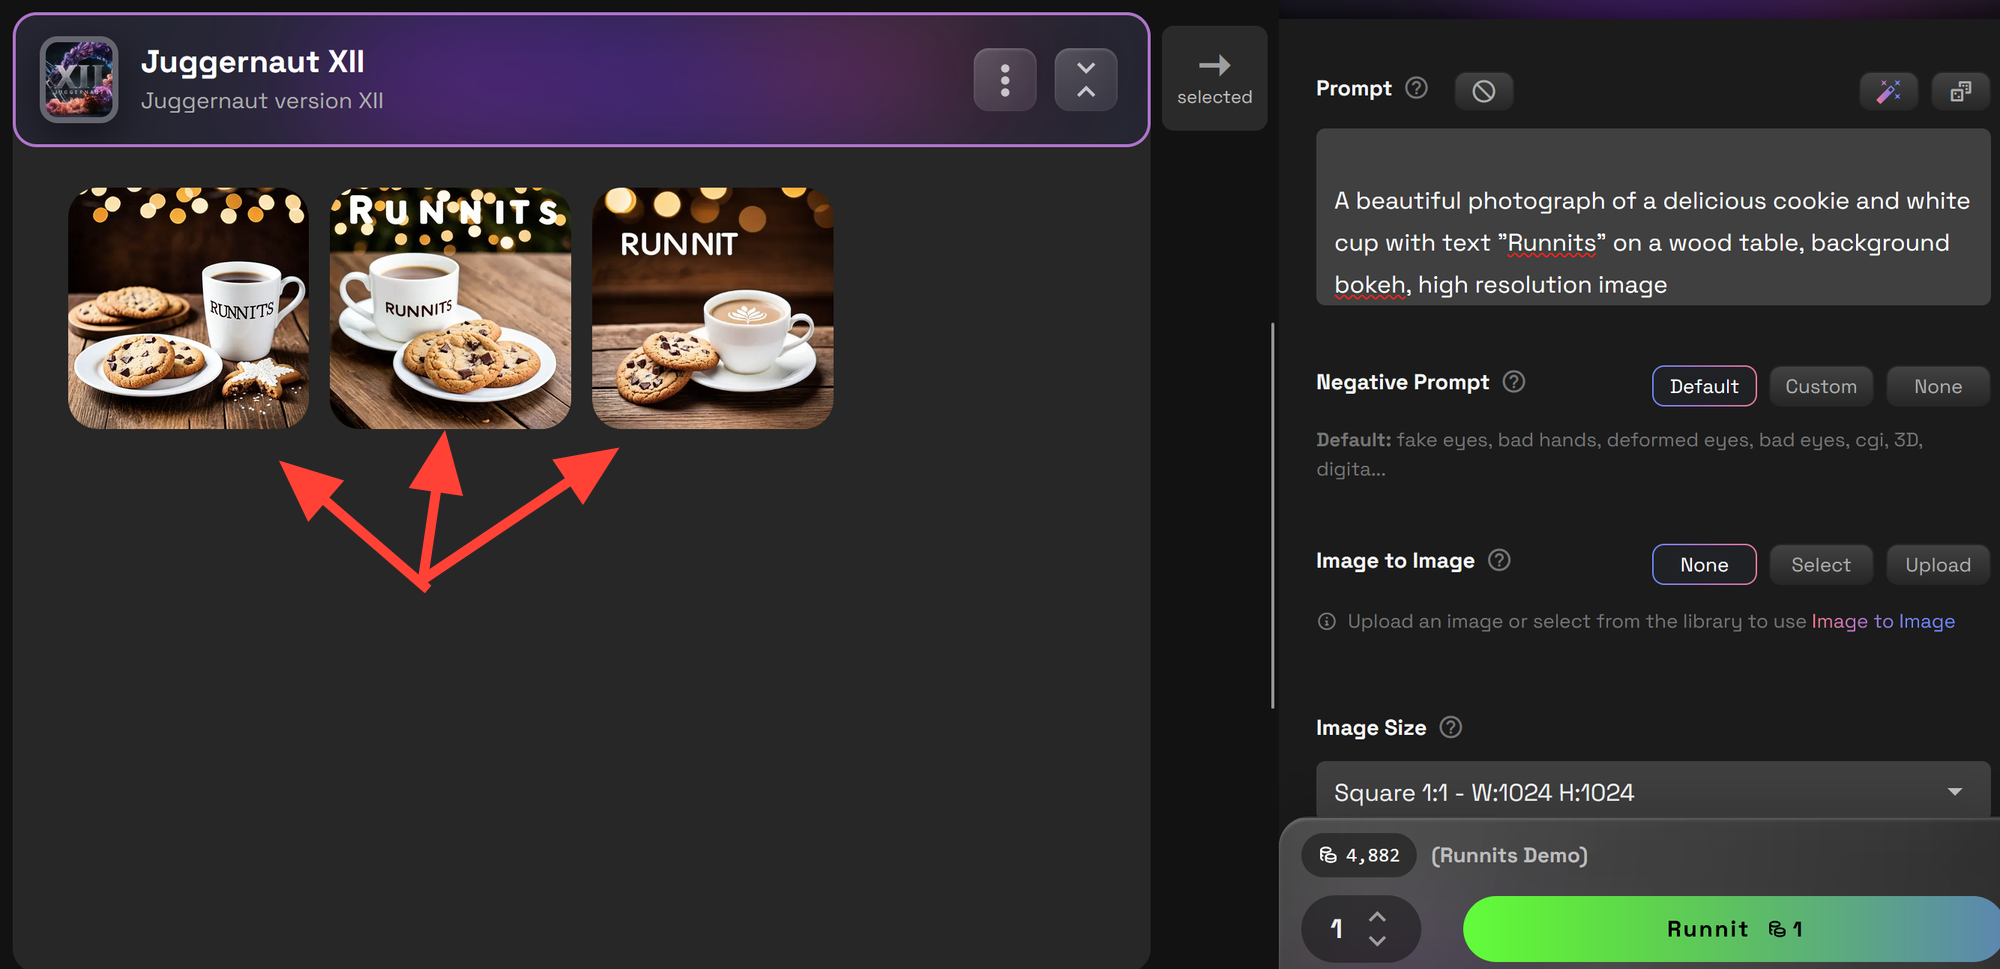
Clicking on the image will expand the image and give you more details.
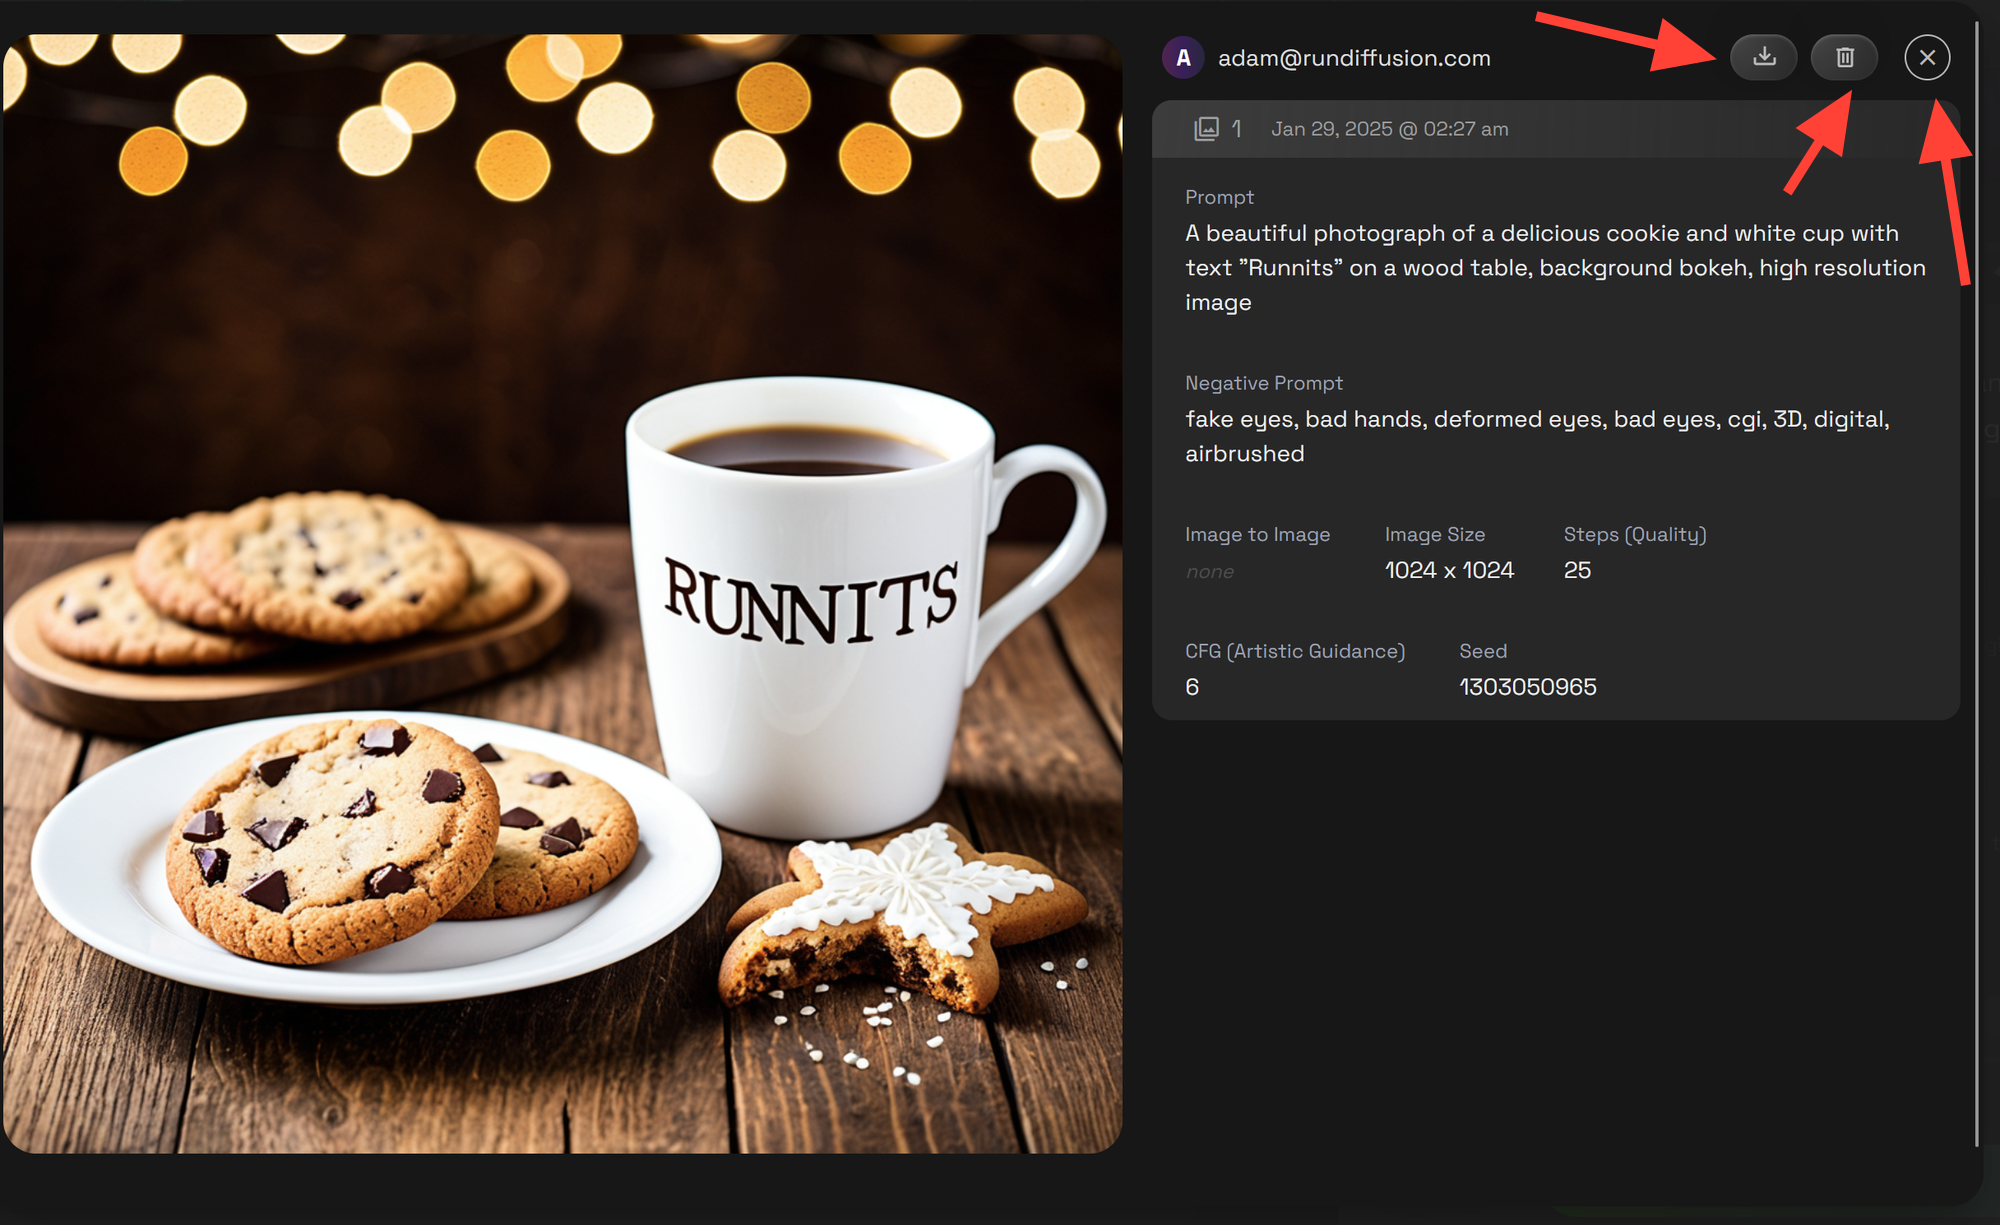

Step 7: Enhance Your Prompt
For prompt suggestions you can try enhancing your prompts, select the Magic Wand icon in the top right.

The Enhance Prompt is now visible. You can select the arrow buttons to replace your old prompts with the enhanced prompt. This can be done for the Positive and Negative prompts.
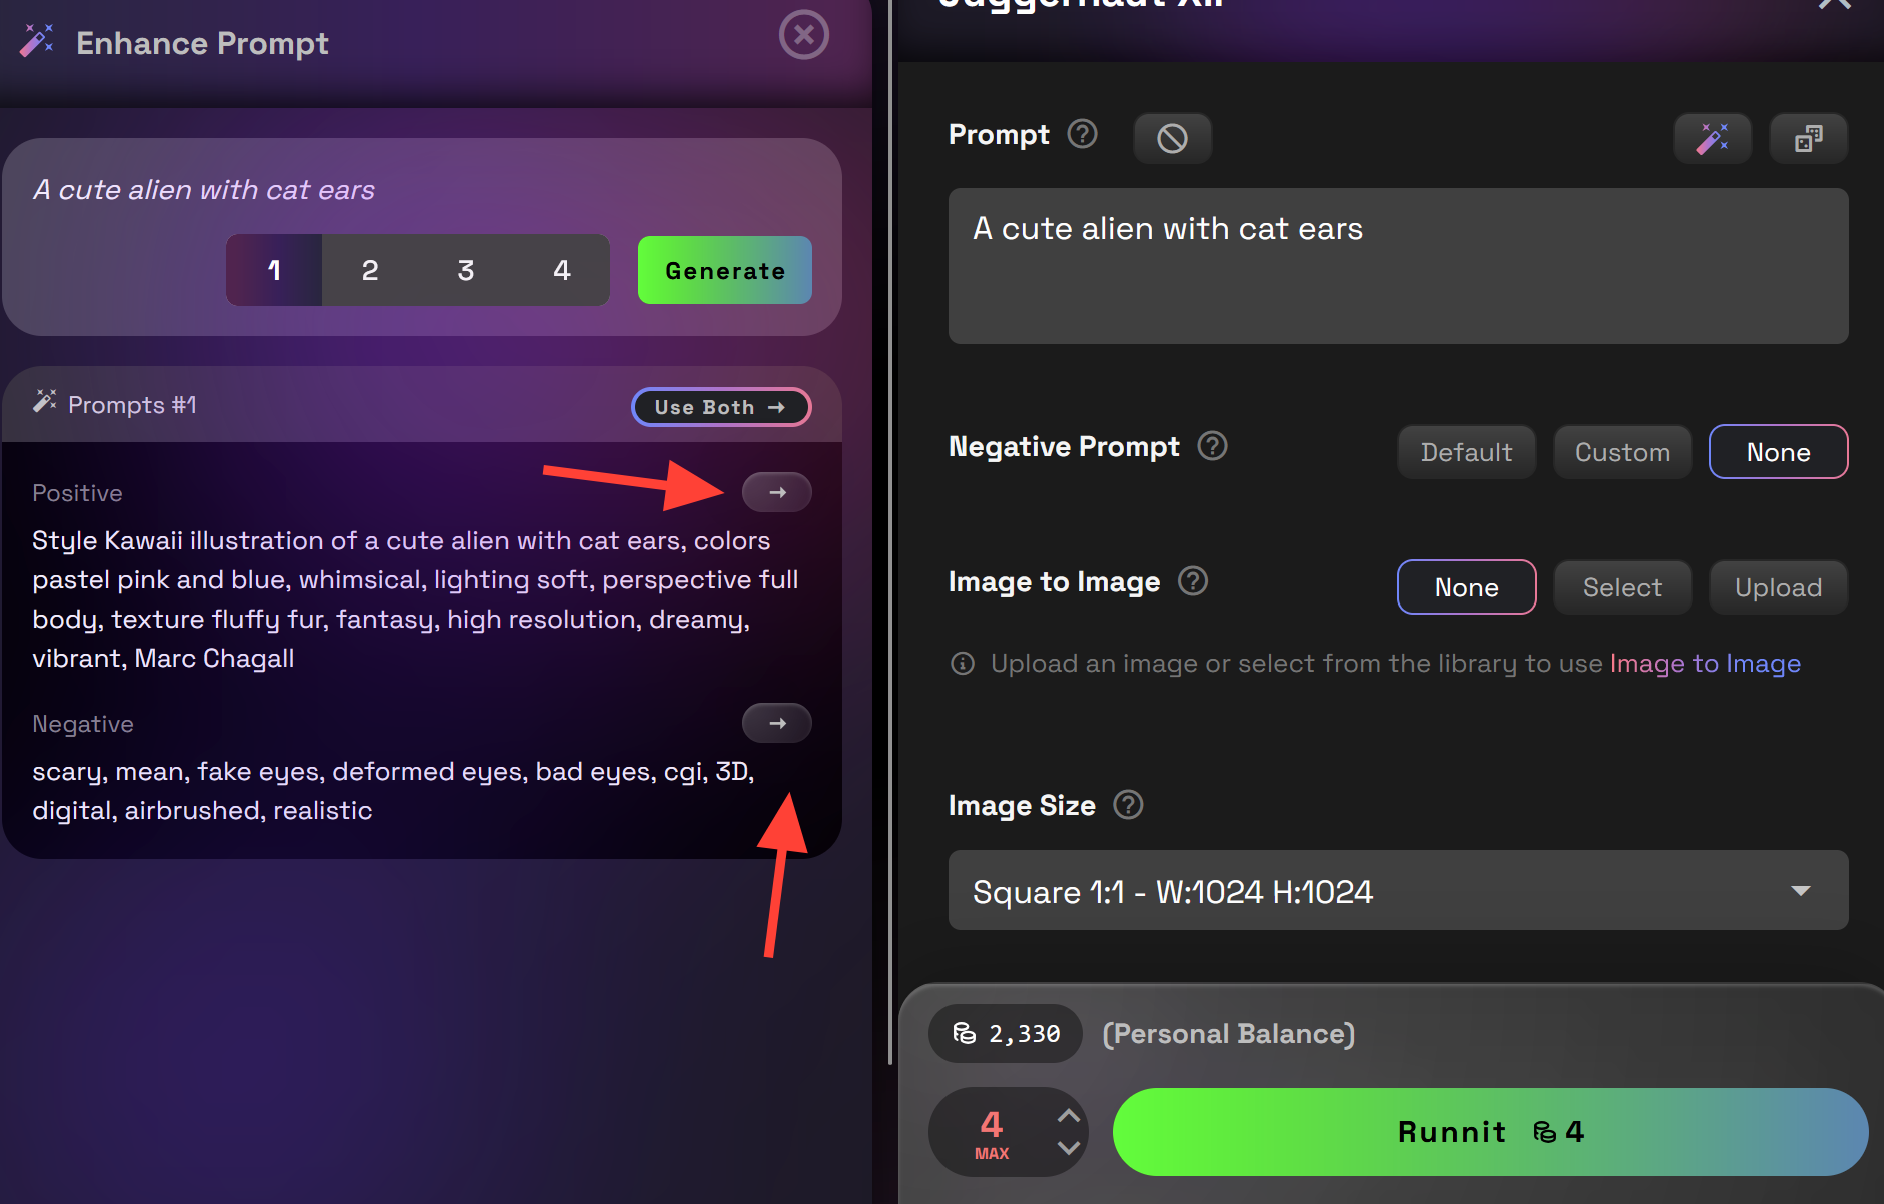
You can then edit the prompt if you want to refine it further.


Step 8: Create Multiple Images
If your project involves text or detailed visuals, generating multiple images can help you select the best result. Set your output to create several variations at once. This speeds up outputs since all 4 images are created

Step 10: Add Another Tool
Continue building your Runnit by adding more tools as needed to complete your project.

Understanding Runnit Tool Settings
Each tool within Runnit offers a variety of settings that can significantly impact your final output. Here’s a quick guide to help you understand some common settings.
- Prompt
The main text that guides your AI generation. It’s the creative seed for your output, so use descriptive language to achieve the look or theme you want. - Negative Prompt
This setting helps refine your results by specifying elements you don’t want in the output. For instance, if you’re creating a nature scene, your negative prompt might be “buildings” or “people.” - Image Size
Controls the size and clarity of your generated image. Higher resolutions offer more detail but require more processing time. - Steps
Steps represent the number of iterations the model takes to create your image. More steps typically improve detail and quality, though too many can sometimes over-complicate results. - CFG (Classifier-Free Guidance)
This setting balances how closely the output follows your prompt. Higher CFG values create outputs that more closely adhere to your prompt but can sometimes look over-processed; lower values offer a freer, more abstract result. - Seed
The seed is a numerical value that determines the random aspects of the image generation. Using the same seed with the same prompt will recreate the same or similar image, which is helpful for consistent results or revisiting previous outputs.
These settings allow you to customize each tool’s output to meet your exact needs, whether that’s fine-tuning details, adjusting quality, or ensuring consistency across multiple images. Experimenting with these options in Runnit will help you perfect your AI creations.
Conclusion
Using Runnit to organize and streamline your AI projects allows you to manage tools efficiently and achieve high-quality results. Using Runnit ensures that you have the creative freedom and flexibility to bring your ideas to life.

Further Reading


