


Architects often start their designs with sketches or digital wire-frames, but turning these initial ideas into high-quality renders can be time-consuming. Sketch to Render in Runnit streamlines this process, allowing architects to convert rough concepts into photo realistic visuals. This article explores how Sketch to Render enhances architectural visualization, accelerates workflows, and improves client communication.
Why Sketch to Render Pro for Architecture?
Fast Conceptualization to Render
- Quickly transform rough sketches into refined renders.
- AI automates shading, textures, and lighting, significantly reducing design time.
- Speeds Up Design Iterations: Instantly visualize multiple design variations.
Enhanced Client Presentations
- Enhances Collaboration: Share renders with teams and stakeholders for quicker decision-making.
- Provides clients with high-fidelity visuals early in the design phase.
- Eliminates misunderstandings by showcasing photographic representations before finalizing plans.
Seamless Workflow Integration
- Works with photographs of hand-drawn sketches, CAD designs, or 3D models.
- Easily integrates by taking a screenshot or photograph of an existing project.
Video Tutorial
To help you get started, we have created a step-by-step video tutorial demonstrating the entire Sketch to Render process. Watch the tutorial to see how you can turn your sketches into stunning renders with ease.
How to Use Sketch to Render for Architecture
Using Runnit Board for Sketch to Render
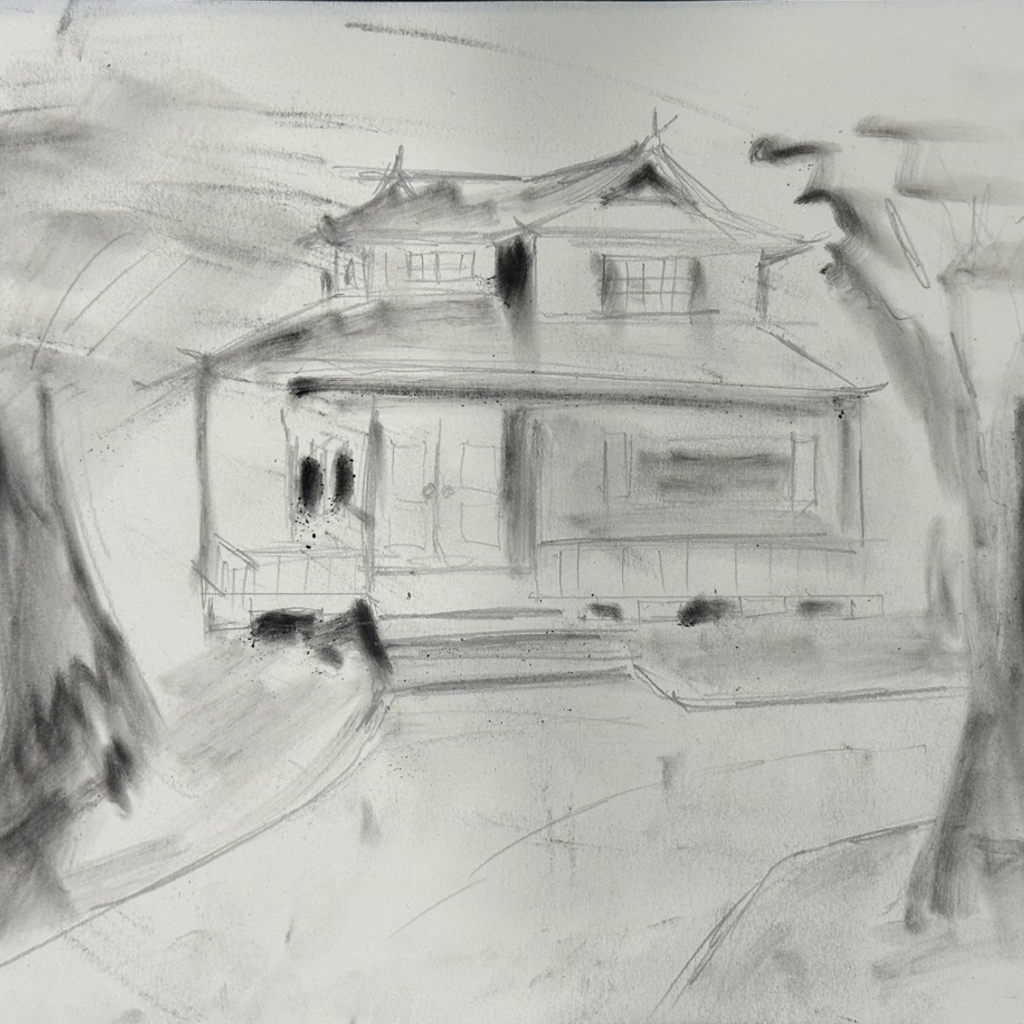
Step 1: Draw a Sketch
- Start with a pencil sketch, digital drawing, or screenshot of a CAD or 3D model design. File must be JPEG or PNG.
- Ensure clear structural outlines for optimal AI interpretation but as you can see in the example a messy basic sketch will work.
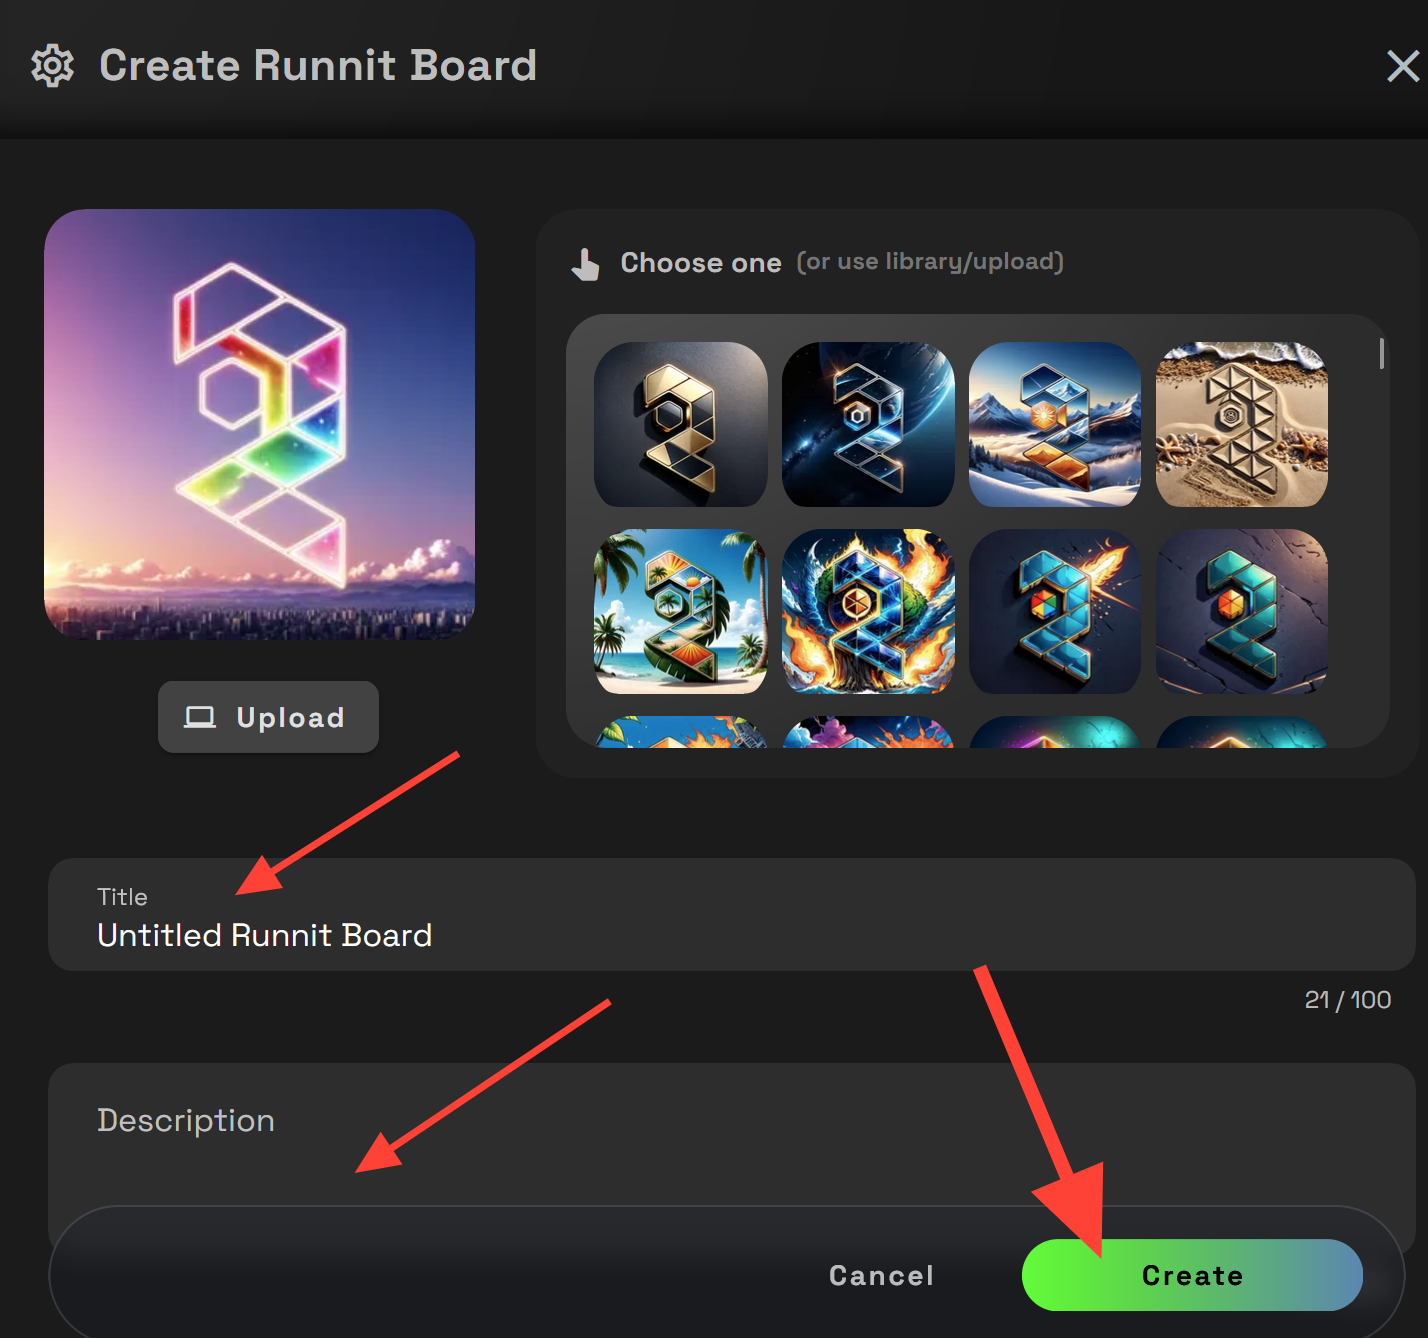
Step 2: Add Runnit Board
- Open Runnit and create a new board to organize your project. Click Add Runnit board, add a title and description and click create.
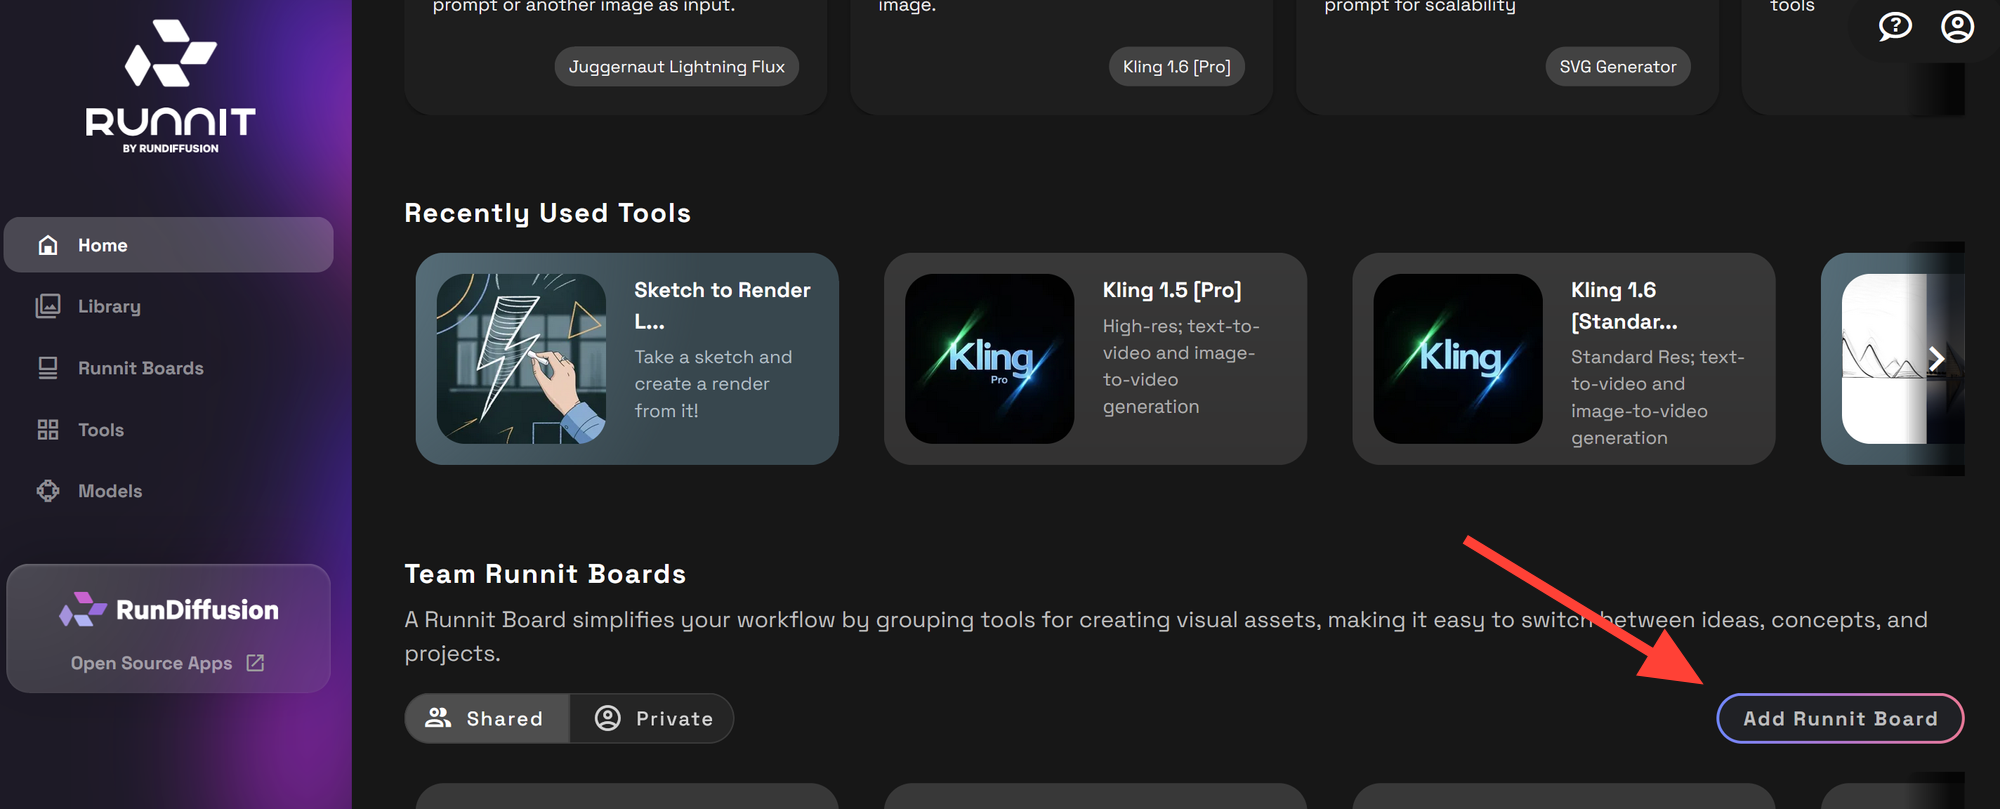
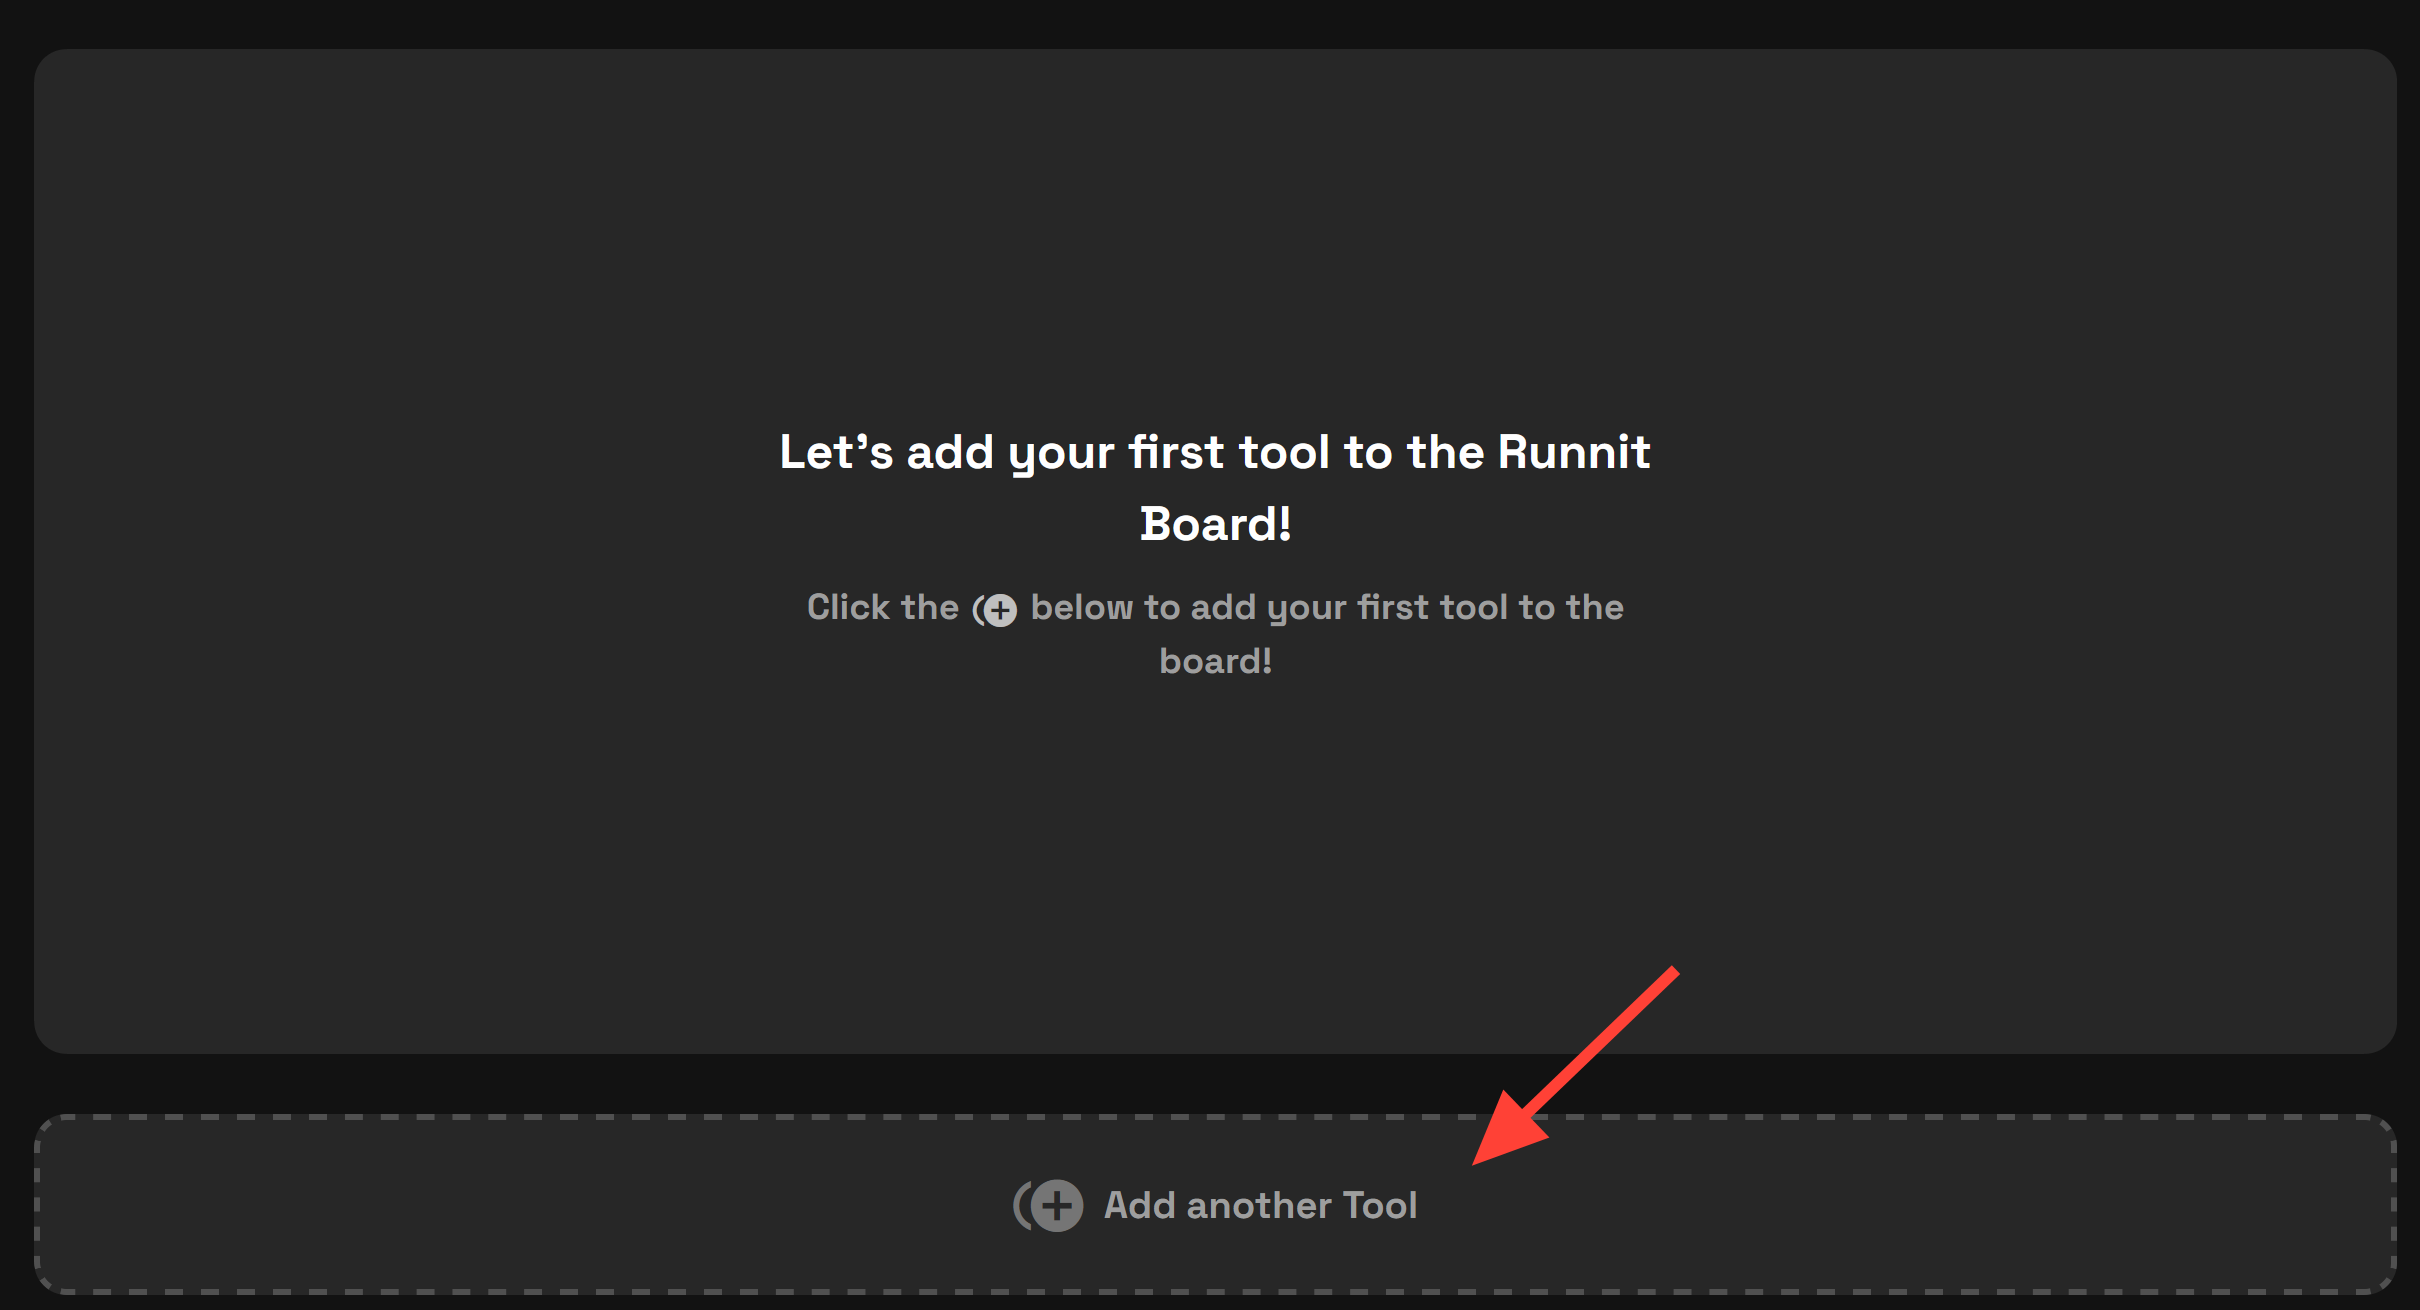
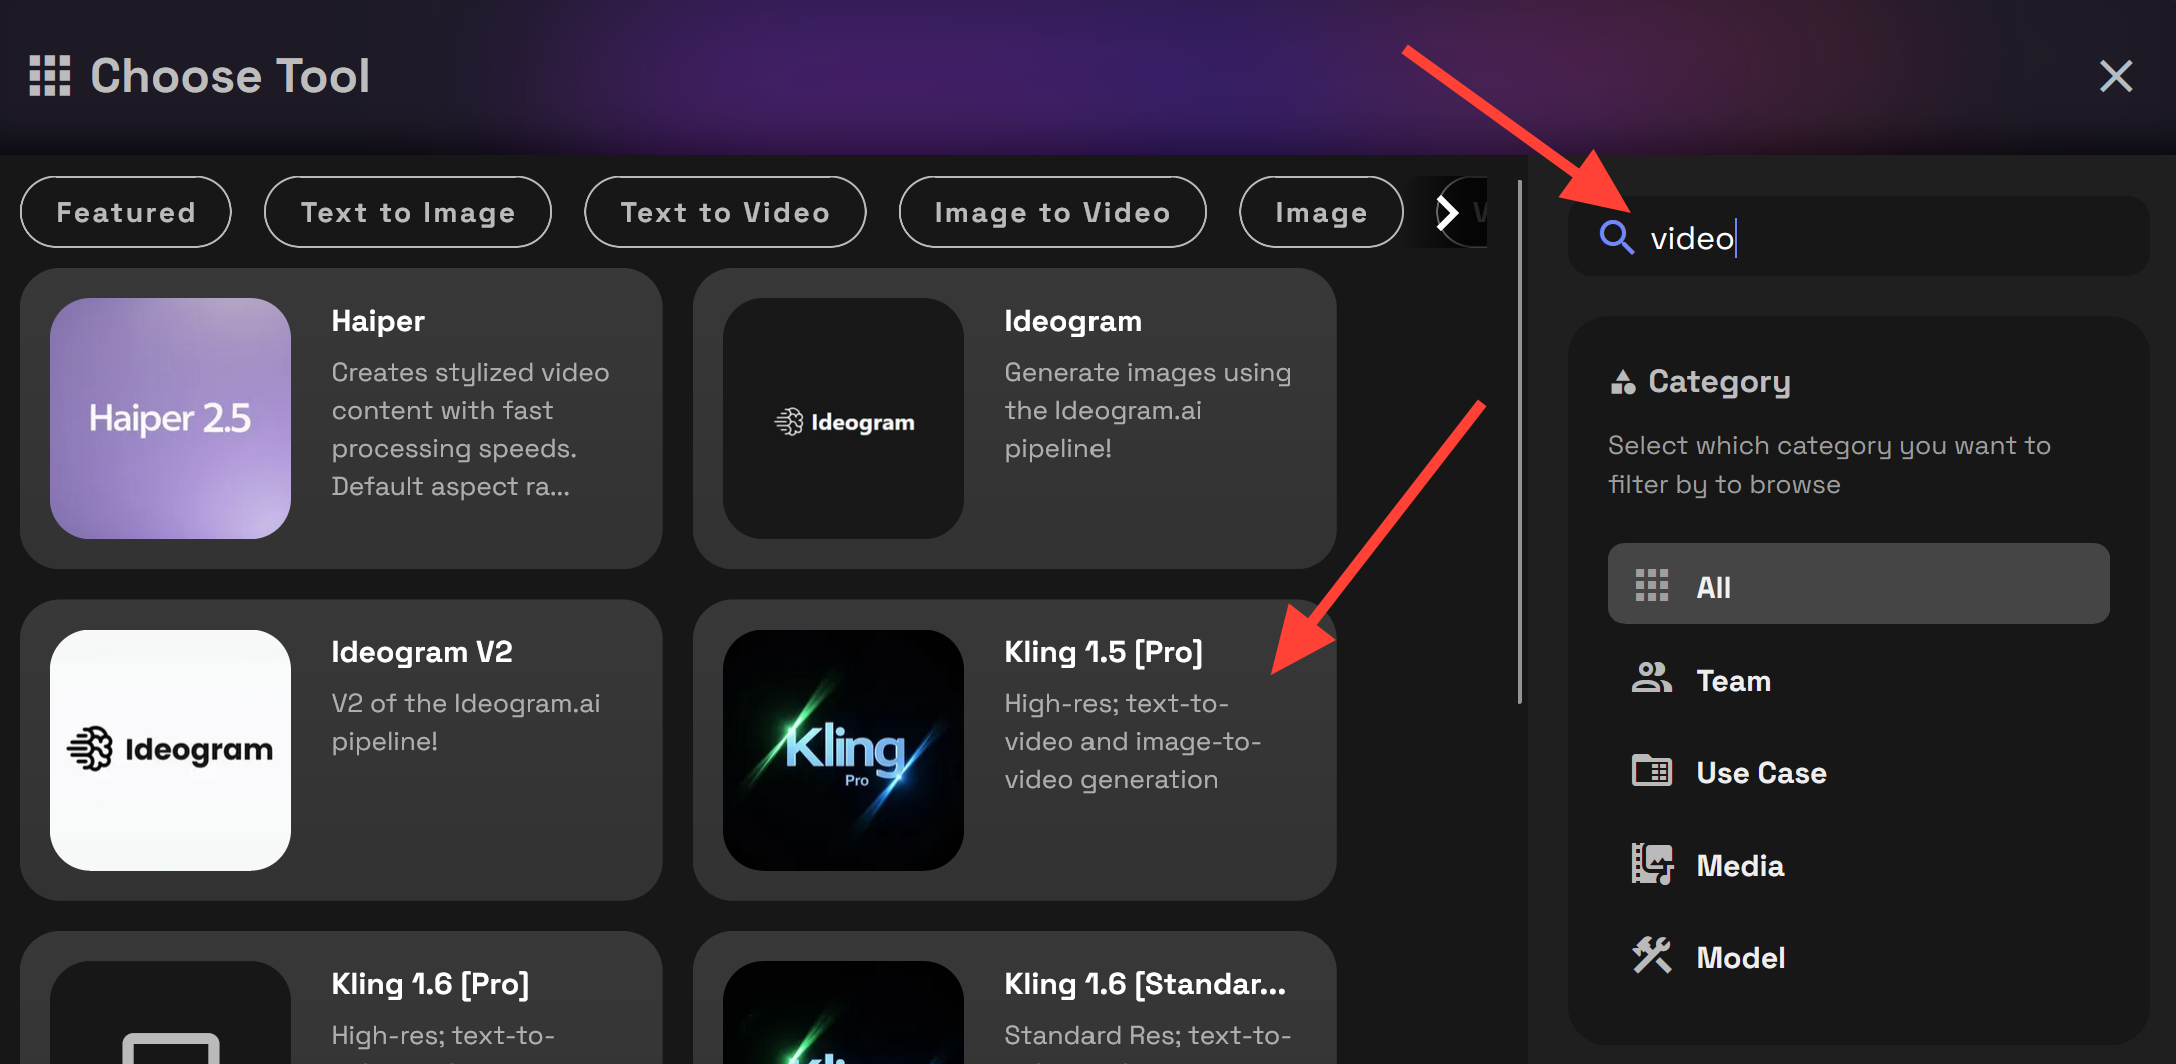
Step 3: Add a Tool
- Select a Sketch to Render tool and a Video tool. Click Add another tool. Type sketch into the search box and click on Sketch to Render lightning or Sketch to Render SDXL. After adding Sketch to Render search for Video and add your favorite video model. New video models are added often as the technology is advancing at a rapid pace.

Step 4: Upload Image
- Upload your sketch or architectural draft to the Runnit Board. Click Upload or select. Upload allows you to upload directly from your computer or select if the image is already in your library.

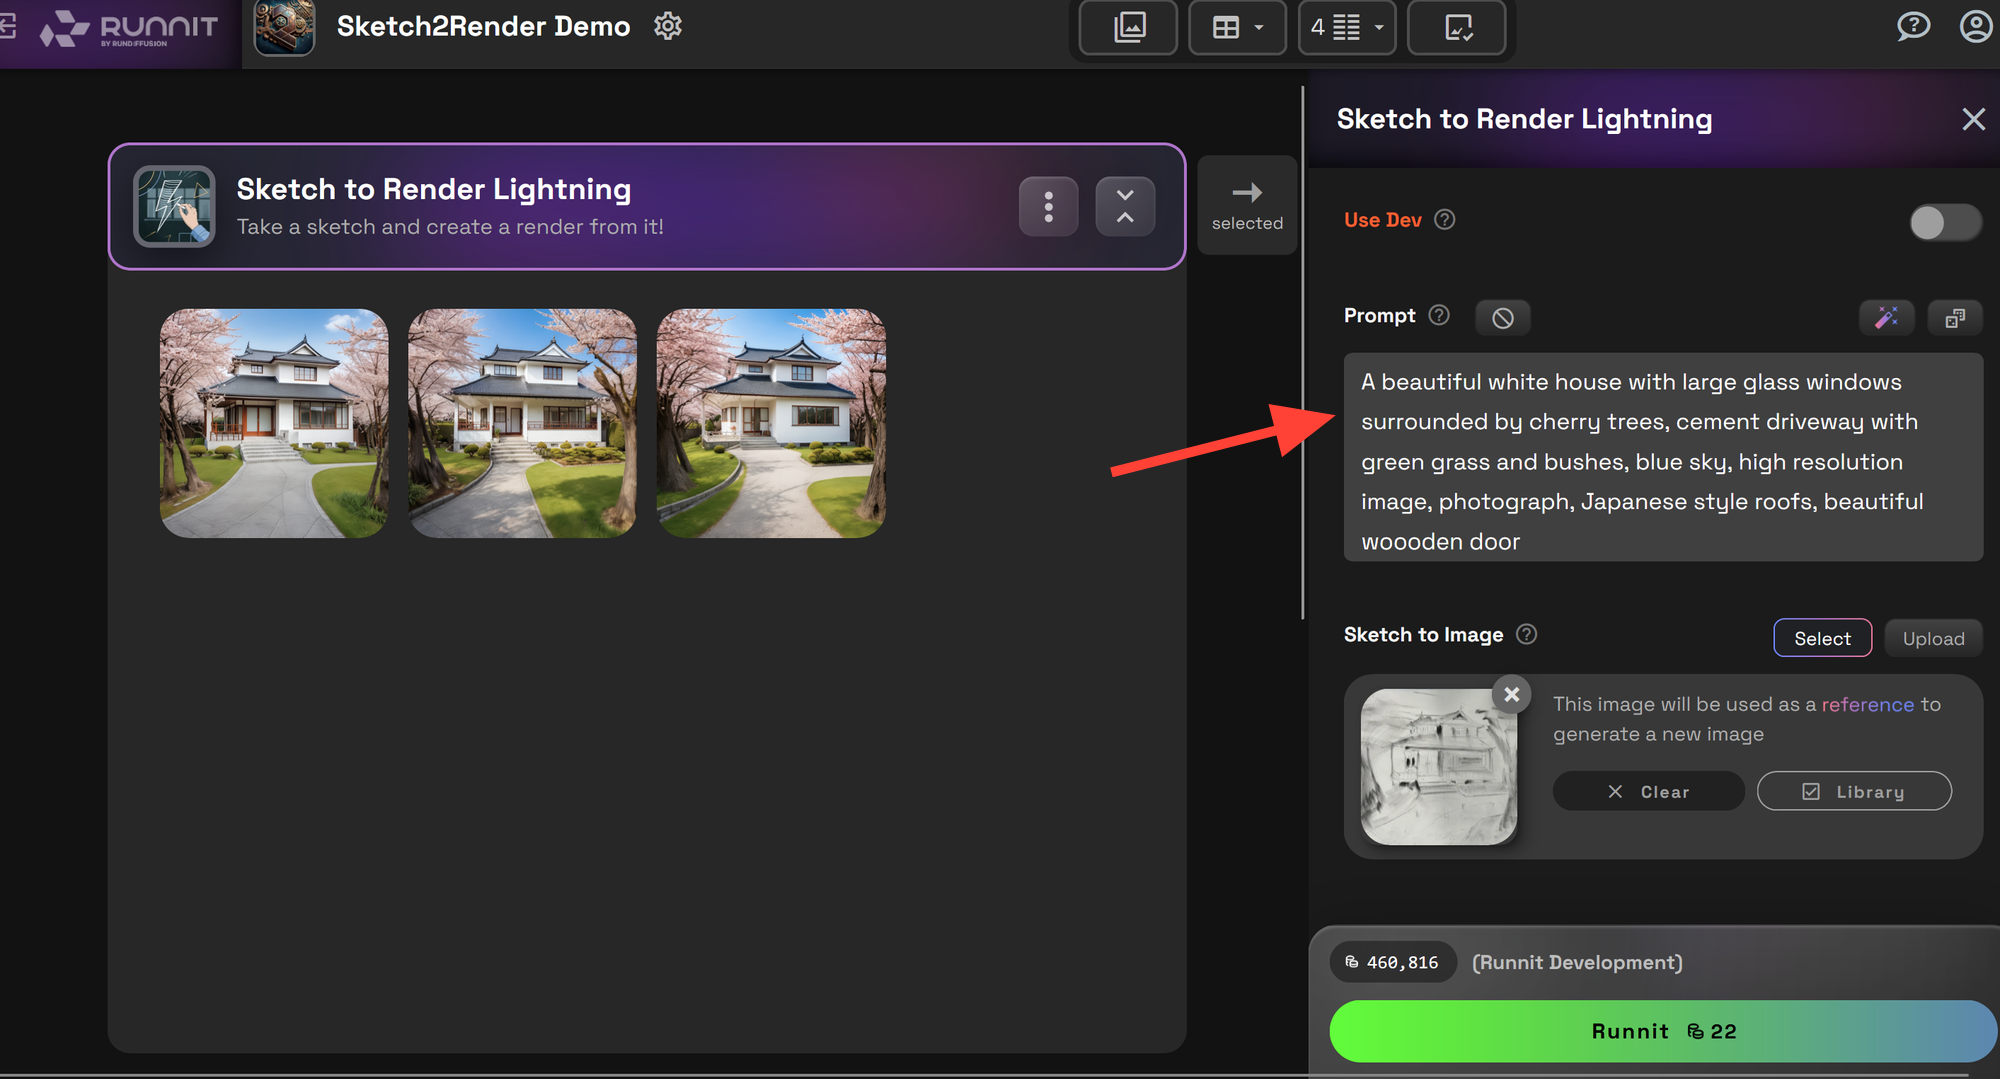
Step 5: Write a Prompt
- Write a prompt on the right side in the prompt box.
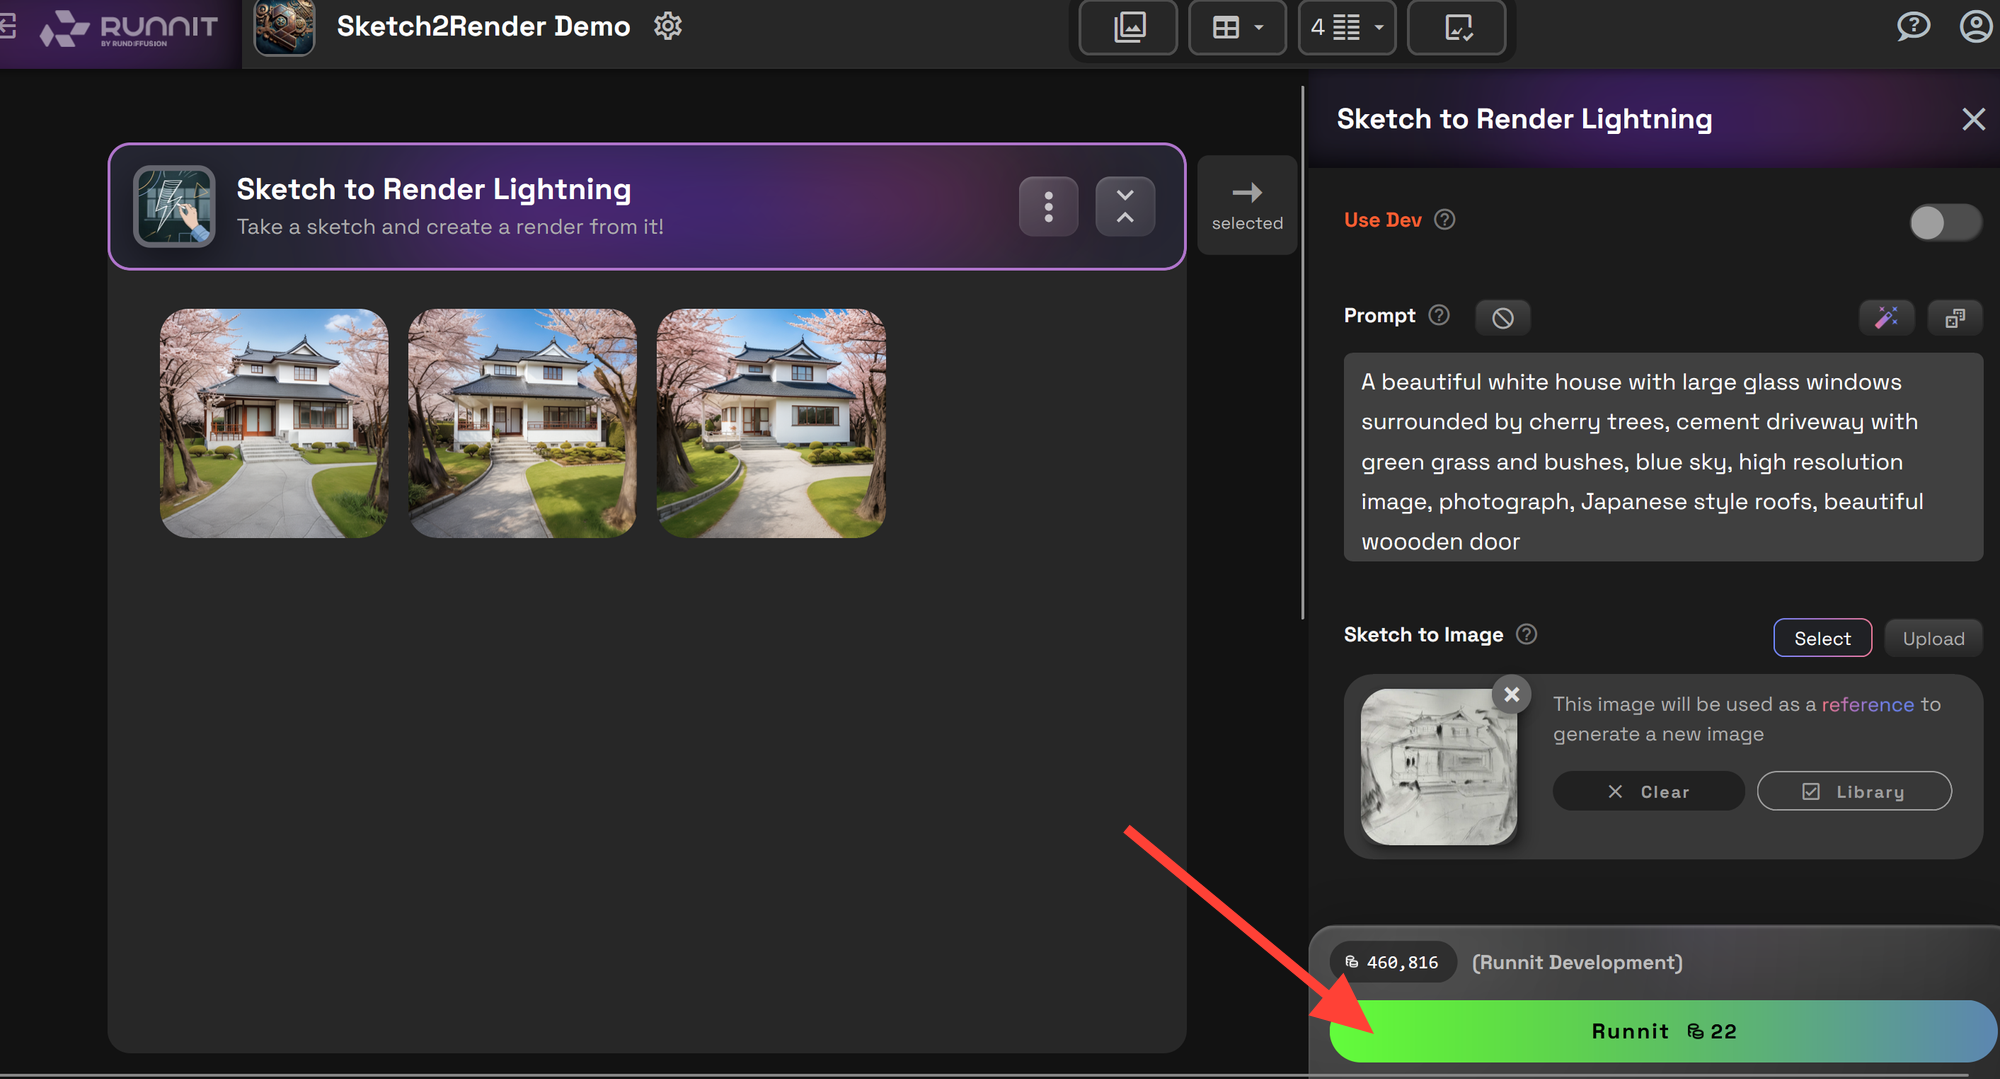
Step 6: Runnit
- Click Runnit to generate a high-quality render from your sketch. You can generate multiple images at a time. Your completed images will display beneath the Sketch to Render Lightning tool.
Using the Video Tool for Animated Visuals
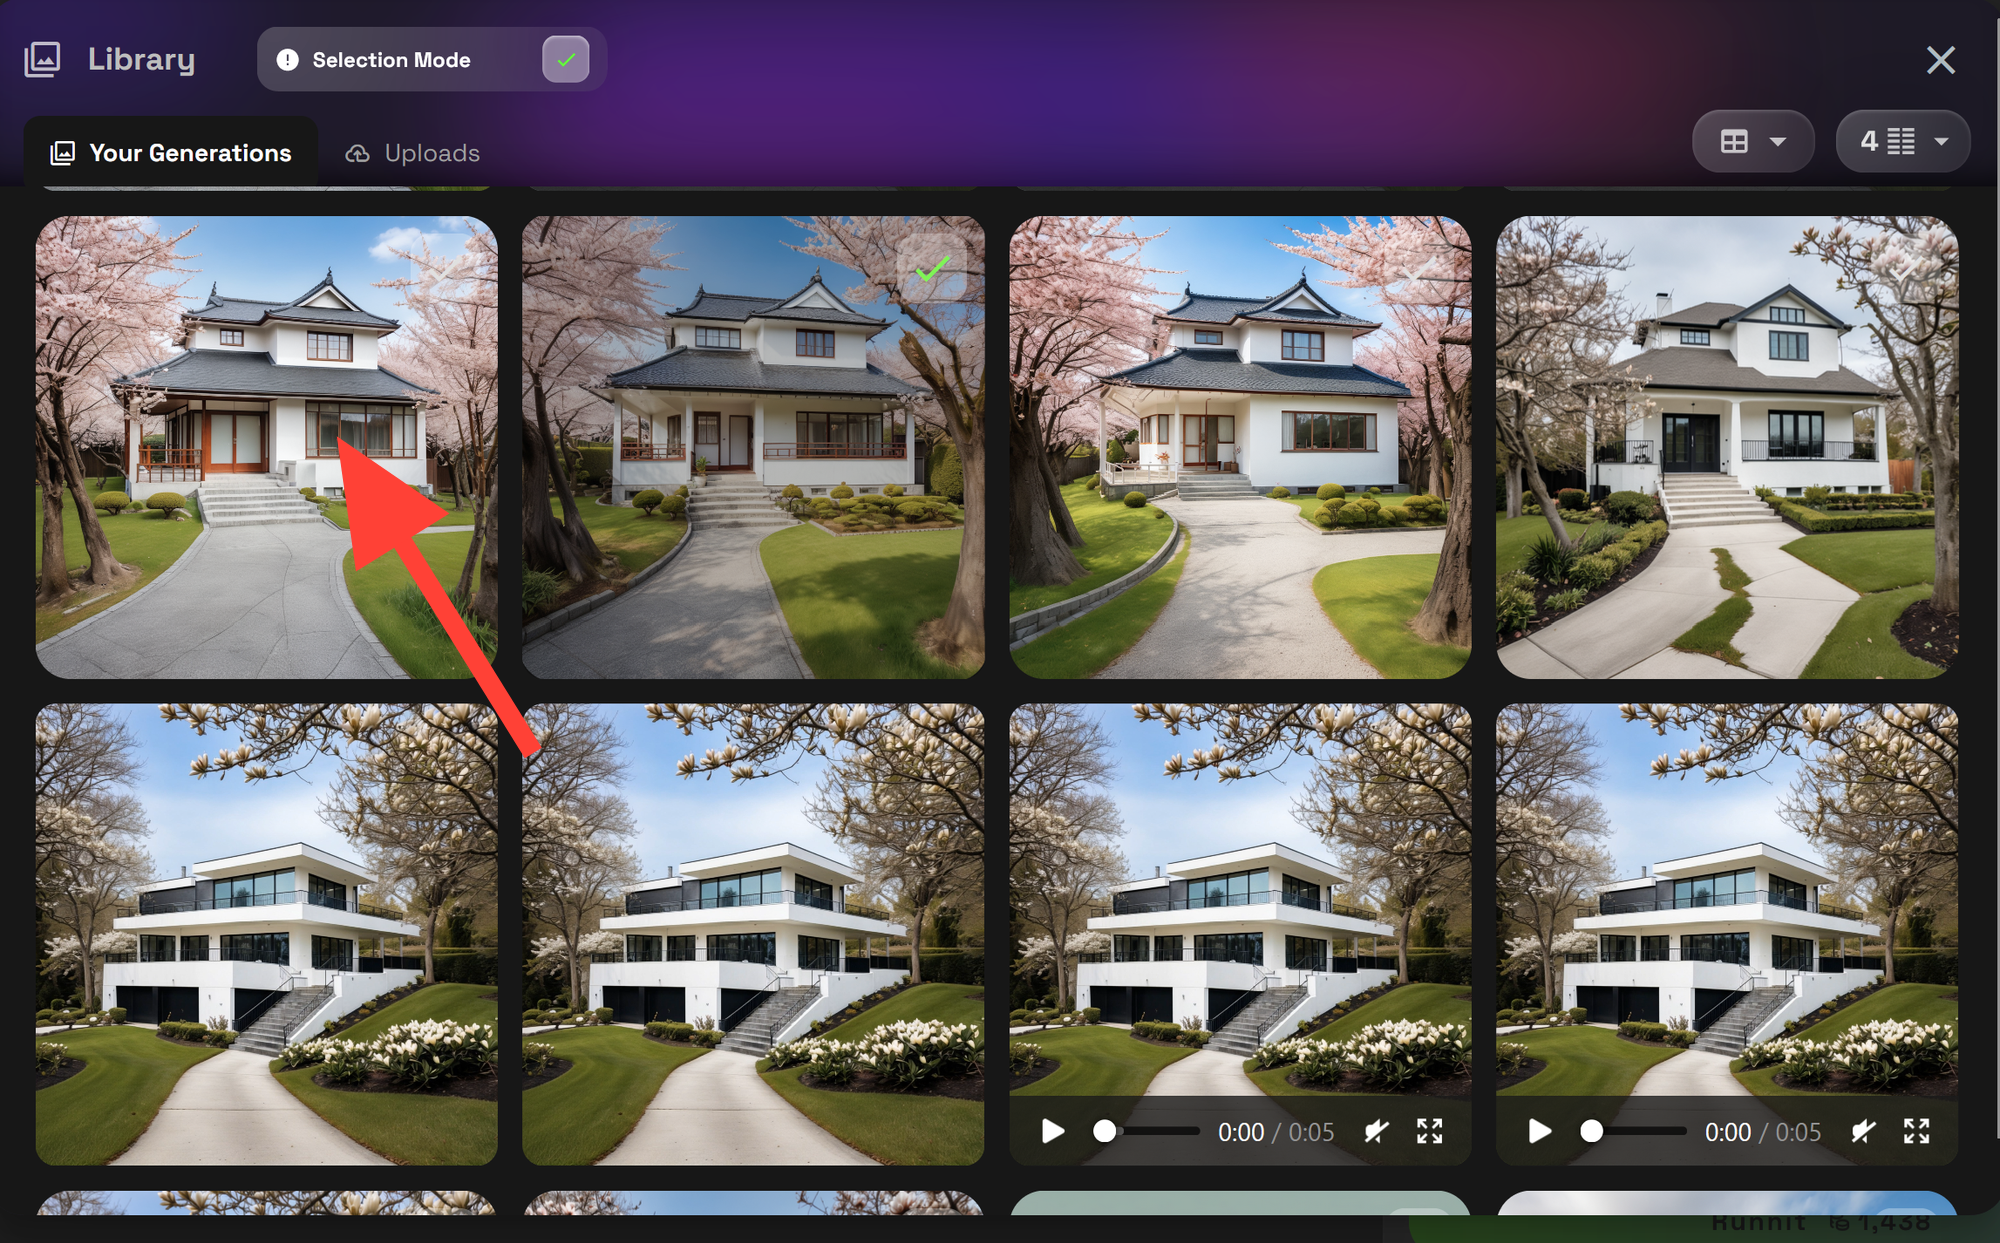
Step 1: Select Image in Library
- Click on the video tool you chose then click Select and Open Image Library. Select Your Generations then click the image.
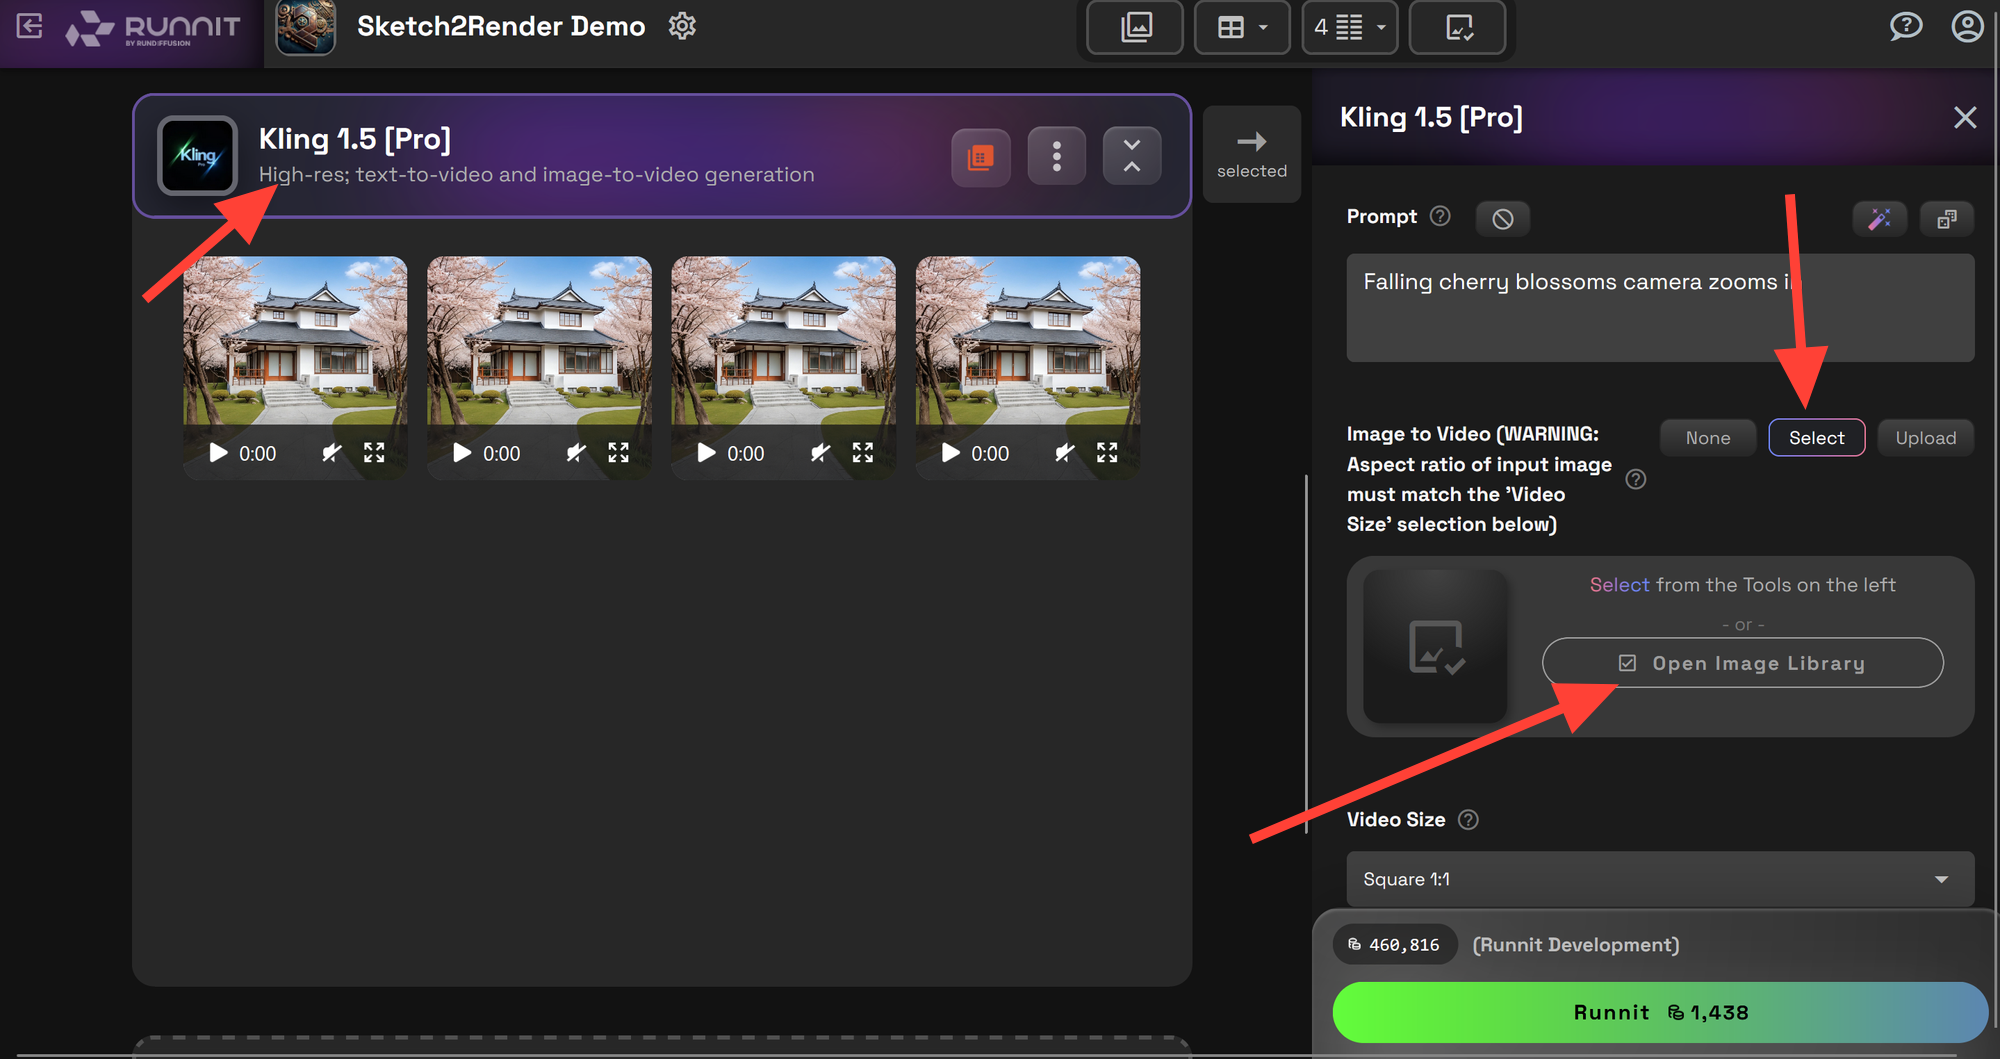
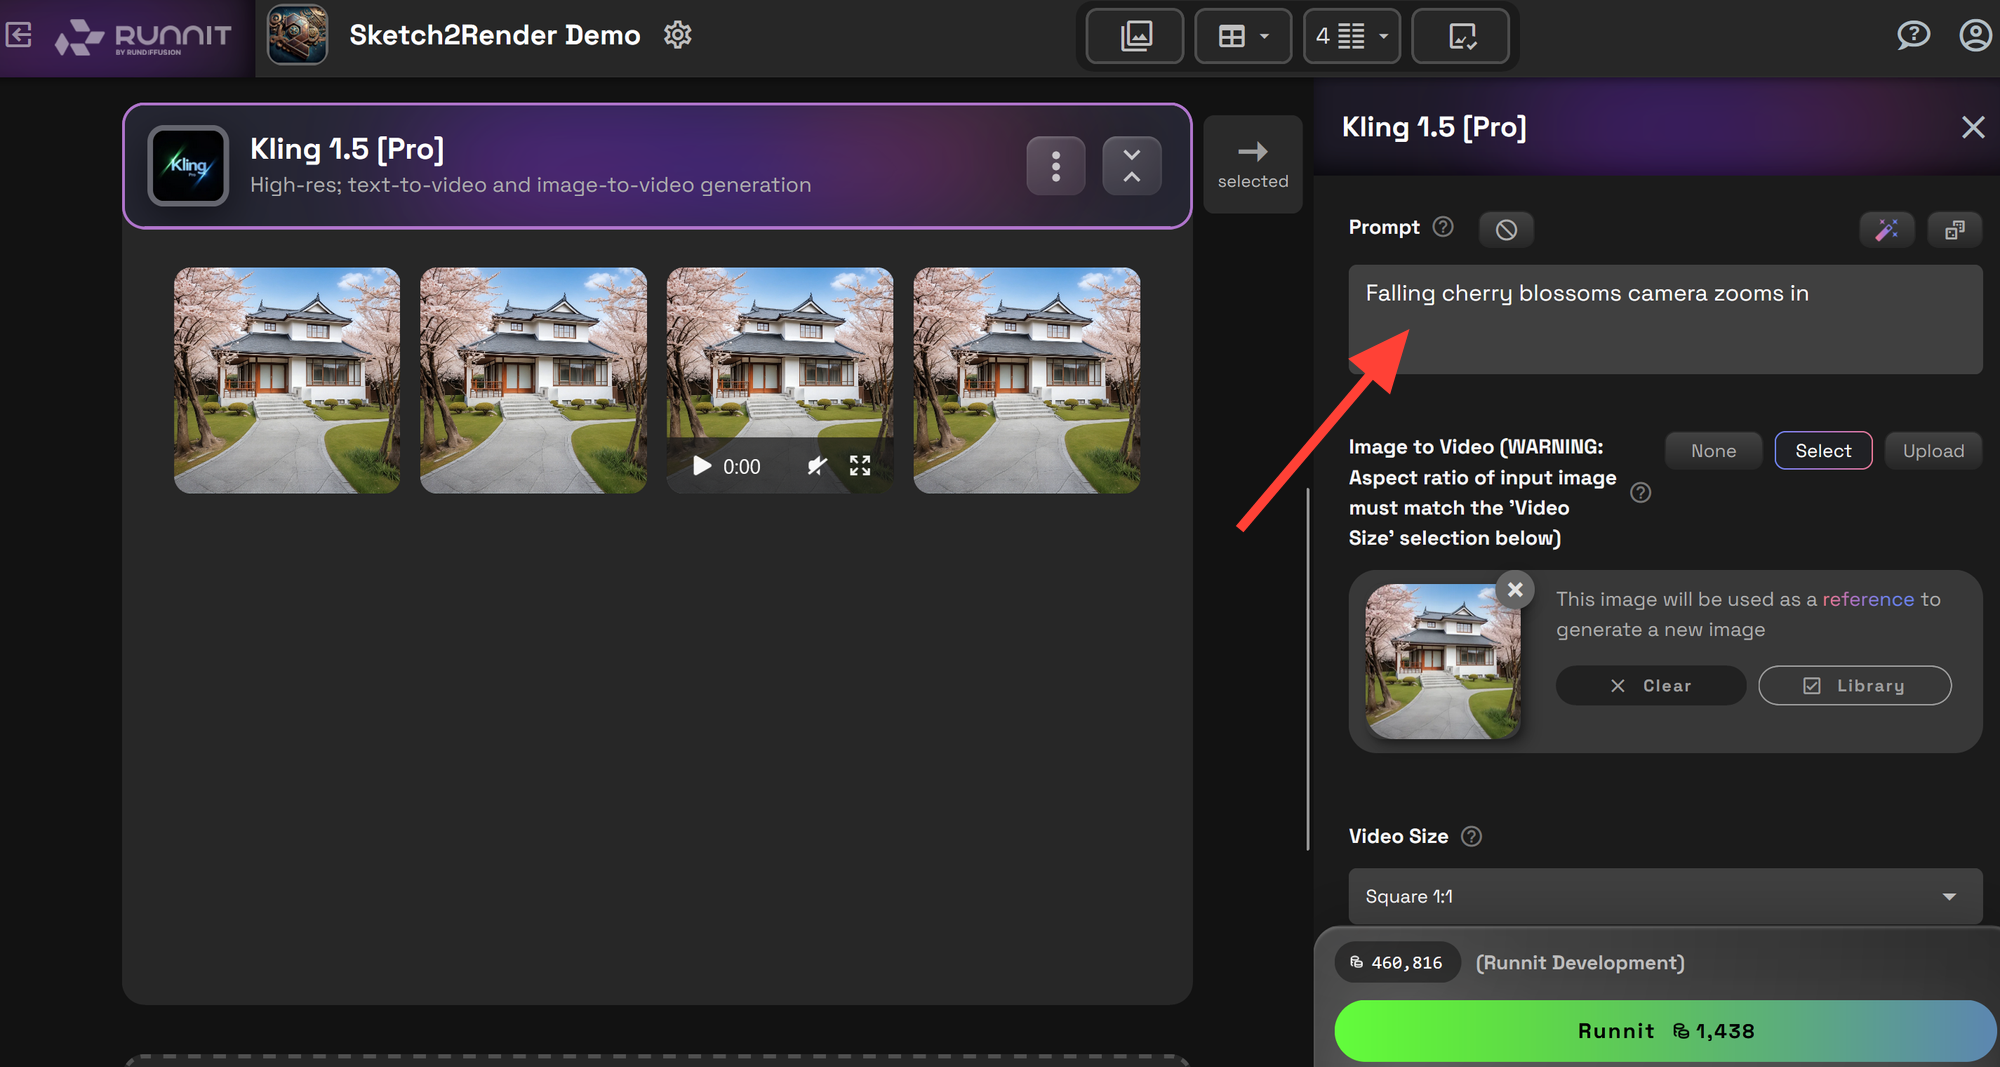
Step 2: Write a Prompt
- Write a prompt describing the video you want to create.
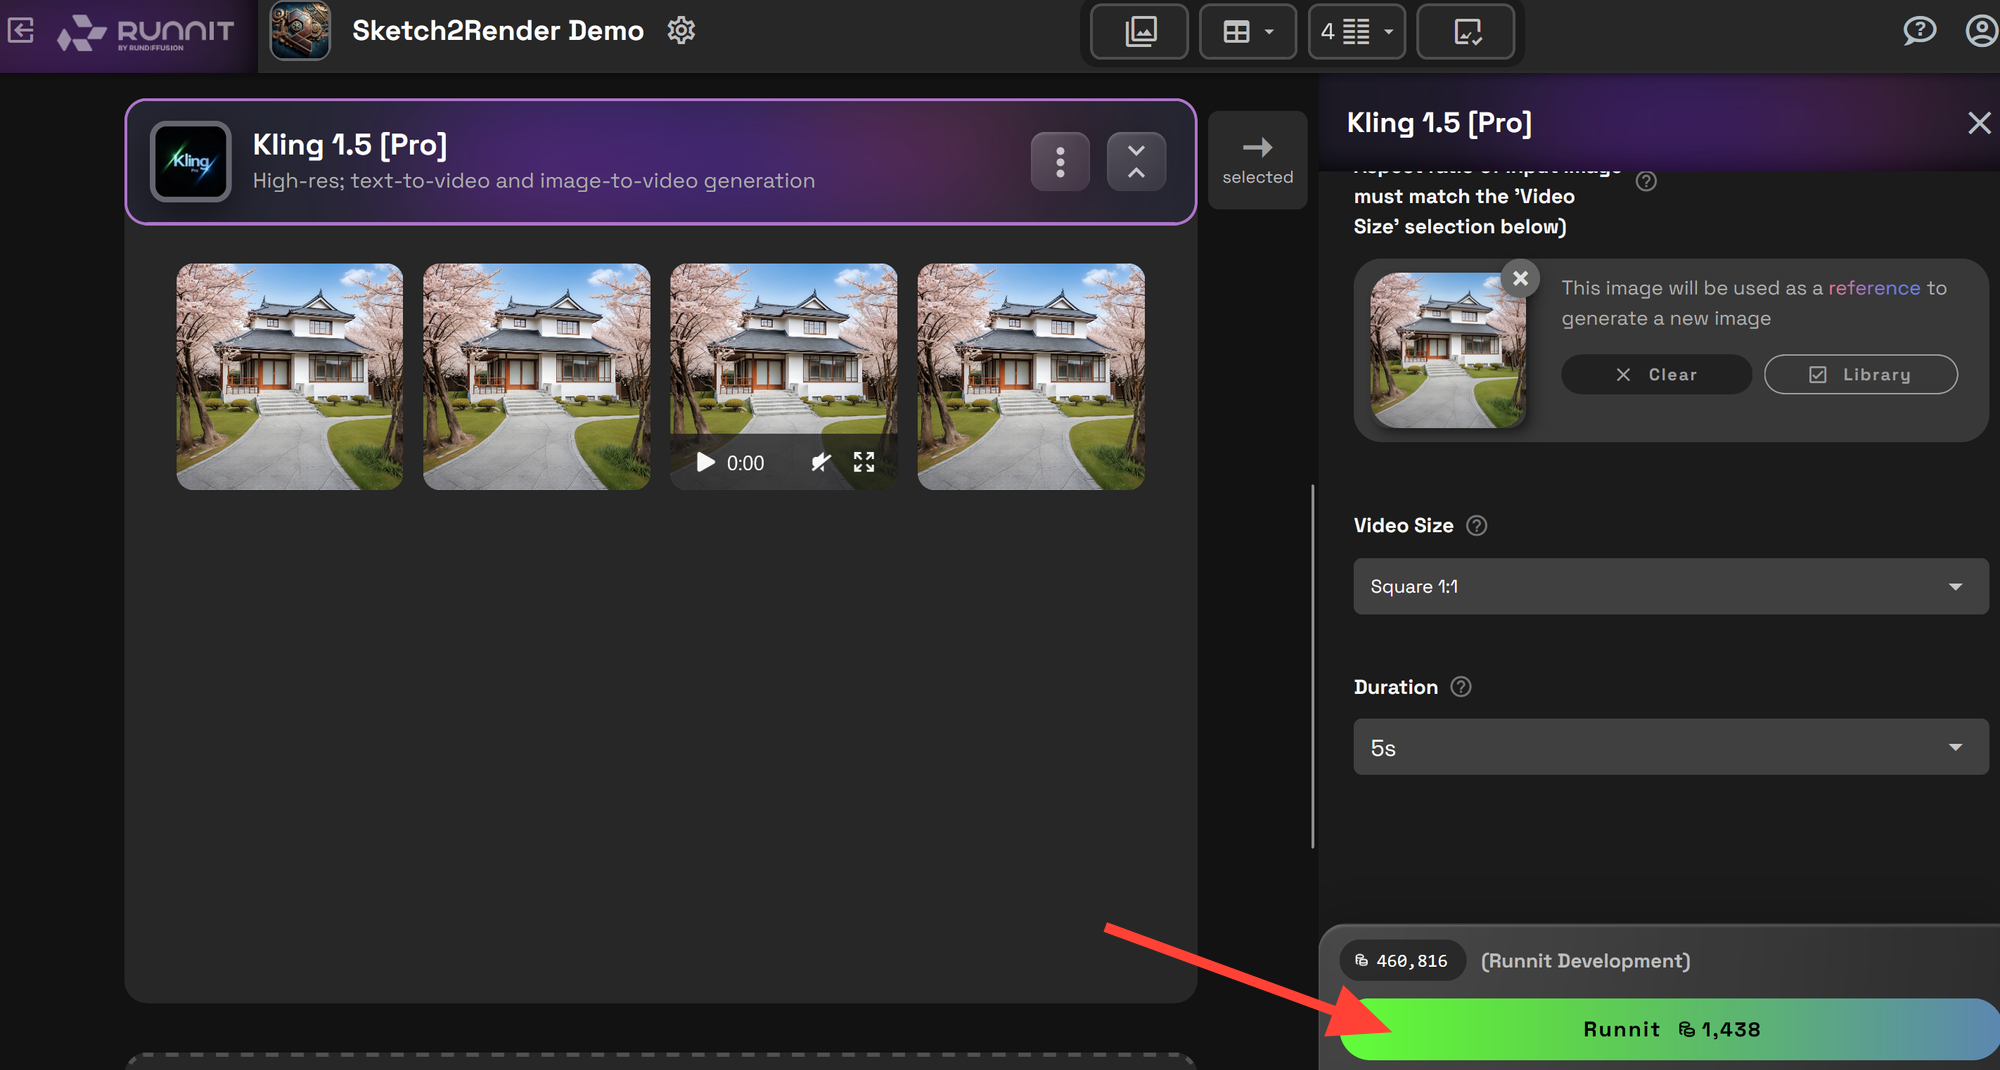
Step 3: Adjust Settings
- Modify parameters such as lighting transitions, camera angles, and motion effects.

Step 4: Runnit
- Click Runnit
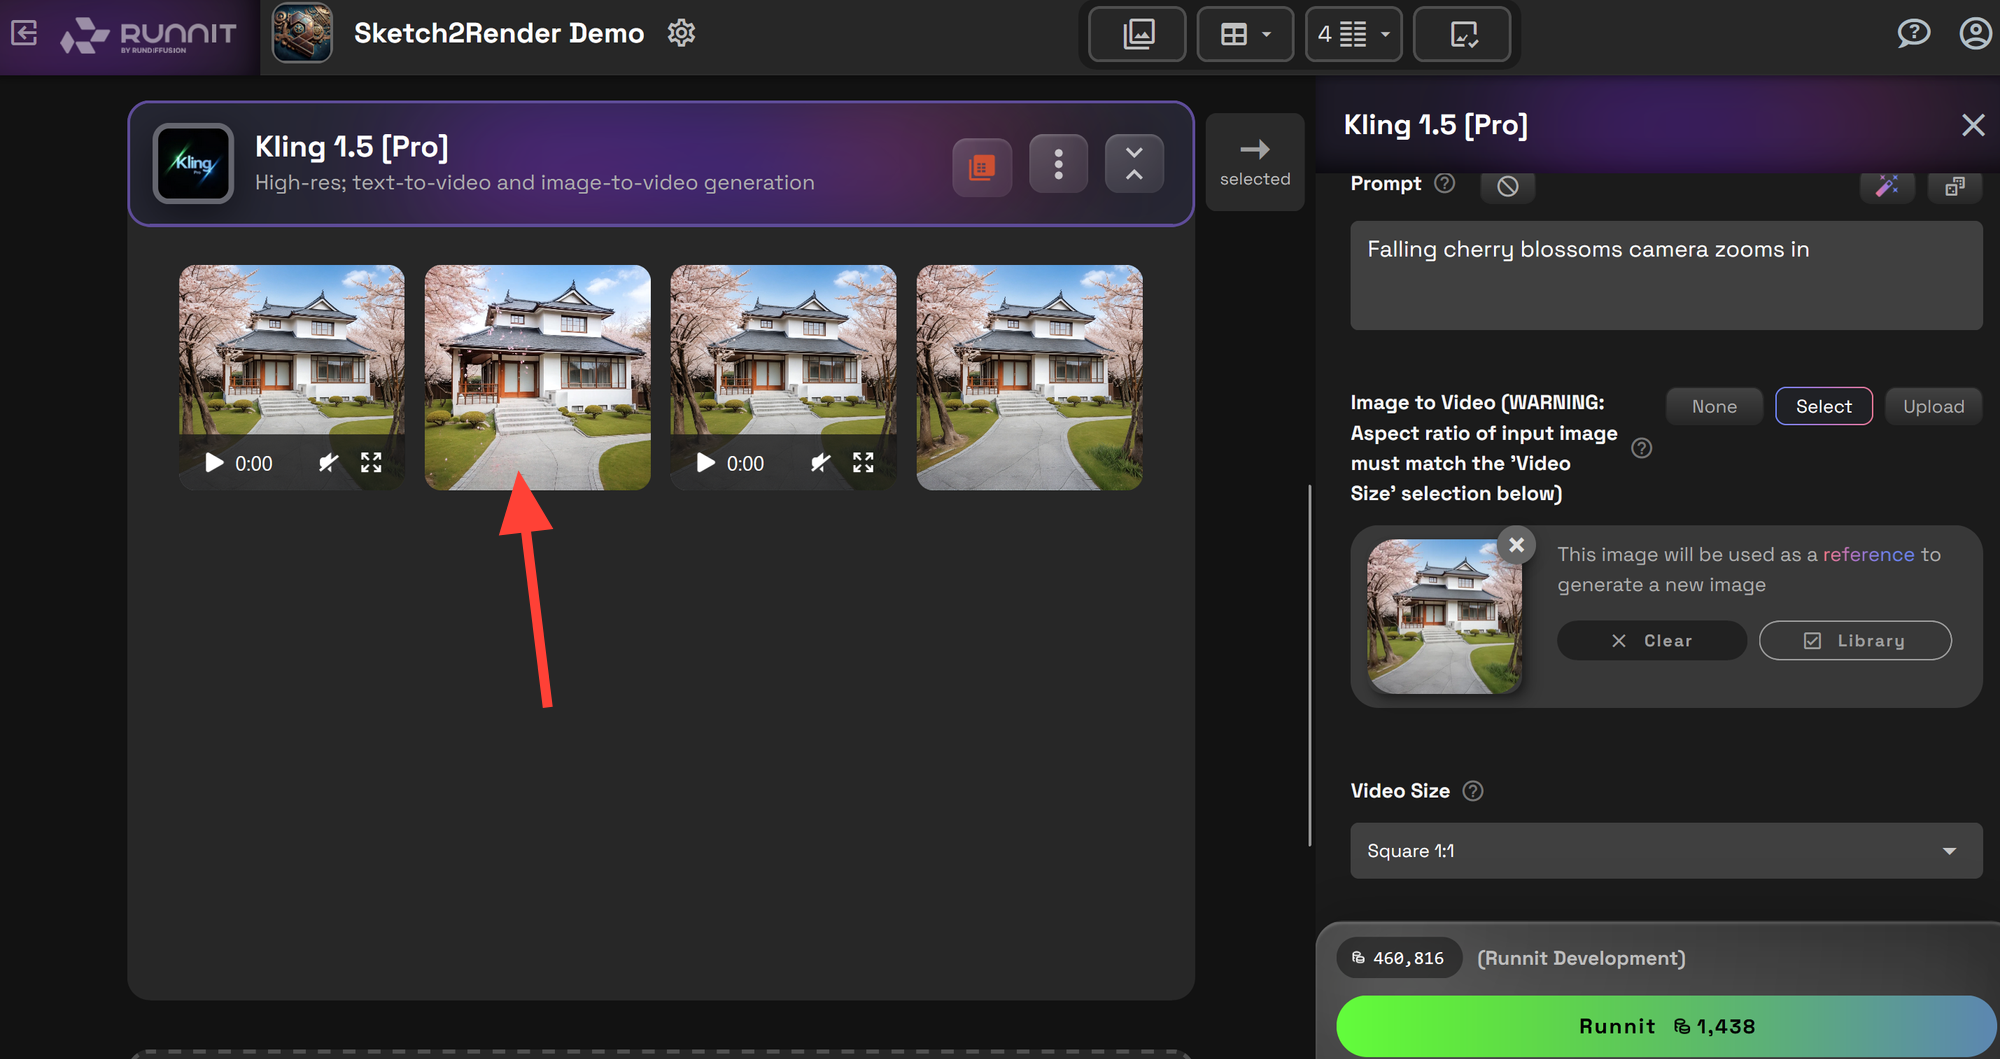
Step 5: Review
- Check your Video and make changes and adjustments as needed.
Get Started with Sketch to Render
Sketch to Render is a game-changer for architects who want to accelerate their design workflow. Whether you’re creating residential layouts, commercial buildings, or urban planning projects, tool provides efficiency and realism with just a few clicks.
