If you're looking to harness the power of ComfyUI on RunDiffusion, this guide will walk you through building a basic workflow that produces high-quality results without overwhelming complexity. Whether you're just starting out or refining your skills, this tutorial provides everything you need to begin generating with confidence.
Getting Started: Launch ComfyUI on RunDiffusion
Follow these quick steps to launch your SDXL-ready ComfyUI workspace:
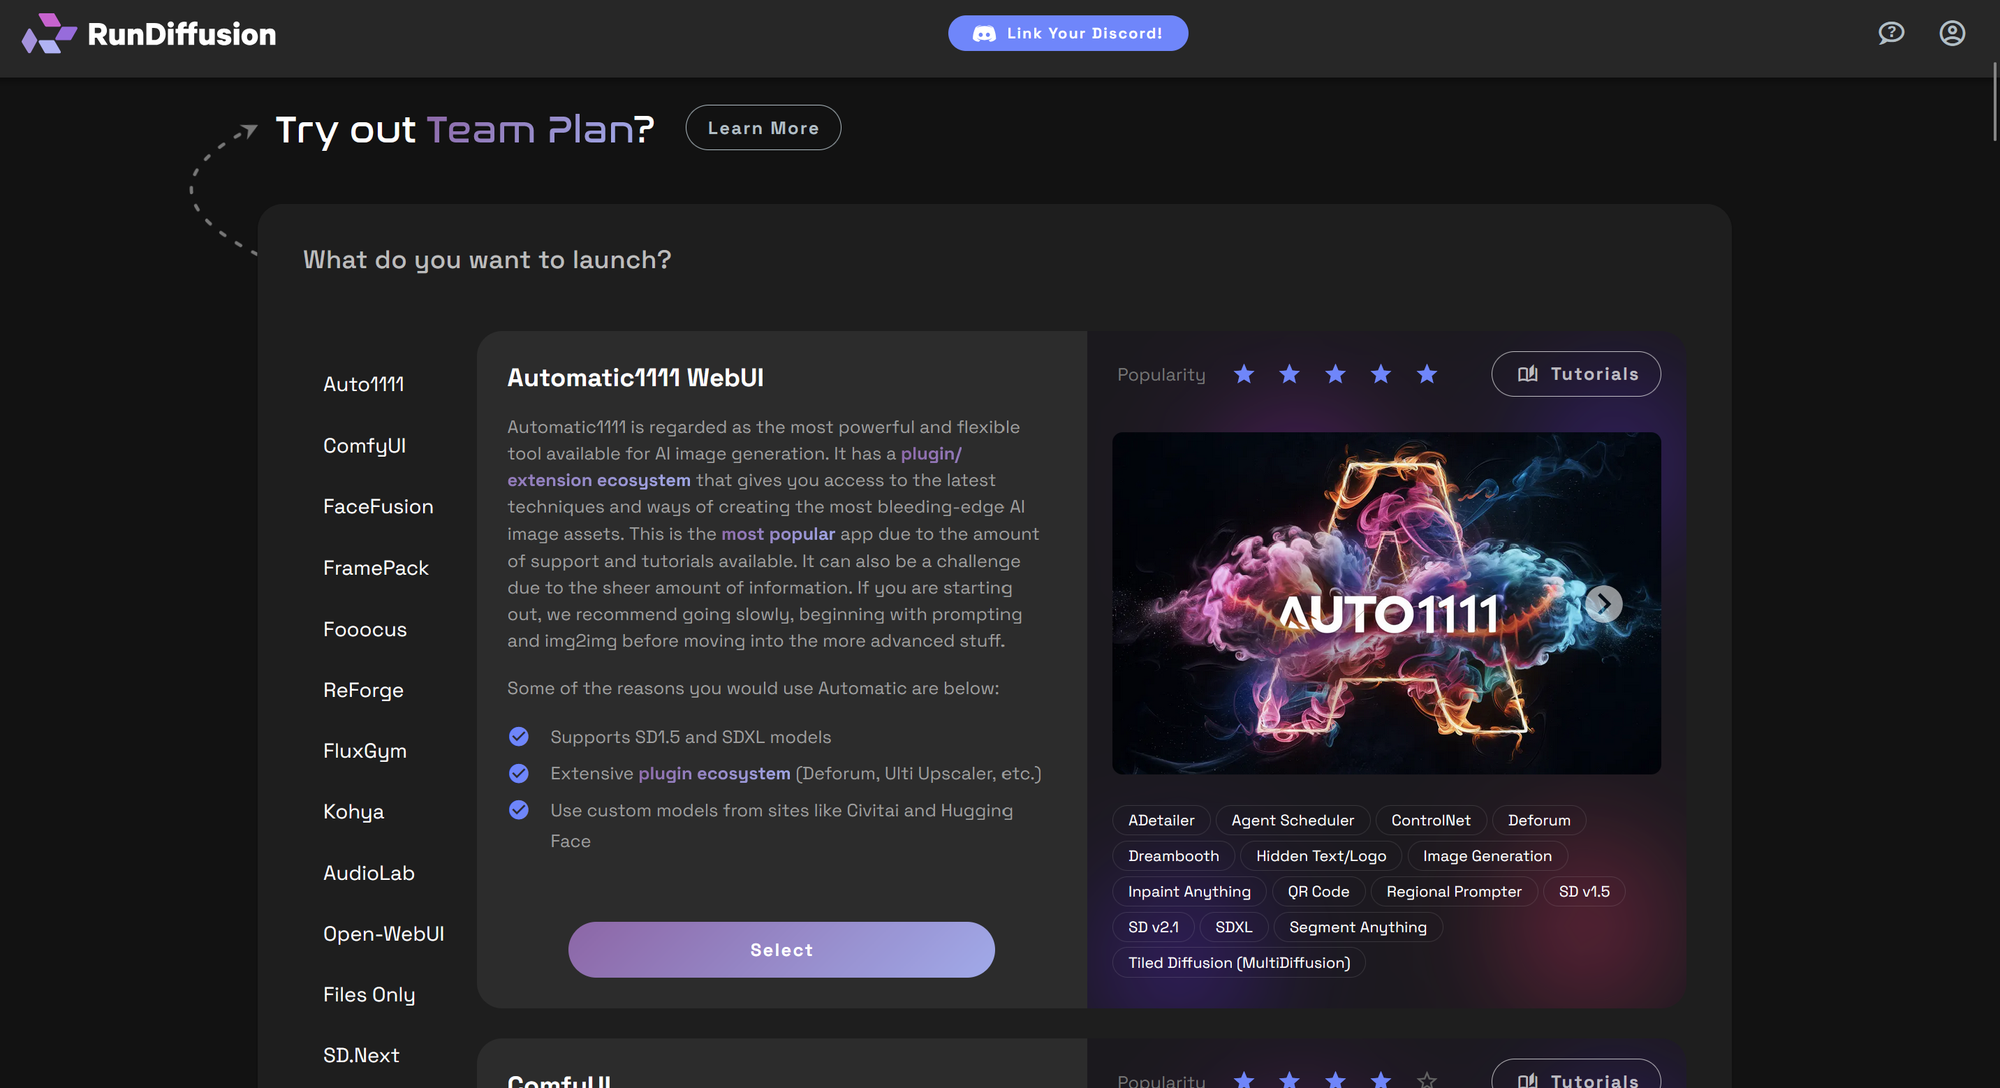
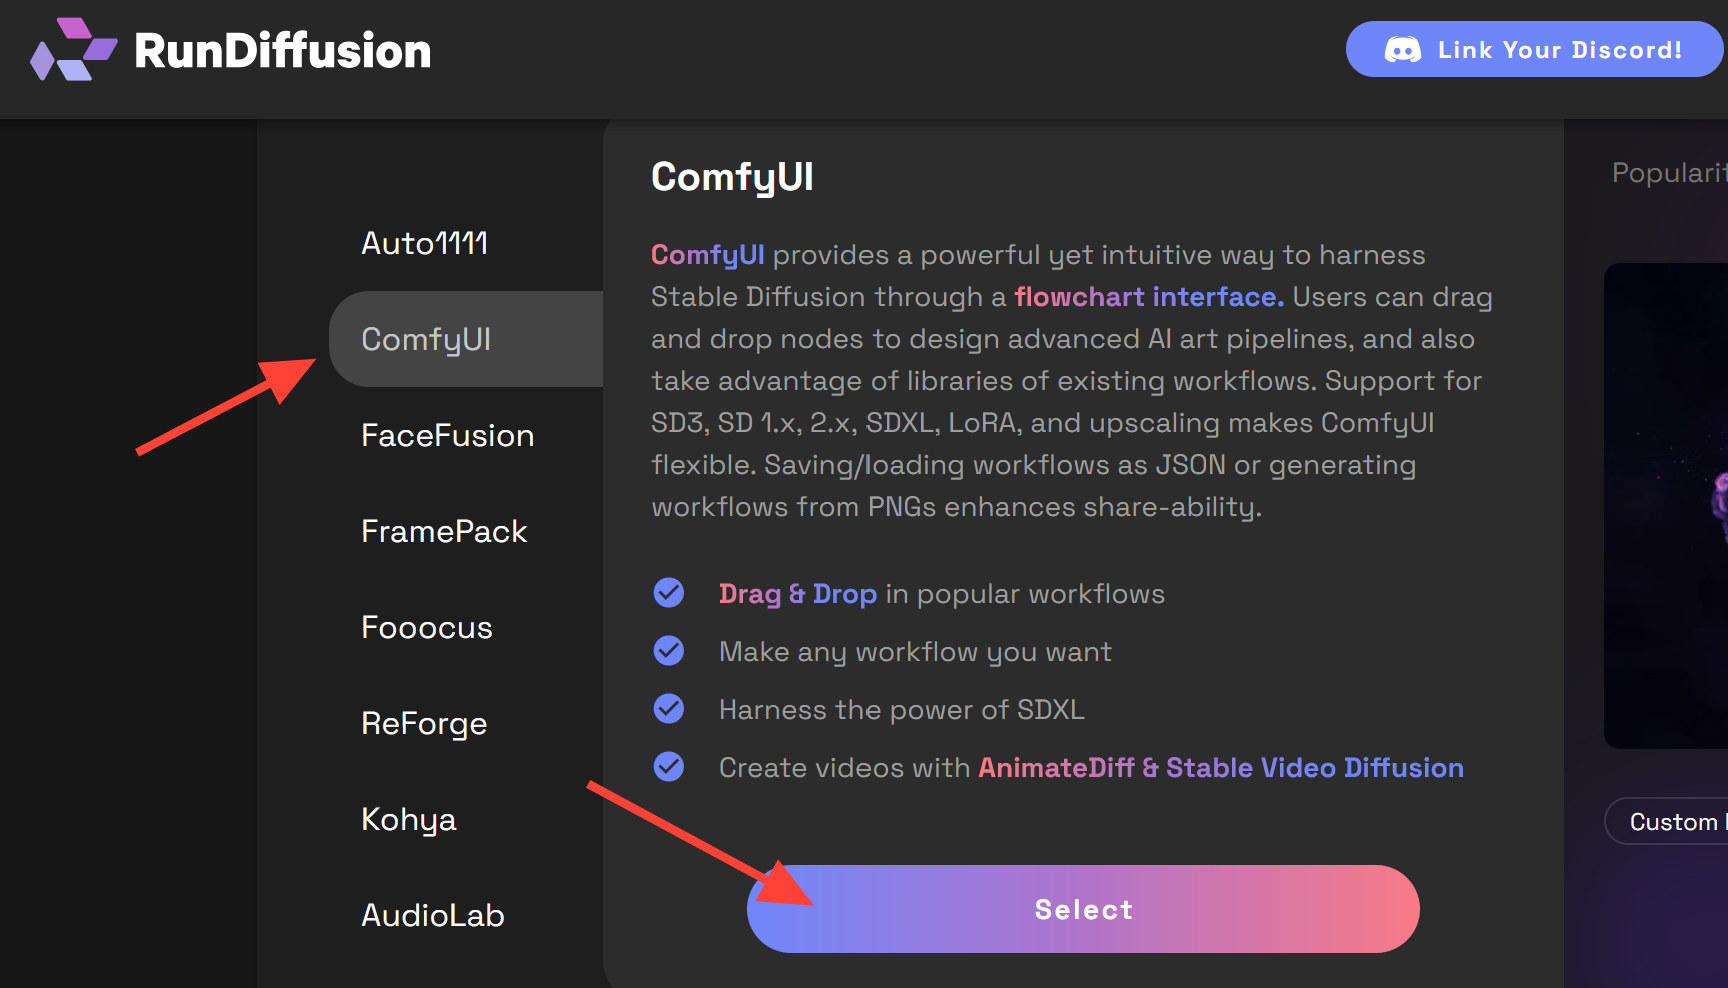
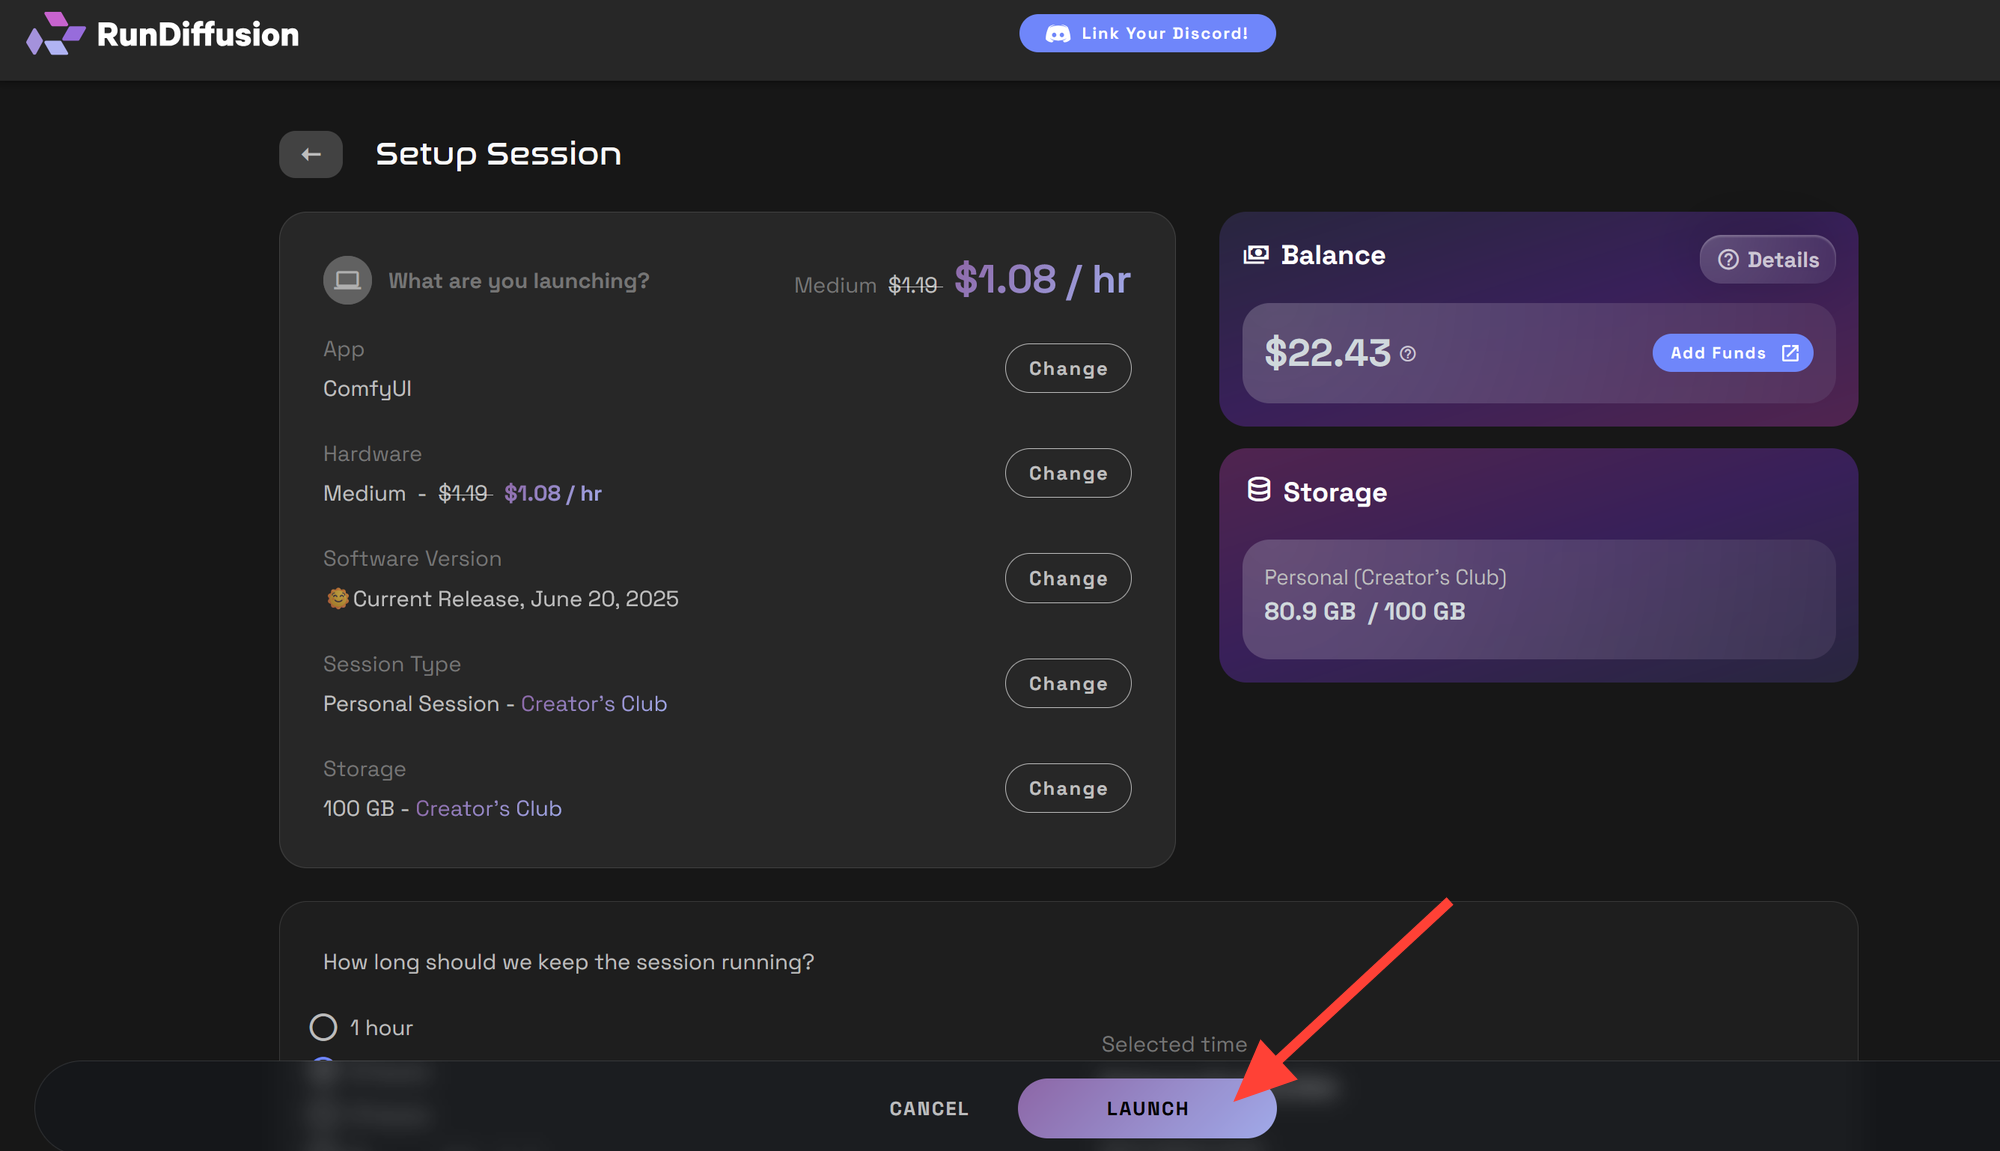
Click ComfyUI, then click Select.
Setup your Session and click Launch. Choose Current Release and Small or Medium hardware for this session.
Build Your First SDXL Workflow
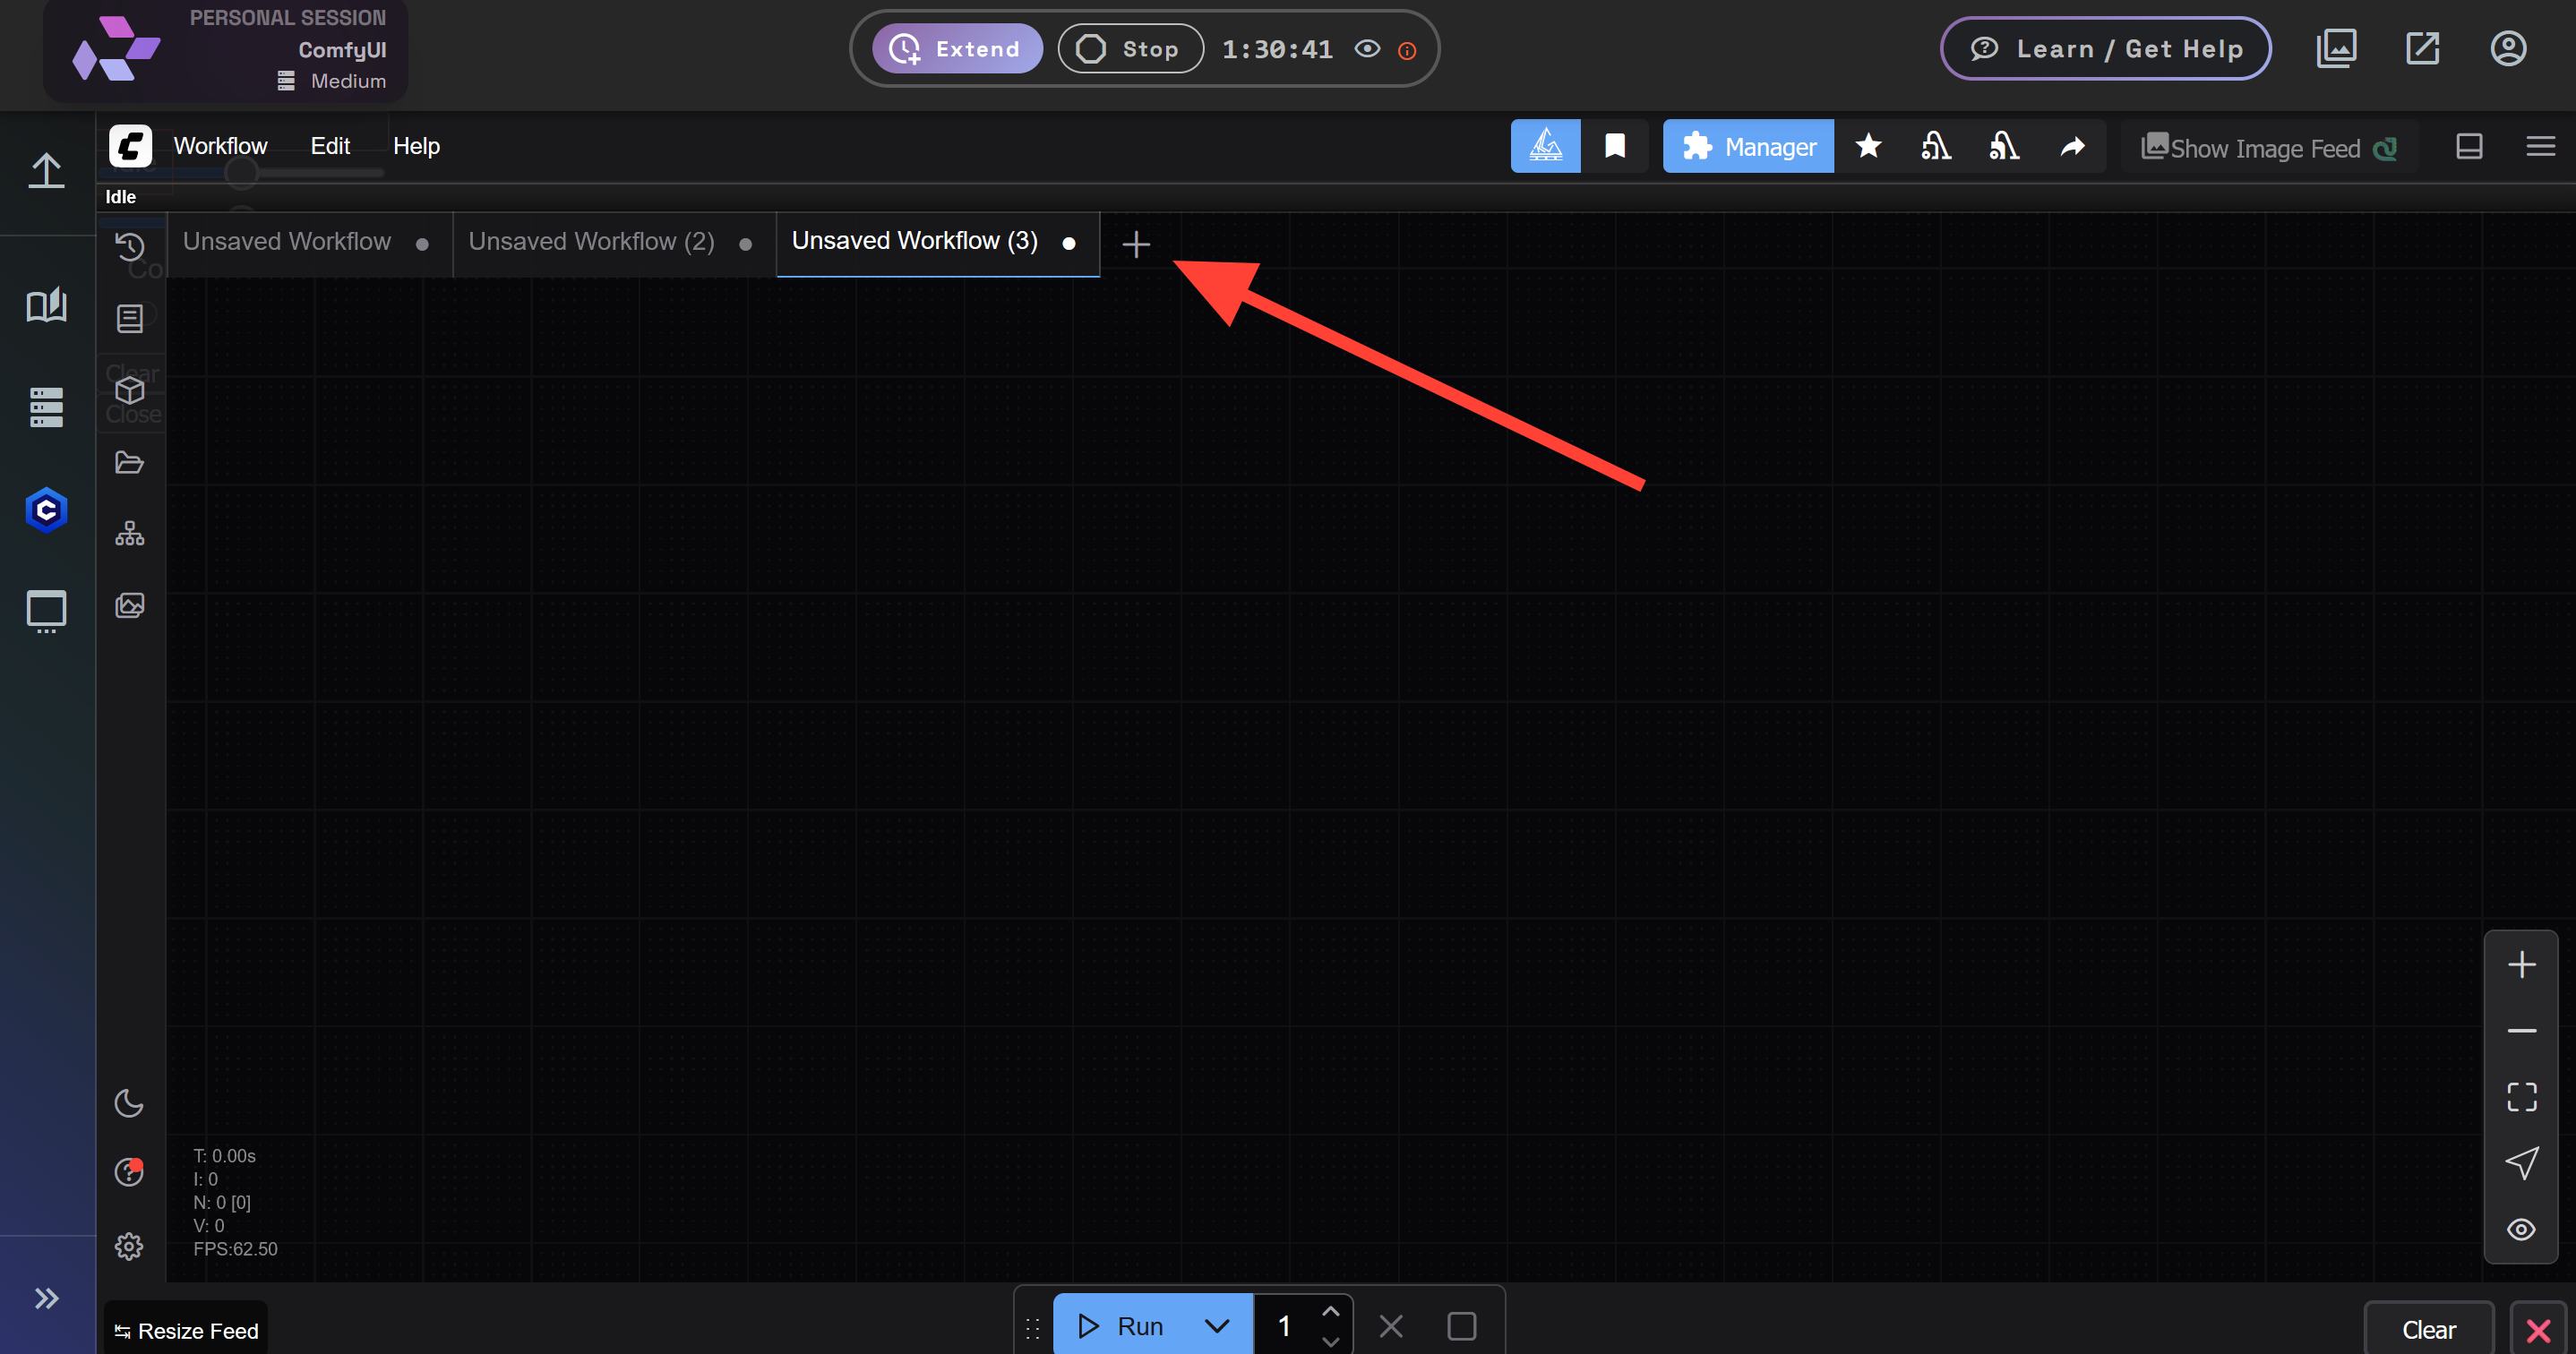
Once the session loads, you’ll see the ComfyUI interface. ComfyUI is built around a node-based system where each step of the image generation process is represented visually. Nodes are connected by dragging outputs to inputs, allowing you to build flexible and transparent workflows.
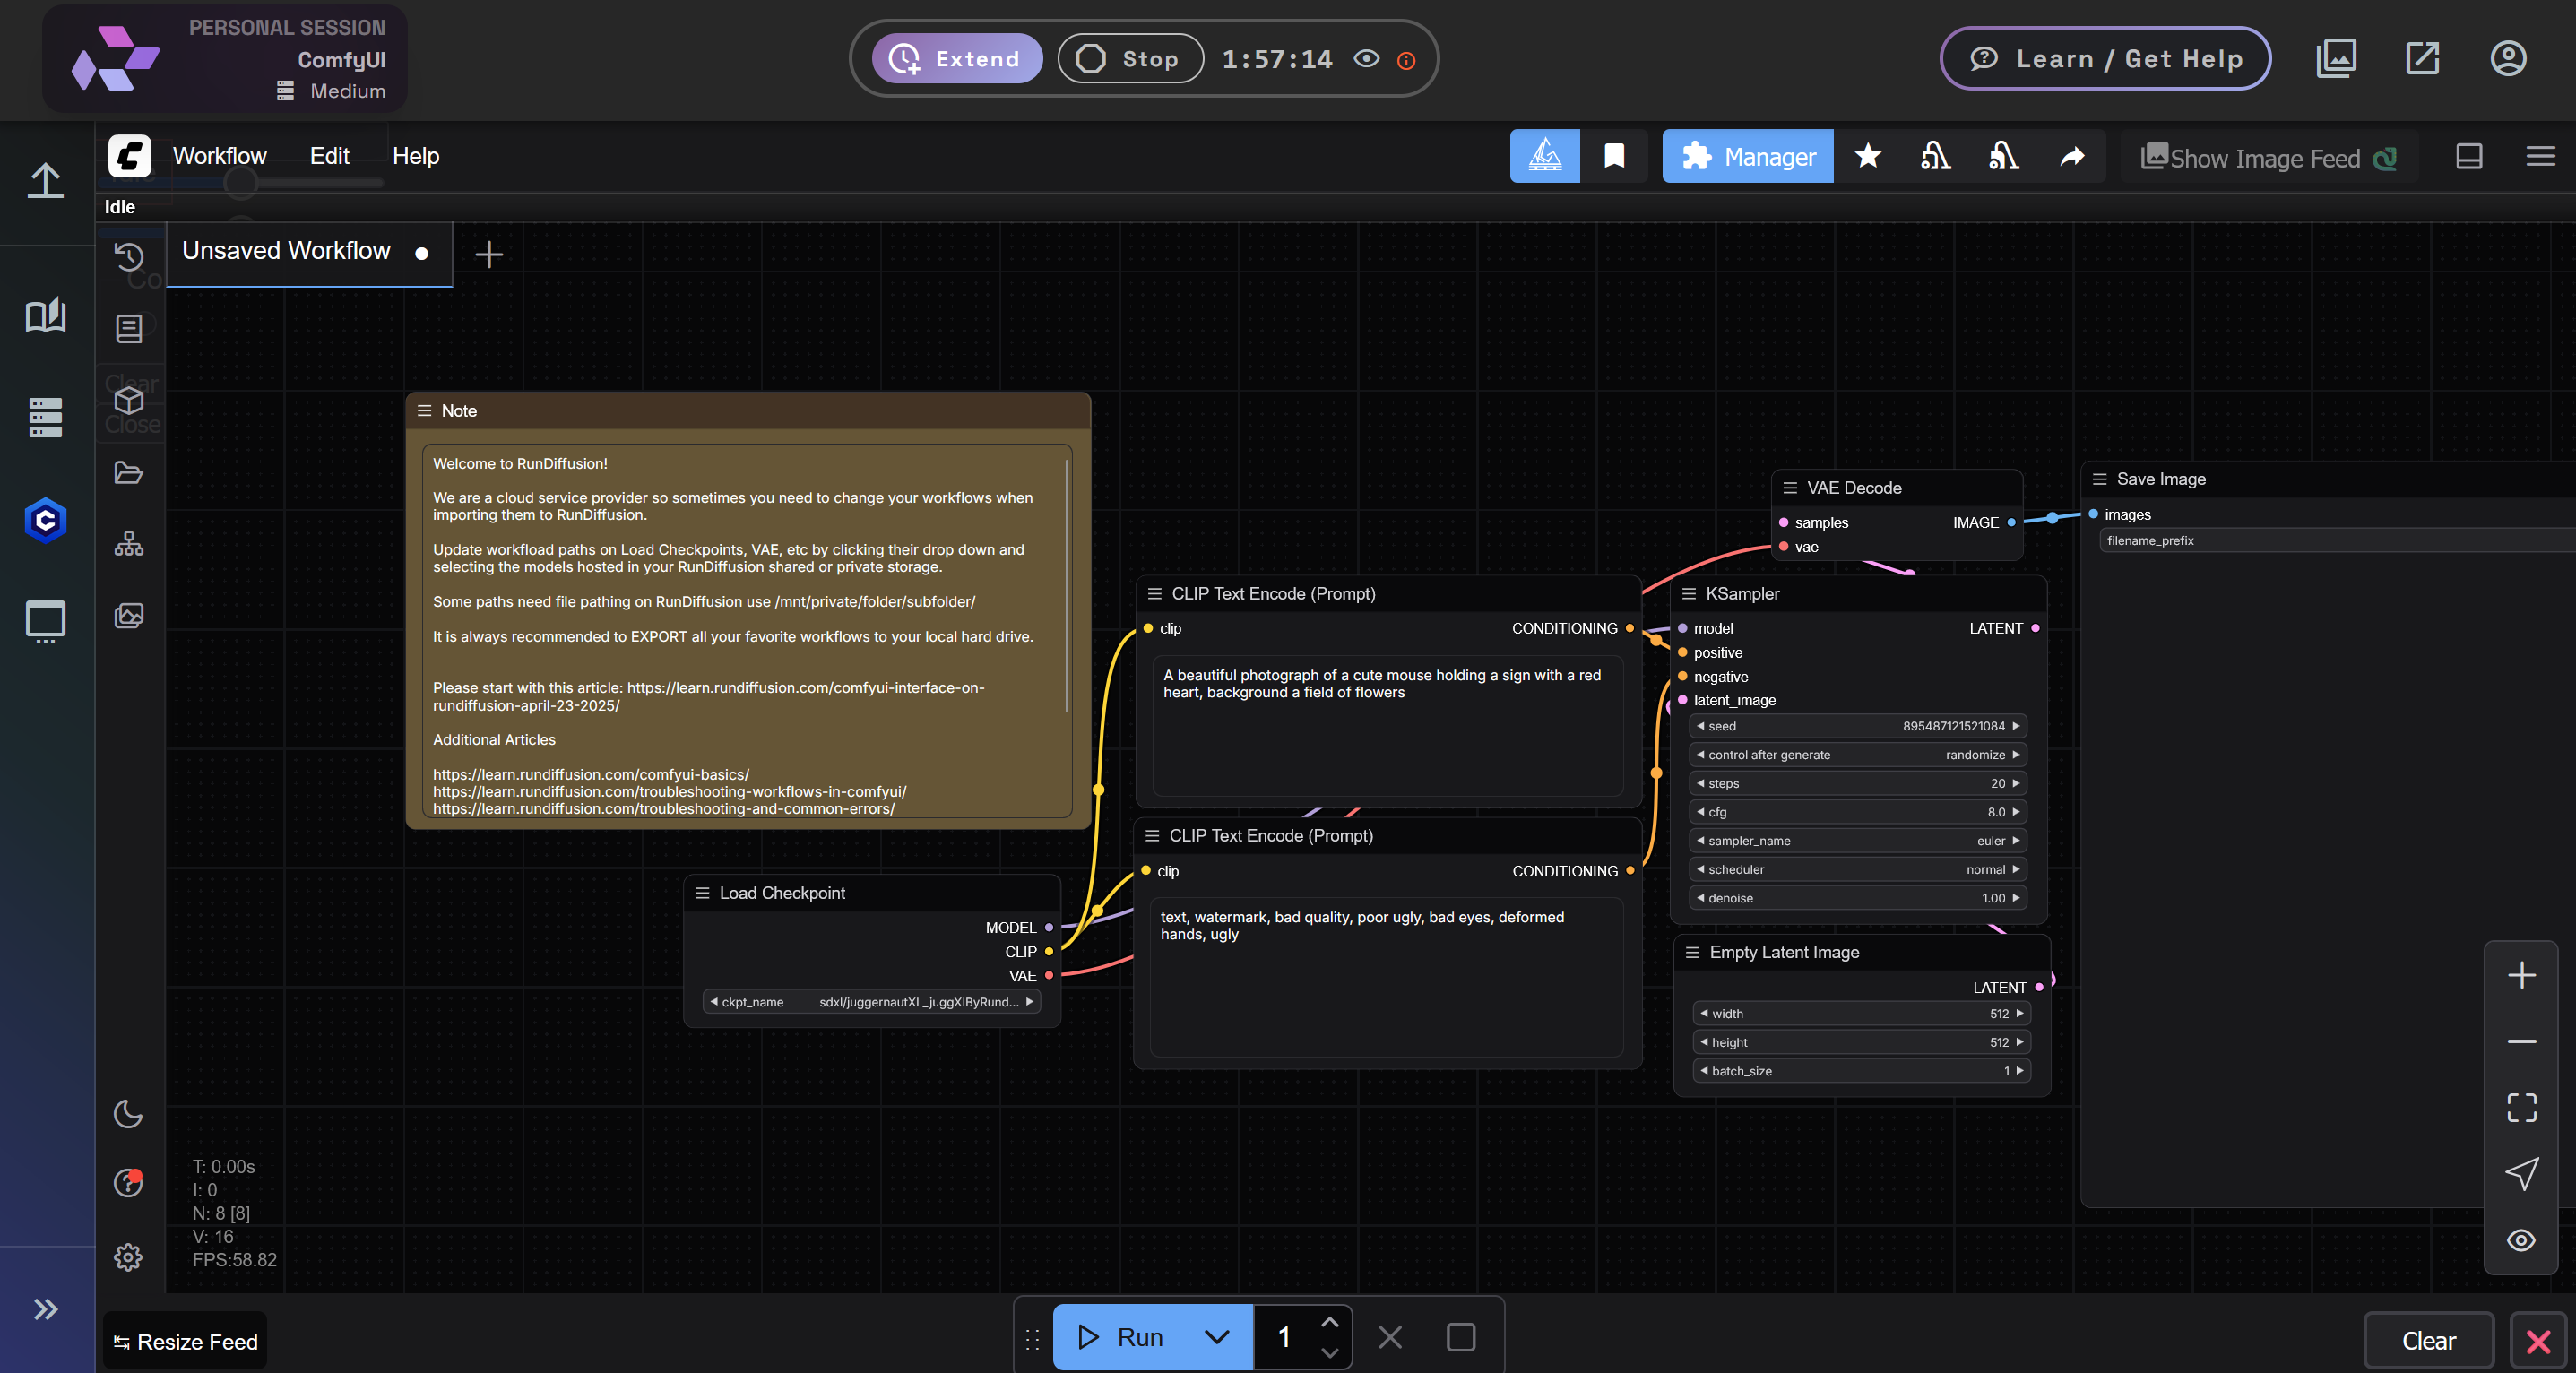
To begin, click on Workflow in the top left menu and select New to create a blank canvas.
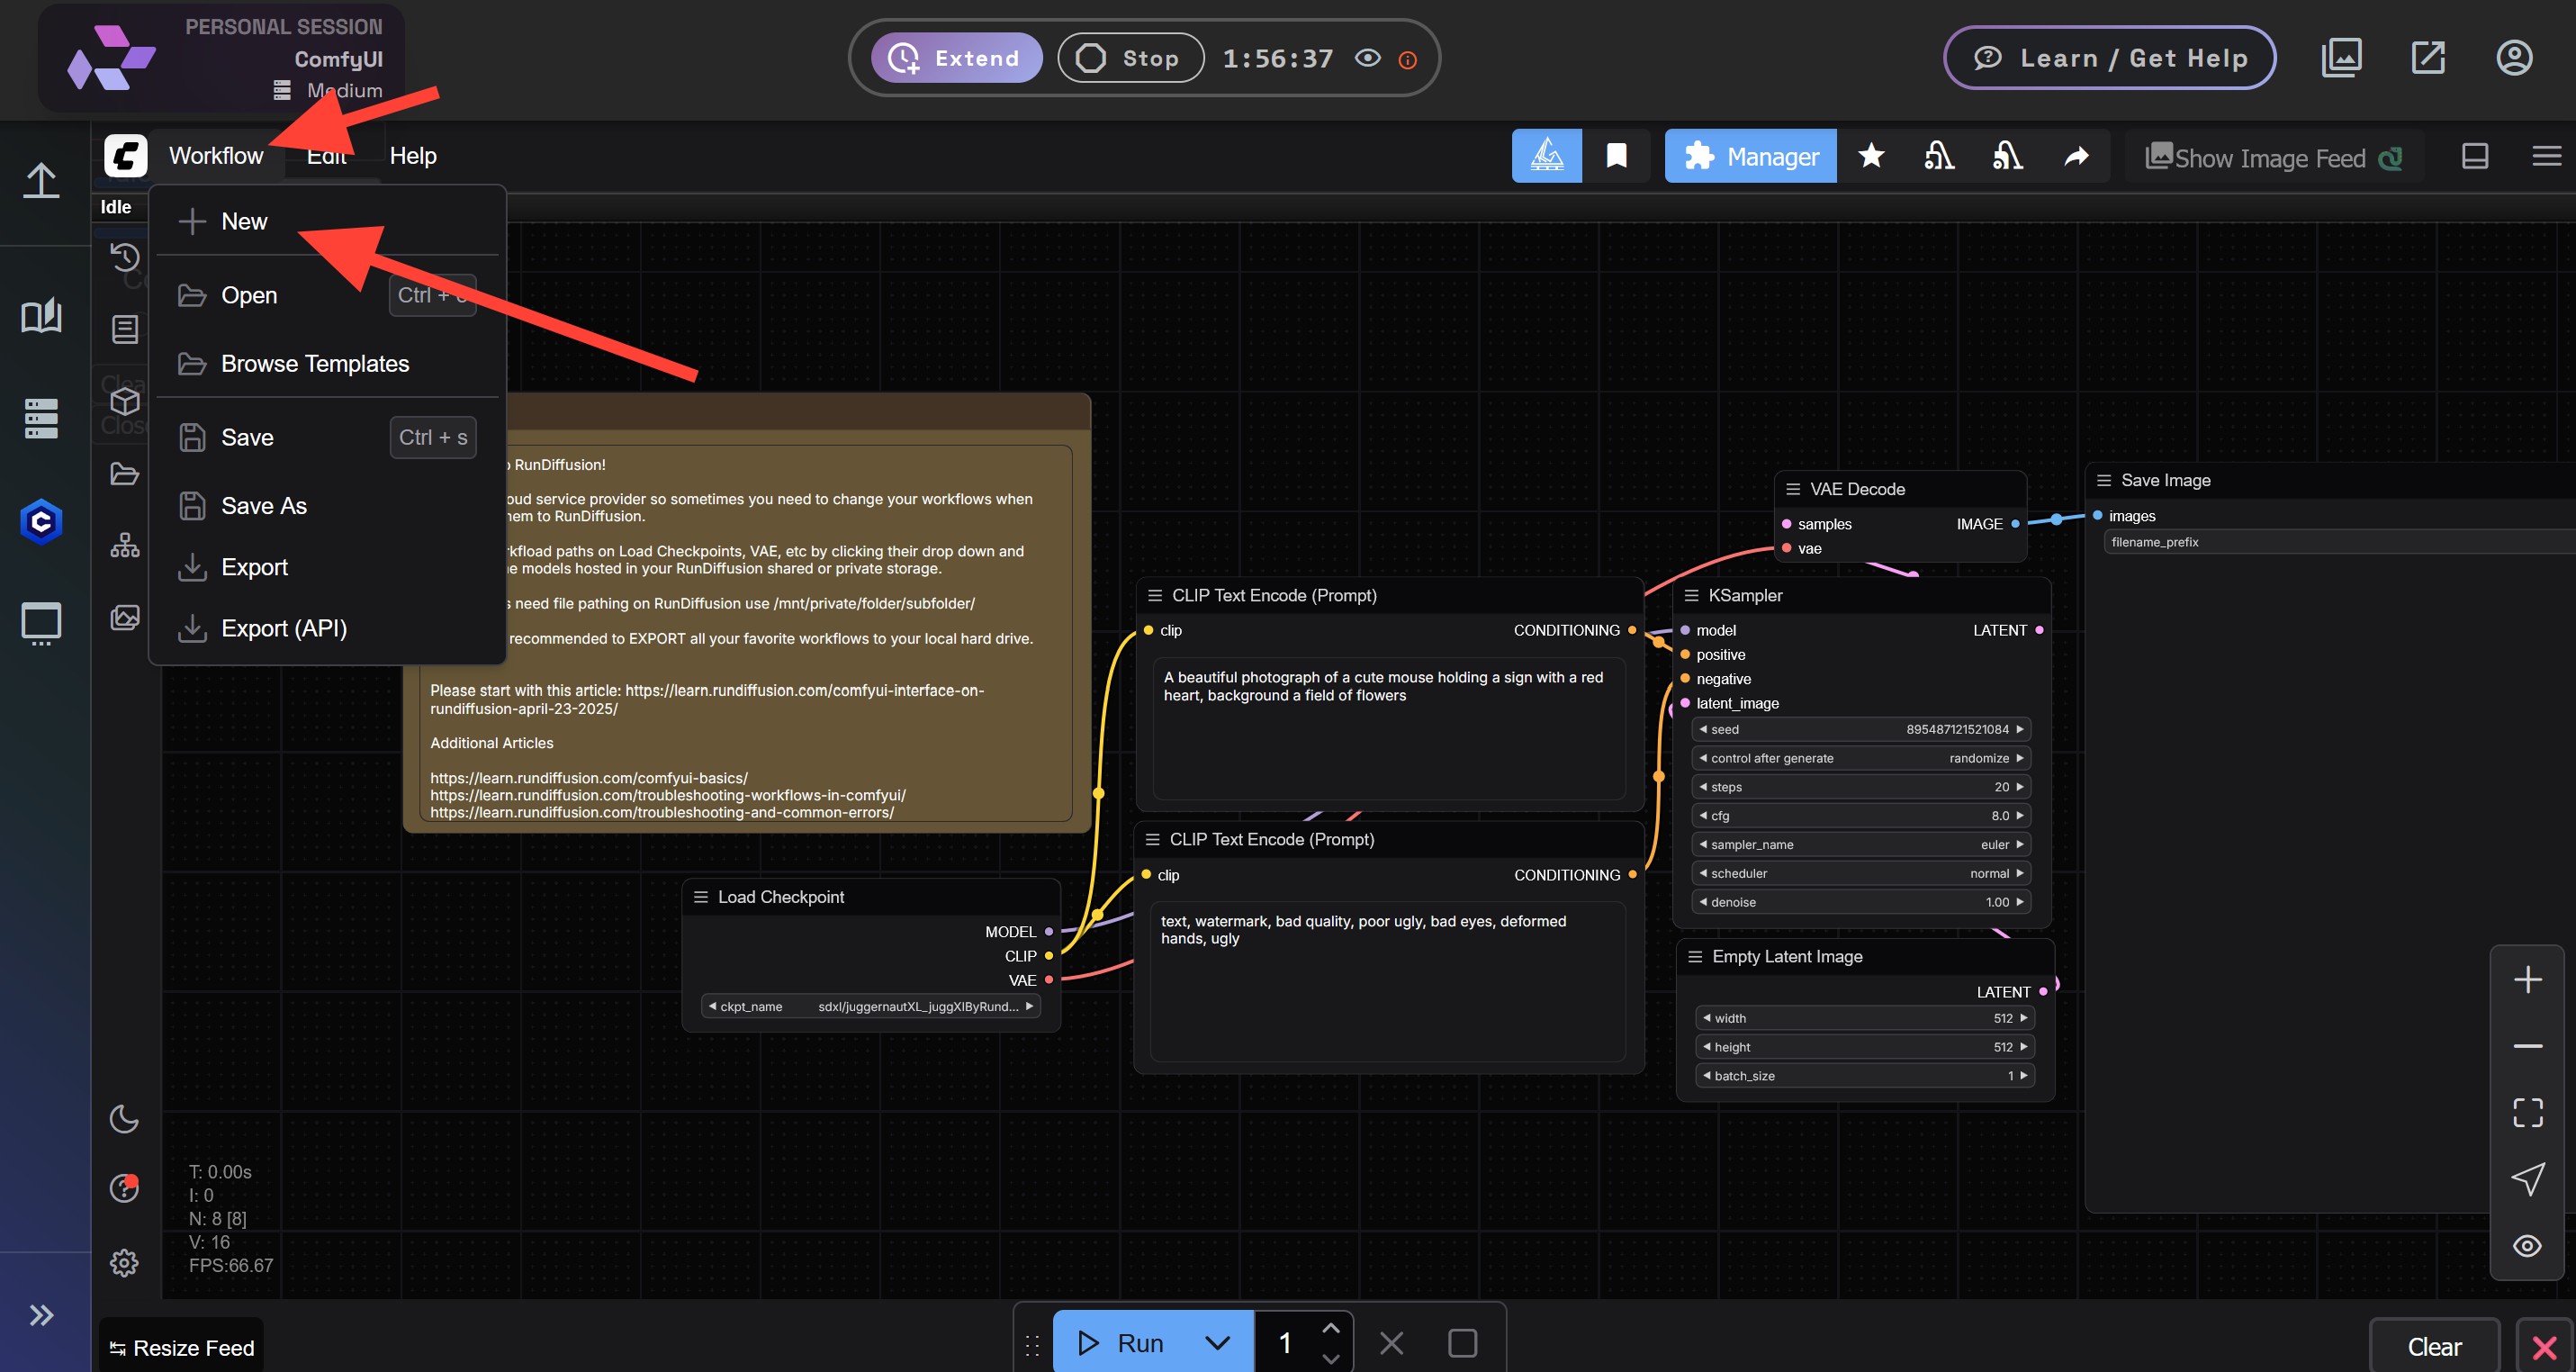
You can also click the plus icon on the UI toolbar to achieve the same result.
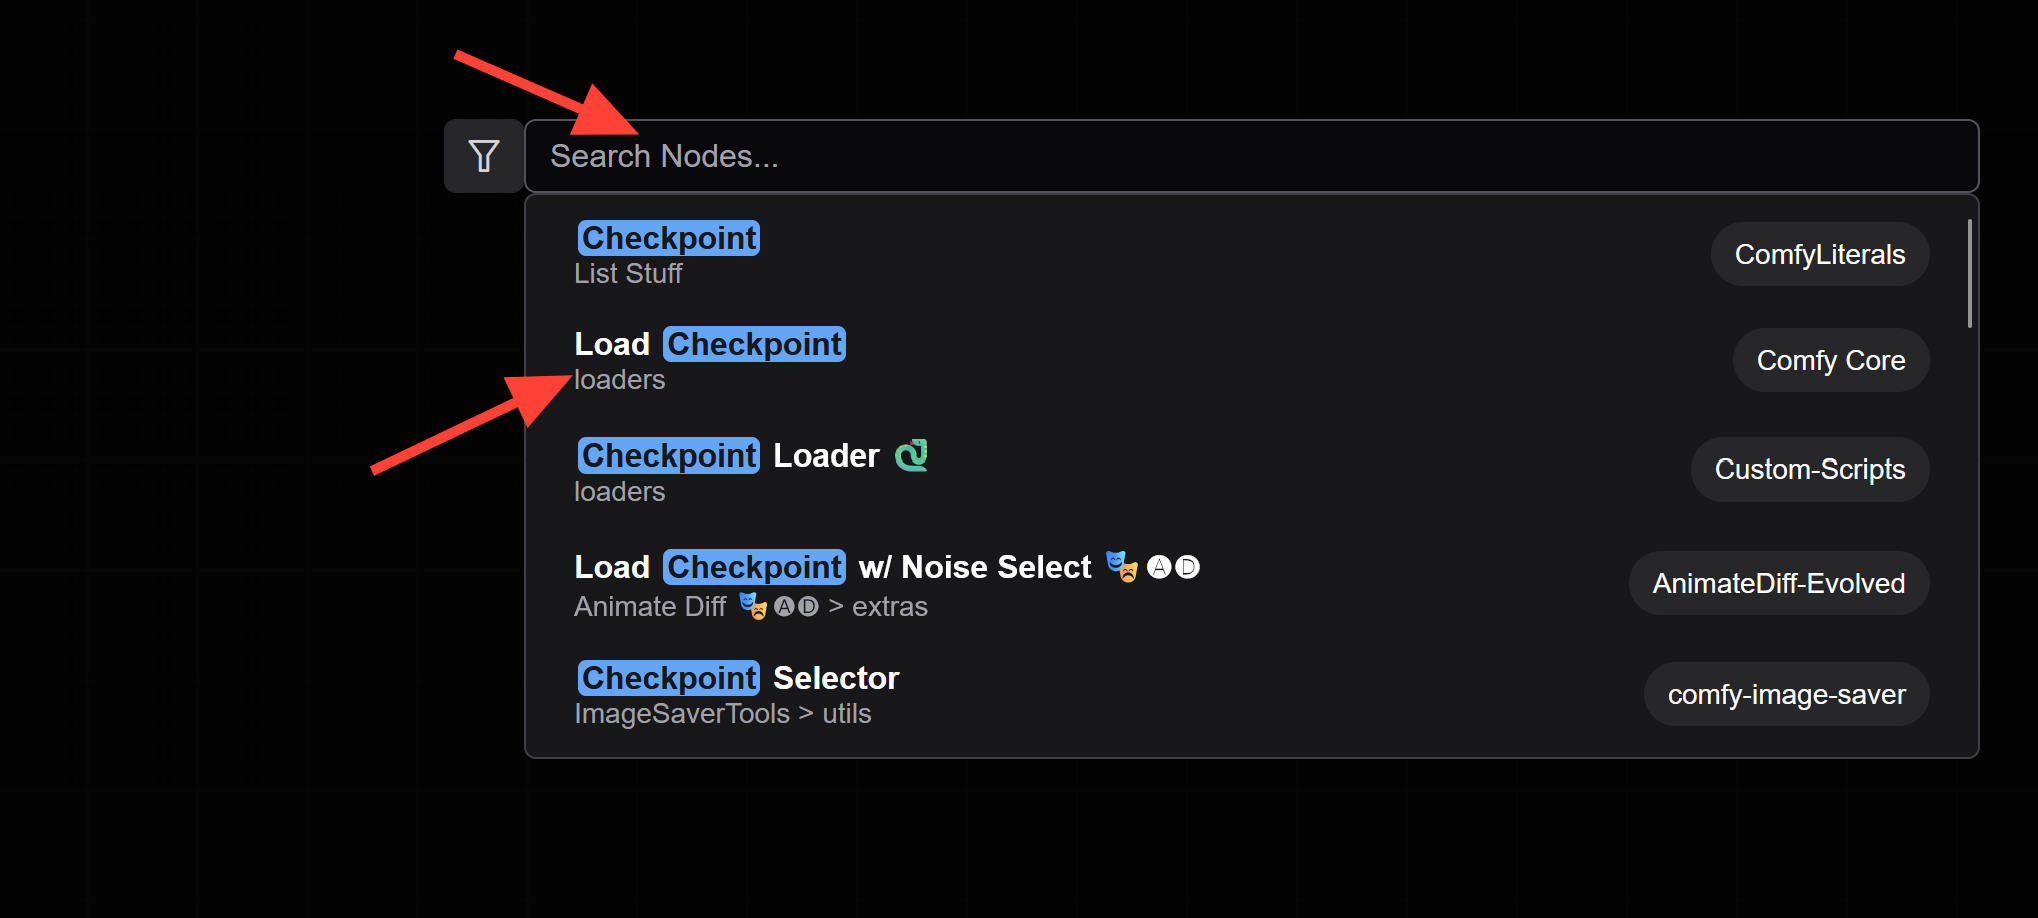
Double-click anywhere on the canvas to bring up the node search menu. Search for and select the Load Checkpoint node.
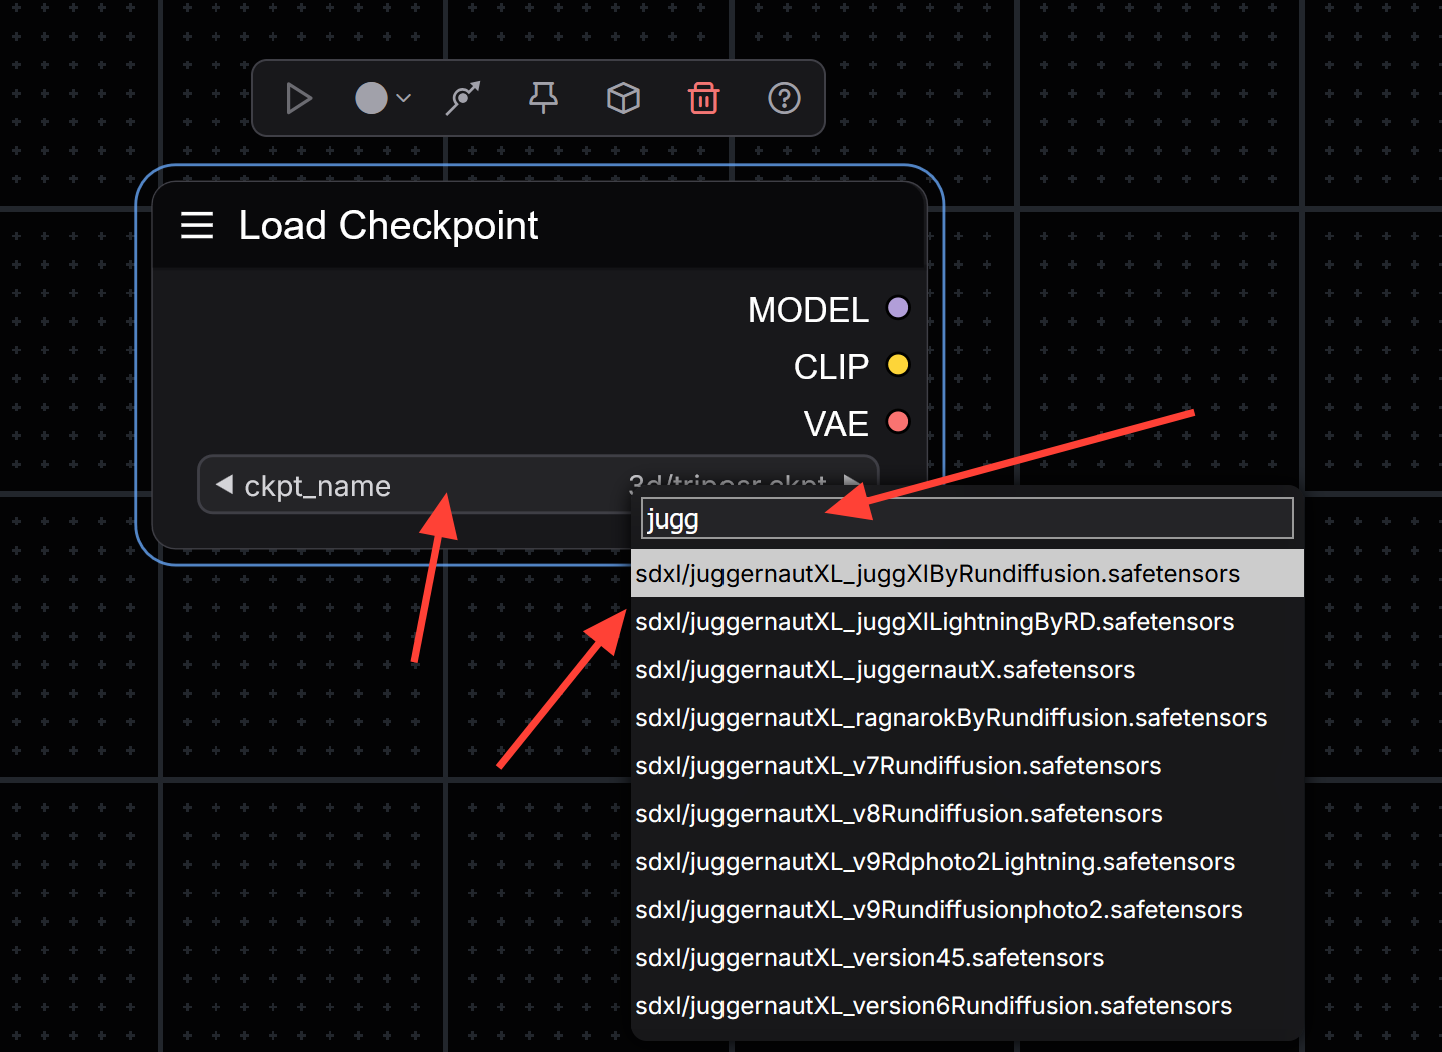
Once the node appears, click on the Checkpoint field to bring up the model selector. Search for a model using the filter boxtype “Jugg” to quickly locate the JuggernautXL_juggXIByRunDiffusion model. Select the model you wish to use
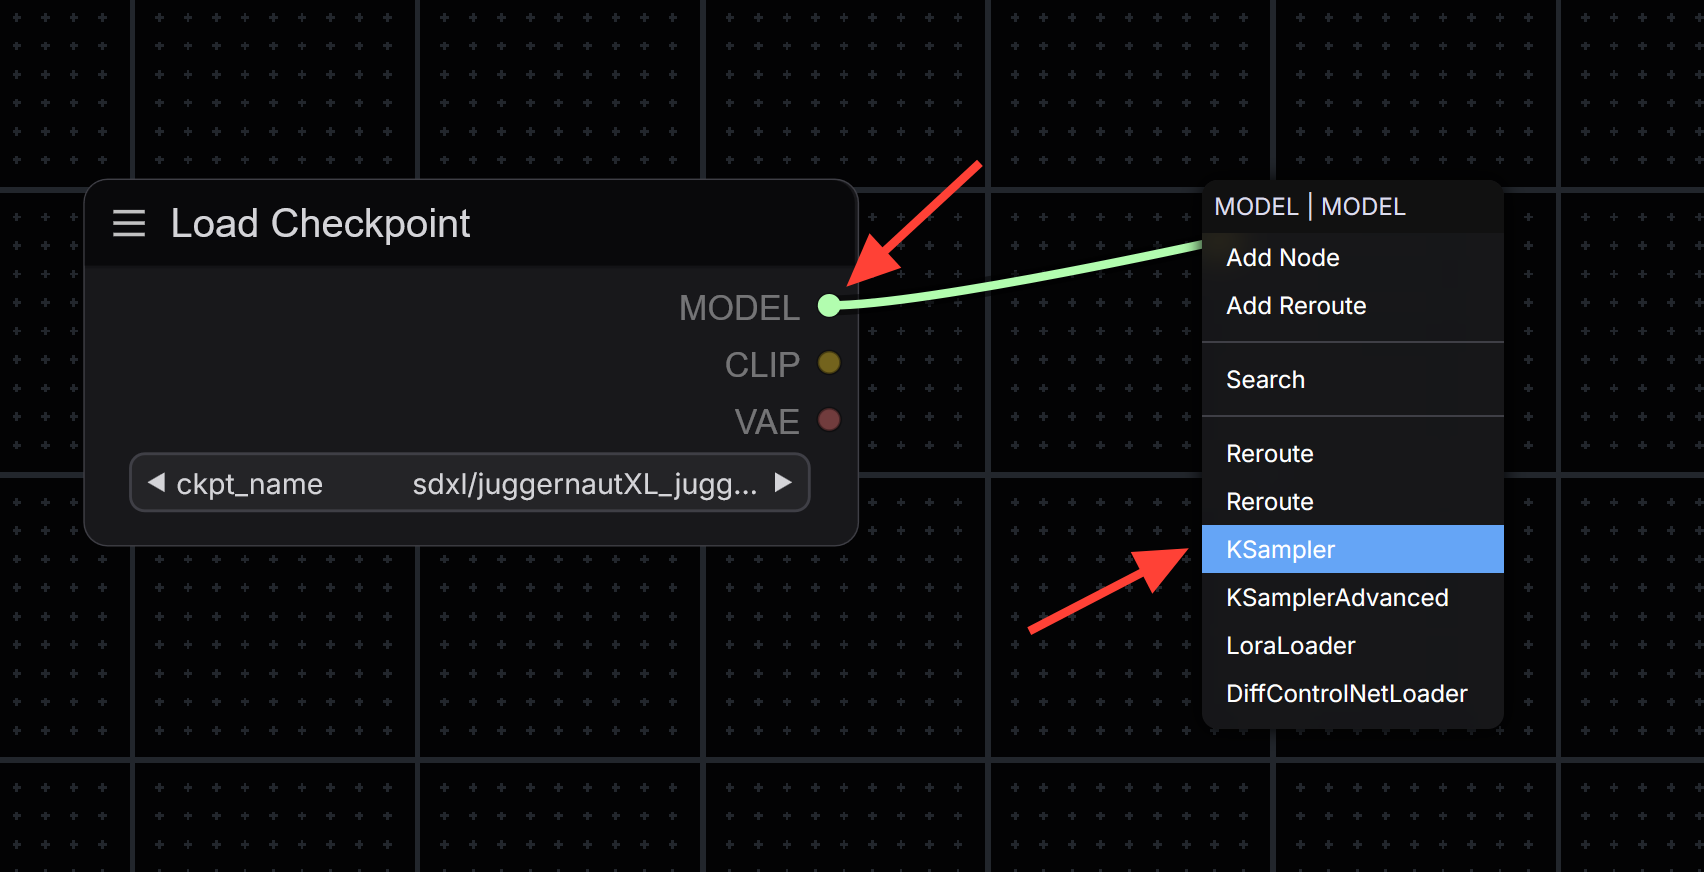
Next, click on the small colored circle next to the MODEL label on the Load Checkpoint node and drag it to an empty area of the canvas. This action opens a node selection. Search for and select the KSampler node.
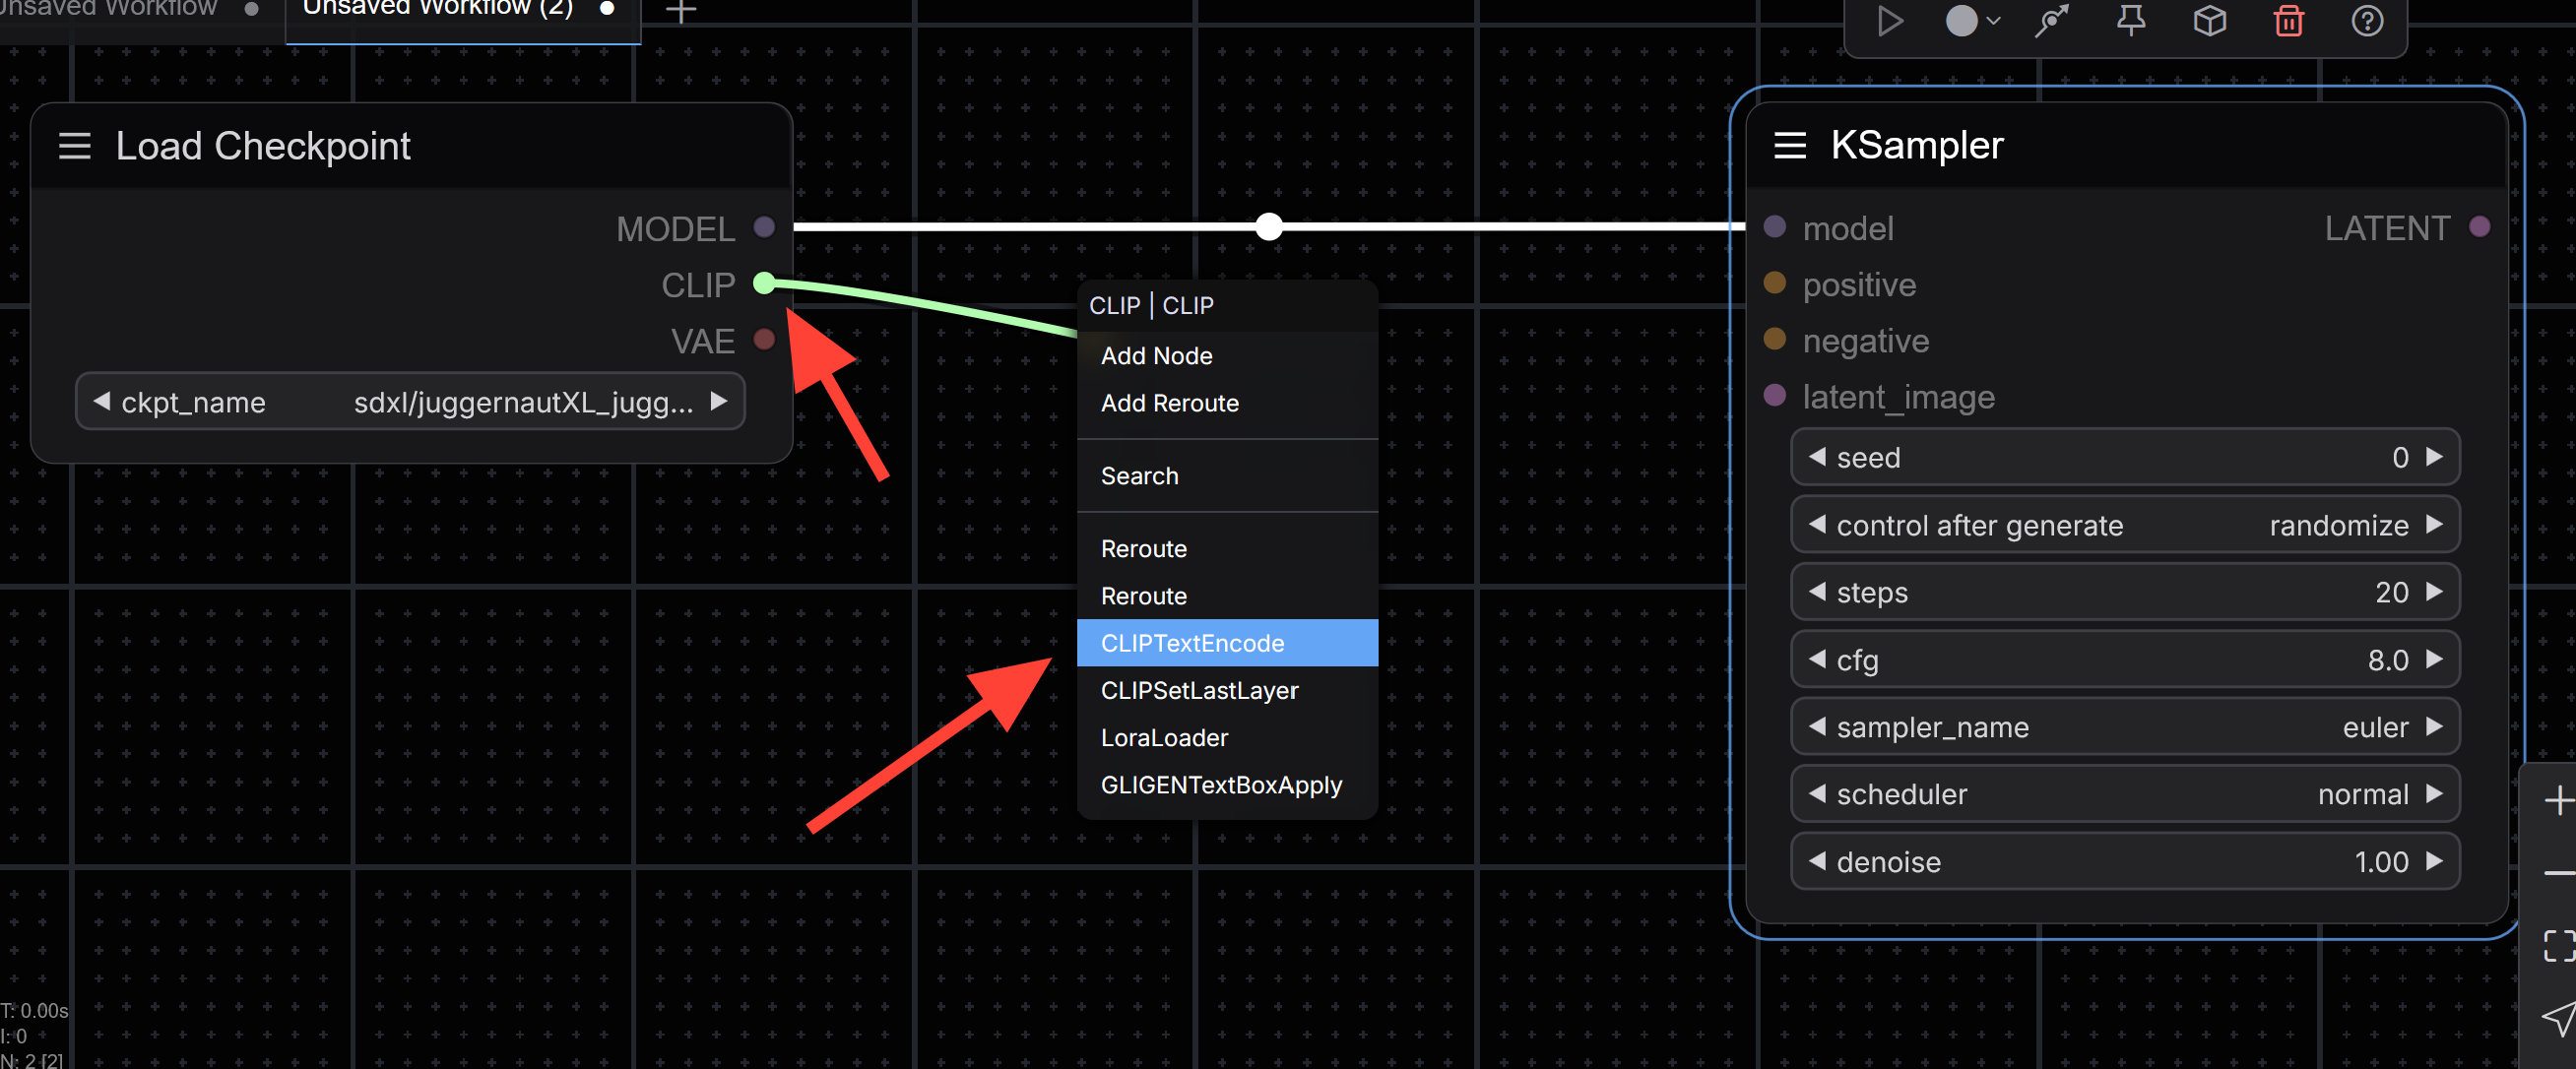
You will now create your positive and negative prompt inputs. On the Load Checkpoint node, locate the circle next to CLIP. Drag and release it onto the canvas to open the node menu. Search for and add the CLIP Text Encode node. Do this twiceone for your positive prompt and one for the negative prompt.
Connect the CONDITIONING output of each CLIP Text Encode node to the corresponding positive and negative prompt inputs on the KSampler node.
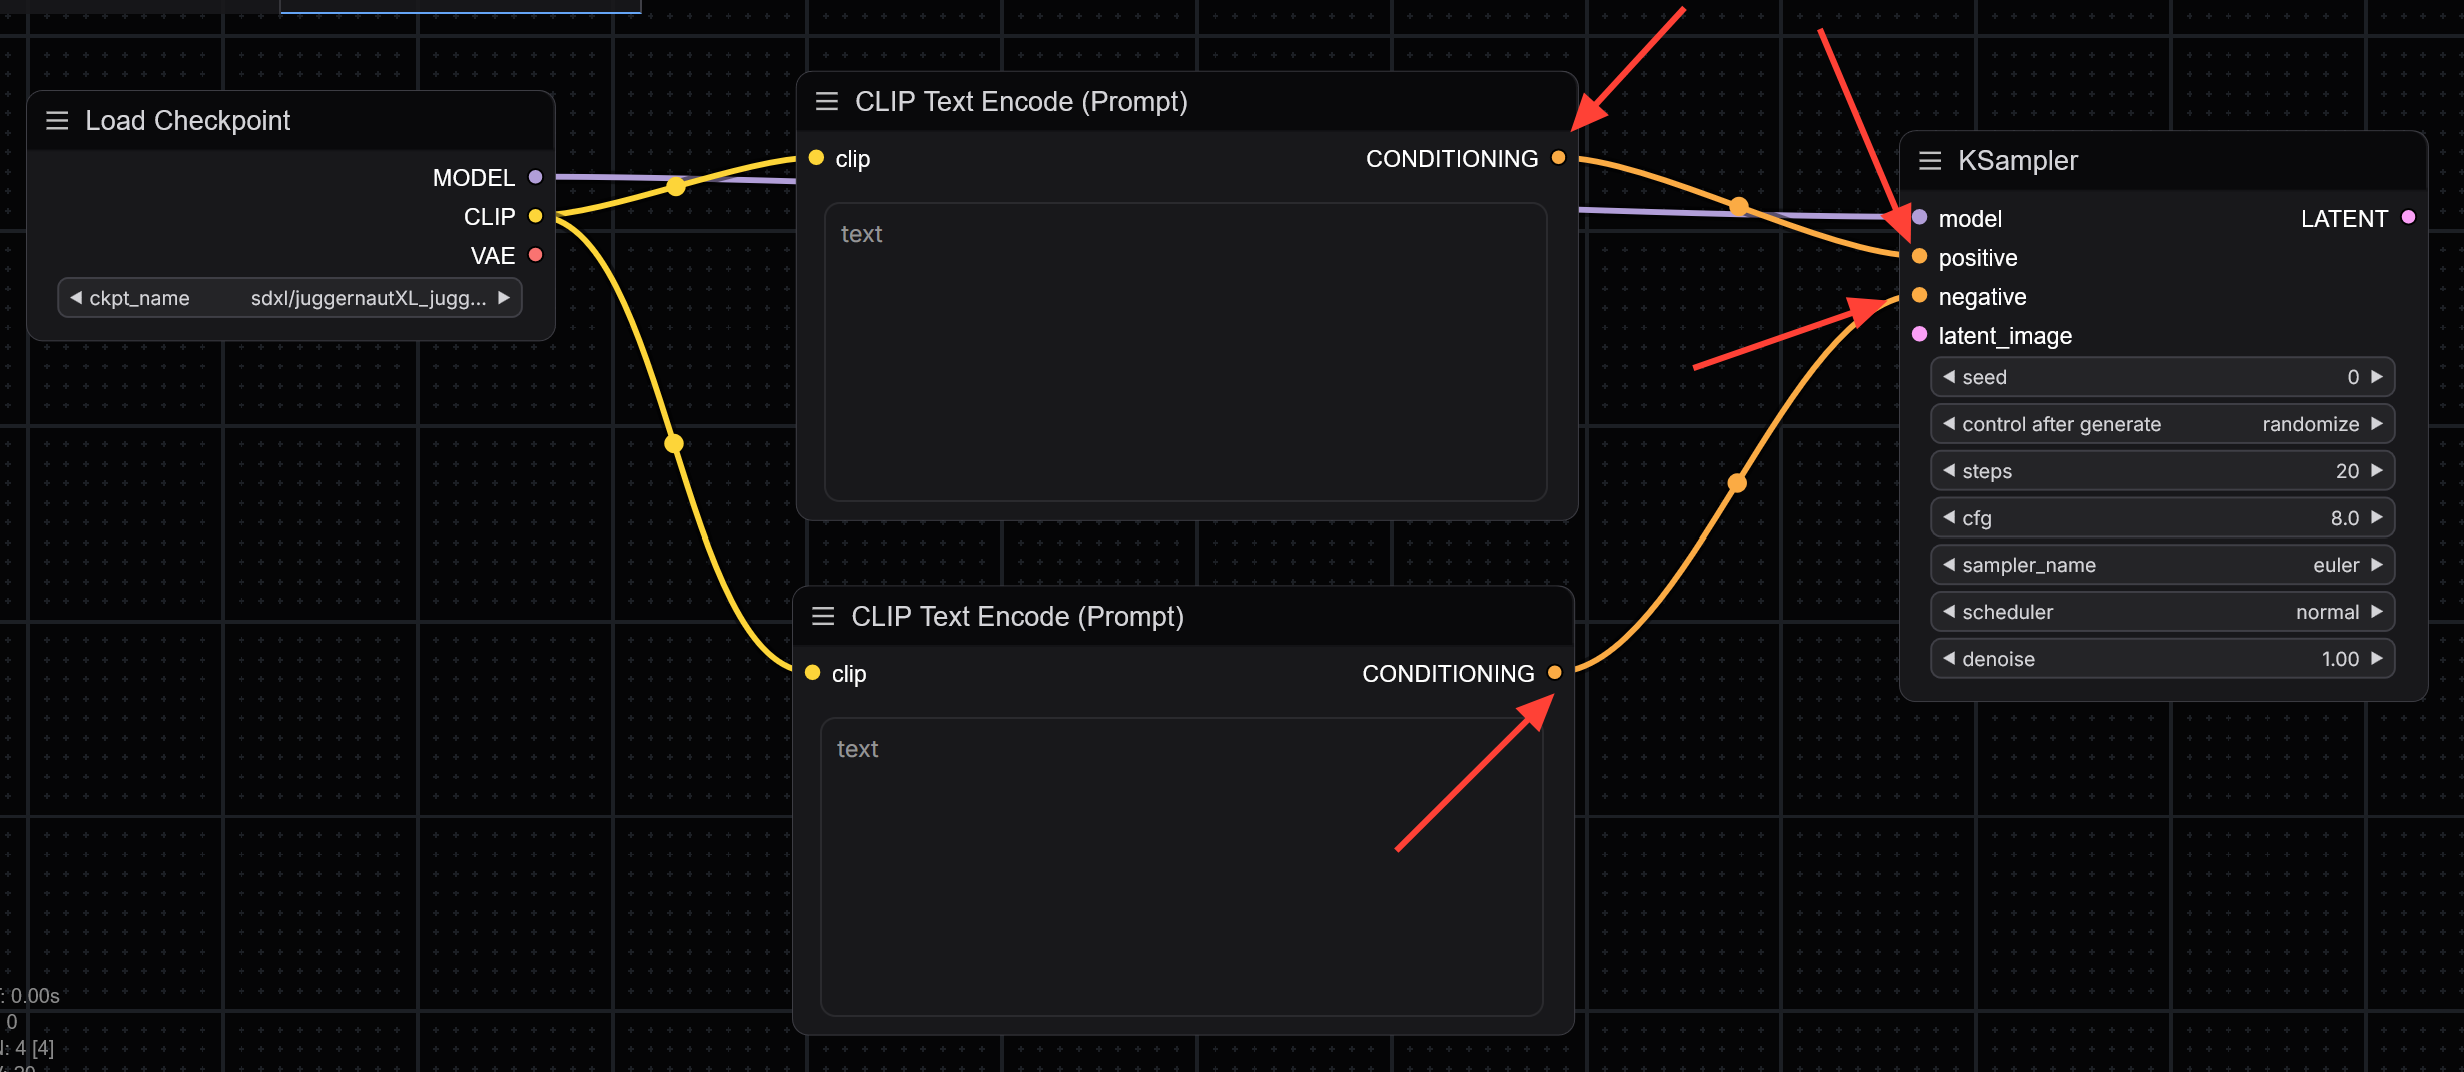
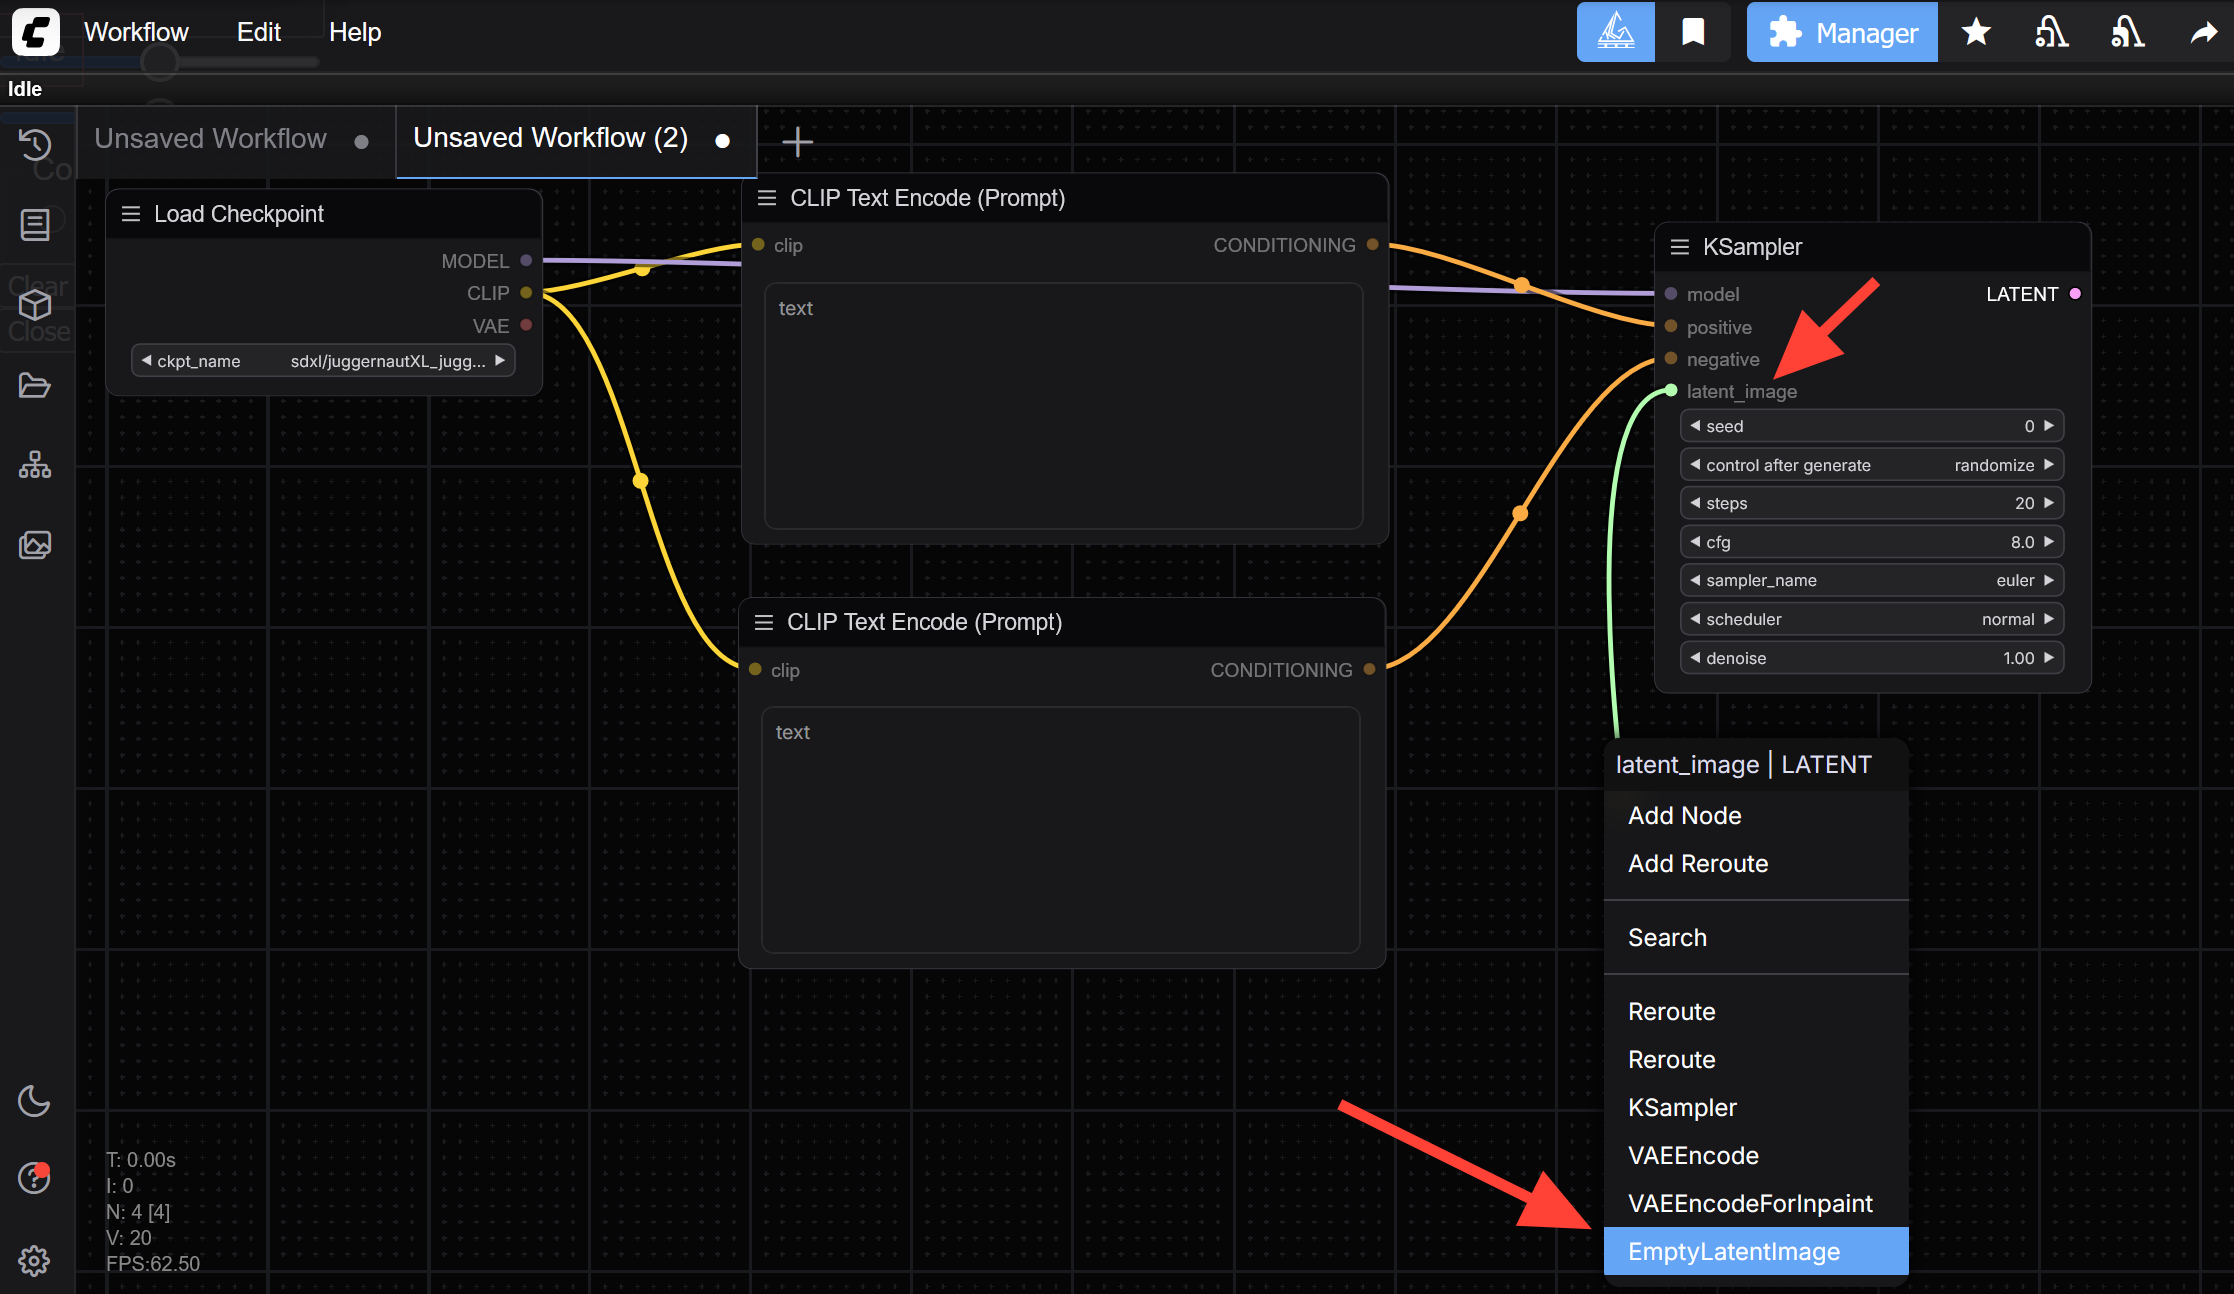
On the KSampler, locate the Latent Image input. Drag and release from that input onto the canvas, then select the latent_image node. This node defines the resolution of your output.
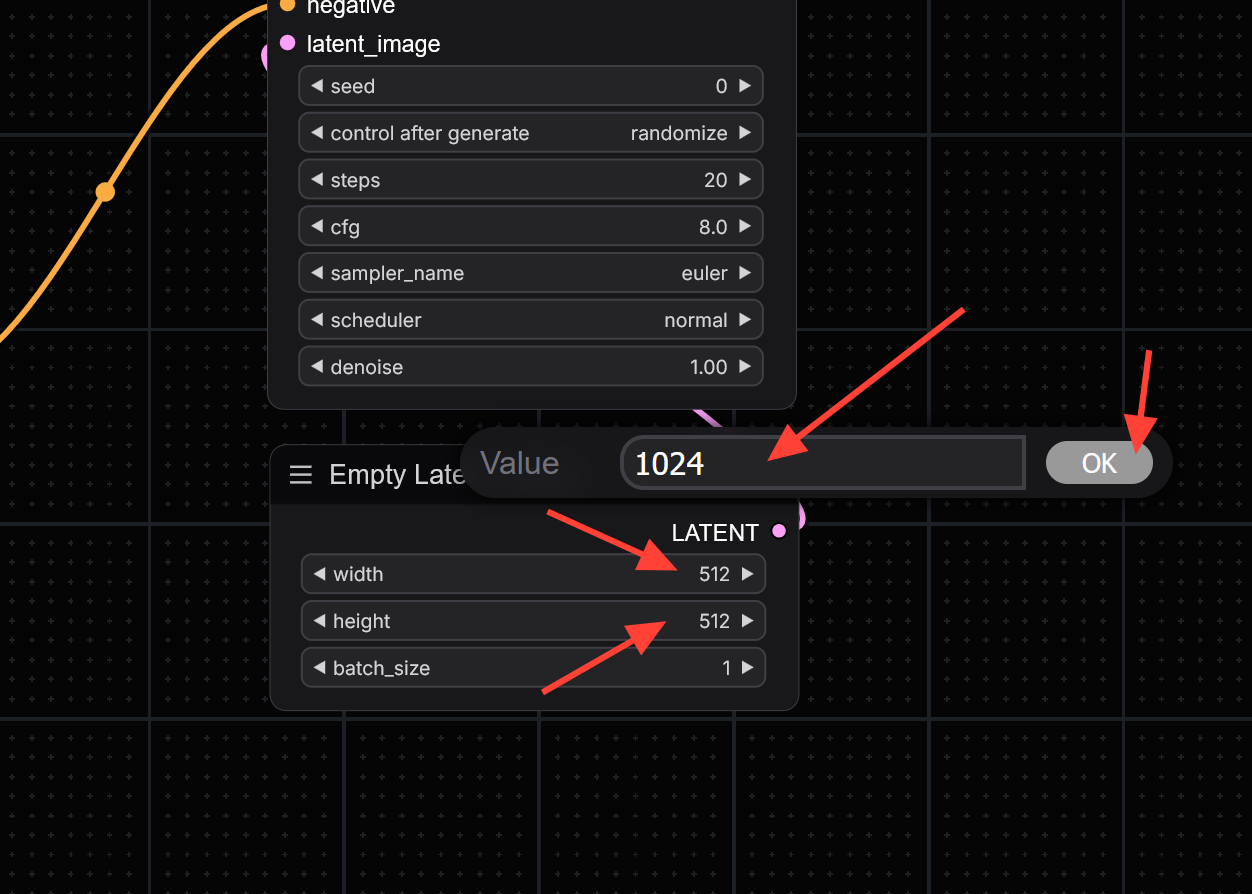
Update the width and height values to match SDXL’s preferred resolution. Change the default width and height from 512 to 1024 for both fields.
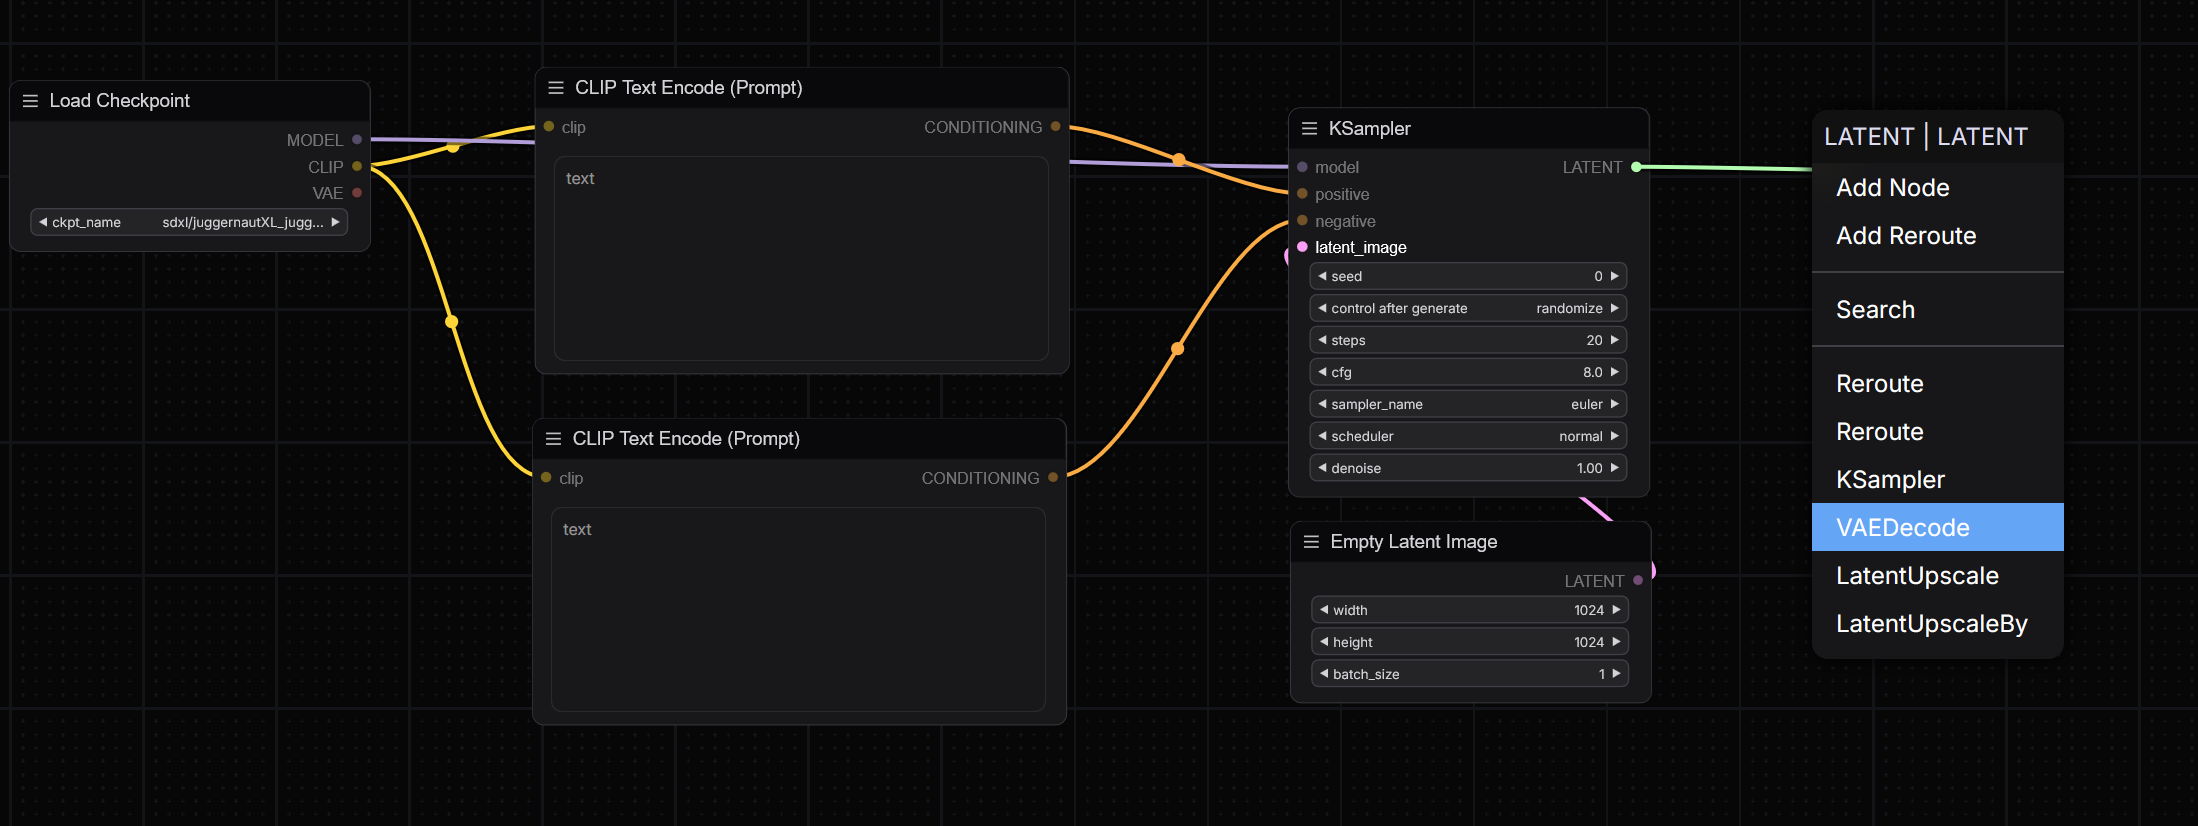
Next, drag a connection from the LATENT output of the KSampler to a blank area on the canvas and select the VAE Decode node.
Now connect the VAE output from the Load Checkpoint node to the VAE input on the VAE Decode node.
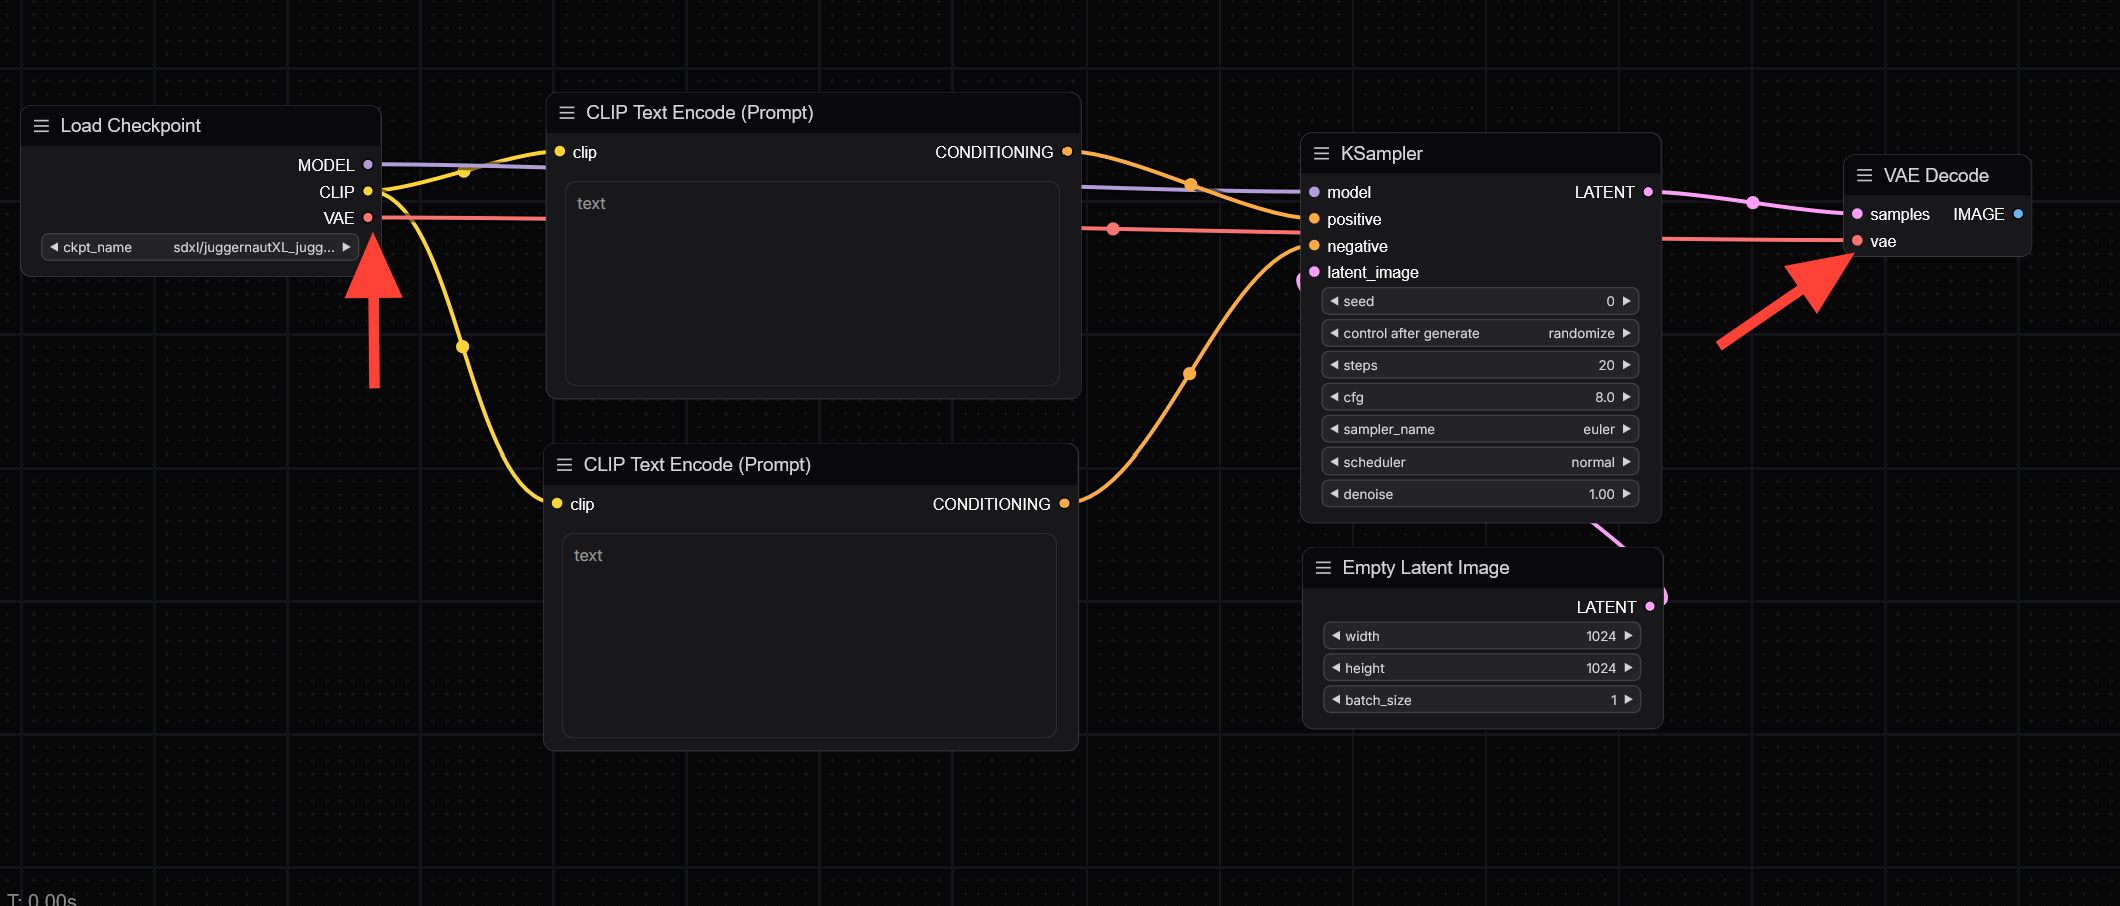
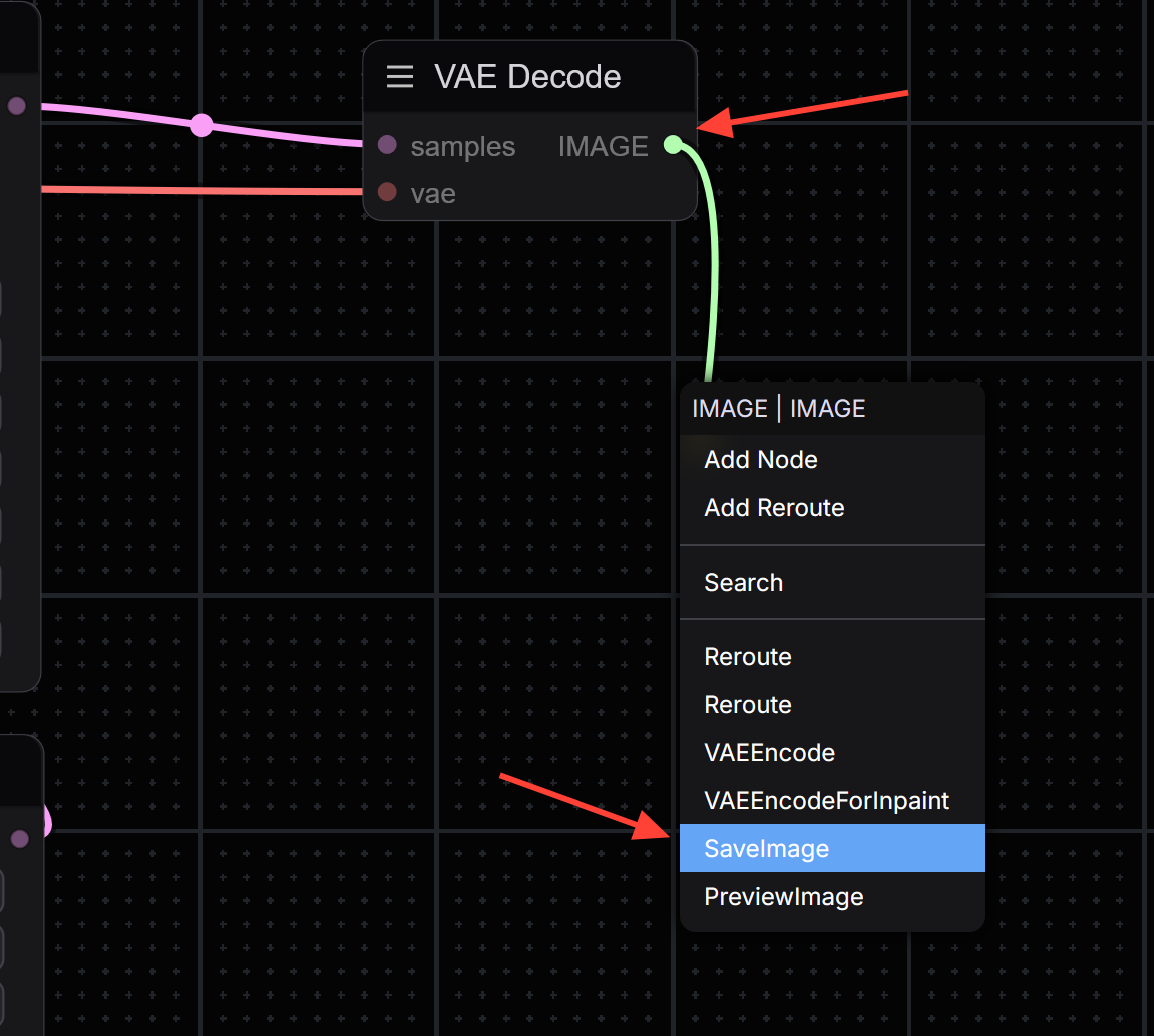
To complete the workflow, drag a connection from the IMAGE output of the VAE Decode node to an empty area and select the Save Image node.
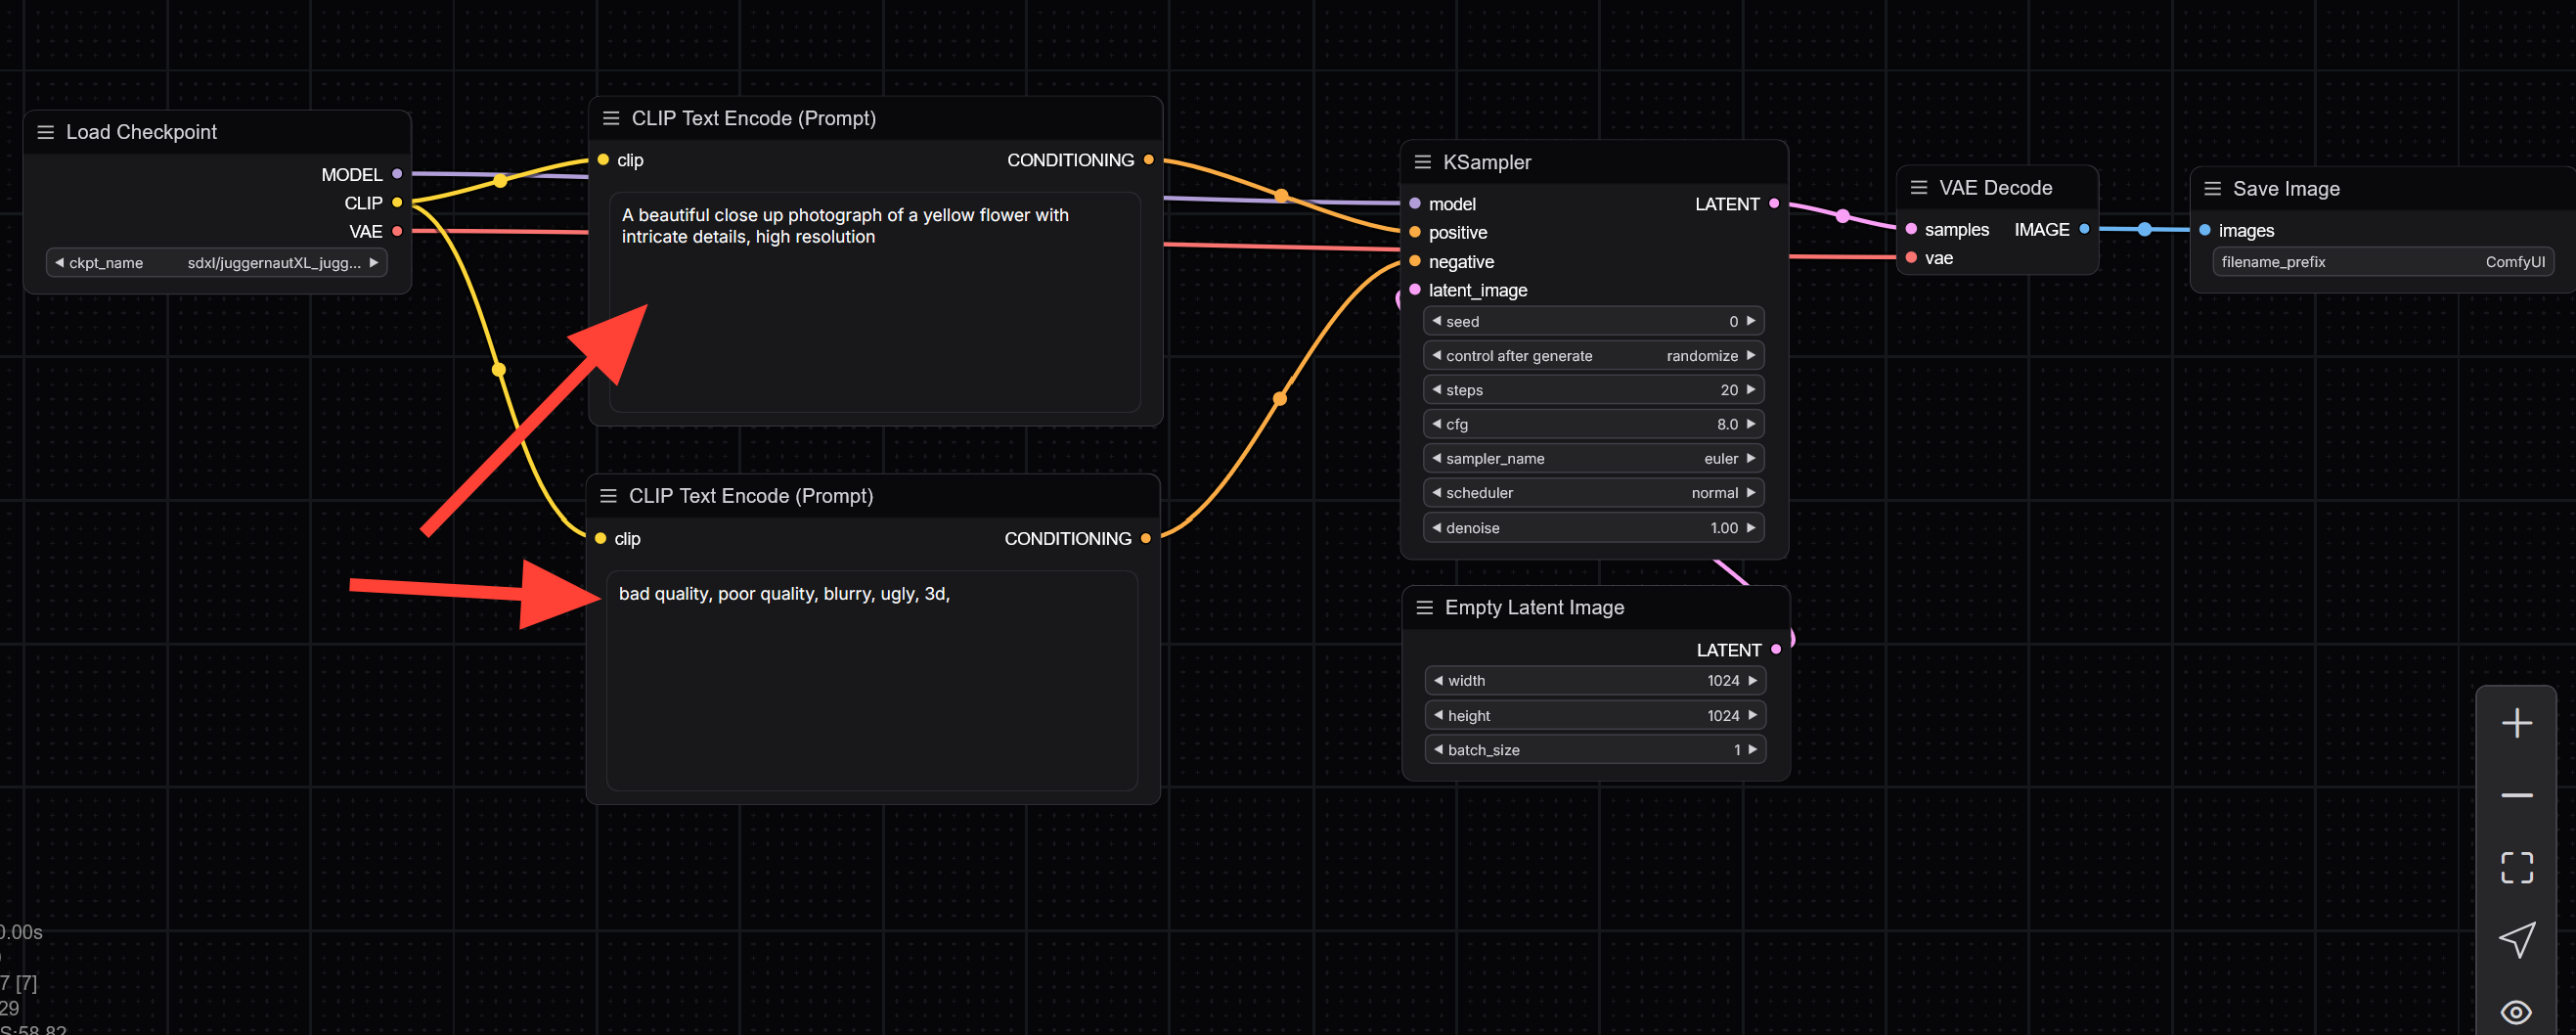
Your basic SDXL workflow is now complete. Add your positive and negative prompts into the respective CLIP Text Encode nodes.
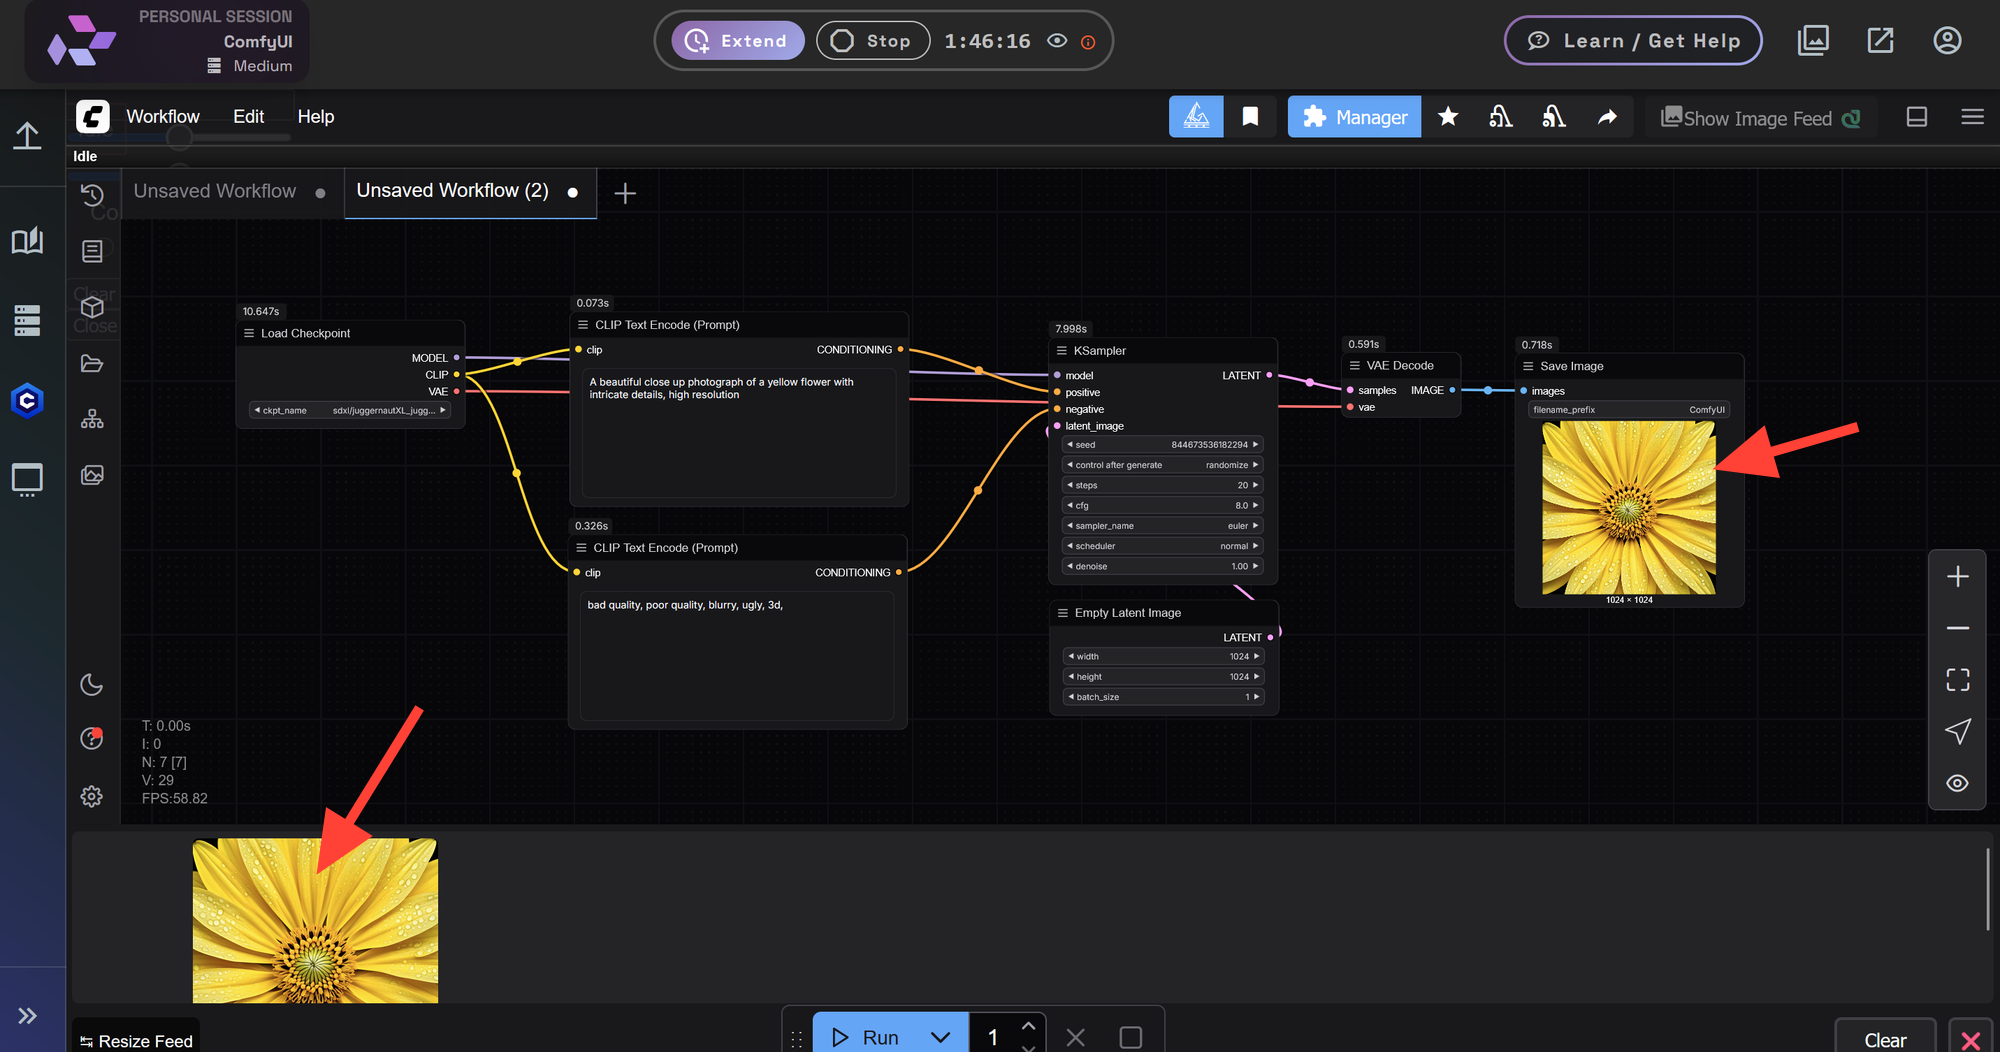
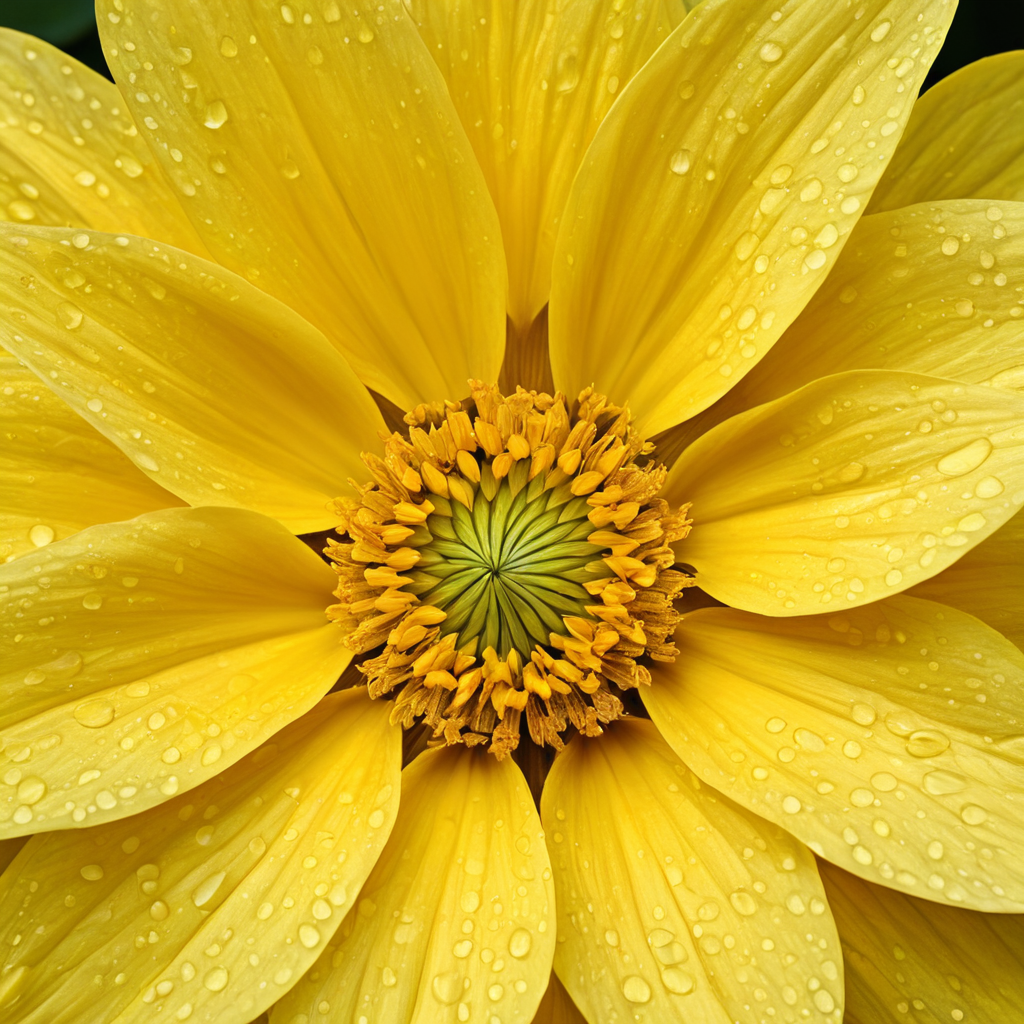
Click Run to execute the workflow. The nodes will process sequentially, and the final image will appear once all nodes complete.
The first run will take longer as it loads themodel checkpoint. Subsequent runs will be much faster since the model remains loaded in memory.
Click the final image to open and save it to your local drive.
Optimizing Your KSampler Settings
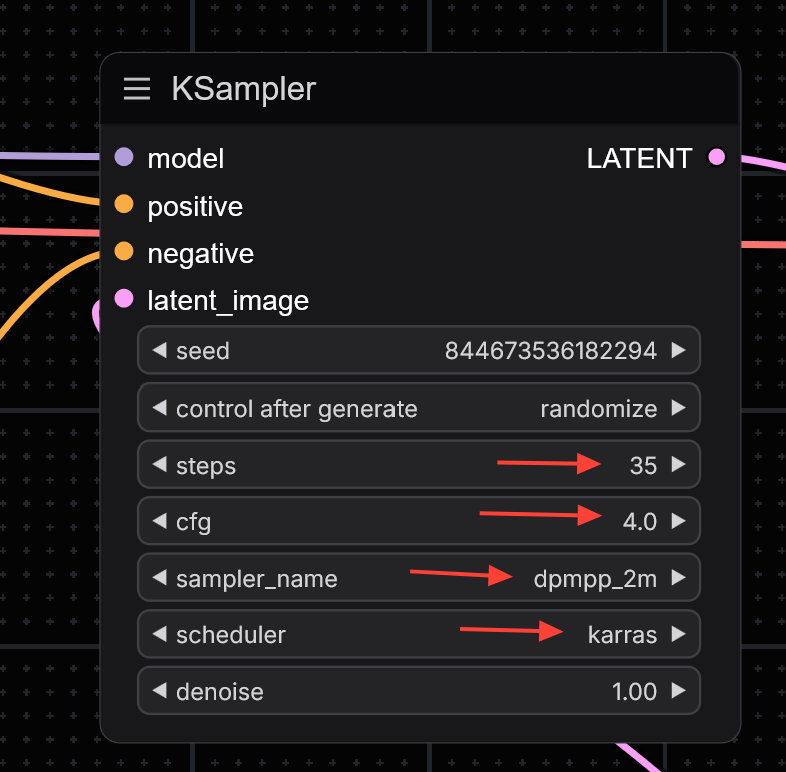
The initial image may appear slightly overprocessed or "overbaked." To improve the results, adjust your KSampler settings using the following configuration recommended for the JuggernautXL model:
- Steps: 35
- CFG: 4
- Sampler Name:
dpmpp_2m - Scheduler:
Karras
You can continue fine-tuning from here and save your image once you're satisfied with the result.
Further Reading
Once you've built your first workflow, there's a lot more you can explore with ComfyUI.
 RunDiffusion Team
 RunDiffusion Team
 RunDiffusion Team