

Why do we need an image Upscaler?
Stable Diffusion v1 has a default image size of 512×512 pixels, which may seem low compared to current standards. For instance, the iPhone 12 camera produces 12 MP images at 4,032 × 3,024 pixels, and its screen displays 2,532 x 1,170 pixels. Consequently, an unscaled Stable Diffusion image would appear pixelated when enlarged.
Moreover, Stable Diffusion's generated complex scenes usually lack sharpness and fine details, posing further challenges.
How does AI upscaler work?
AI upscalers, in contrast, are models that have been trained using vast amounts of data. To simulate real-world degradation, good-quality images are artificially corrupted, then reduced in size. A neural network model is then trained to recover the original images, incorporating a significant amount of prior knowledge into the model.
This embedded knowledge allows the model to fill in the missing information accurately. It's similar to how humans remember a person's face without needing to study it in great detail, instead focusing on a few key features.
How to use AI upscaler for Stable Diffusion?
Once you have starter a server, click on the Extras tab at the top. The upscaling menu will be the first one to appear.
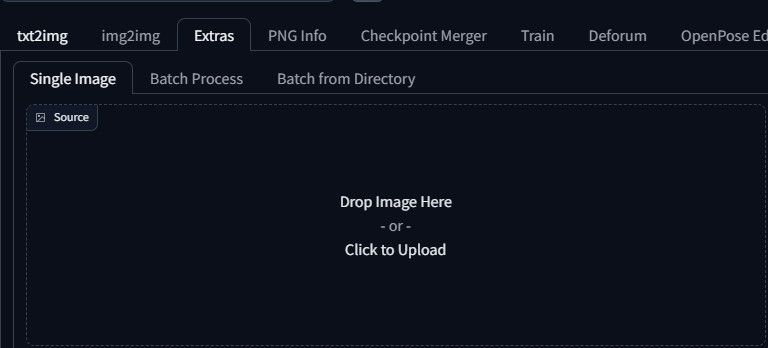
If you only need to upscale a single image, you can remain on the first tab. However, if you have multiple images to upscale, you can switch to the Batch from Directory tab to upload multiple images into the file browser and use the correct path to pull from.
As a side note, if you are wanting to upscale a photo from text2img or img2img tab, you just need to click "Send to extras" button located in the lower right corner.

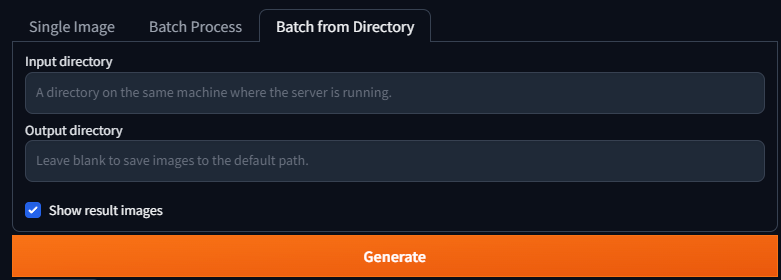
Batch from Directory
Directories
To access the shared storage file path, refer to the Auto1111/paths.txt file. It contains a unique path that looks like this:
/mnt/image-storage/c8shs6-sfhe6-88665-sfw7ss3/UPLOADS/batch
To upload your images to this directory, you must log in through the file browser using a new login with the following credentials:
Username: upload Password: password
After logging in, you can upload your images to the designated folder. Once done, log out and log back in to your sduser account.
Creator Club Members
Use the /mnt/private/ and then make a directory, like say for example Batch1. In Input Directory, put /mnt/private/Batch1/
In Output Directory, specify another folder
Example: /mnt/private/batch-test/Batch1Done/
Scale By/Scale To
Under the "Scale by" subtab, the Resize setting refers to the multiplier used for upscaling the image. For instance, if you wish to increase a 512x512 image to 1024x1024, you need a multiplier of 2. The default upscaling value in Stable Diffusion is 4. However, if you want to upscale your image to a specific size, you can click on the Scale to subtab and enter the desired width and height. In case the upscaled image's size ratio varies from the input image, you should check or uncheck the Crop to Fit option, depending on how you want Stable Diffusion to handle the difference.

After specifying the desired upscaling value, the next step is to select the appropriate model for Stable Diffusion to use. For this guide, we will be using 4x-UltraSharp. Select your preferred model and click on the Generate button to initiate the upscaling process.
What are the Best Upscale Models in Stable Diffusion?
Stable Diffusion offers a variety of upscaling models to choose from, each optimized for specific types of images. Here's a breakdown of the models available and their suitability for different types of images:
- LDSR: Ideal for photos but may introduce random noise
- BSRGAN: Good for photos, subtly sharp without overdoing it
- ESRGAN_4x: Super sharp, but might be too unrealistic for some photos
- R-ESRGAN-General-4xV3: Okay for photos, but with a bit too much blur
- R-ESRGAN-General-WDN-4xV3: Very good for photos, with texture and definition without being overbearing
- R-ESRGAN-AnimeVideo: Good for anime, but may not be suitable for photos
- R-ESRGAN-4x+: Similar to BSRGAN with slightly more texture
- R-ESRGAN-4x+-Anime6B: Best for anime images
- ScuNET-GAN: Too blurry for most images
- ScuNET-PSNR: Not suitable for any type of image
- SwinIR_4x: May introduce tile lines, not suitable for most images
When using Stable Diffusion, select the model that best suits the type of image you're upscaling.
Upscaling beyond ∞
This next method is using an outside program to upscale past the limits of Stable Diffusion. This method can produce crazy resolutions, however, practically only useful in a poster or canvas scenario as the files become too large to share anywhere online. This also is fun for very detailed images, as you can zoom in to every little detail of the picture.
This program is called "Upscayl" and is available at https://www.upscayl.org
Upscayl is very user friendly and simply done on this main page alone.
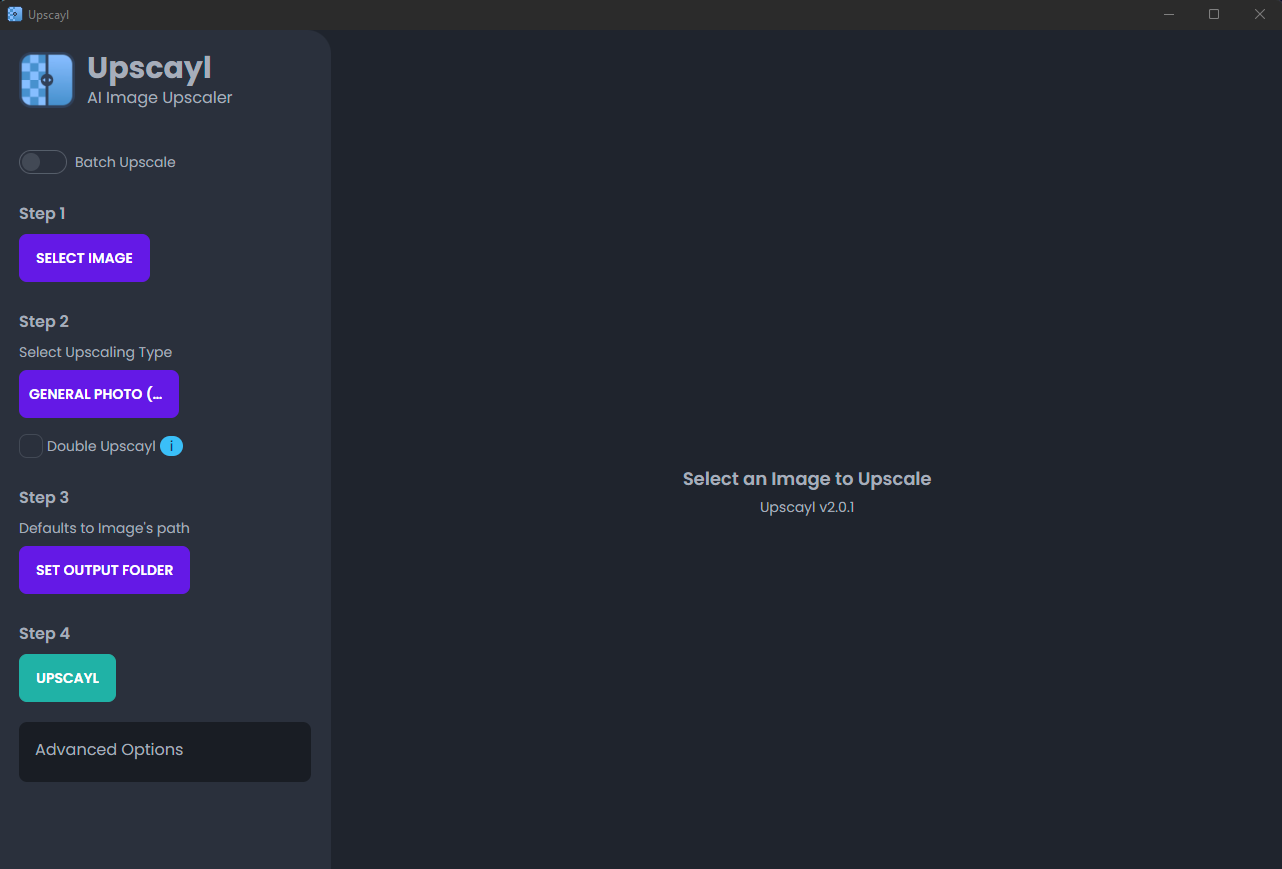
- Select "Batch Upscale" if you have multiple images to do at once
- Select file/files
- Choose the upscaling method - You will notice a couple familiar names
- Select output folder
- Advanced options allows to choose "theme" of the upscale as well as the output image file type - png/jpeg/webm
- UPSCALE!
Photo Editing
A favorite website of mine photo tools is https://www.iloveimg.com
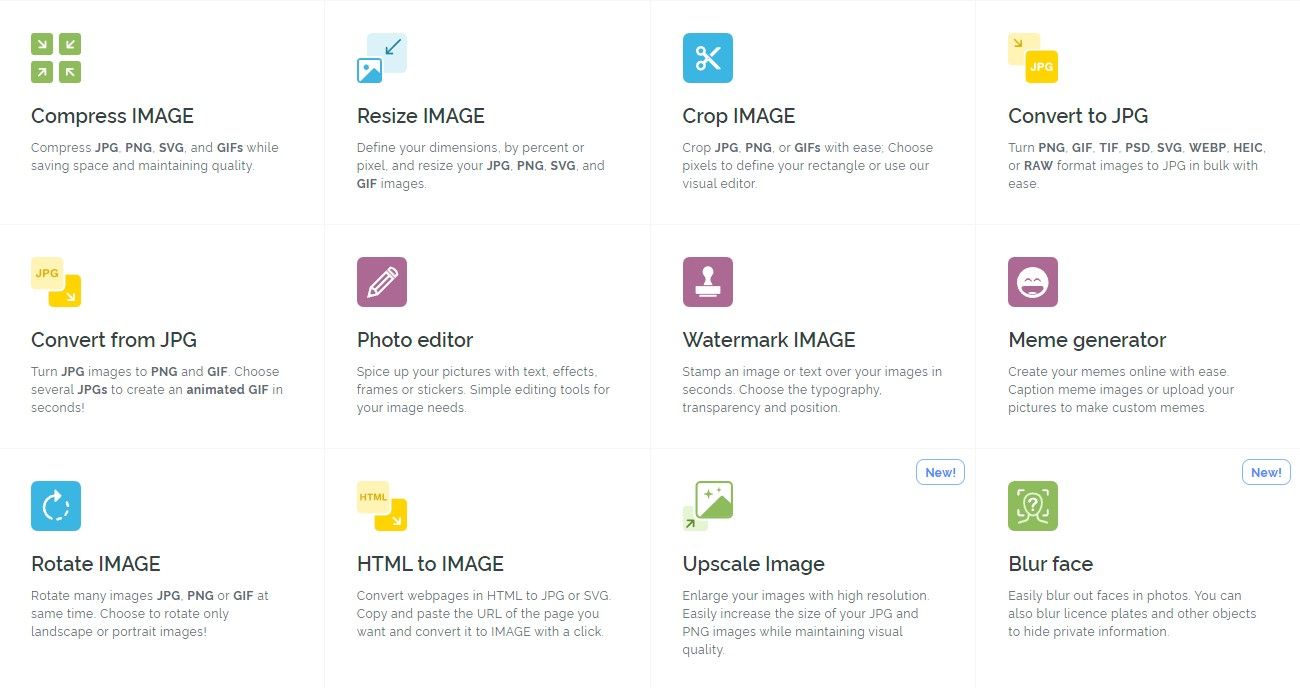
There are many tools to choose from, but in the likes of upscaling the "compress image" is almost always required to be able to post upscaled photos to social media/websites due to their relatively small upload size requirements.